On this tutorial I’ll show you how to operate cash drawers.
###Connection types
-
Serial Connection: Drawer connects to PC through serial port. This connection type is not recommended because drawers does not have power source of their own and to be able to kick drawer they use power from serial port. If port voltage is not enough for cash drawer it won’t work. If you have that kind of drawers on hand you can search Google for USB powered kickers.
-
RJ11 Connection: Drawer connects to a receipt printer with a RJ11 type cable. This is better because we can adjust voltage for drawer so it works with any kind of cash drawer.
###How it works
We’ll use SambaPOS’s printing mechanism to send kick command to cash drawer. This technique works great because you can prefer to open drawer while printing receipts, receiving payments or manually. What we need to do is adding drawer kick command to a printer template and send it to drawer.
So we’ll need to configure a printer for drawer. If our cash drawer connected to the receipt printer we can use existing ticket printer setting to send commands. For serial connection we’ll need to add a Port Printer, configure Port setting and use this printer to send kicking command.
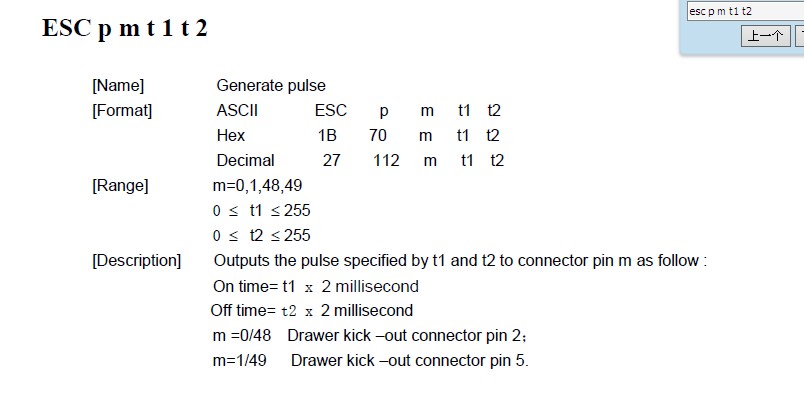
First of all we need to know which command we need to send to open drawer. For serial connection <XCT>21 command should work. For receipt printer connection it depends on your cash drawer model. Most used command is <XCT>27,112,0,25,250. For this tutorial I’ll use this command. You can visit http://keyhut.com/popopen.htm or google your drawer model to find required command. Don’t forget to add <XCT> tag behind command so SambaPOS can understand this is not a printout.
###Preparing printer template
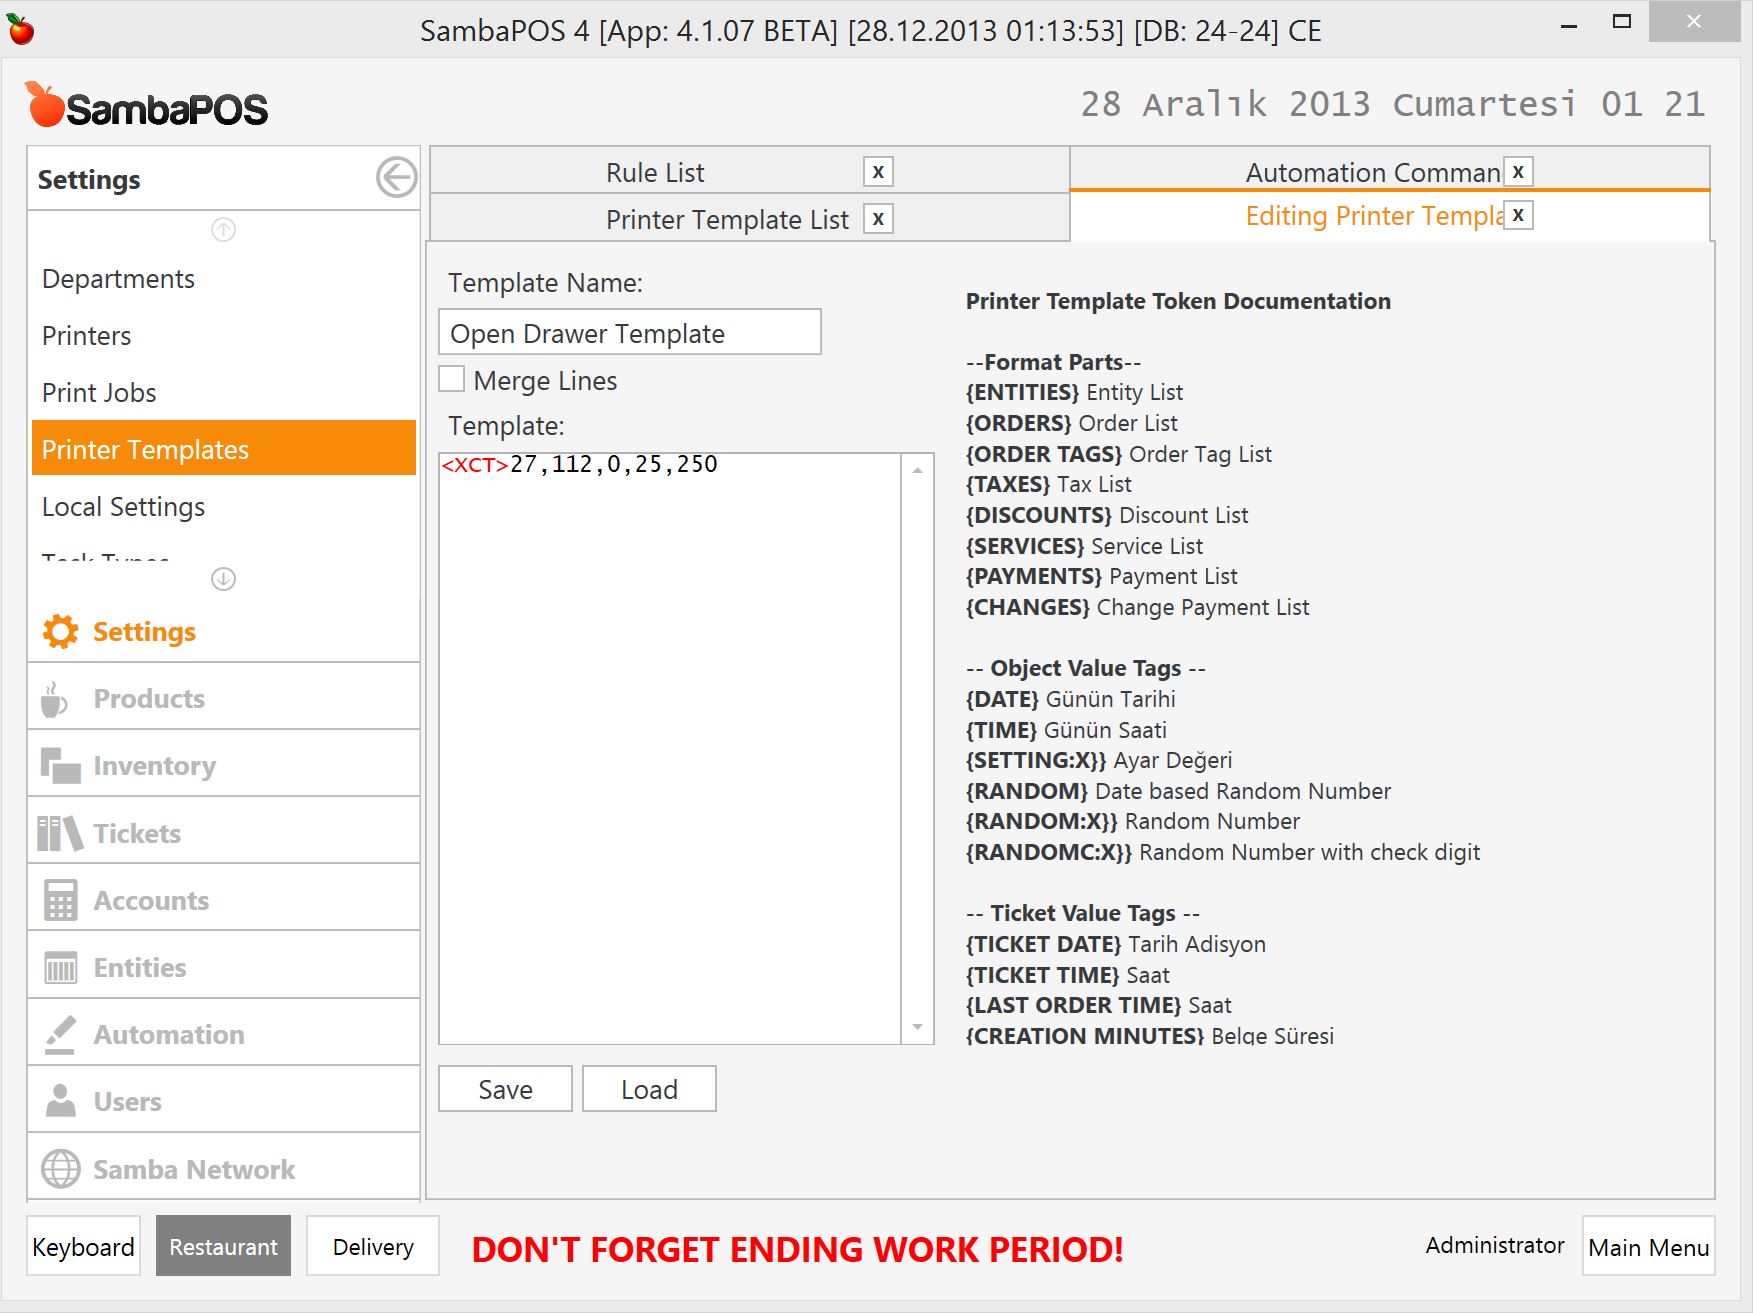
This is simple. If we need to kick drawer while printing bills, the only thing we need to do is adding <XCT>27,112,0,25,250 command to the beginning of the template. When that template prints drawer will open.
For most cases we’ll need finer control. For this reason we’ll prepare a separate printer template and use it when we want to open drawer. Navigate to Settings > Printer Templates and add a printer template that contains only drawer opening command.
We’ll also need a print job to start printing. This print job will map our printer template to printer.
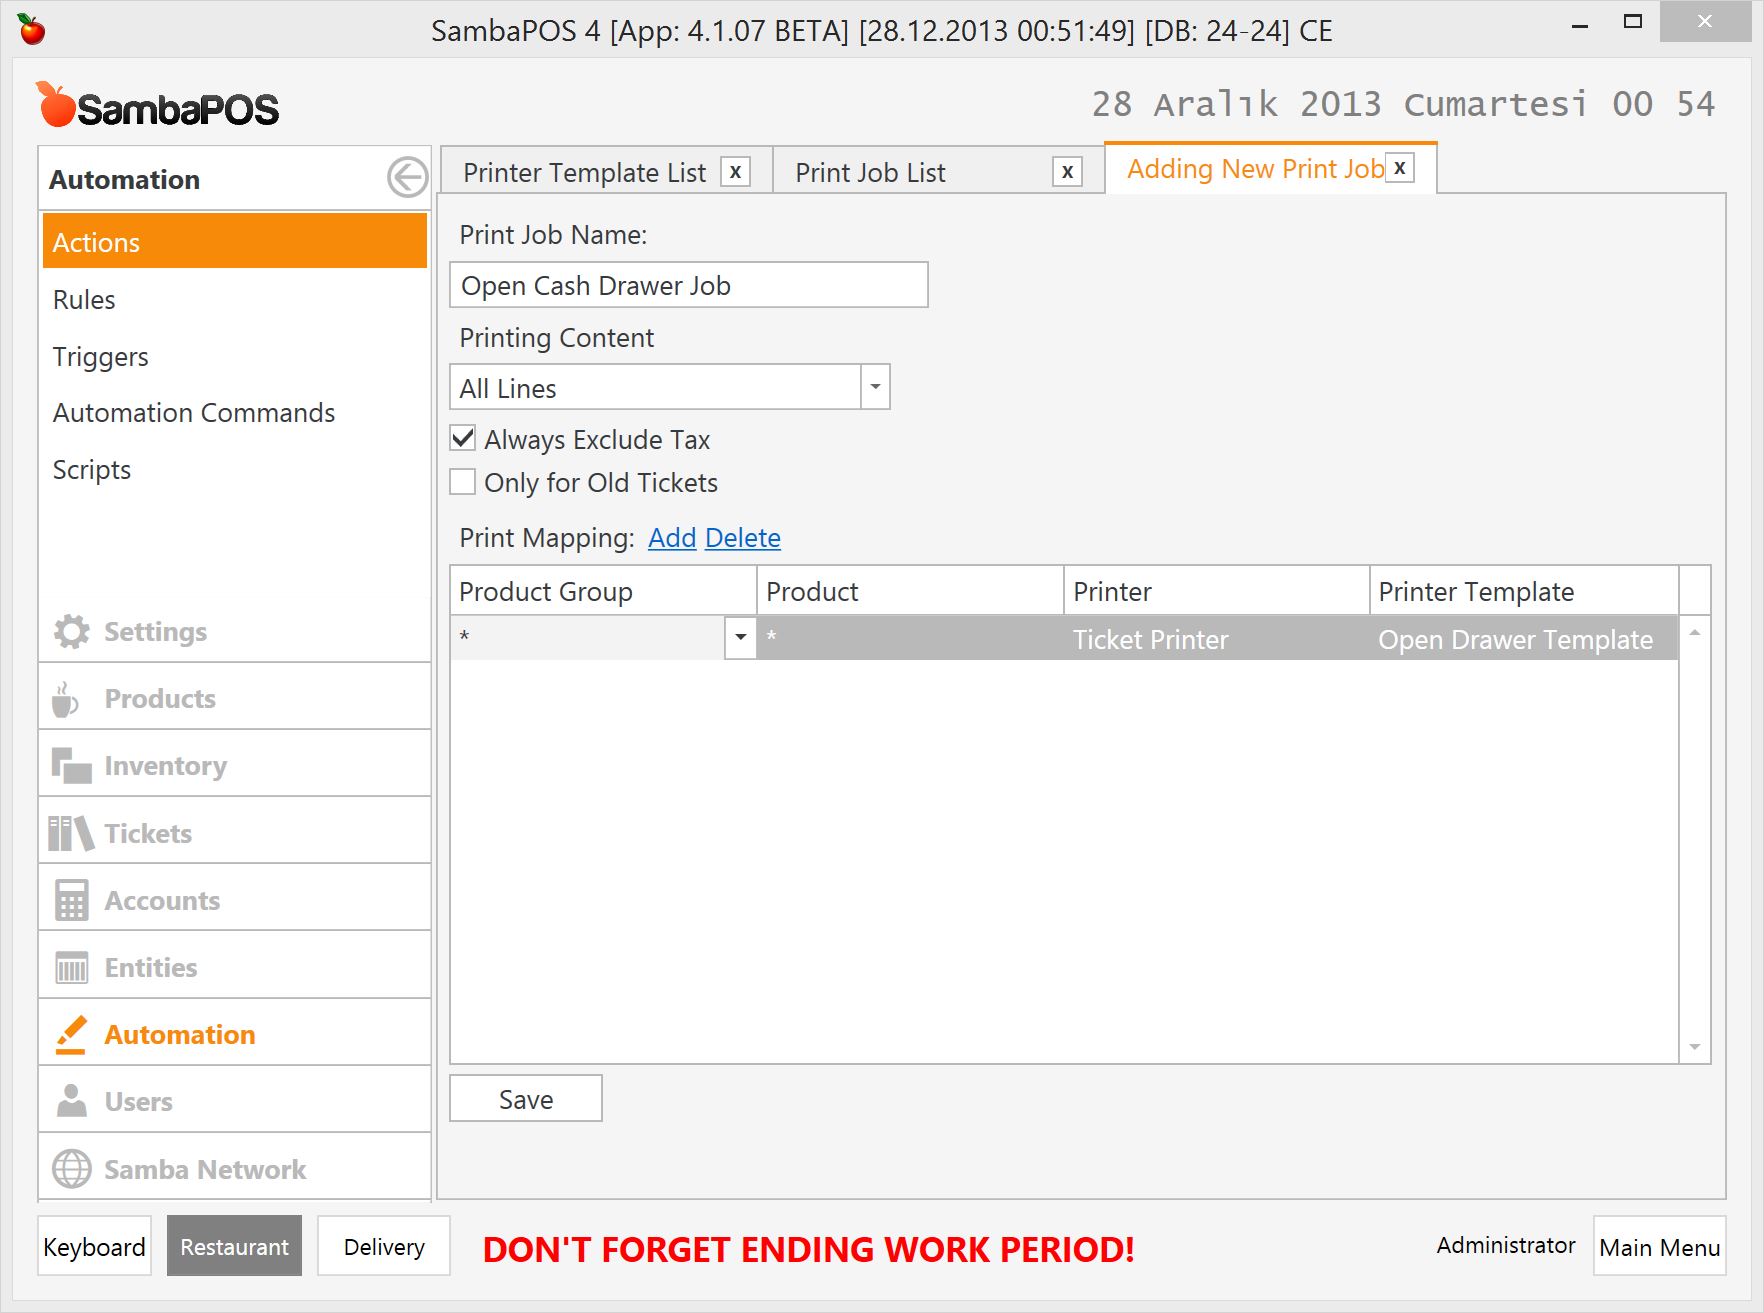
I’ve added a mapping and selected template and printer. We are using Ticket Printer since we assume our drawer connected to receipt printer.
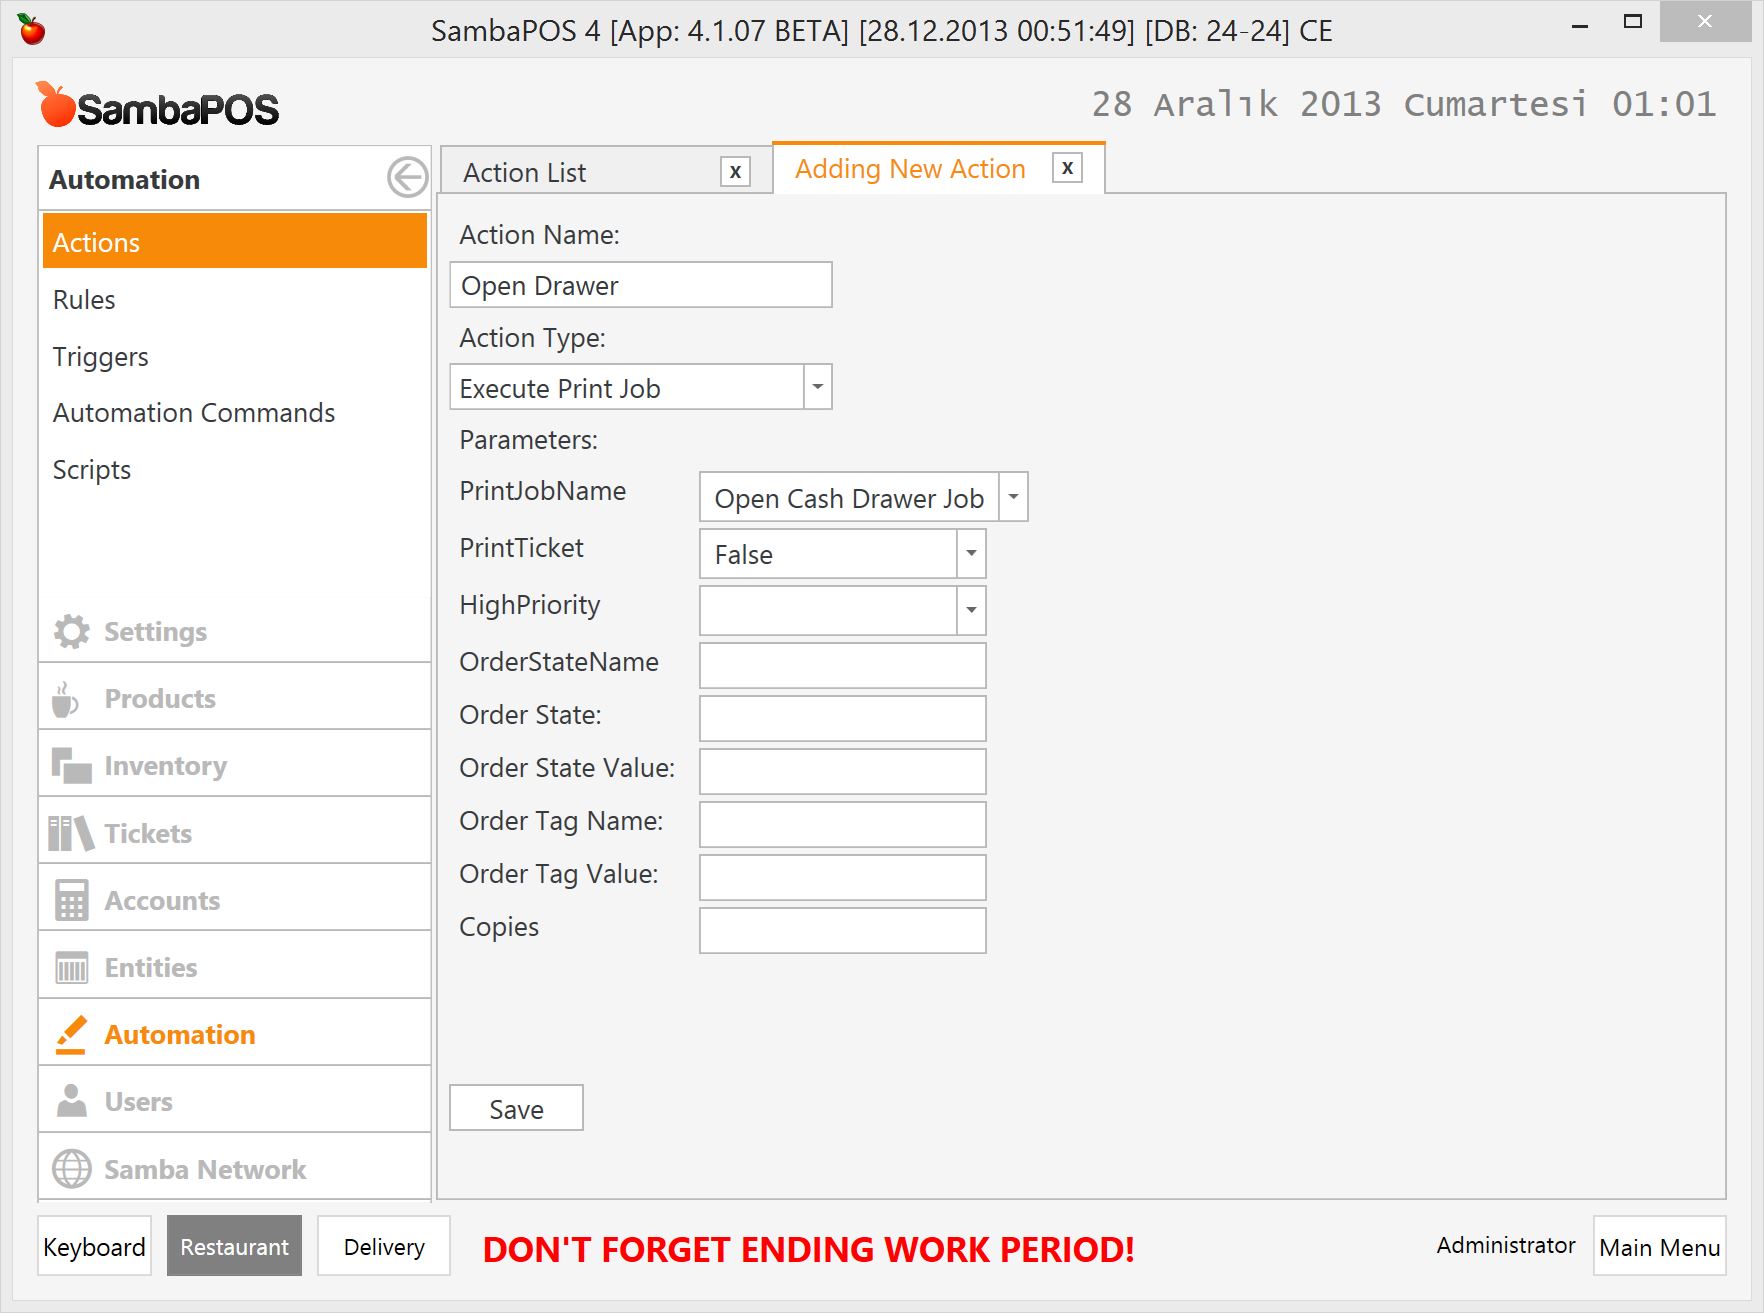
Finally we’ll need an action that executes this print job. Navigate to Automation > Actions and create a new action.
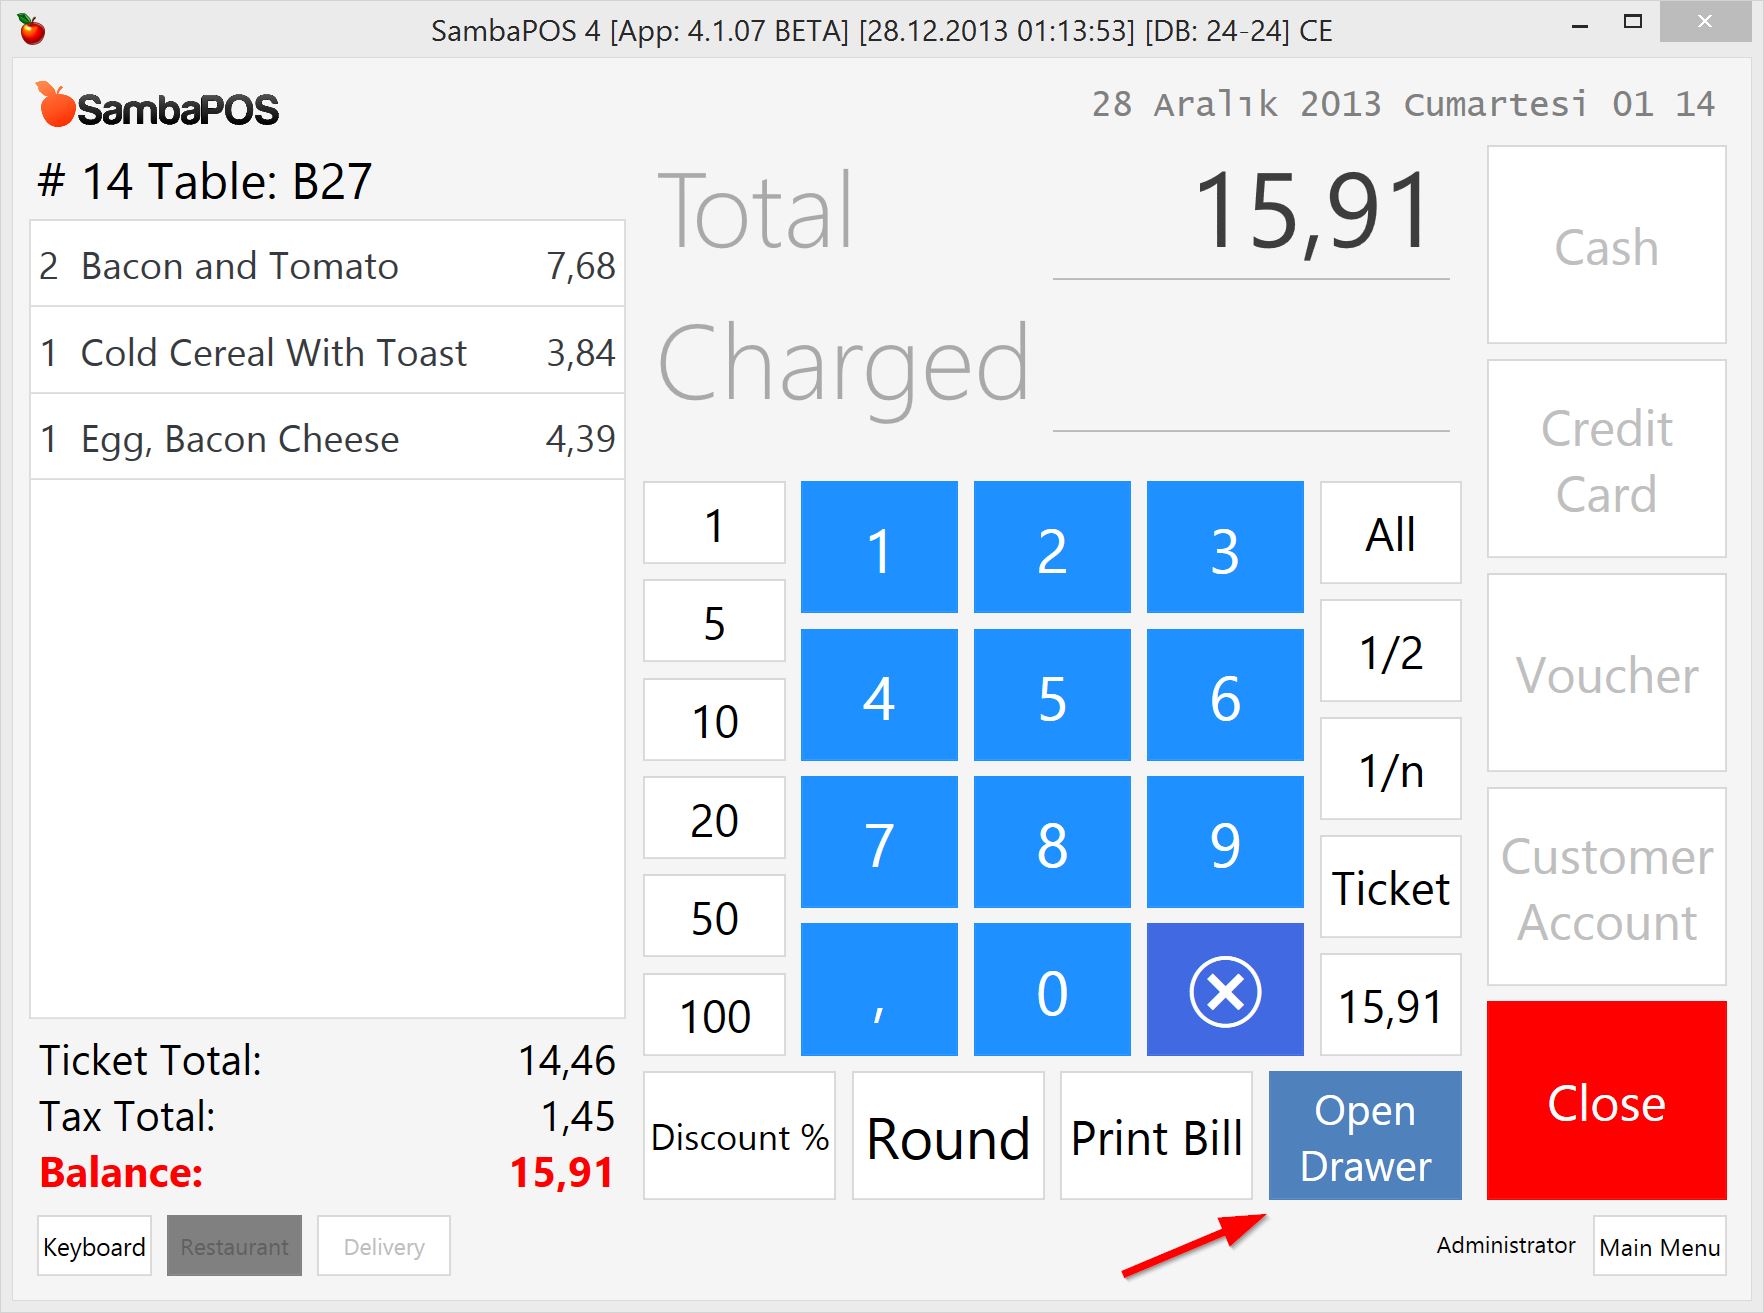
###Opening drawer manually
Adding an Open Drawer button to Payment screen might be handy.
First we’ll create an Automation Command to display a button on Payment Screen. This is how that button should appear. Please note we’re using \r to wrap button header to two lines.

Now we’ll map that to Payment Screen. I’m switching to Mappings tab.
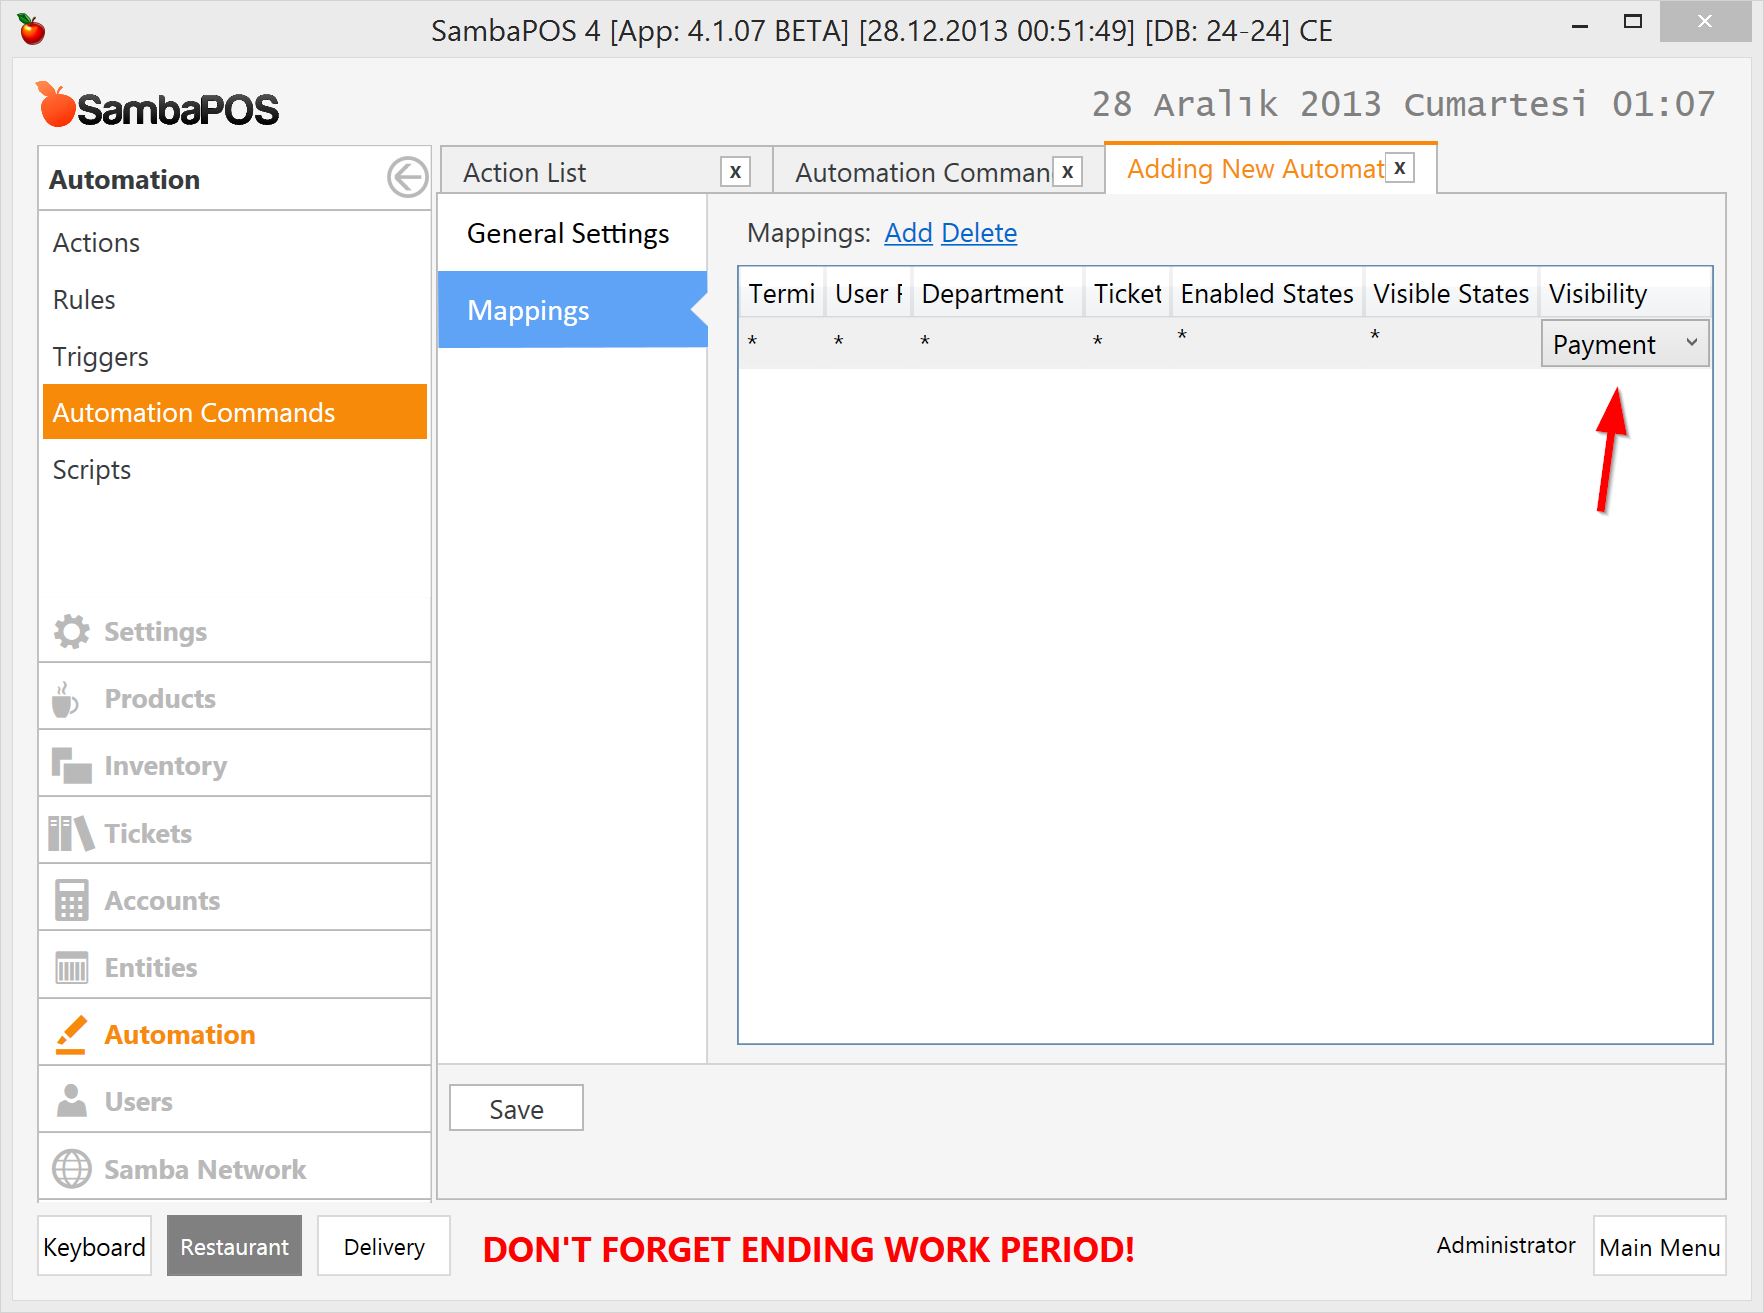
Visibility should be Payment because we need to see this button on payment screen. If you want you can change user role mapping to show this button to a specific user role or you can map it to only Fast Food department.
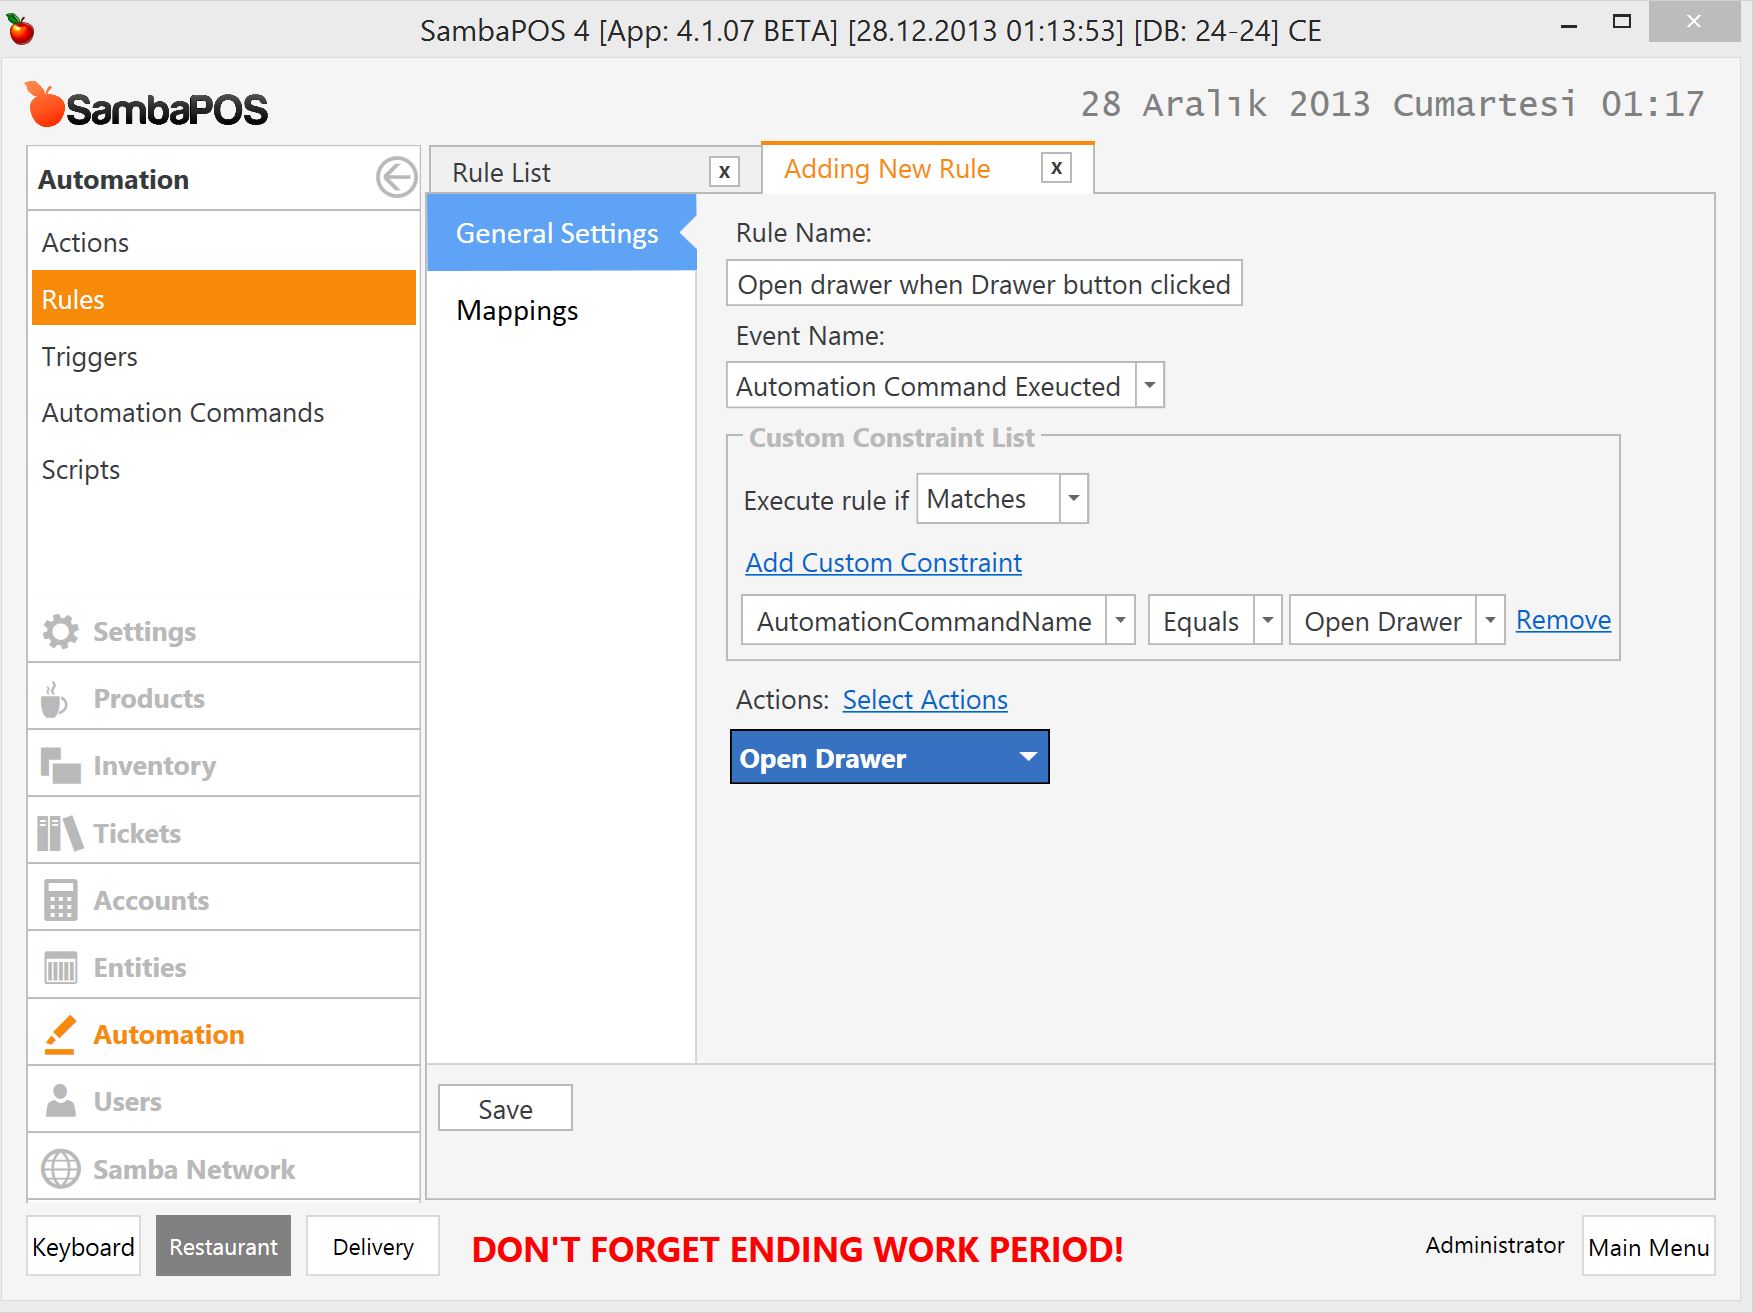
Now we’ll execute open drawer job when this button clicked. We need to configure a rule for that.
…and we’ll add default mapping to enable this rule.
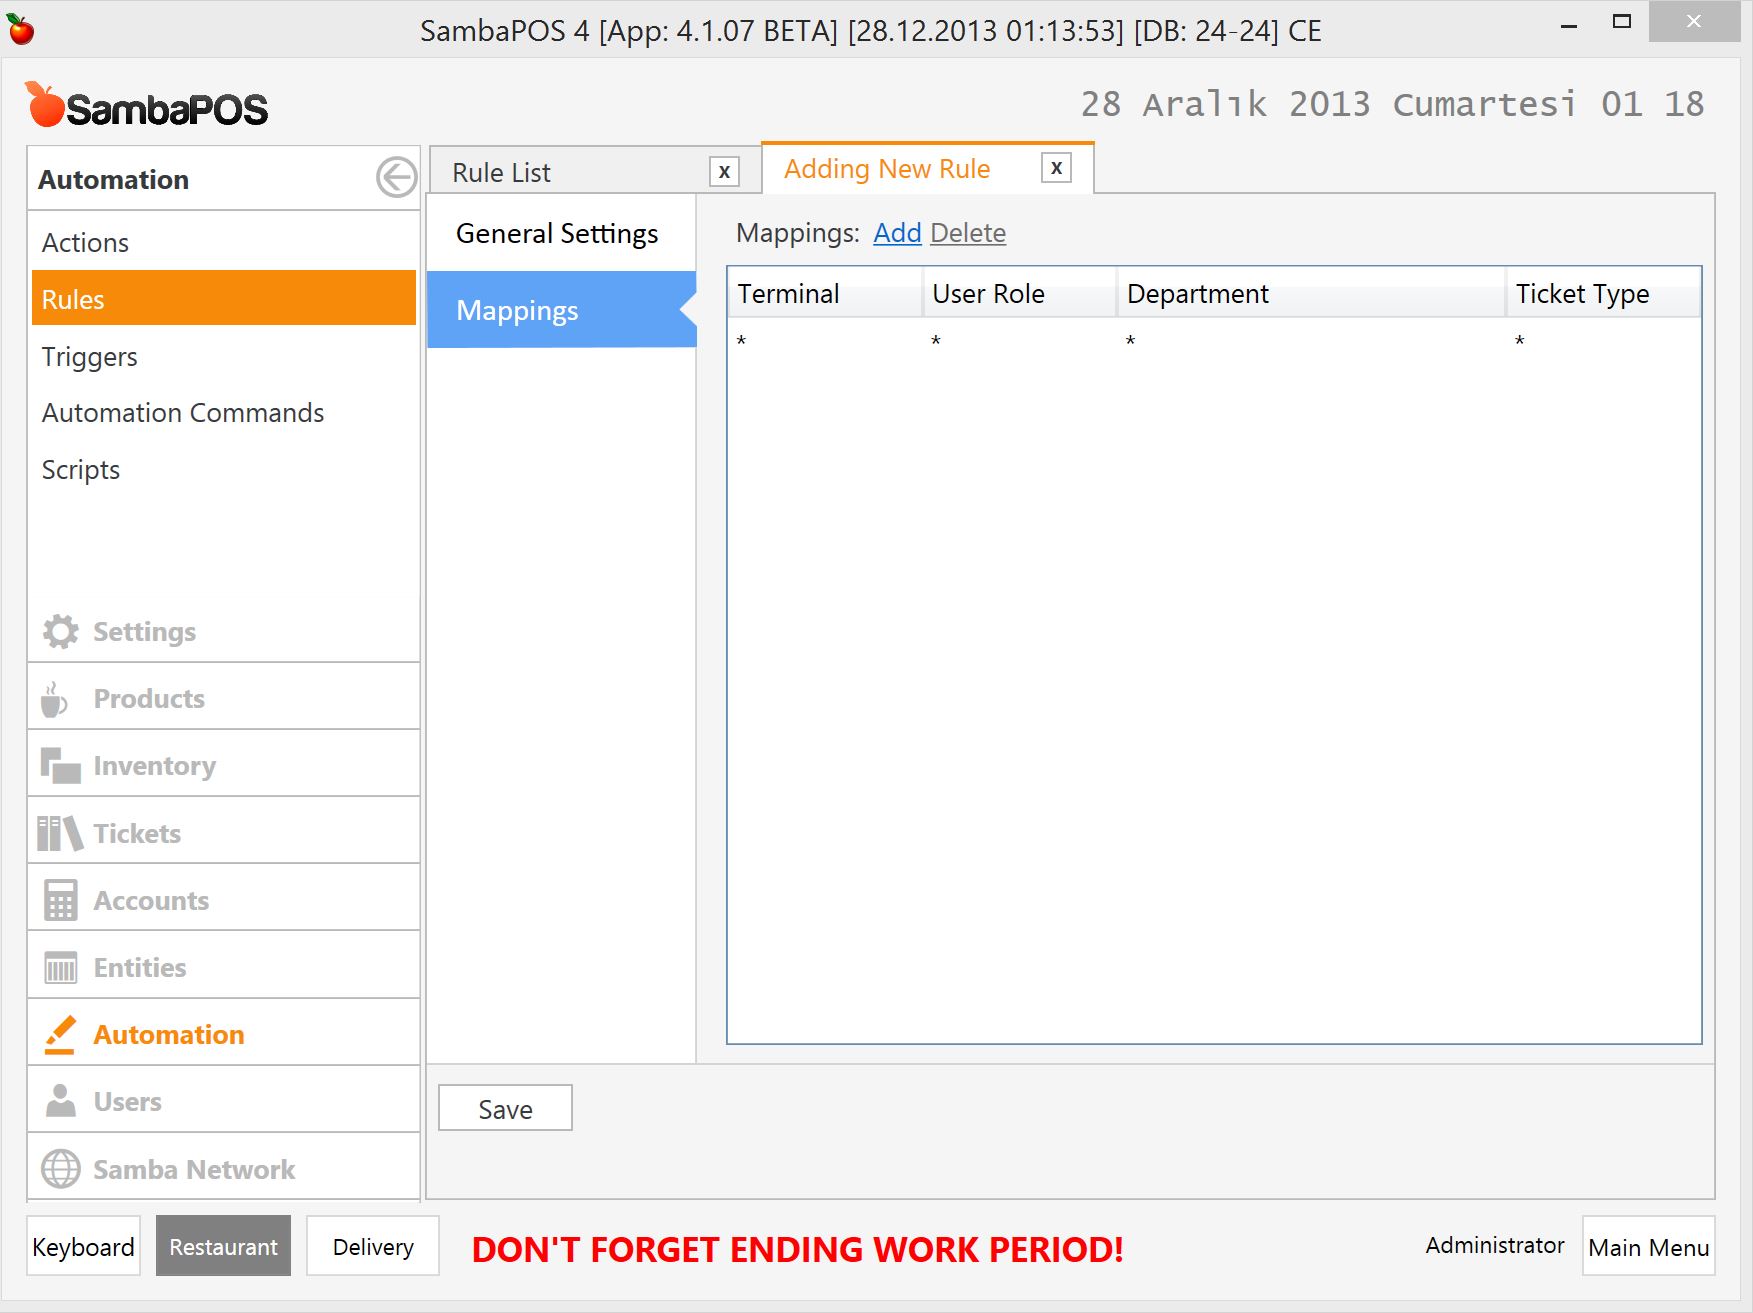
That’s all. Now we should see cash drawer button on Payment Screen and it should kick drawer when clicked.
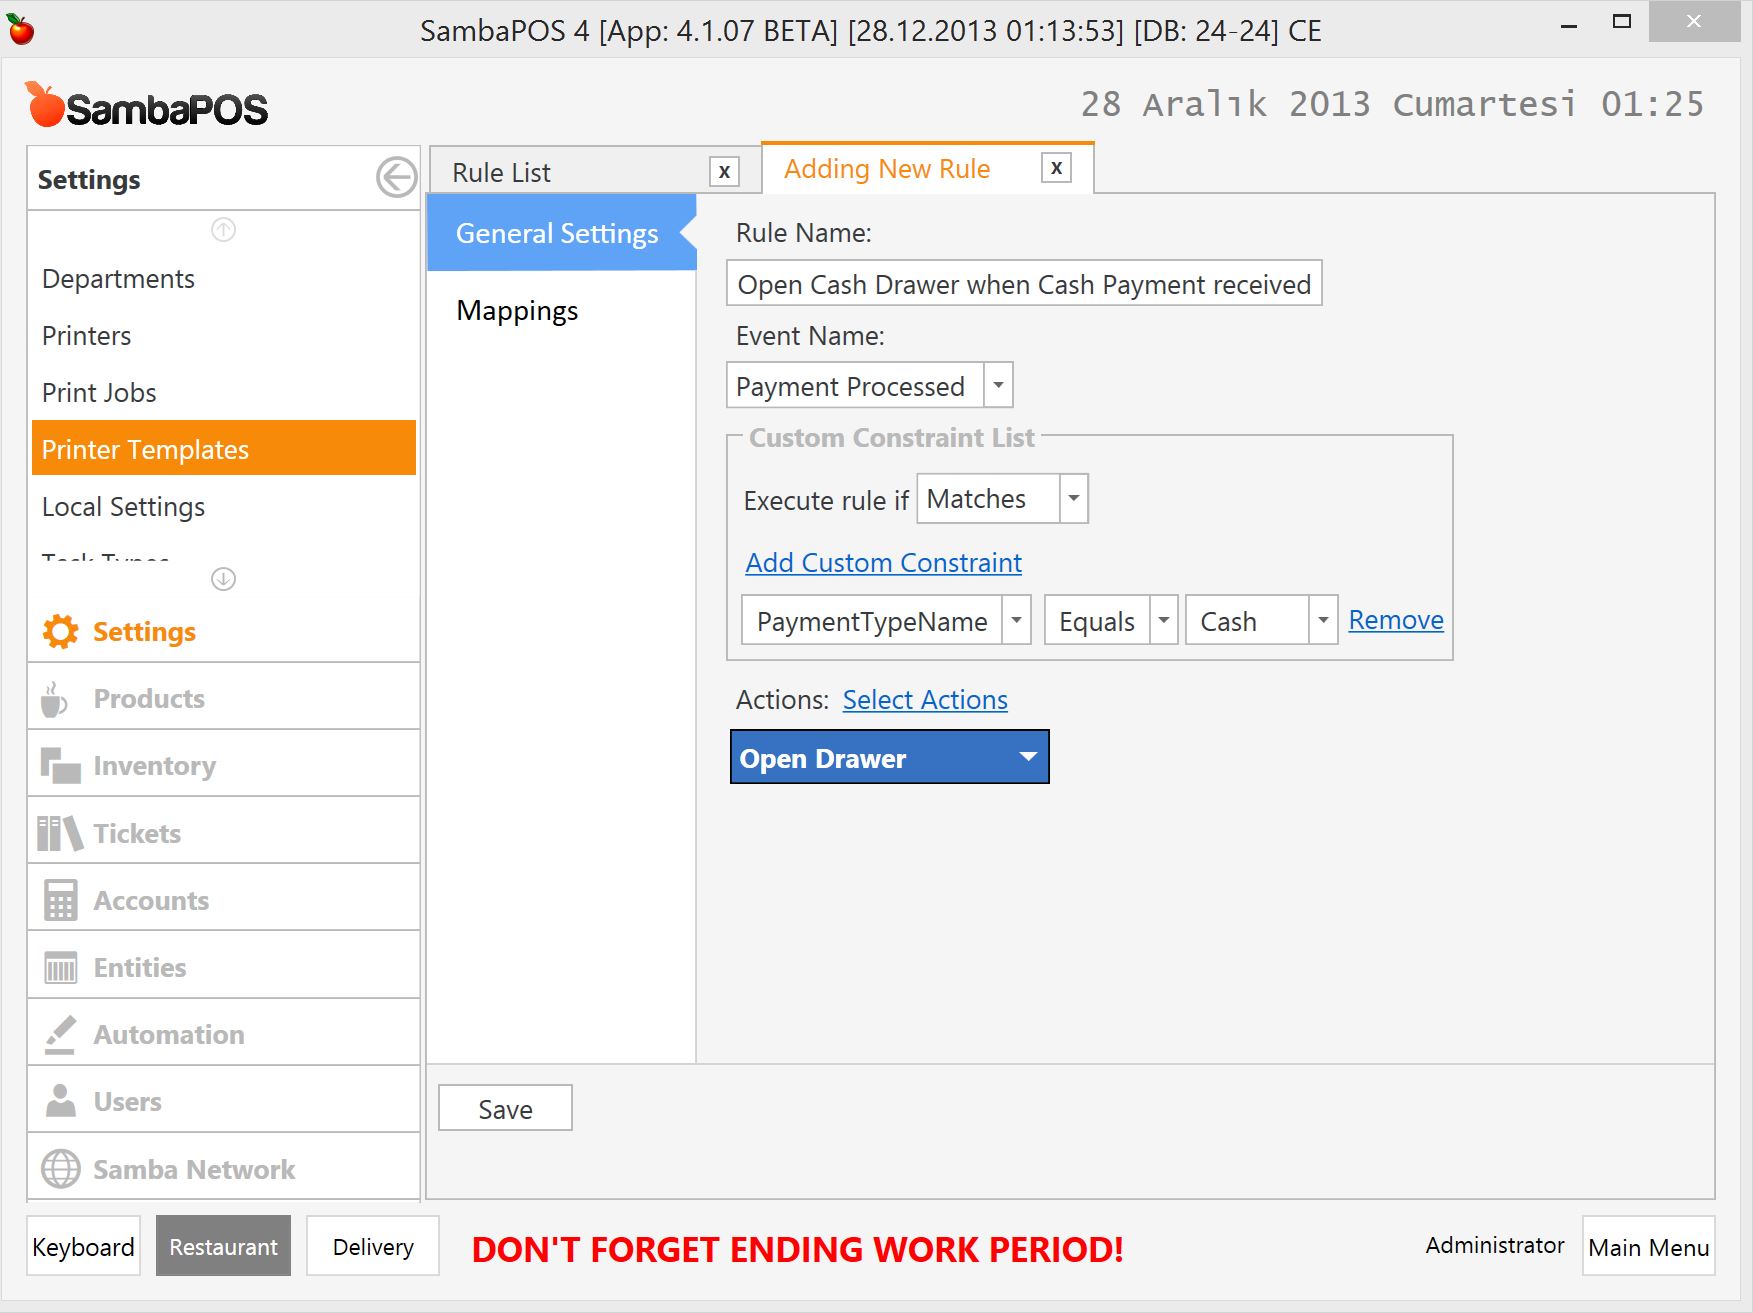
###Opening cash drawer on Cash payments
We already did the hard work. Now we can automate drawer opening for our needs. For example we can open it when we receive cash payment. This is simple. We’ll create a rule for Payment Processed event.
Don’t forget to add a default mapping.
This rule will execute open drawer action when we receive a cash payment. Great isn’t it?