Oh Thanks for clarifying that.
I made it more complicated then it seems lol.
That’s neat. Thanks for sharing.
Oh Thanks for clarifying that.
I made it more complicated then it seems lol.
That’s neat. Thanks for sharing.
Auto Select option but dont have any tags mapped to it.
Pretty much all of your points above were answered with auto select except this one. I too would love to have an option to disable this @emre I understand its useful for doing this like canceling multiple orders and disabeling it would render that useless but giving us the option to enable to disable this would be good and allow us to build our own flow.
Tagging an order always disables multi selection temporarily for next selection so you can tag orders one by one.
You can disable portion selection for a specific order line by using “Update Order” action. Not tested for this specific setup yet but it may help solving portion selection issue.
Well of course we may not perfectly simulate other POS workflows but in SambaPOS universe it might be possible to improve efficiency by using what we have.
So I would use Update Order action, set Disable Portion Selection to False then use it on Order Added to Ticket event?
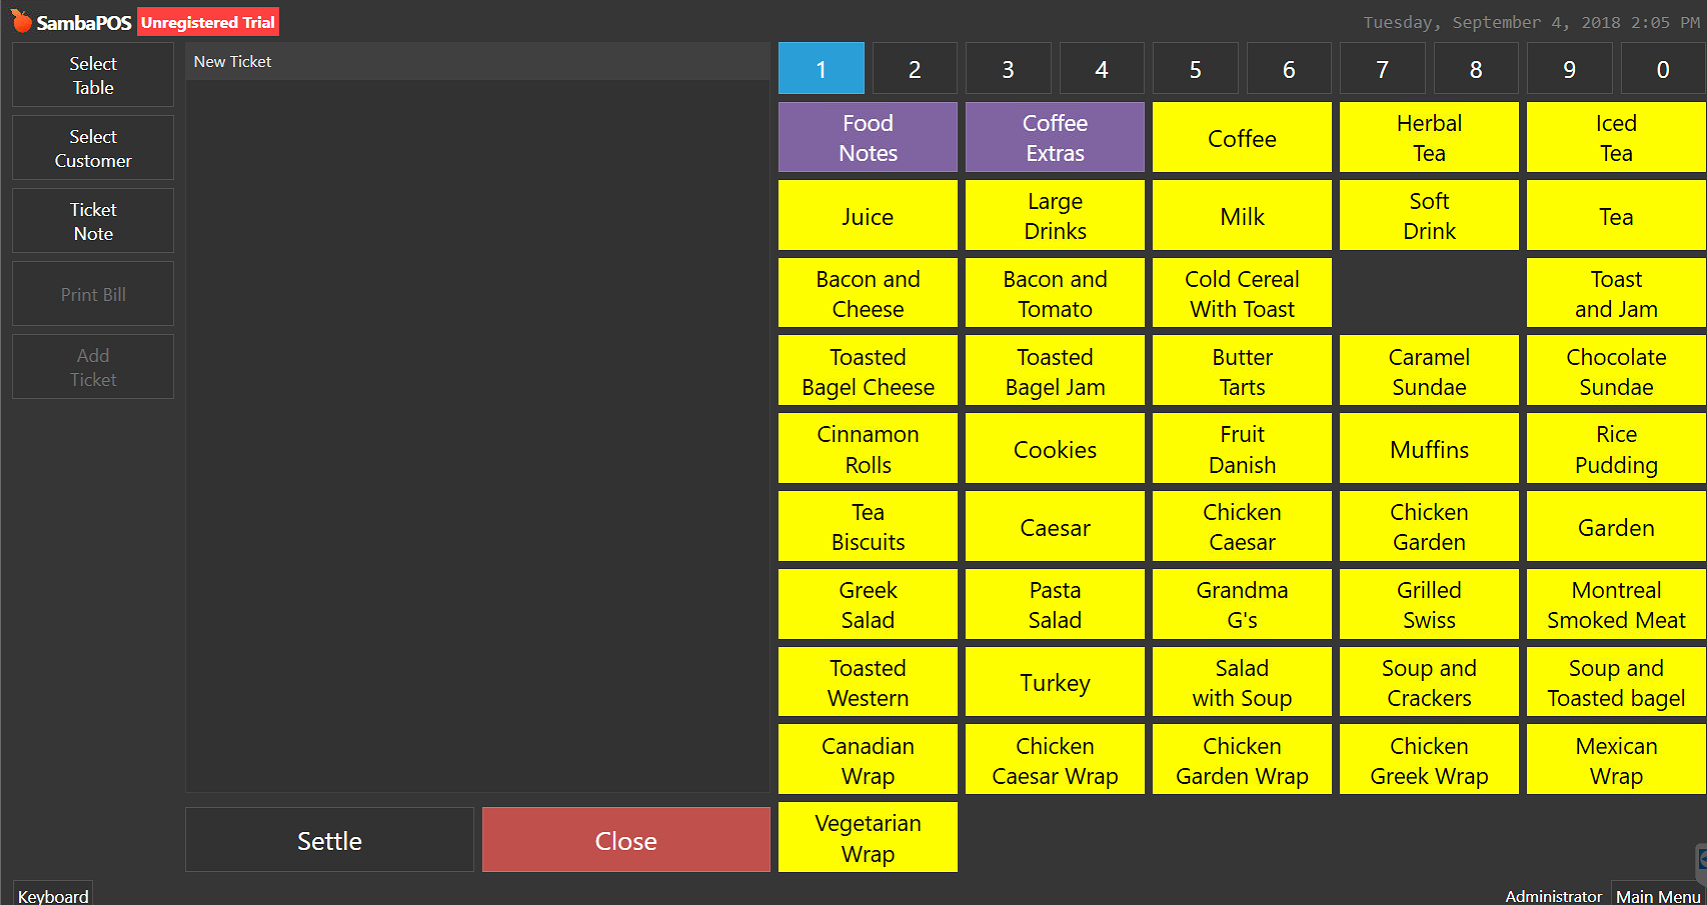
Also noticed on your example, you have put the order tag buttons on a new line, how did you do that, is it related to the blank spaces I indicated below?
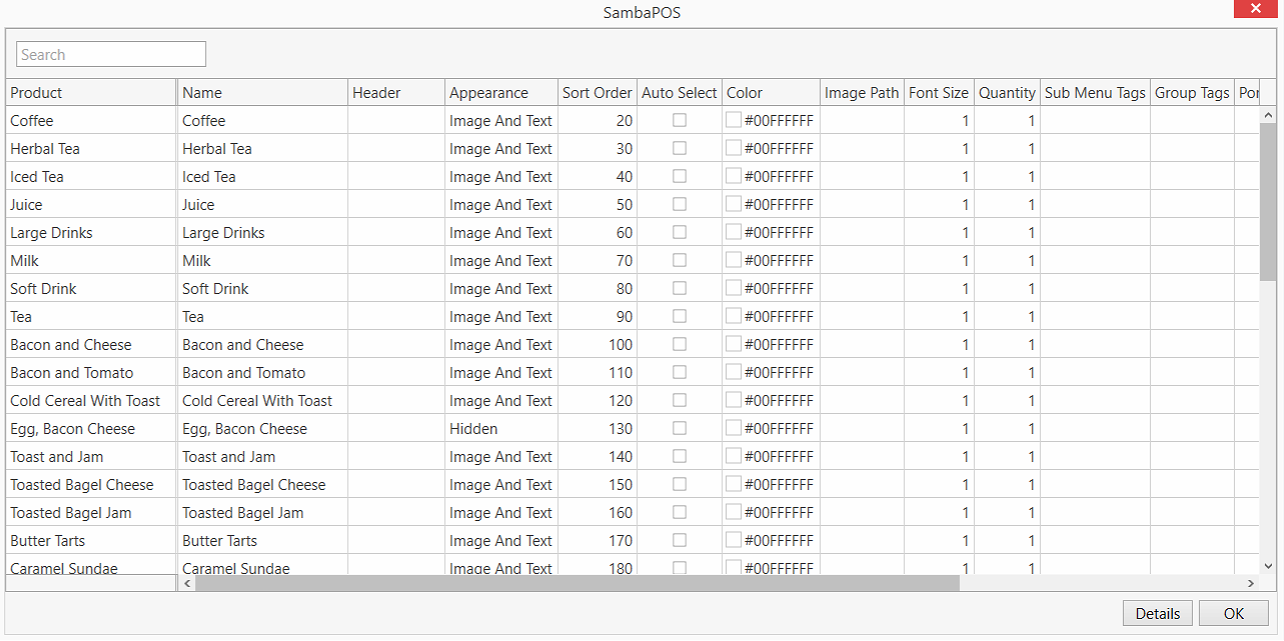
Can’t see anything in your product properties that is doing that…
EDIT: Is it related to Sort Order?
It could be that button 90 and 100 are hidden and at bottom. Notice he has not scrolled down and caramel is visible indicating there are 2 other buttons.
I think I saw on another post the other day the blank button being created with * in the product Name field and some other fields, but can’t remember seeing that documented anywhere
Typically you can create those by using hidden custom buttons, Rickh did that for his.
EDIT: If you follow @rickh stuff its probably in there. I know he used that feature extensively in his systems… just about all of his screen is custom buttons.
@Jesse Saw it here:
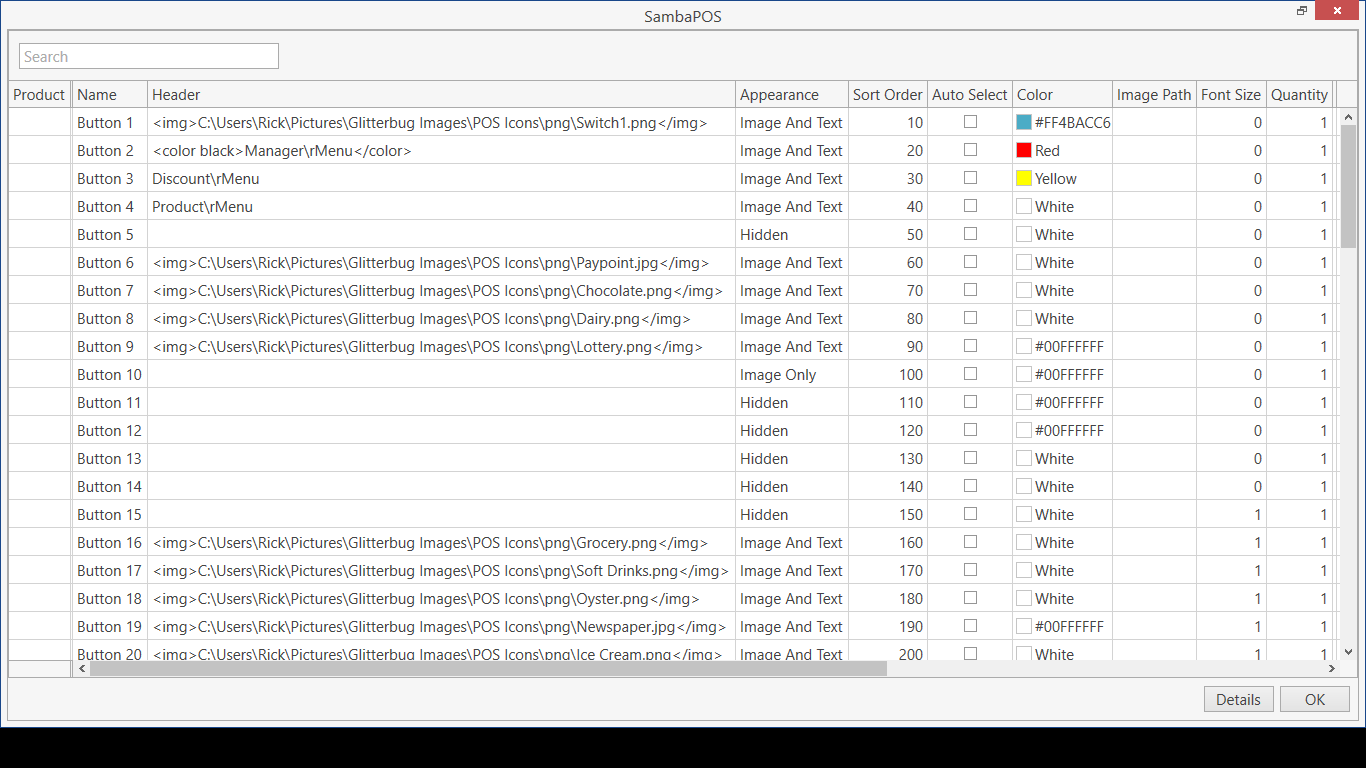
The screenshot above shows Ricks custom button setup.
A little hard to see but if you look at the right the product name is empty and he just puts the name as “Button 1”(as an example) then he sets the appearance to “Hidden”
So you can just create a custom button and name it * and set appearance to “hidden” causing this to occur.
Yep all you do is create the custom button and then select HIDDEN to hide it and use it as a spacer
You can then delete any name and heading fields they can be left totally blank as you don’t need them