##Creating a Private/Public Key Pair
You can use a Key File to login to your Router instead of using a Password. To use this feature, you need to generate a Public/Private Key Pair. This is done using a tool named puttygen,exe which comes with the PuTTY package.
-
run
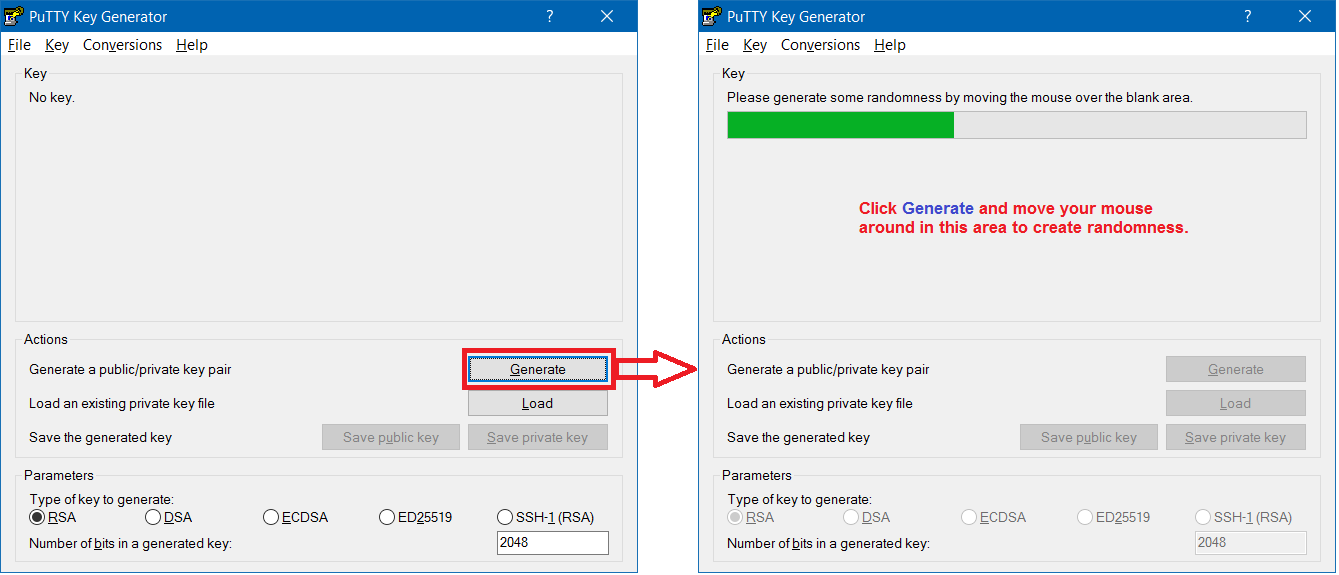
puttygen.exe -
click Generate and move your mouse around in the blank area of the dialog to create randomness
-
the Public Key is the top part - you will save this key in your Router by copying the text and pasting it into your Router via the Web Admin. You can also save the Public Key to a file and open it later with Notepad to copy and paste it’s content.
-
the Private Key will be saved to a file on your computer when you click Save Private Key
###Generate Key Pair
###Save Public and Private Keys

##Saving Public Key to your Router
The Public Key needs to be registered in your Router.
This is the Public Key.
Paste this single line into “Authorized Keys” as-is… no linefeeds, no tabs.
The Format is:
ssh-rsa KEYREALLYLONGENDINGWITH== comment
Example:
ssh-rsa AAAAAAasdfETRU3253NzaC1yc2EAAAABJQAAAQEAjtSdrYkLp68...== rsa-key-20140702
Different Router Firmware has different locations in the Web Admin for this key. The 2 examples given are for an Asus RT-AC66U with AsusMerlin-WRT firmware (close to stock) and for a Router running DD-WRT firmware.
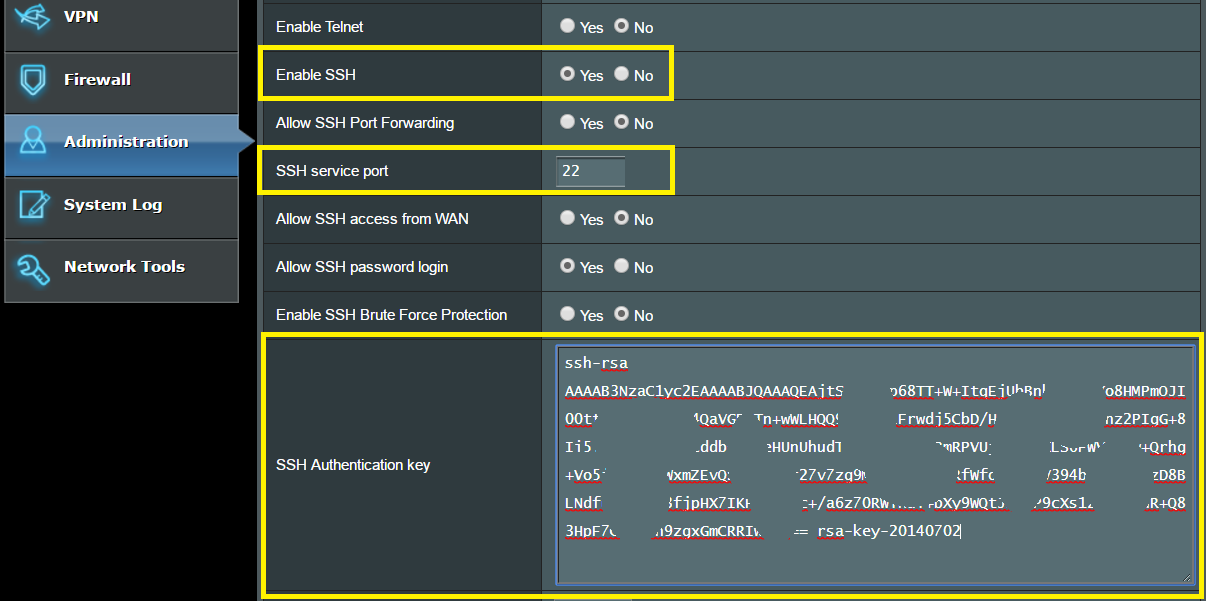
###Asus RT-AC66U with AsusMerlin-WRT firware (close to stock)
The Public Key goes in Administration > System > SSH Authentication key. You also need to enable SSH and set a Port to be able to use this feature. Telnet will not work.
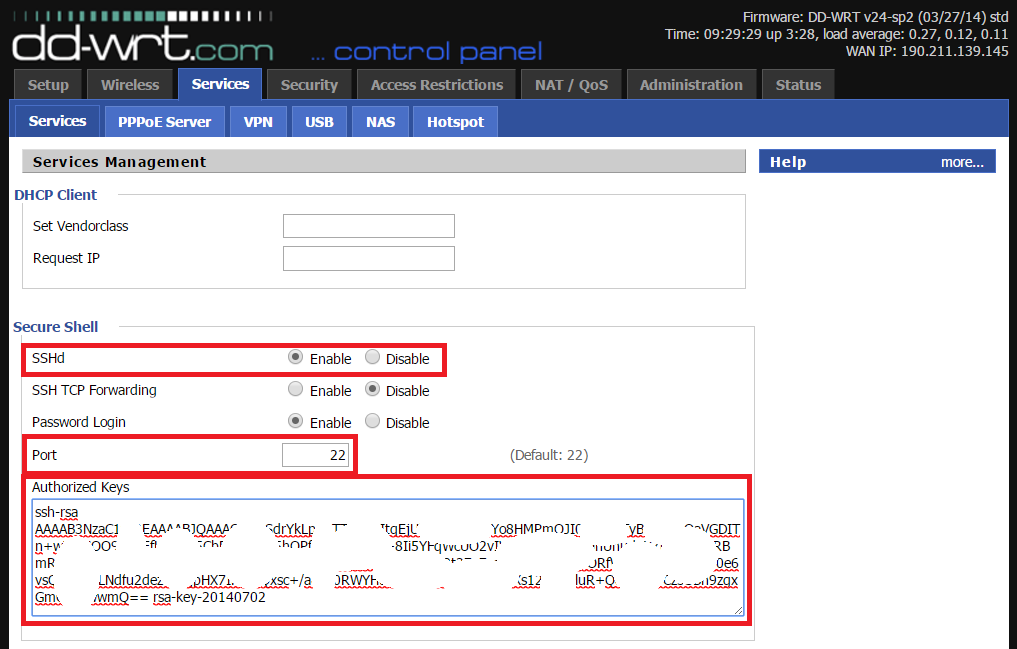
###DD-WRT Firmware
The Public Key goes in Services > Services > Secure Shell >Authorized Keys. You also need to enable SSH and set a Port to be able to use this feature. Telnet will not work.
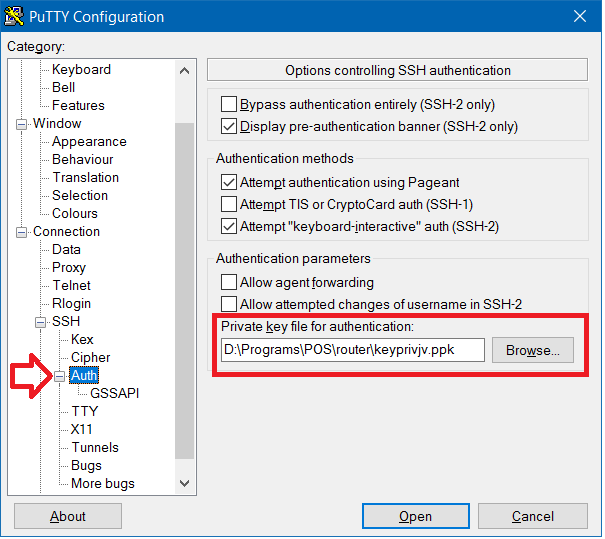
When you use PuTTY, you specify your Private Key File in the Session Settings under Connection > SSH > Auth …
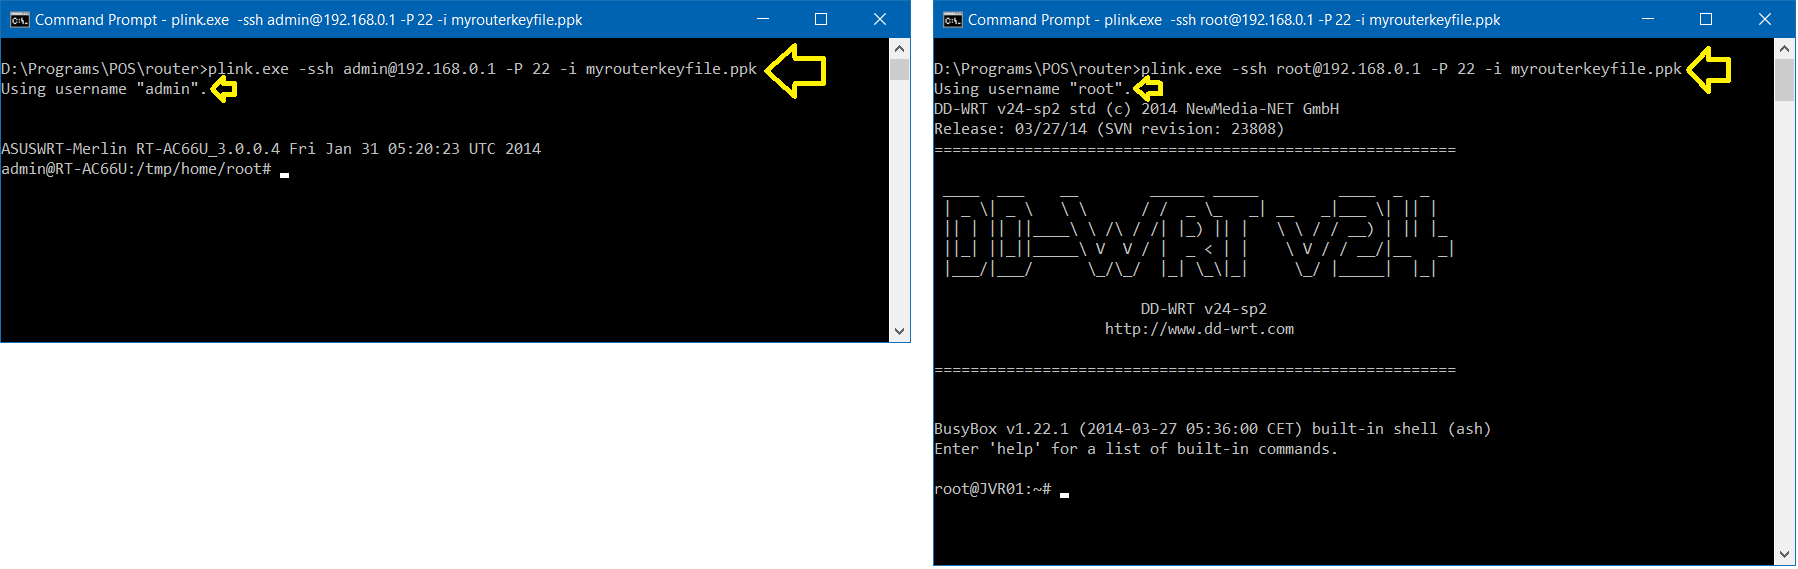
When you use PLINK, you specify your Private Key File using the -i myrouterkeyfile.ppk parameter …
plink.exe -ssh USER@HOST -P PORT -i myrouterkeyfile.ppk
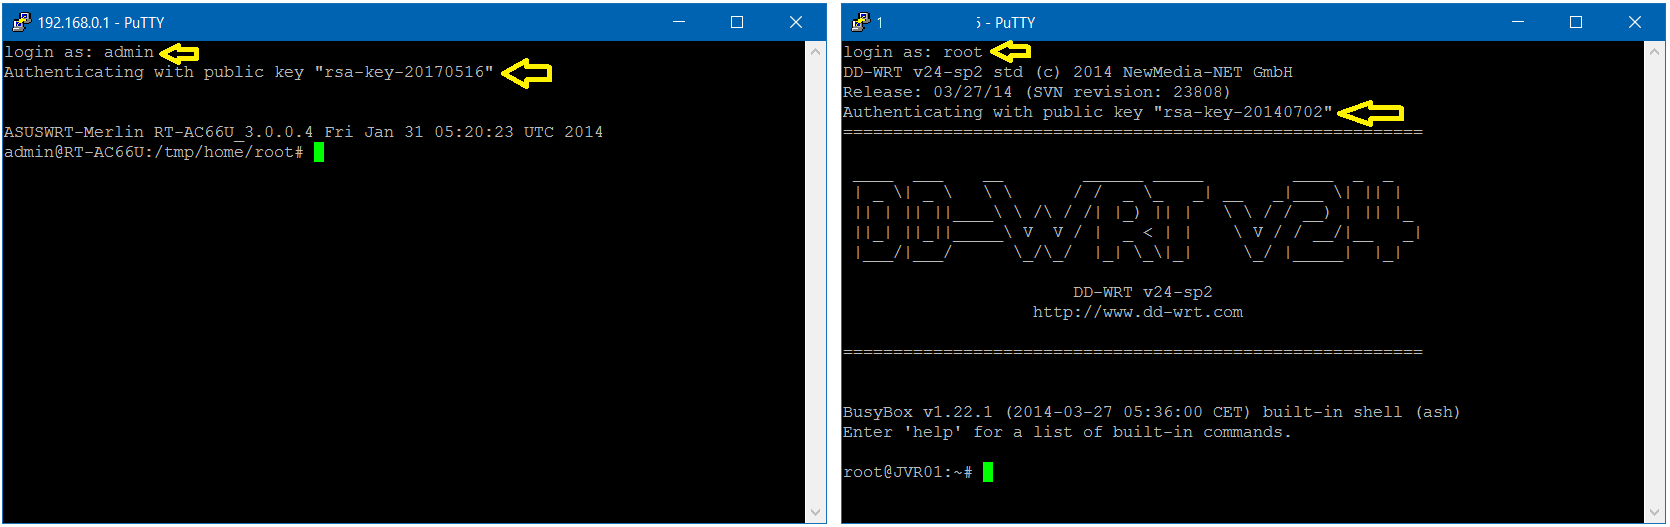
plink.exe -ssh admin@192.168.0.1 -P 22 -i myrouterkeyfile.ppk
plink.exe -ssh root@192.168.0.1 -P 22 -i myrouterkeyfile.ppk