##Implementation
###1. Actions
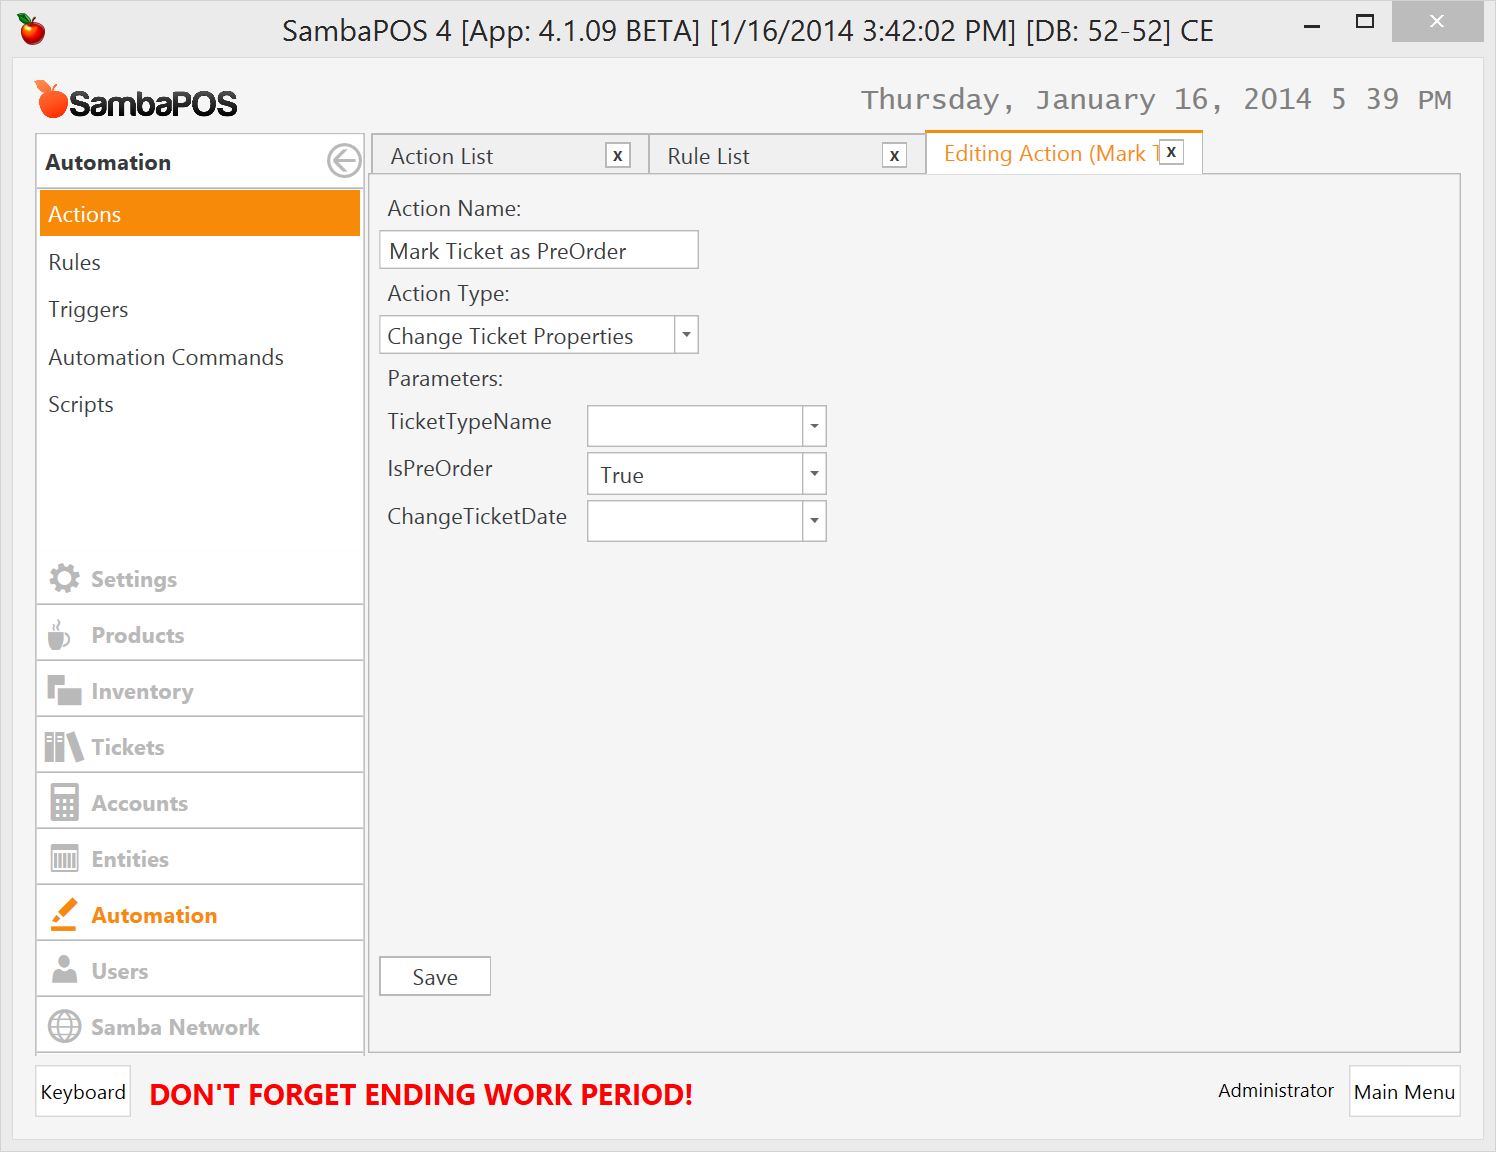
####1.1 Mark ticket as pre-order action
We’ll start by creating two actions to enable, disable pre-order setting of a ticket.
“Mark ticket as pre-order” action is useful to change ticket to a pre-order ticket. We’ll use Change Ticket Properties action. We’ll set pre-order to True.
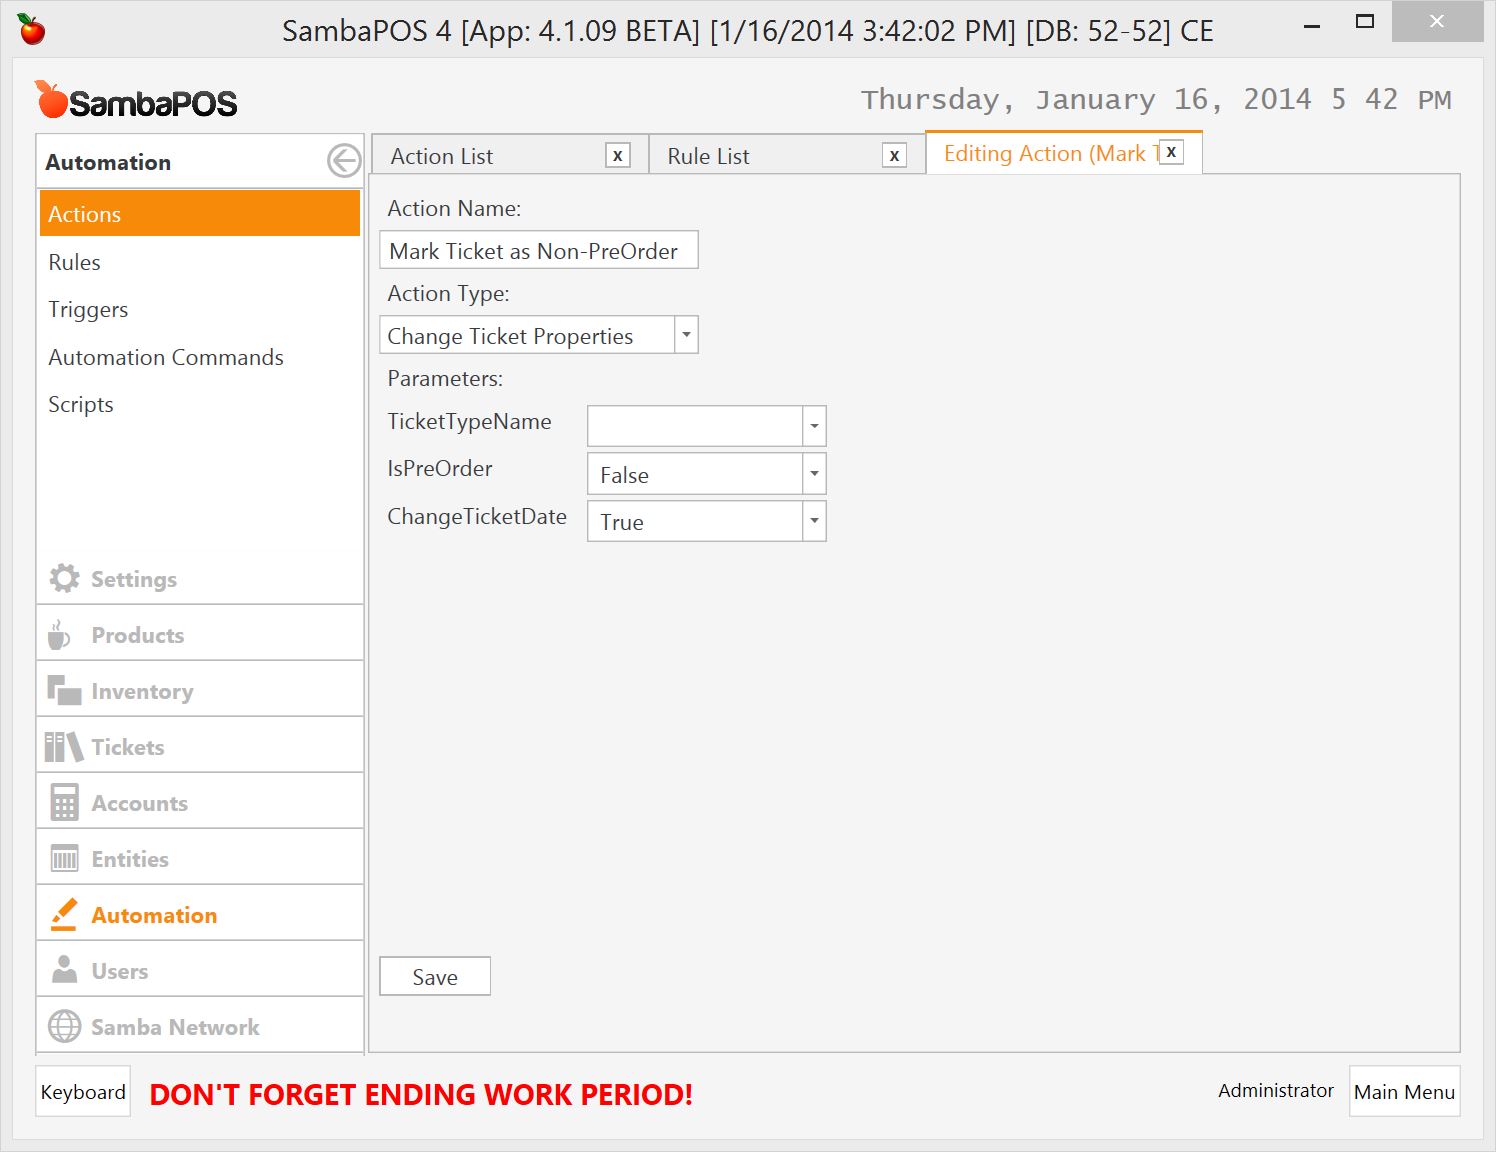
####1.2 Mark ticket as Non-preOrder action
This action disables pre-order setting for ticket and also changes ticket date to current date. We’ll execute this action when we convert a reservation ticket to a regular ticket.
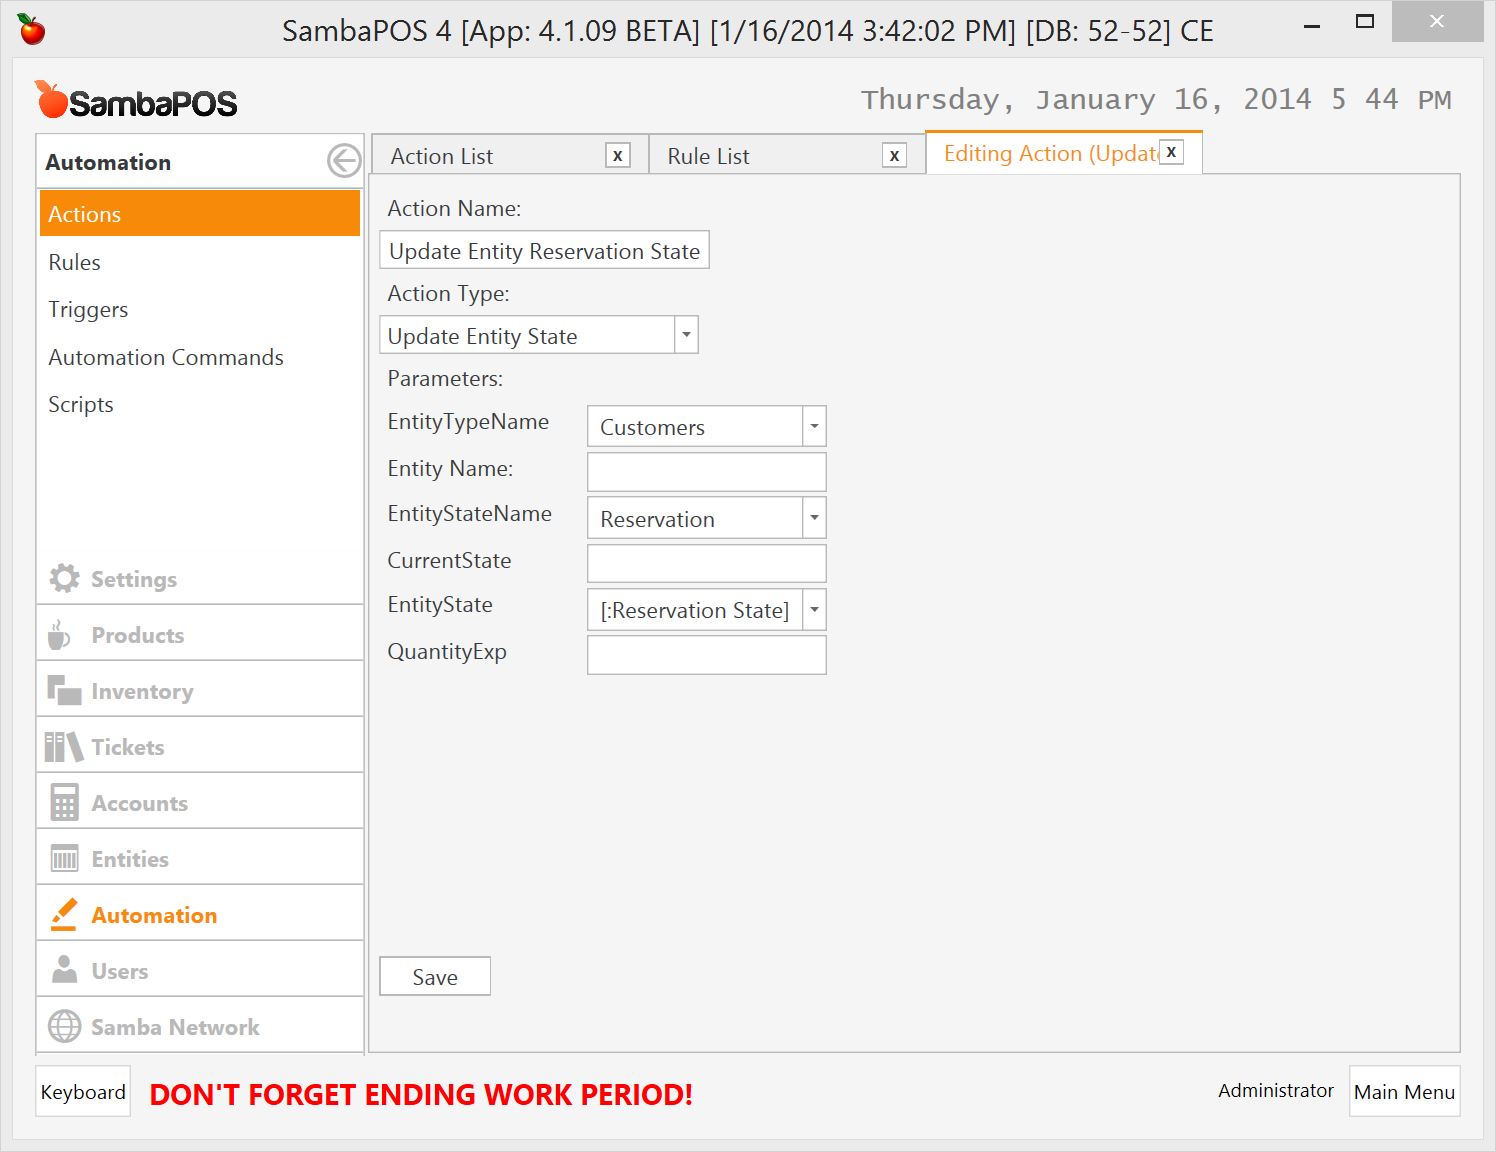
####1.3 Update Entity Reservation state action
We’ll need another action to update Entity’s (Customer in this case) reservation state. So we can list customers who have active reservations.
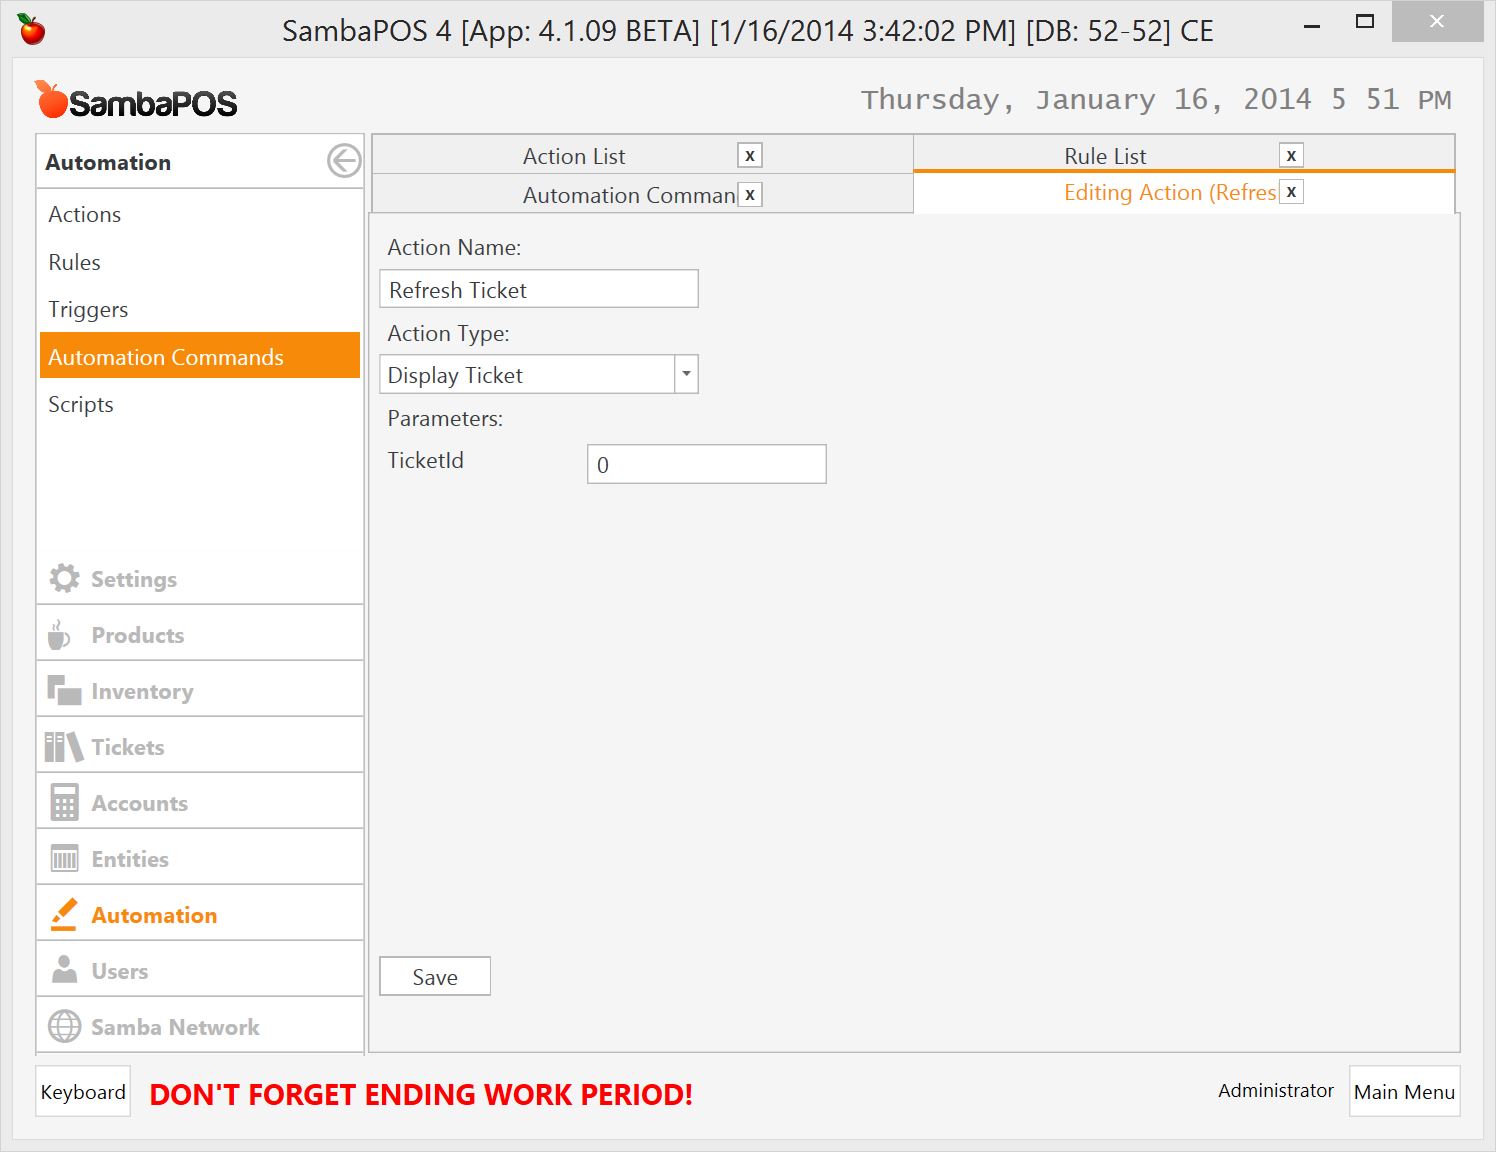
####1.4 Refresh ticket action
Finally we need a simple action to refresh ticket’s display. We can use this action to refresh ticket screen after we make changes on ticket states or tags.
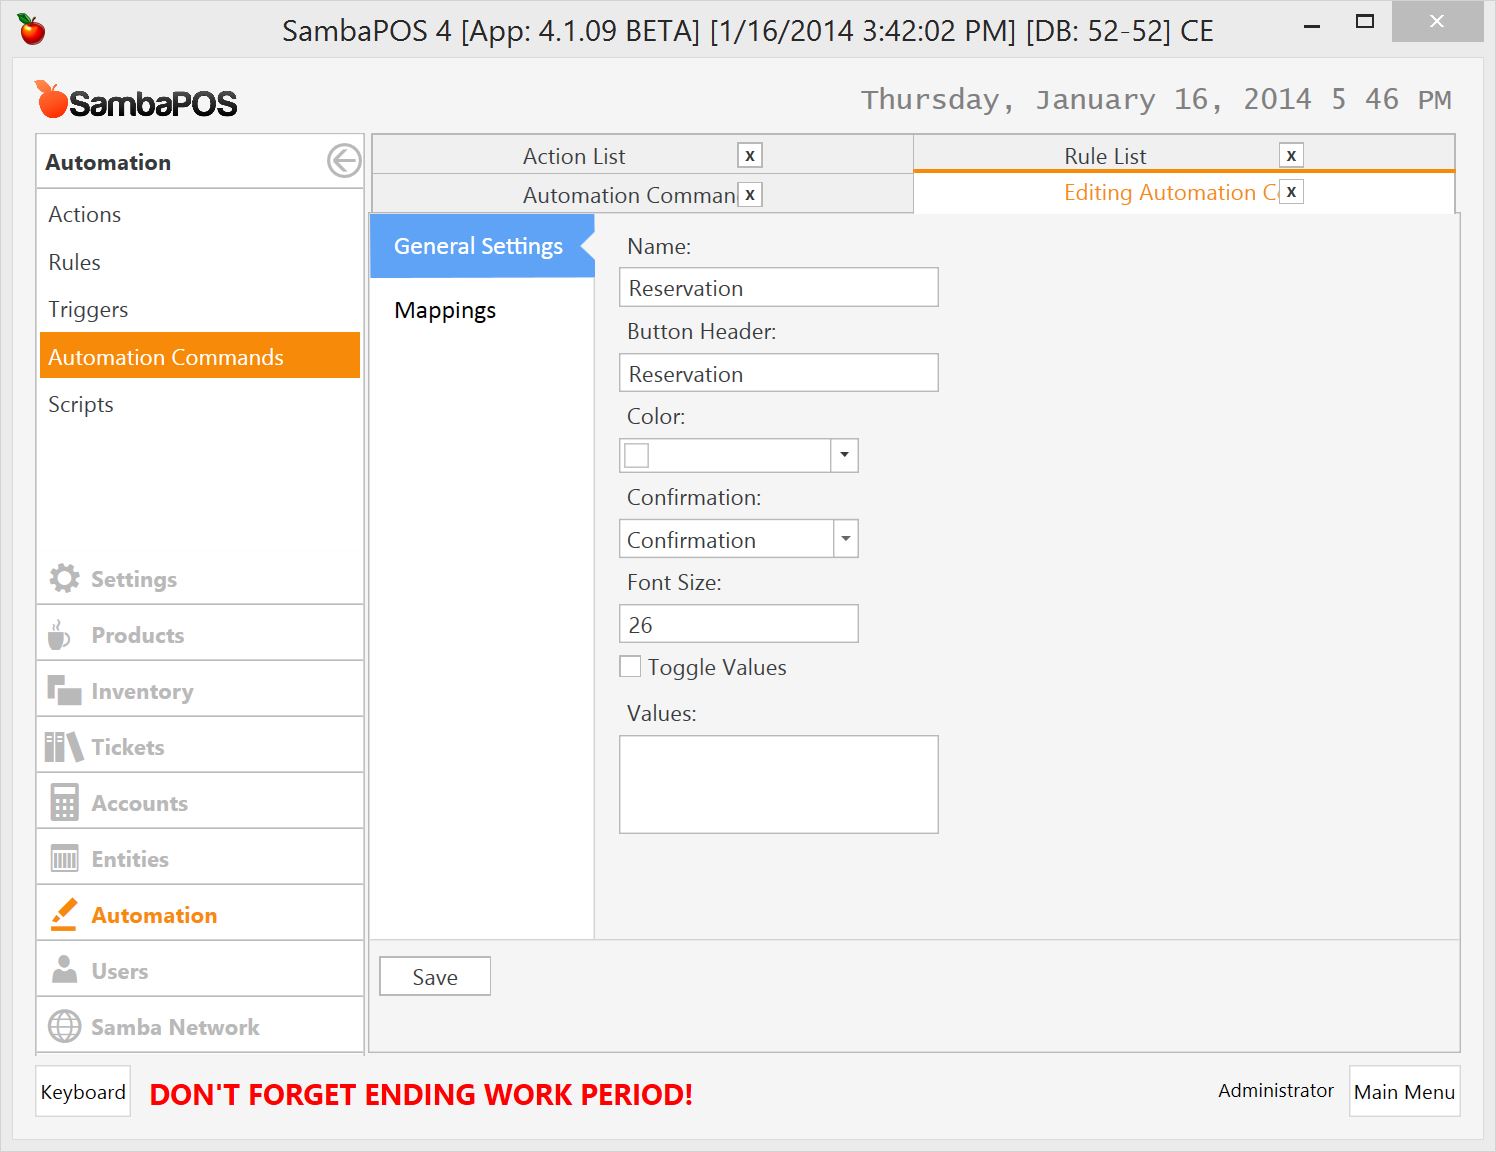
###2. Automation Commands
We need two automation commands for “Reservation” and “Check-in” buttons.
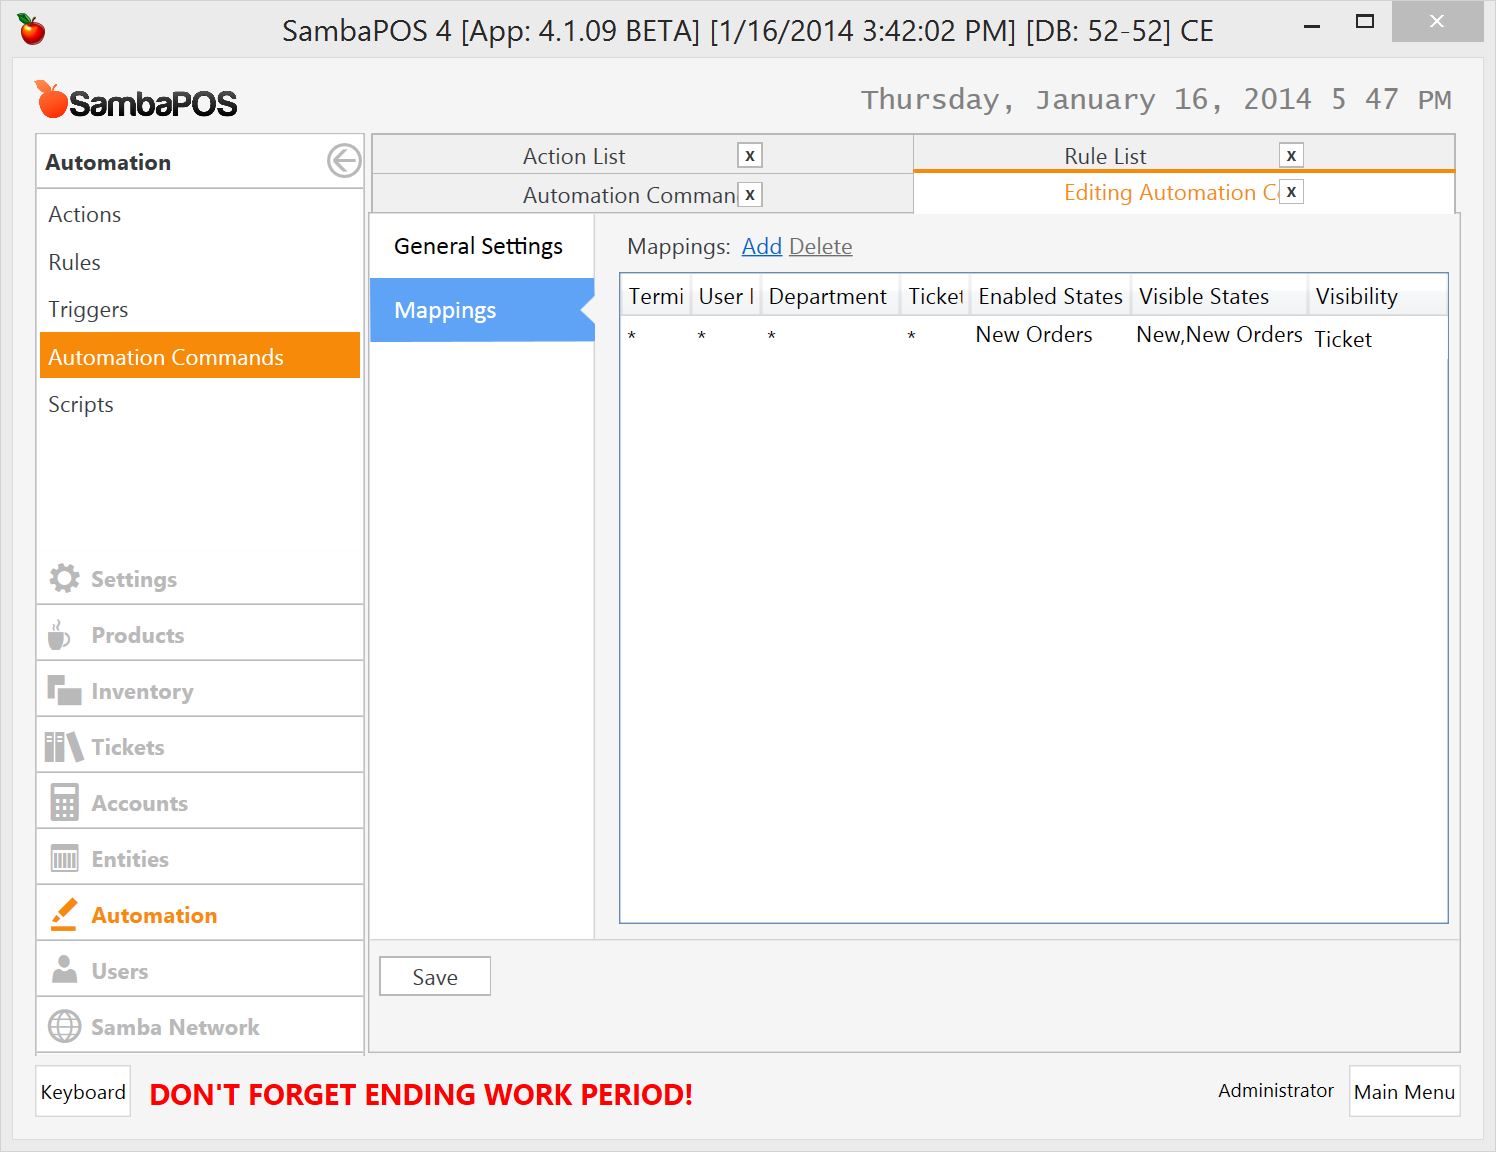
####2.1 Reservation Command
I’ve enabled confirmation setting so it will ask a confirmation when we execute this action. We’ll map this action as follows.
We’ll see Reservation button when ticket state is “New” or “New Orders” but we can click this button only when we start receiving orders so the Enabled States is “New Orders”
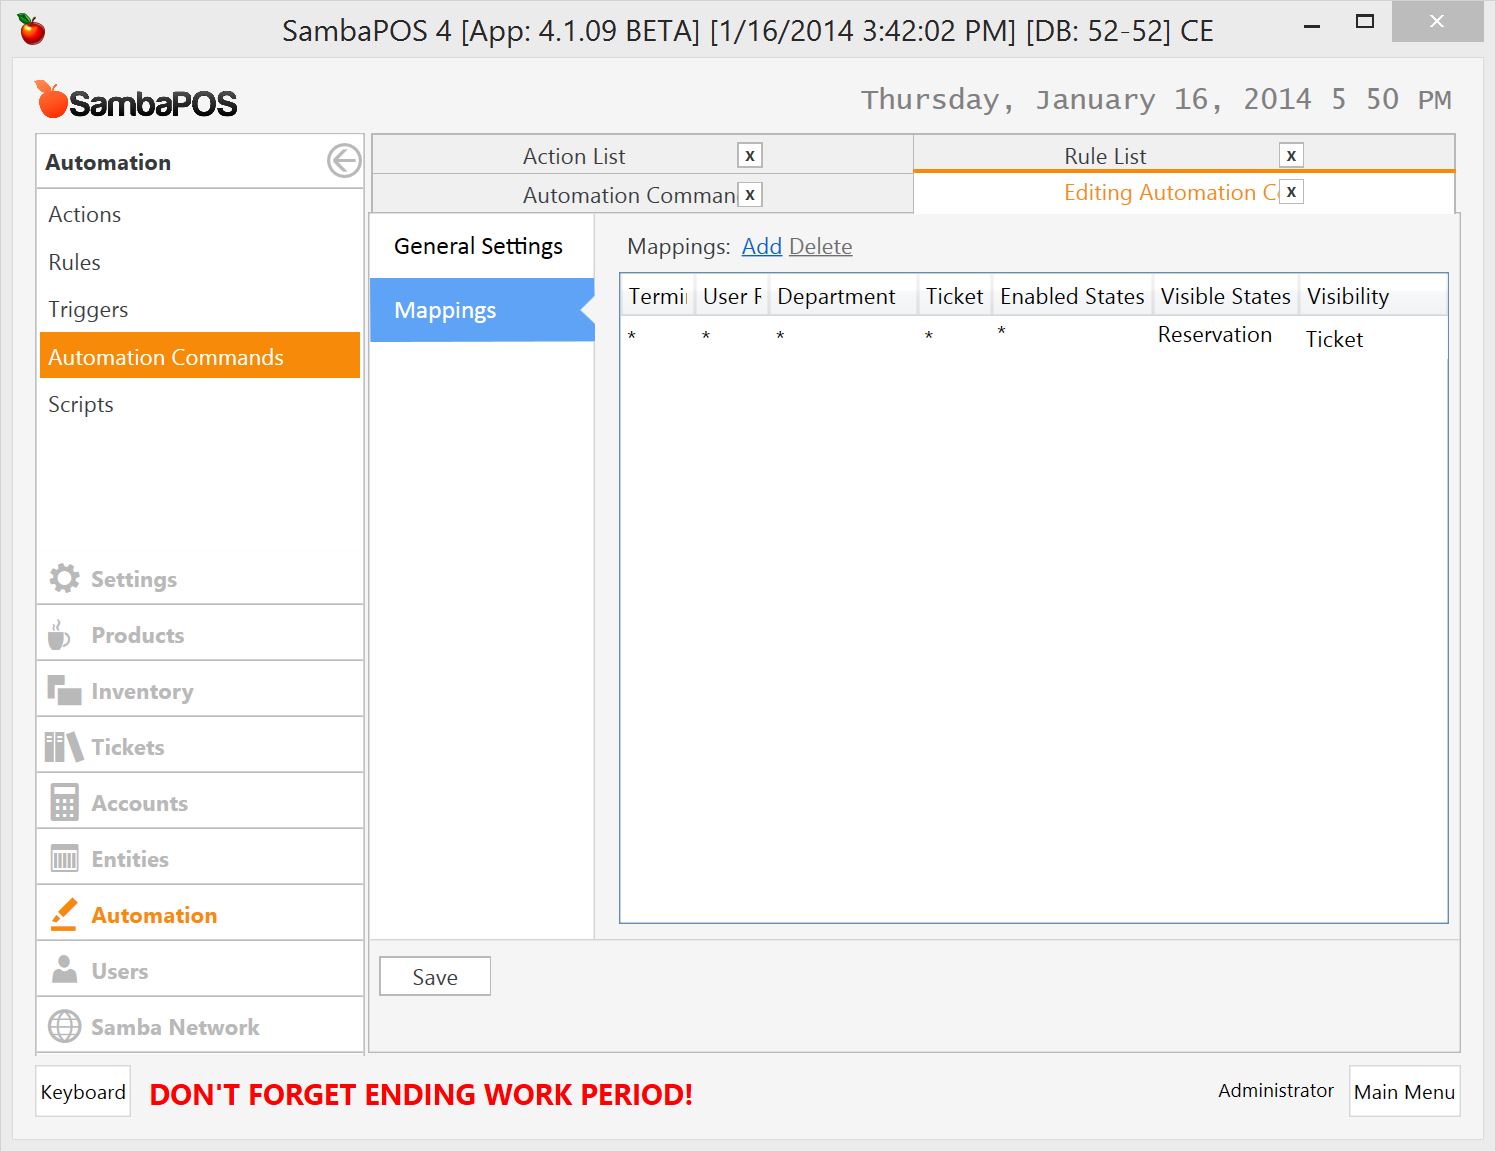
####2.2 Check-in Command
We’ll create another command for “Check-in” operation.
I’ve also enabled confirmation setting for this command. Now let’s see how it mapped.
It works only when ticket status is “Reservation”.
###3. Rules
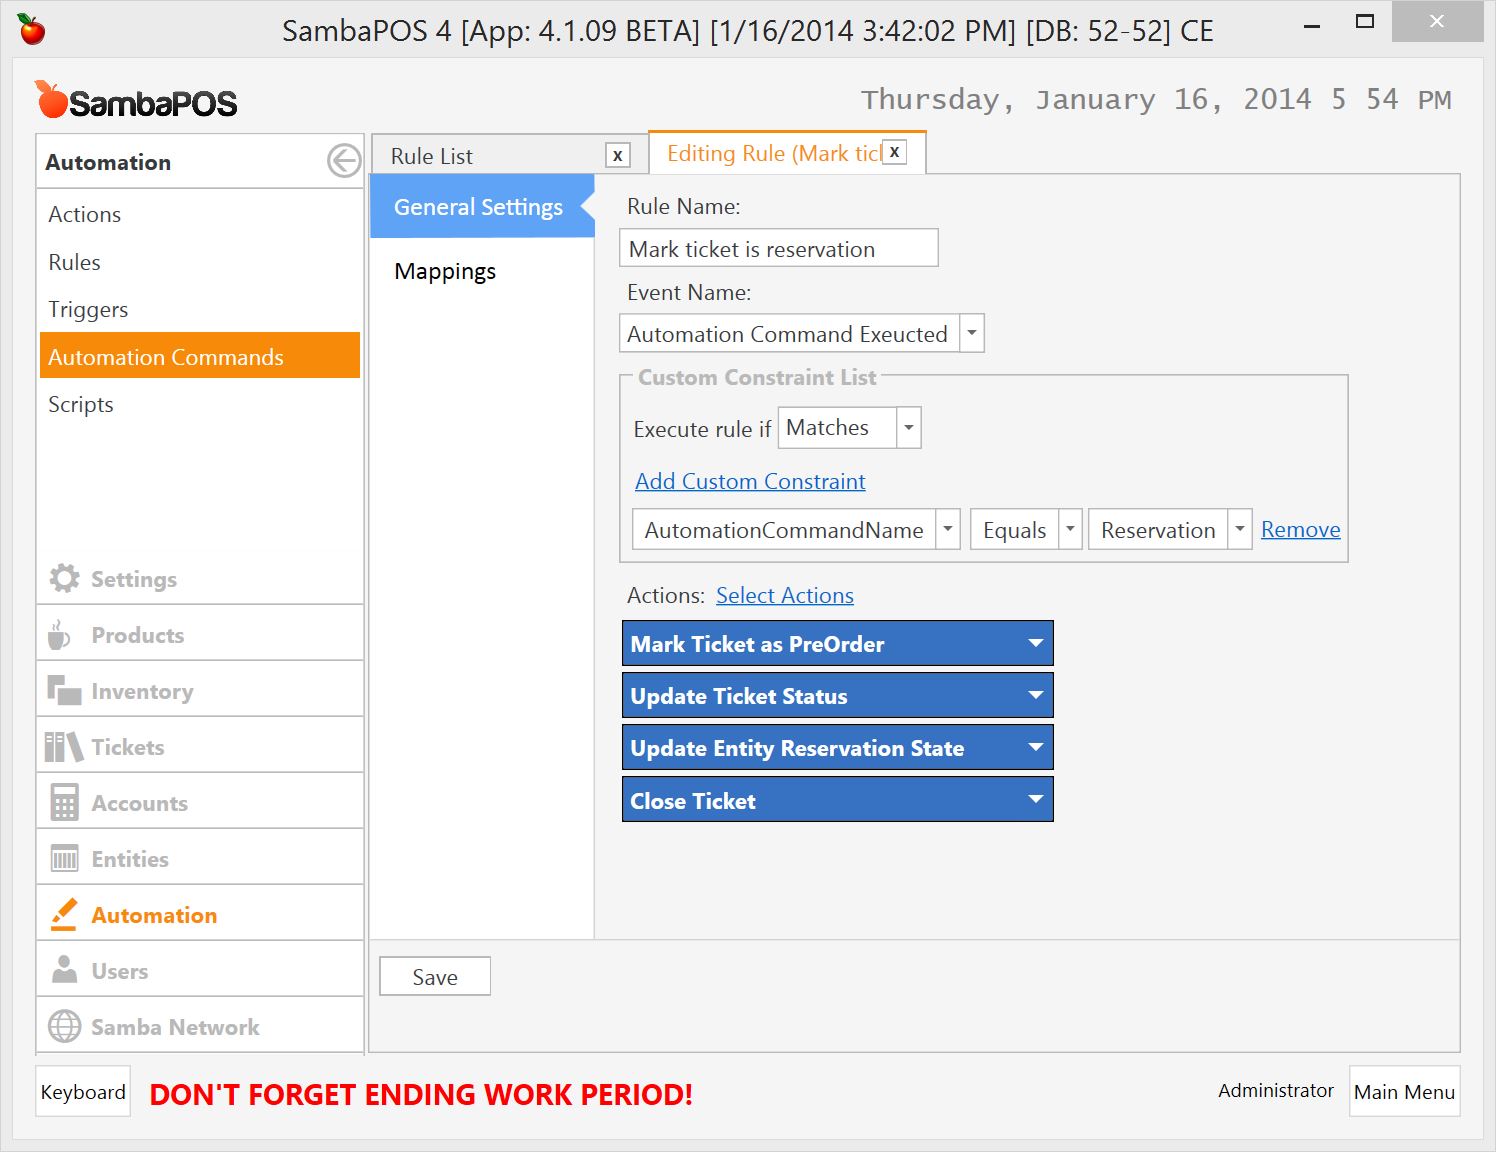
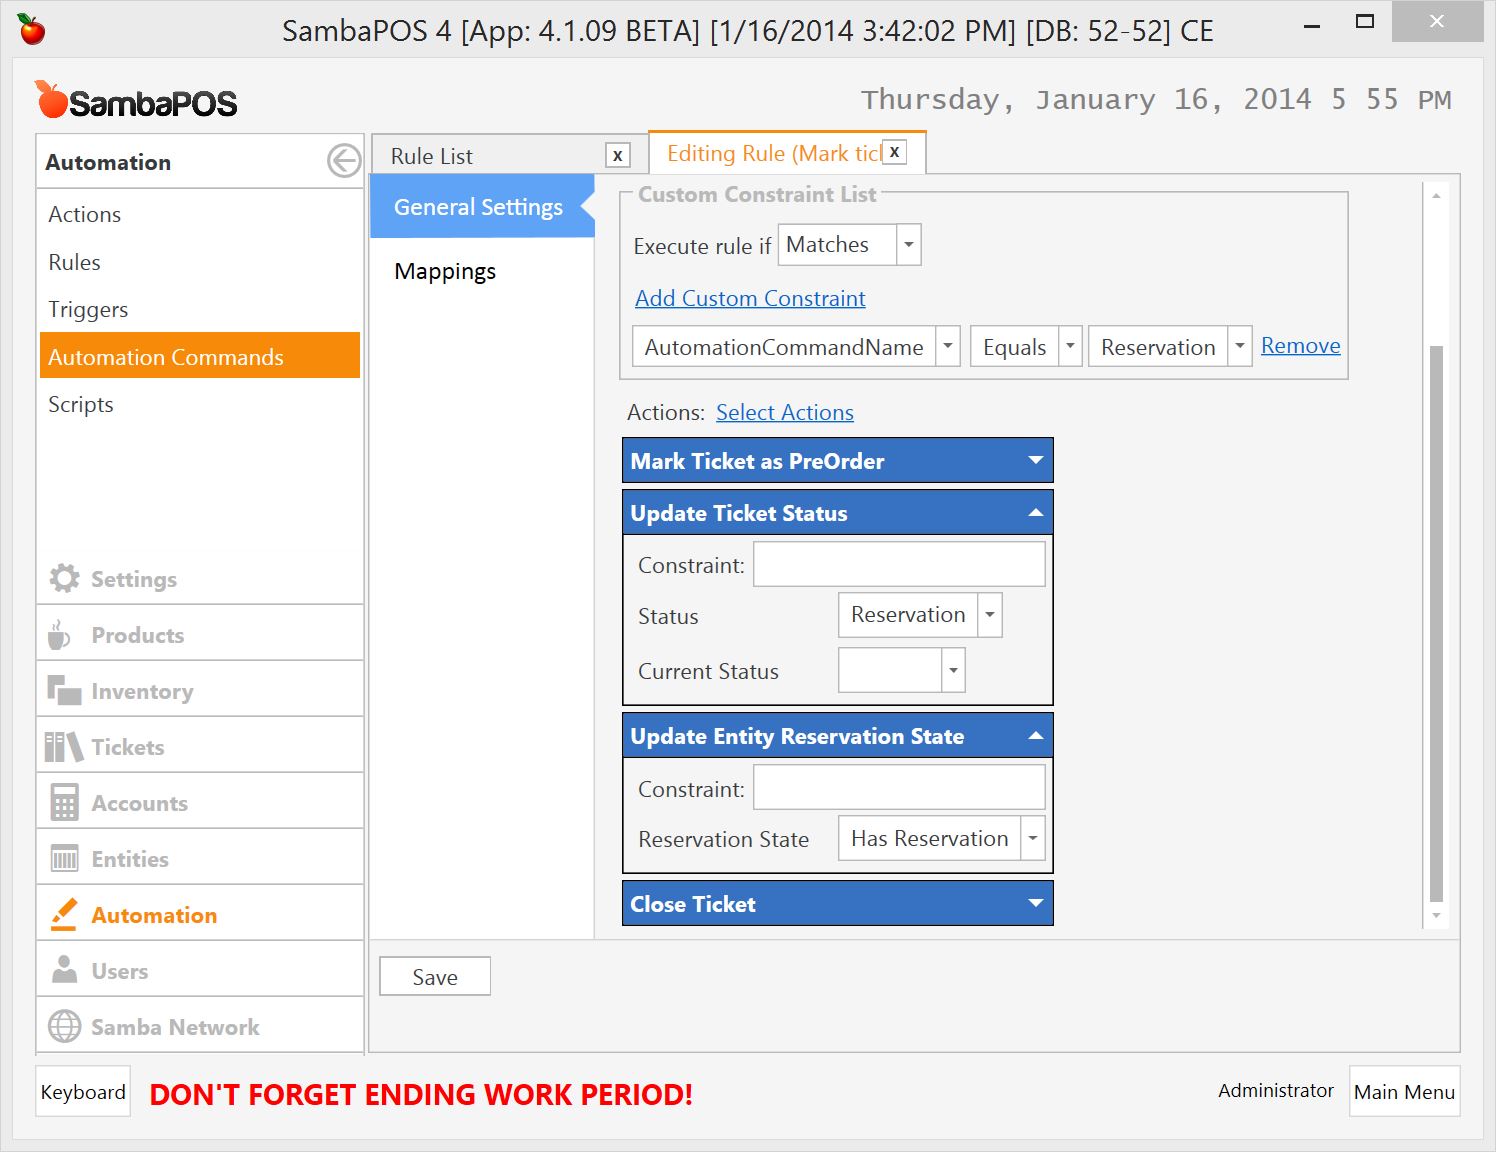
####3.1 Mark ticket as reservation rule
First of all we’ll tell SambaPOS how “Reservation” Button works.
We need to pass parameters to “Update Ticket Status” and “Update Entity Reservation State” actions. This screen shot shows these parameters.
So when we click on “Reservation” Button.
- It marks ticket as pre-order.
- Changes ticket status to “Reservation”
- Changes Entity’s Reservation state to “Has Reservation”. So we can create a new state record to display these entities in different colors.
- Closes Ticket. Instead of closing ticket you can use “Refresh Ticket” action to keep ticket open.
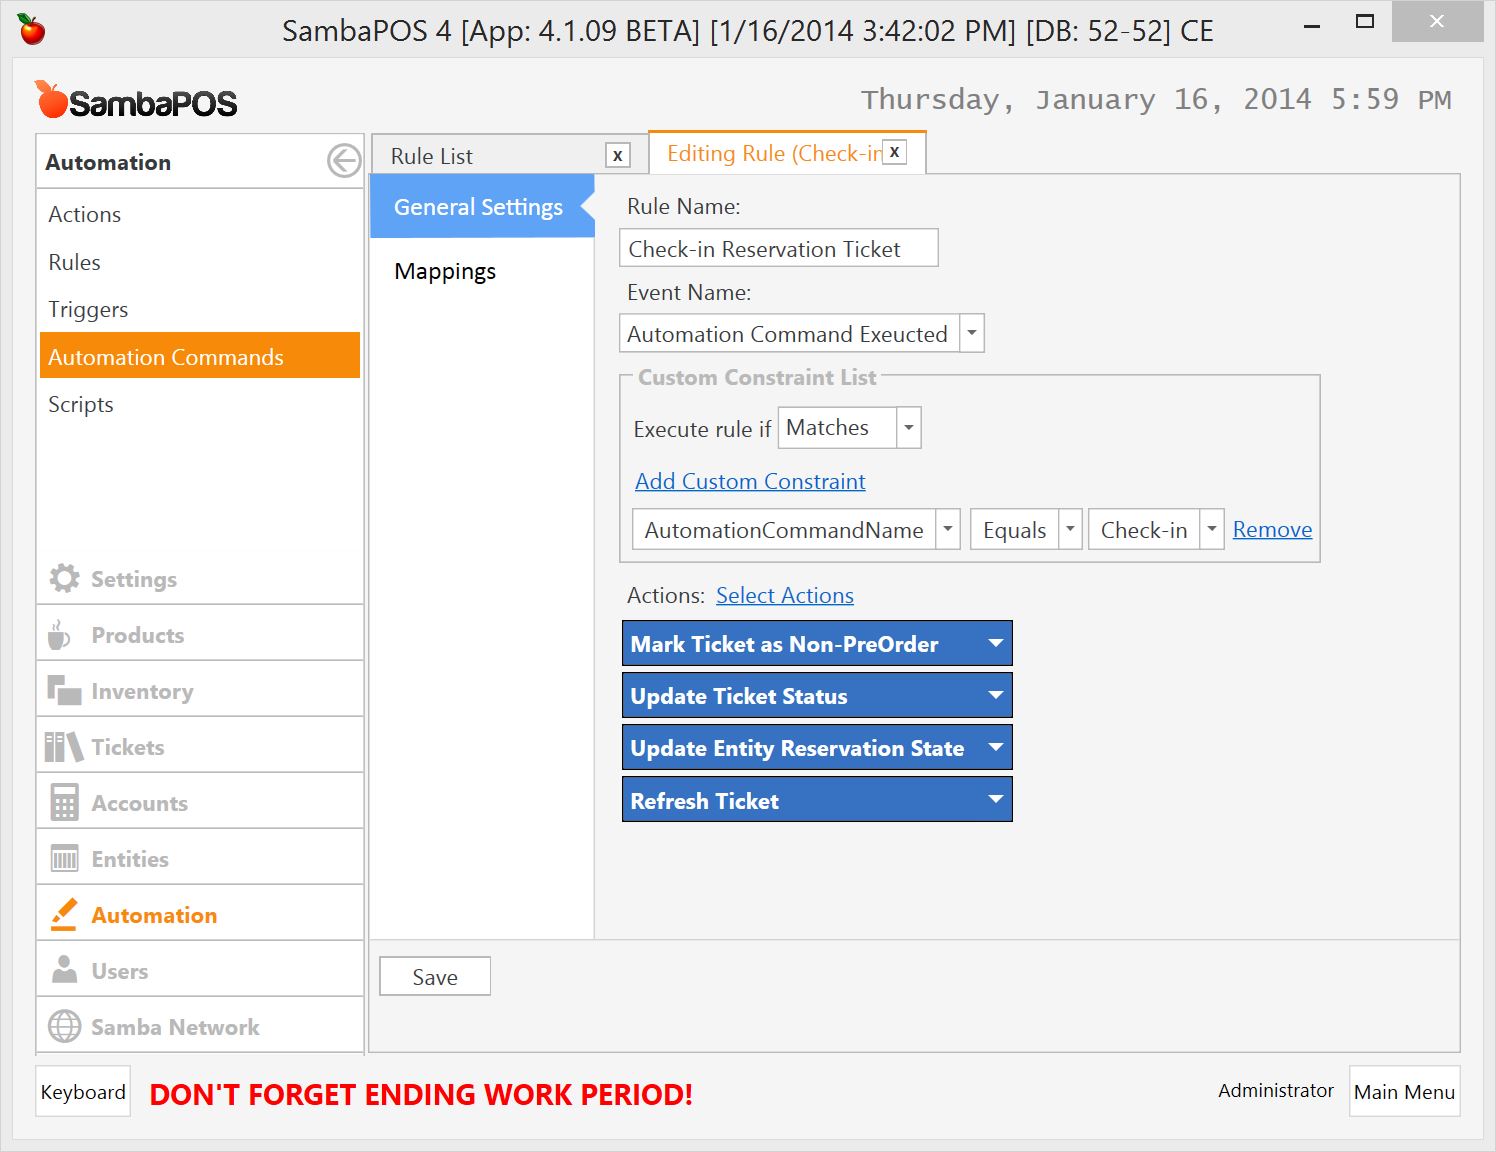
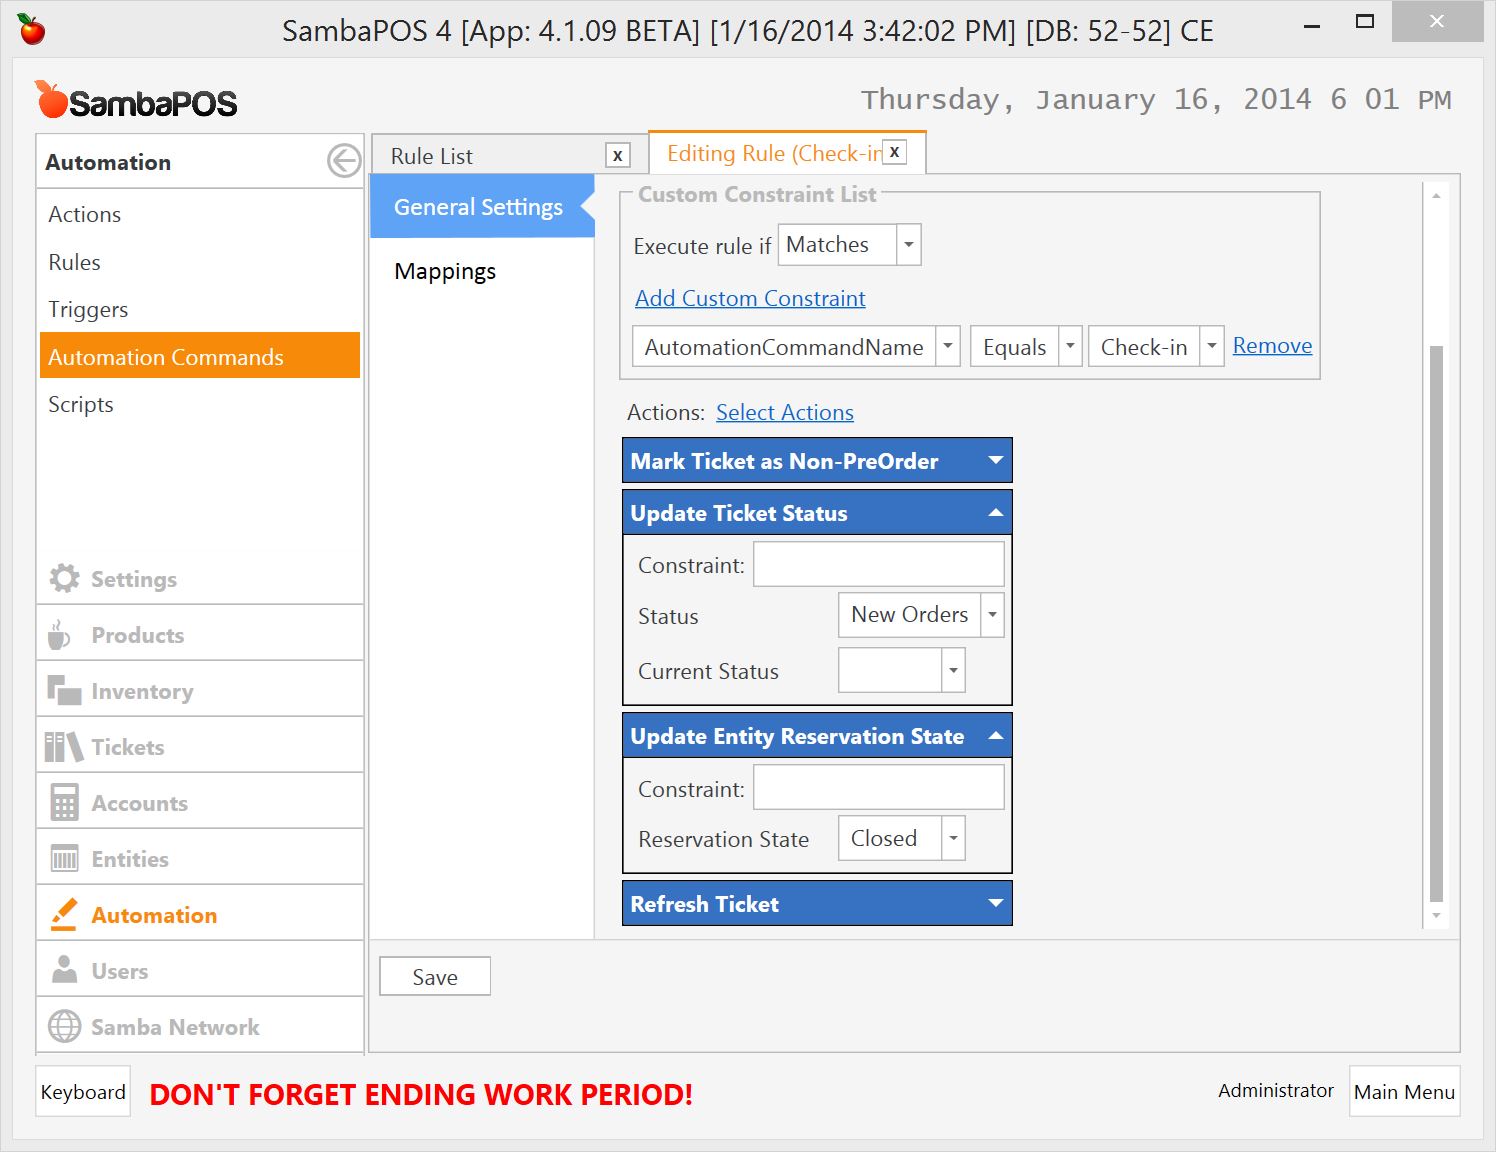
####3.2 Check-in reservation ticket rule
We need another rule to handle “Check-in” button. We’ll use this button to convert a reservation ticket to a regular ticket.
See next screenshot for action parameters.
When we click on “Check-in” button SambaPOS does:
- Disables pre-order setting of ticket so this ticket works like a regular ticket.
- It changes ticket’s status back to “New Orders”. Like we are creating a new ticket.
- Changes Entity’s Reservation state to “Closed”. As you can remember we updated it to “Has Reservation” to list entities that has reservations.
- In final step it refreshes ticket display. We’ll keep ticket open so we can assign ticket to a table or make other changes.
###4. Changes for existing rules
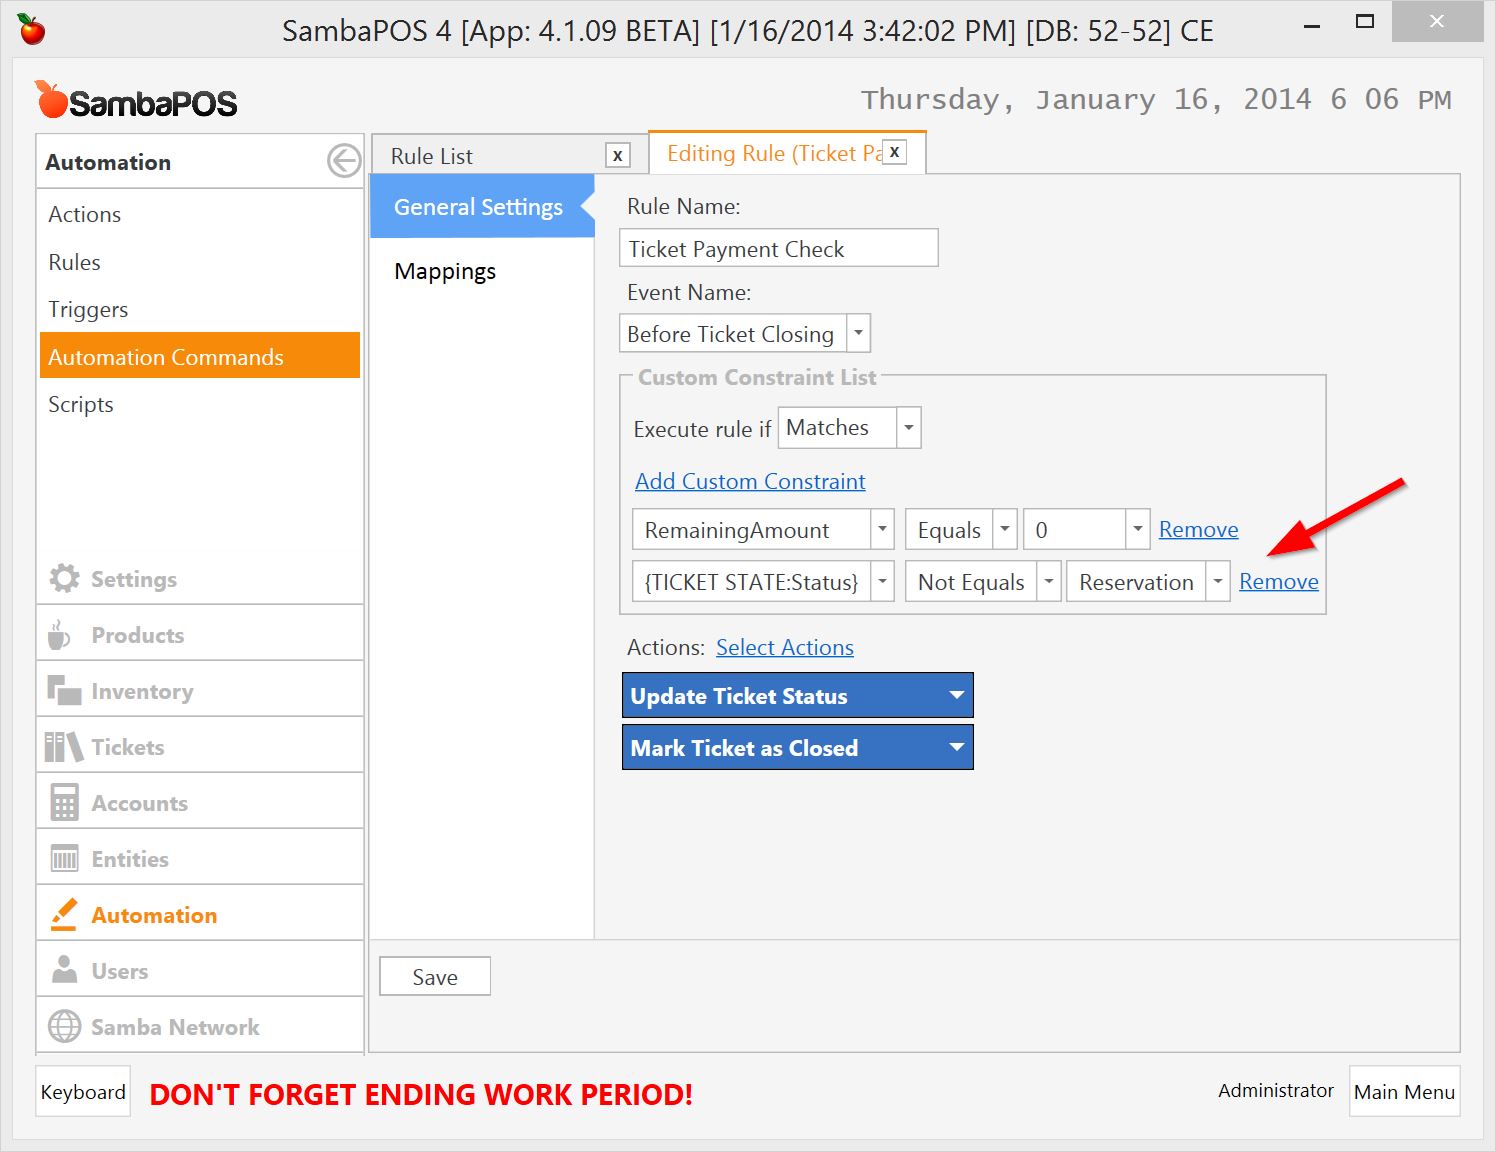
####4.1 Ticket Payment Check rule
As you know “Ticket payment check” is useful to closing paid tickets. We can receive advance payments for reservation tickets but we want to keep that ticket open. So we’ll add a constraint to keep reservation tickets open.
This rule will work if ticket’s status is not “Reservation”.
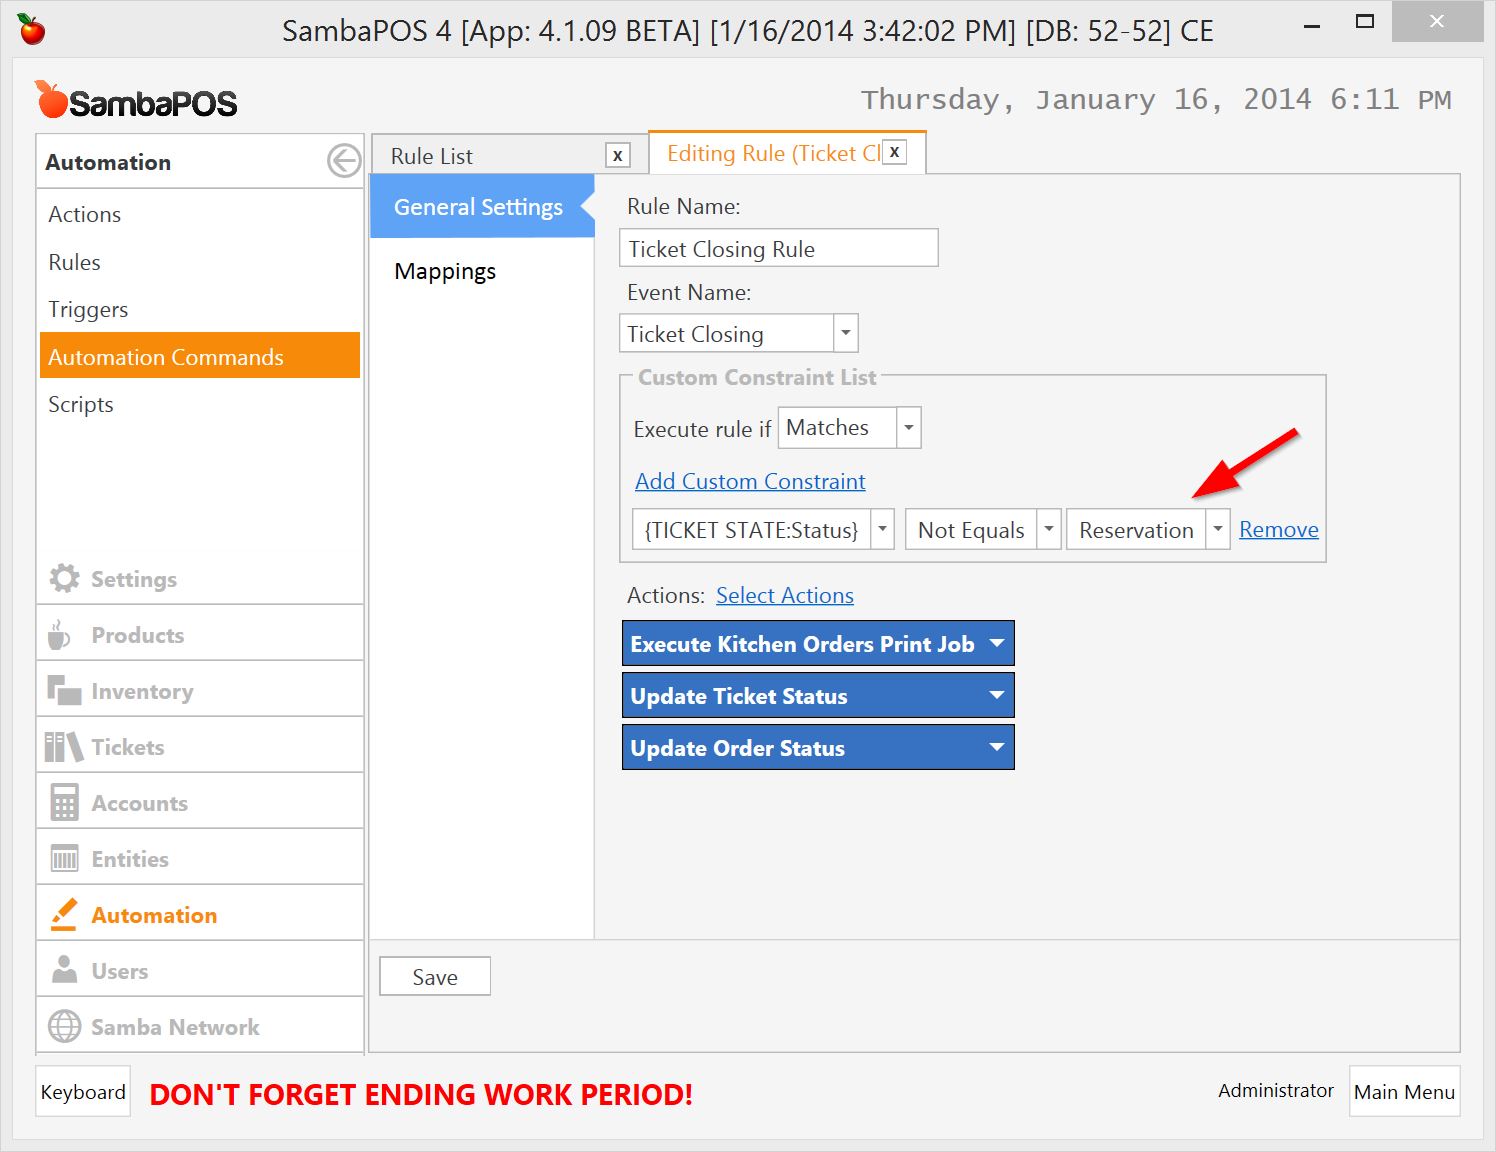
####4.2 Ticket Closing rule
This rule sends orders to kitchen, changes ticket status to “UnPaid” and changes order states to “Sumbitted” to indicate these orders printed to kitchen. We also need to disable this rule for “Reservation” tickets since we need to send orders to kitchen after “Check-in”
This rule won’t work for reservation tickets. When we click on “Check-in” button it will change ticket’s status from “Reservation” to “New Orders” so this rule will start working.
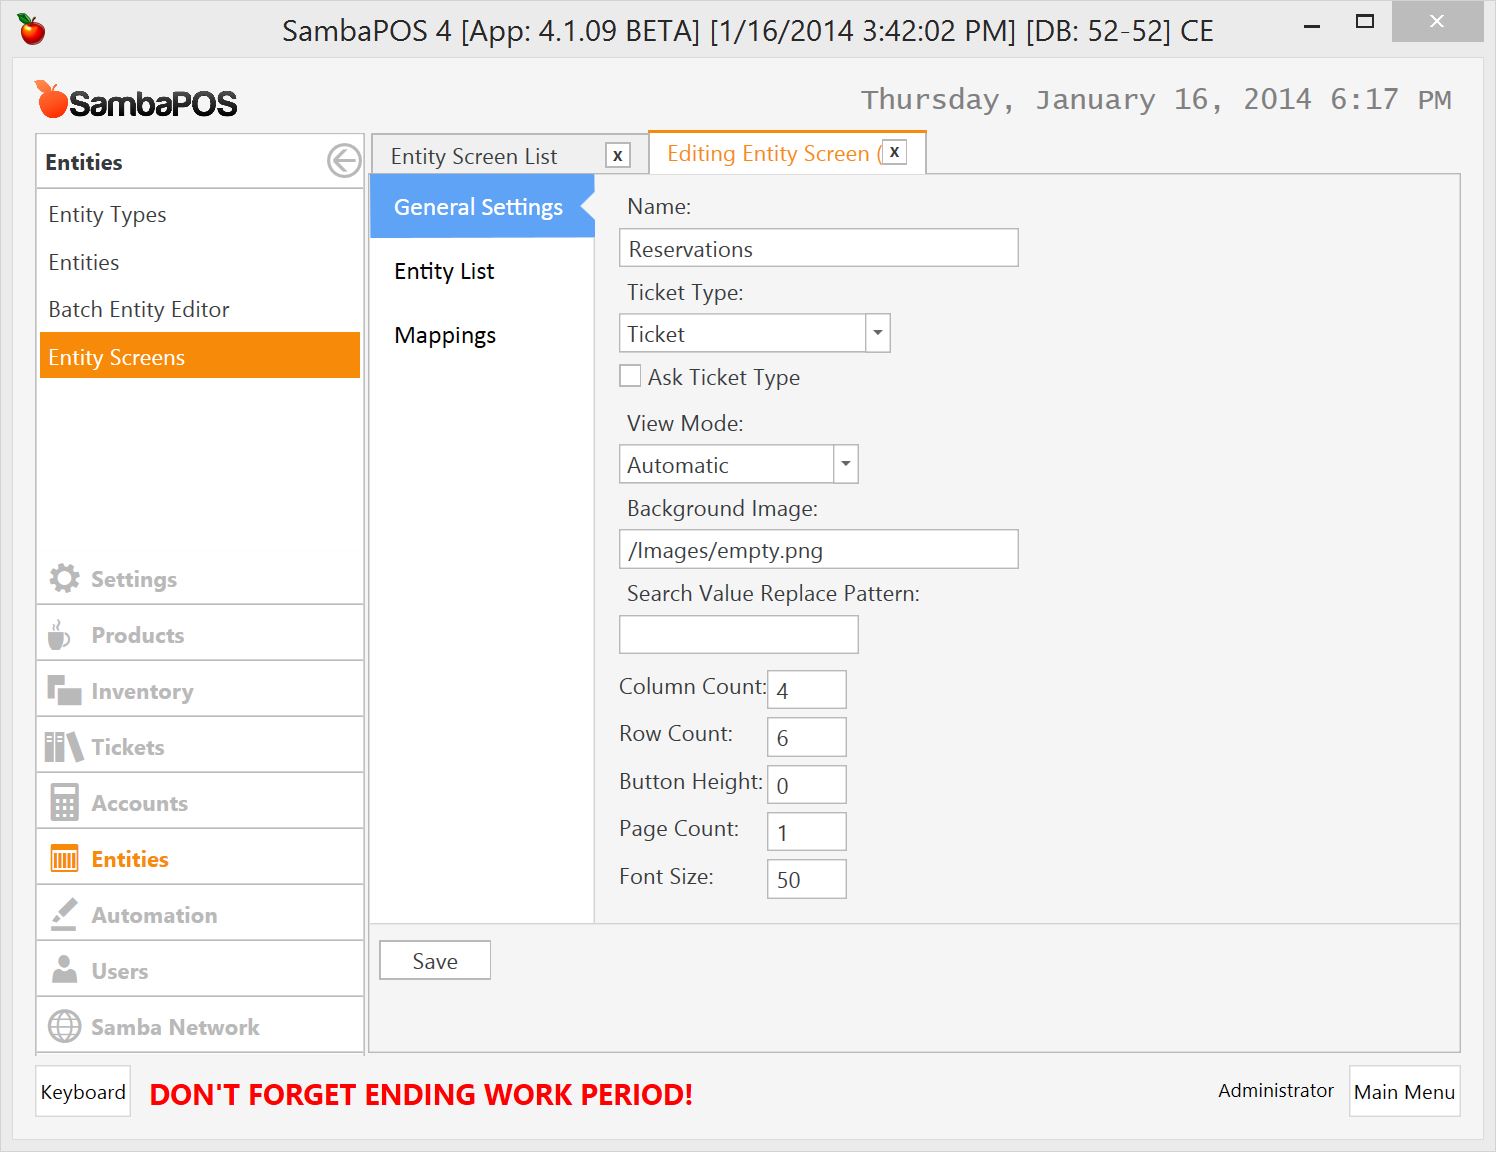
###5. Reservation Entity Screen
We’ll create a new entity screen to display customers that have reservation. As you can remember we update Customer’s reservation state to “Has Reservation” so we can create a new entity screen to list these customers.
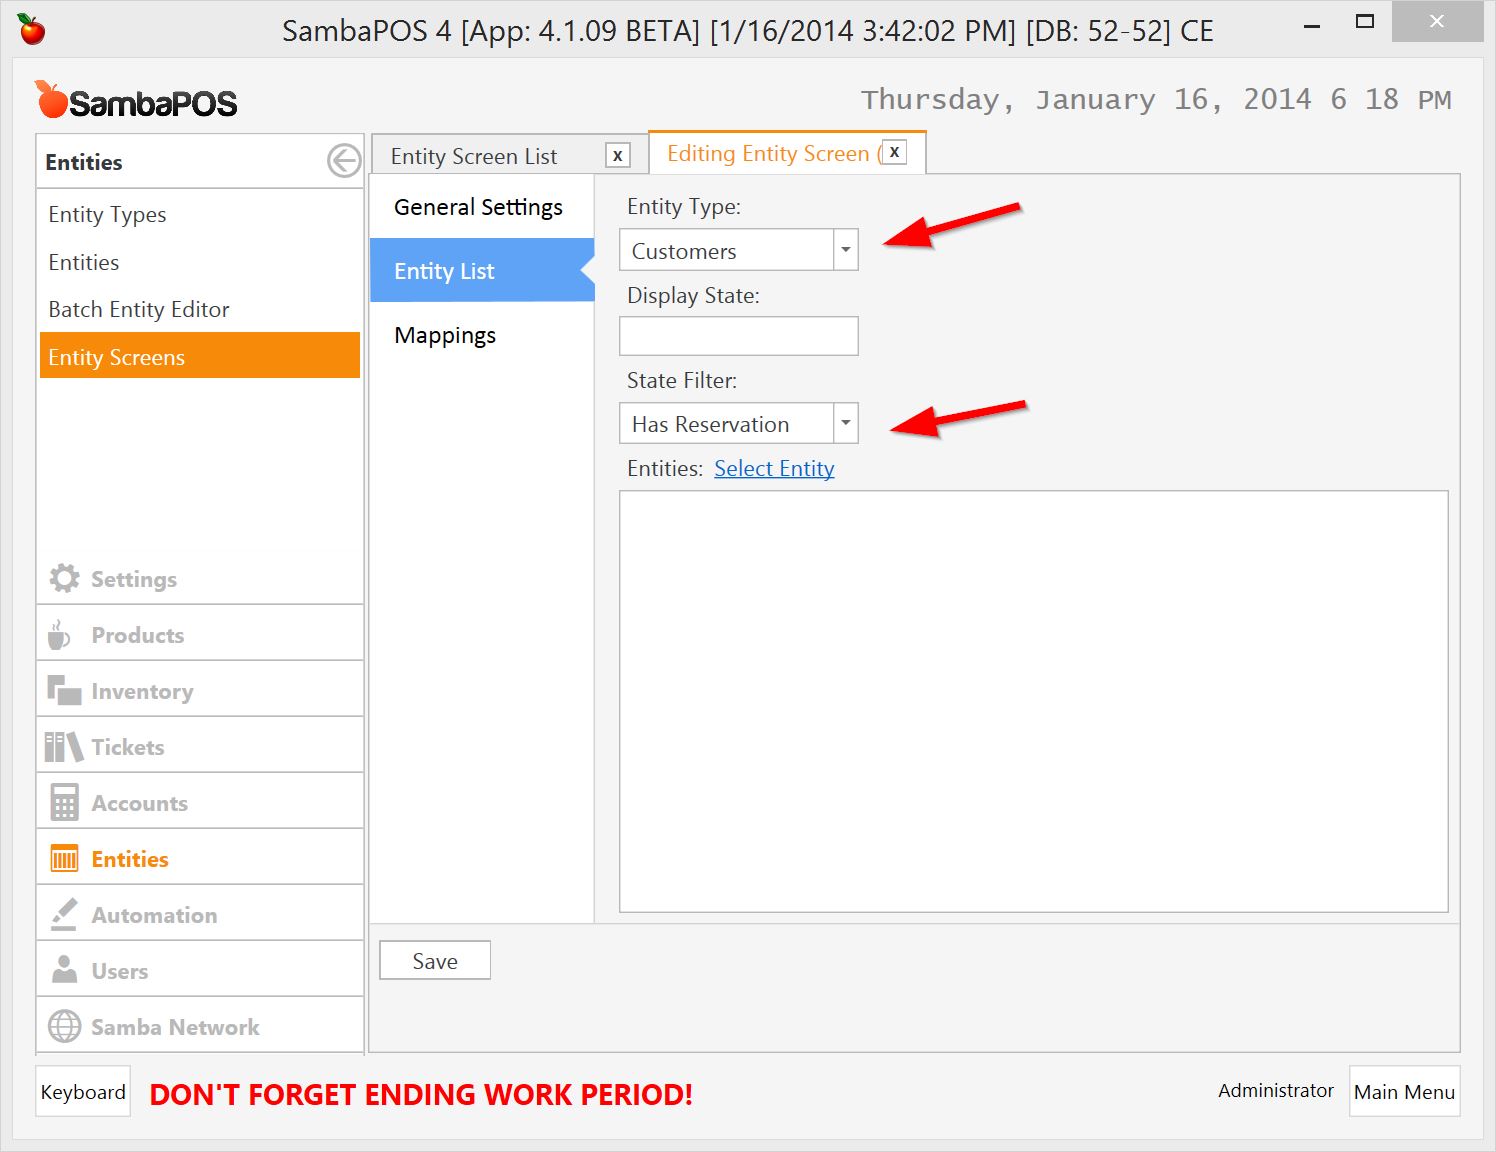
On “Entity List” screen we’ll configure which entities it should display.
It should list “Customers” with “Has Reservation” state.
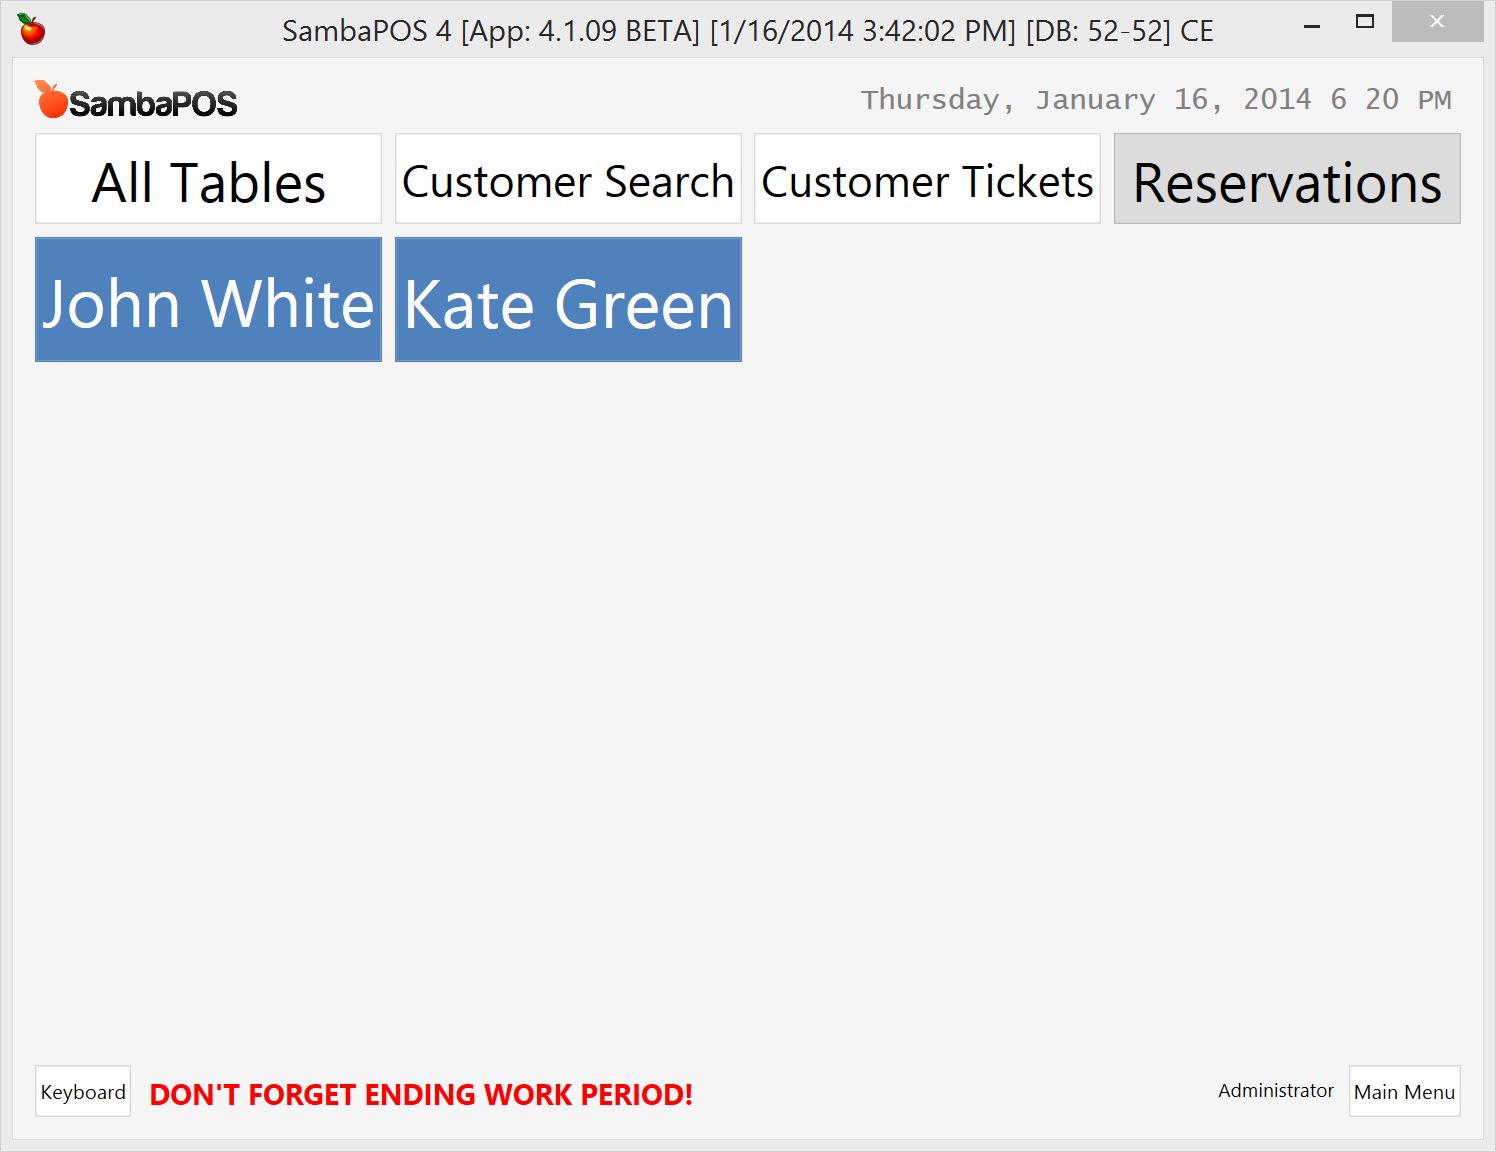
Finally we need to create a new state configuration to give a different color to “Has Reservation” state.
On “Reservations” screen buttons will have Blue color.
In sample database and video this screen is a custom screen and it displays a Ticket Lister next to Entity Grid. If you want to enable this feature you can change screen type to custom and add a “Entity Grid” widget and a “Ticket Lister” Widget.
This is how Ticket Lister widget configured.
It lists tickets that have Reservation state and it displays Customer Name and Phone number.
##What’s Next?
This tutorial aims to feature pre-order tickets. On next tutorial I’ll show you how to handle reservation dates and “No-Show” feature to disable reservation tickets.