Hello everyone, I am trying to figure out a way to create a entity screen that lists unpaid tickets and take them straight to the payment screen. This will save time as the cashiers don’t need to open the orders then shit settle to go to pay.
1 Like
You can use the Ticket Lister widget and set the State to Unpaid. You would set up automation command so when selected it will take it to payment screen. The action used would be Display Payment Screen action. You put it inside Automation Command Executed rule and the constraint would be the Automation Command you defined in the Ticket Lister.
You also need a Load Ticket action it would read Command Value… So for Command Value in the Ticket Lister widget you would use {TICKET ID} tag. Put the Load Ticket action before the Display Payment Screen action in your rule.
So to sum it up:
- Create a Custom Entity Screen and insert a Ticket Lister widget
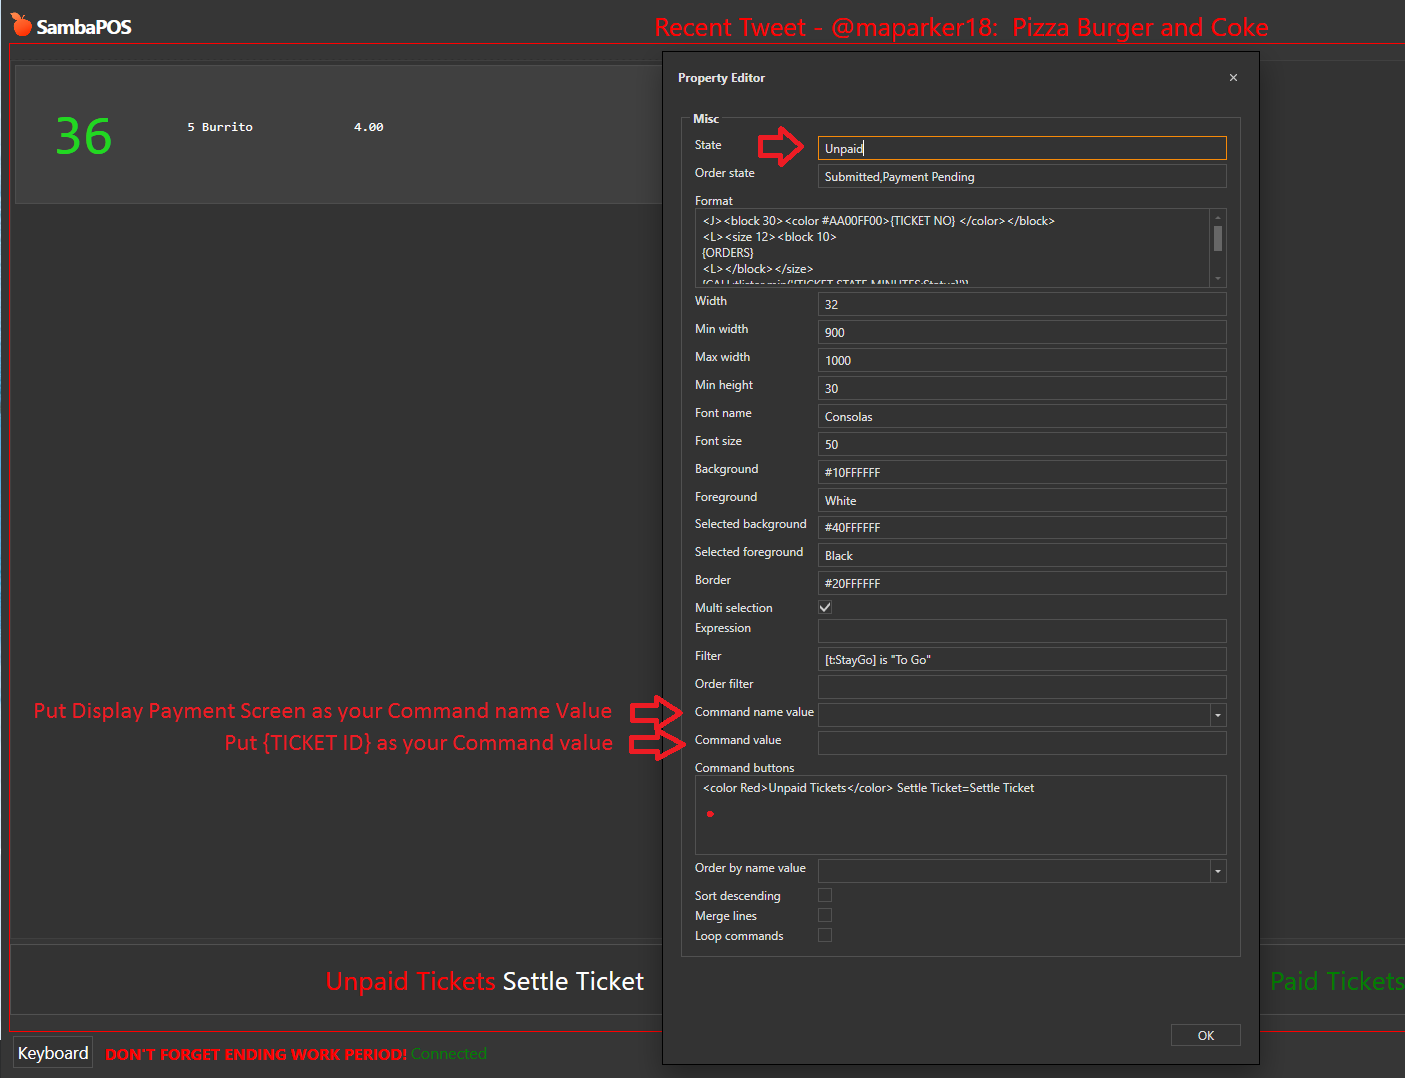
- In the Ticket Lister Widget settings put Unpaid for State
- In the Ticket Lister Widget settings for
Command name valueput Display Payment Screen - In the Ticket Lister Widget settings for
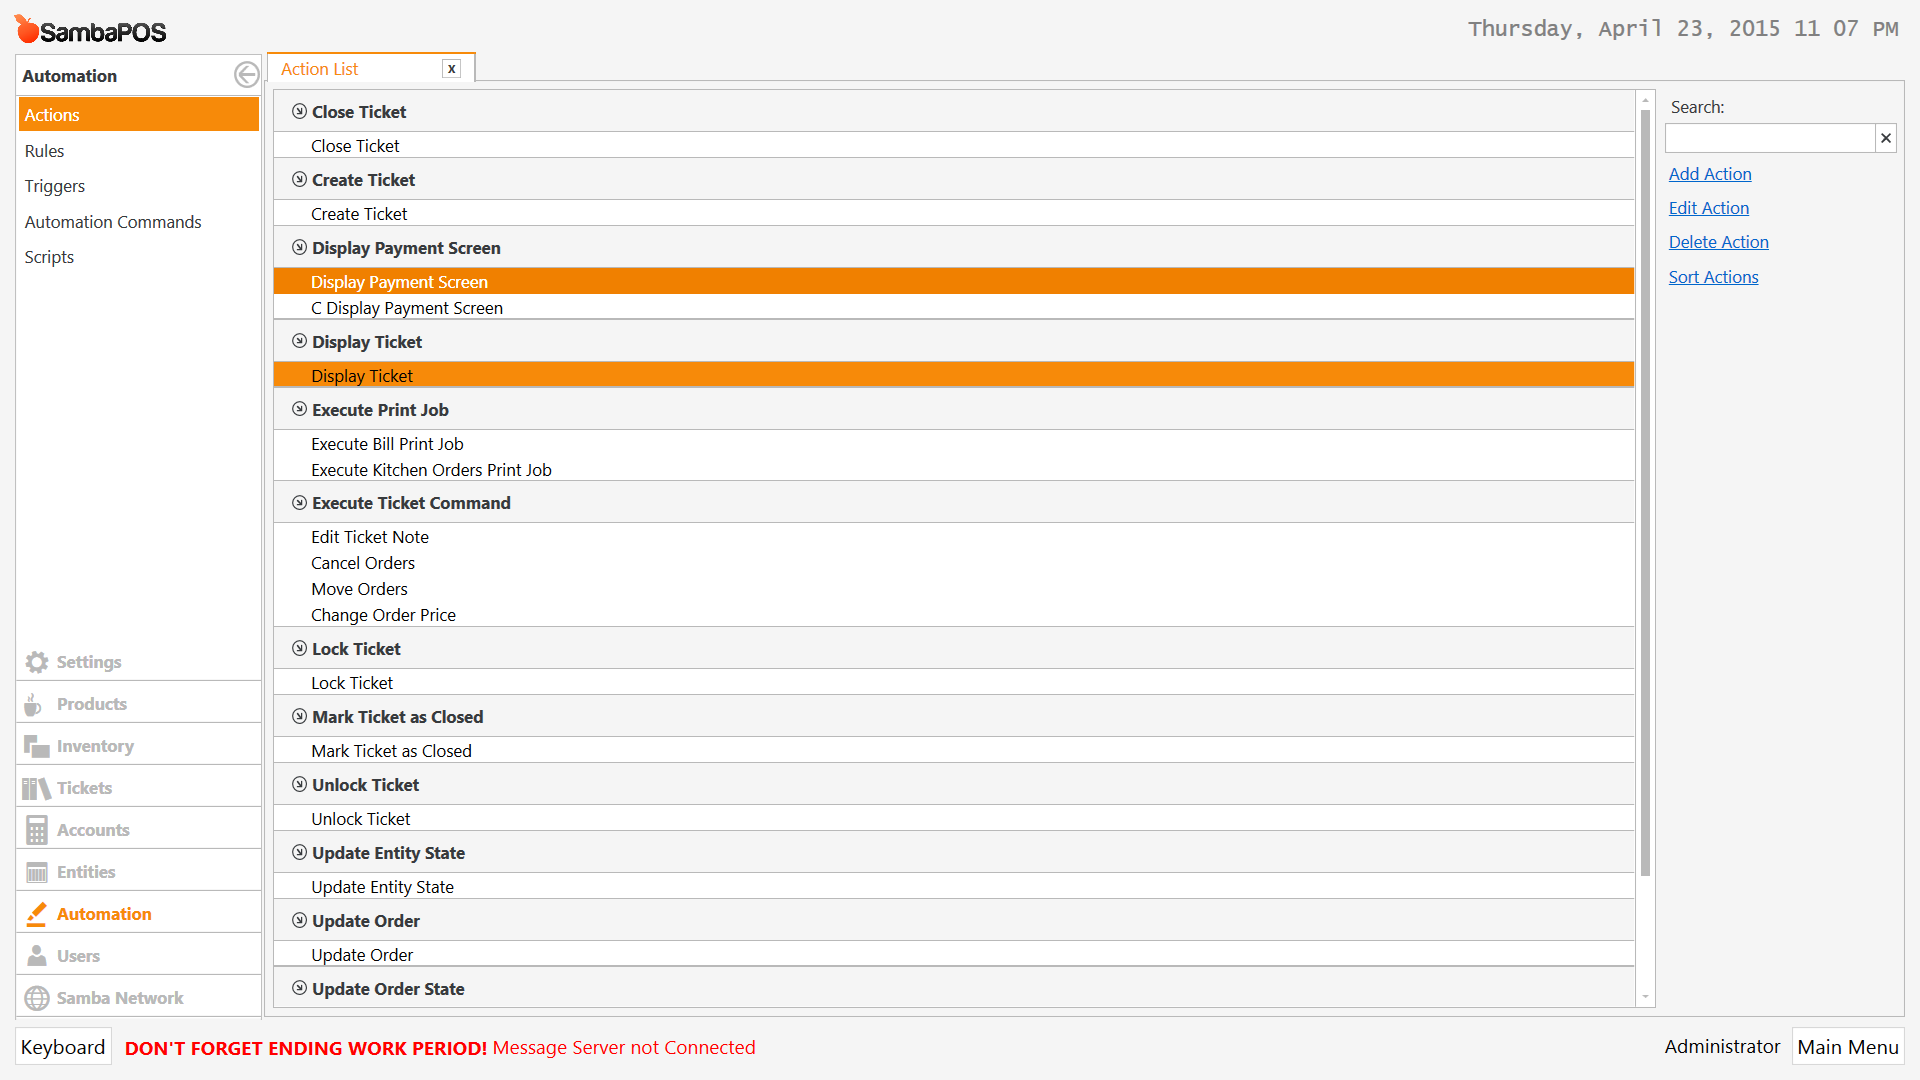
Command valueput {TICKET ID} - Create a Display Payment Screen action
- Create a Display Ticket action and use [:Ticket ID] variable for Ticket ID
- Create an
Automation Command ExecutedRule and set the Custom Constraint to Automation Command Equals Display Payment Screen - In your rule put your Load Ticket action first and set Command Value as your Ticket ID then put your Display Payment Screen action last
That is it your done. Obviously you can tweak this further to your taste.
4 Likes
Unfortunately I can’t get it to work. I’m pretty sure Ive followed everything correctly but
1- Create a Custom Entity Screen and insert a Ticket Lister widget - CHECK
2- In the Ticket Lister Widget settings put Unpaid for State - CHECK
None of the “Bill Requested” tables are showing up here
3 - In the Ticket Lister Widget settings for Command name value put Display Payment Screen - CHECK
4 - In the Ticket Lister Widget settings for Command value put {TICKET ID} - CHECK

5 - Create a Display Payment Screen action - CHECK
This already existed under actions
6 - Create a Display Ticket action and use [:Ticket ID] variable for Ticket ID - CHECK
7- Create an Automation Command Executed Rule and set the Custom Constraint to Automation Command Equals Display Payment Screen - CHECK
This option was not available from the drop down menu but I typed it in there anyway
8 - In your rule put your Load Ticket action first and set Command Value as your Ticket ID then put your Display Payment Screen action last

I made a mistake it should have been Load Ticket action not Display Ticket
Also try adding Bill Requested to the State along with Unpaid you can add both like this: Unpaid,Bill Requested
Bill requested tickets still aren’t appearing, so I dont know if it the commands work or not. The orders are there but once I untill I print then they disapear
Ok let me look into it. I have a fresh database here.
EDIT: Ok the state is Locked not Bill Requested. so try Unpaid and Locked like Unpaid,Locked
Just tested the commands and they work great. The only tickets with Locked State are the ones with Bill Requested in your system? If not we may need to create a new state flow. Or it will show all Locked tickets if some are not Bill Requested you may not want them there. If all your Locked tickets are bill requested then your fine.
1 Like
I believe the tickets get locked after we use the close button as well since I see tickets that haven’t been printed.
I don’t know if it possible but I think we can work around it using the entity grid widget and using the bill requested state filter.
The command doesn’t seem to work for me still.
I know it works I just tested it. Be sure you set Load Ticket instead of Display Ticket in the rule.
Entity Grid can work as well. Entity Grid will read Bill Requested because it is an Entity State so this might be preferred.
I just got it to work… I re entered the command value under widget settings in capitals this time and it worked
awesome! thanks alot for your help!
1 Like
Yes Tags are case sensitive so if you ever see us type {TICKET ID} or {TICKET TOTAL} then you have to type it exact caps and all.
Some in brackets like [:CommandValue] are case sensitive as well. if you typed it as [:Commandvalue] it would not work.
2 Likes