In this tutorial I’ll show you how to setup tables when you first install SambaPOS.
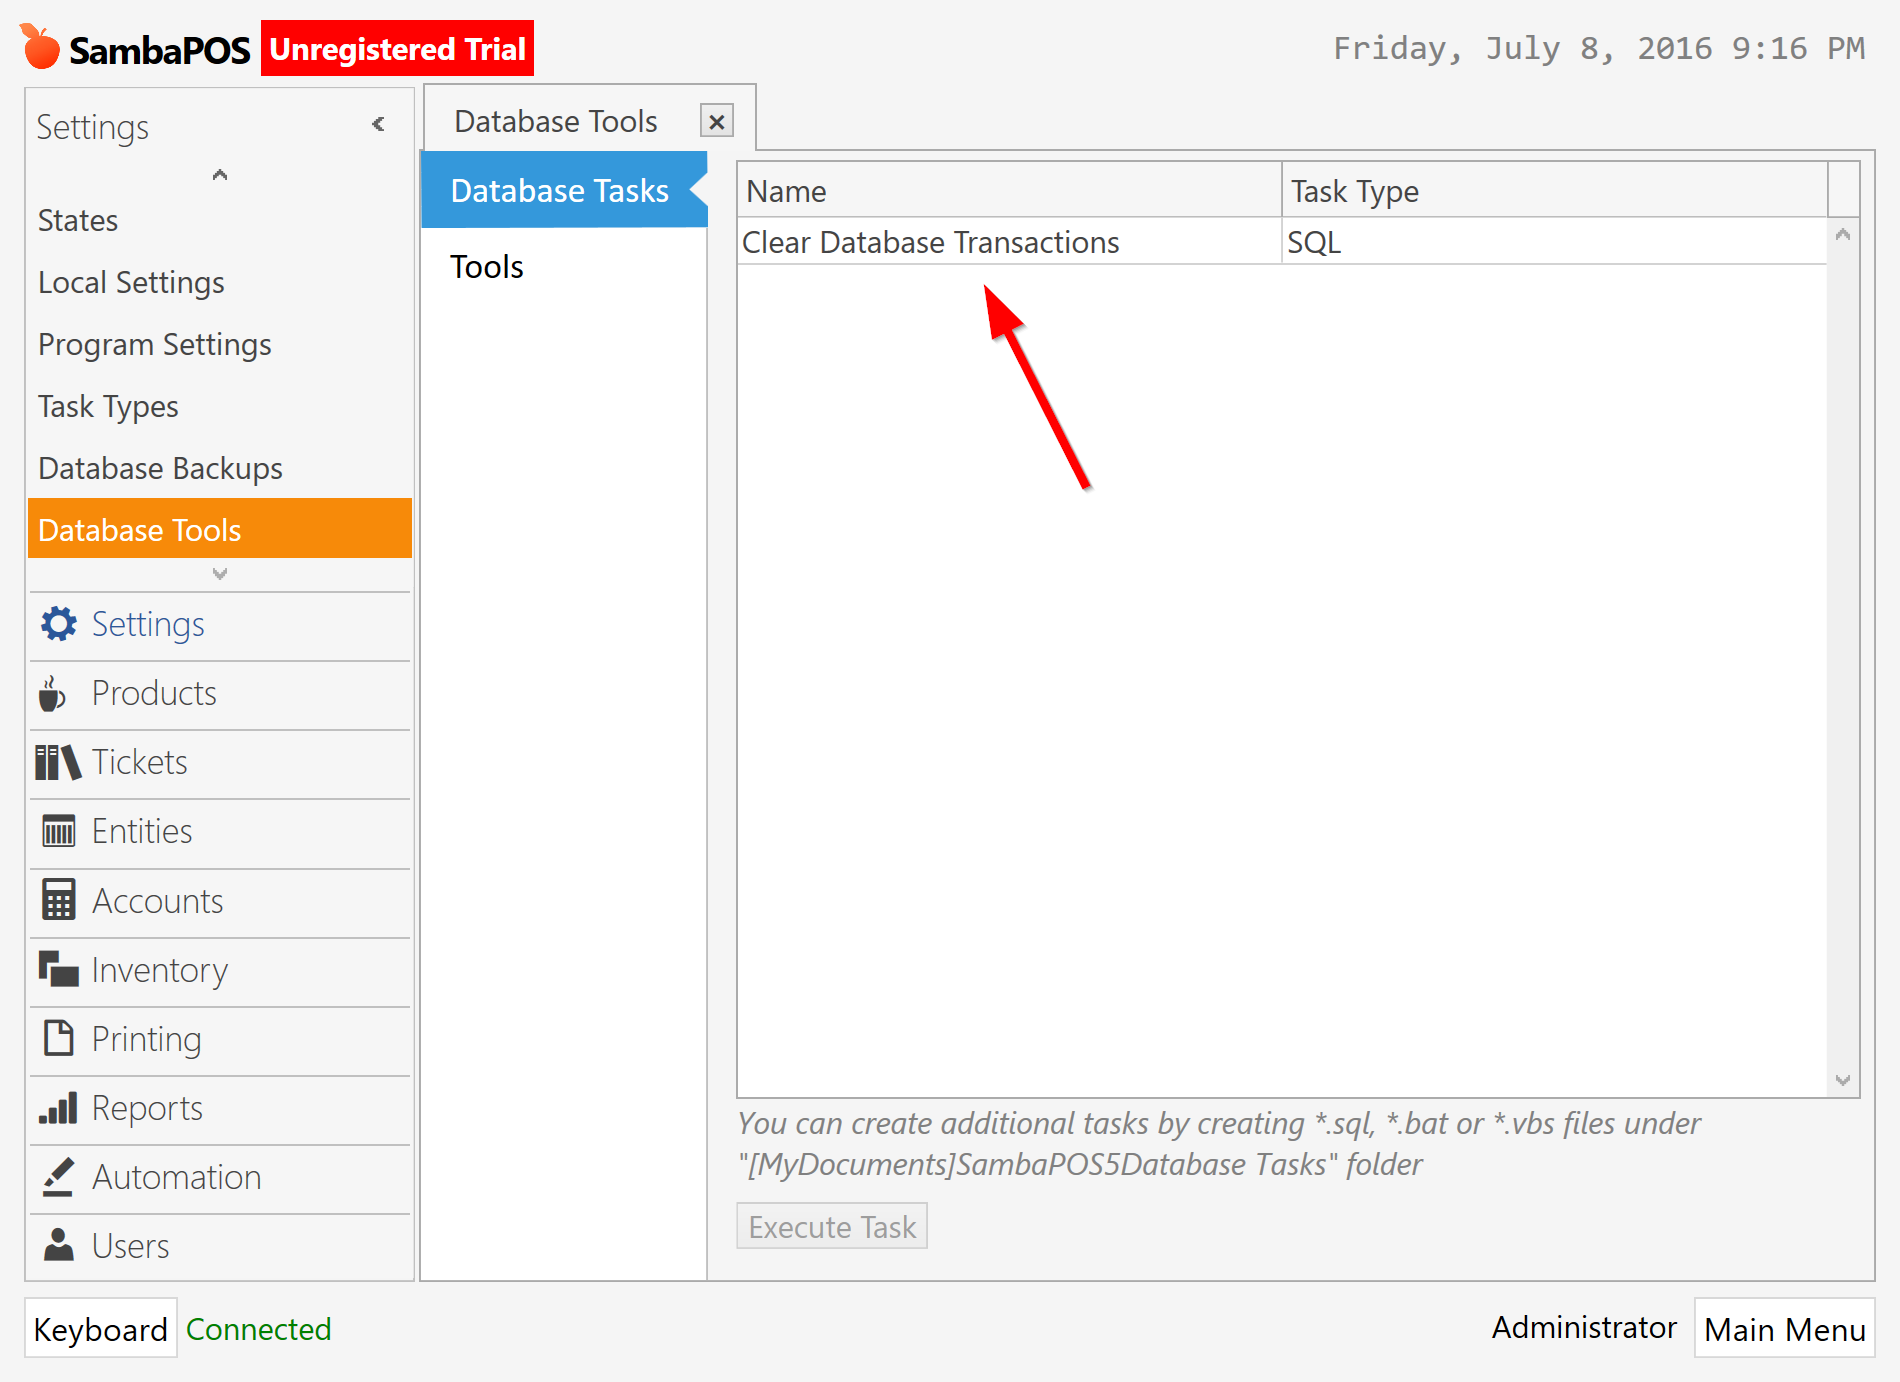
First of all clear database transactions to ensure all test tickets you’ve created while testing SambaPOS are cleared. You can’t remove a table when there are tickets created for that table.
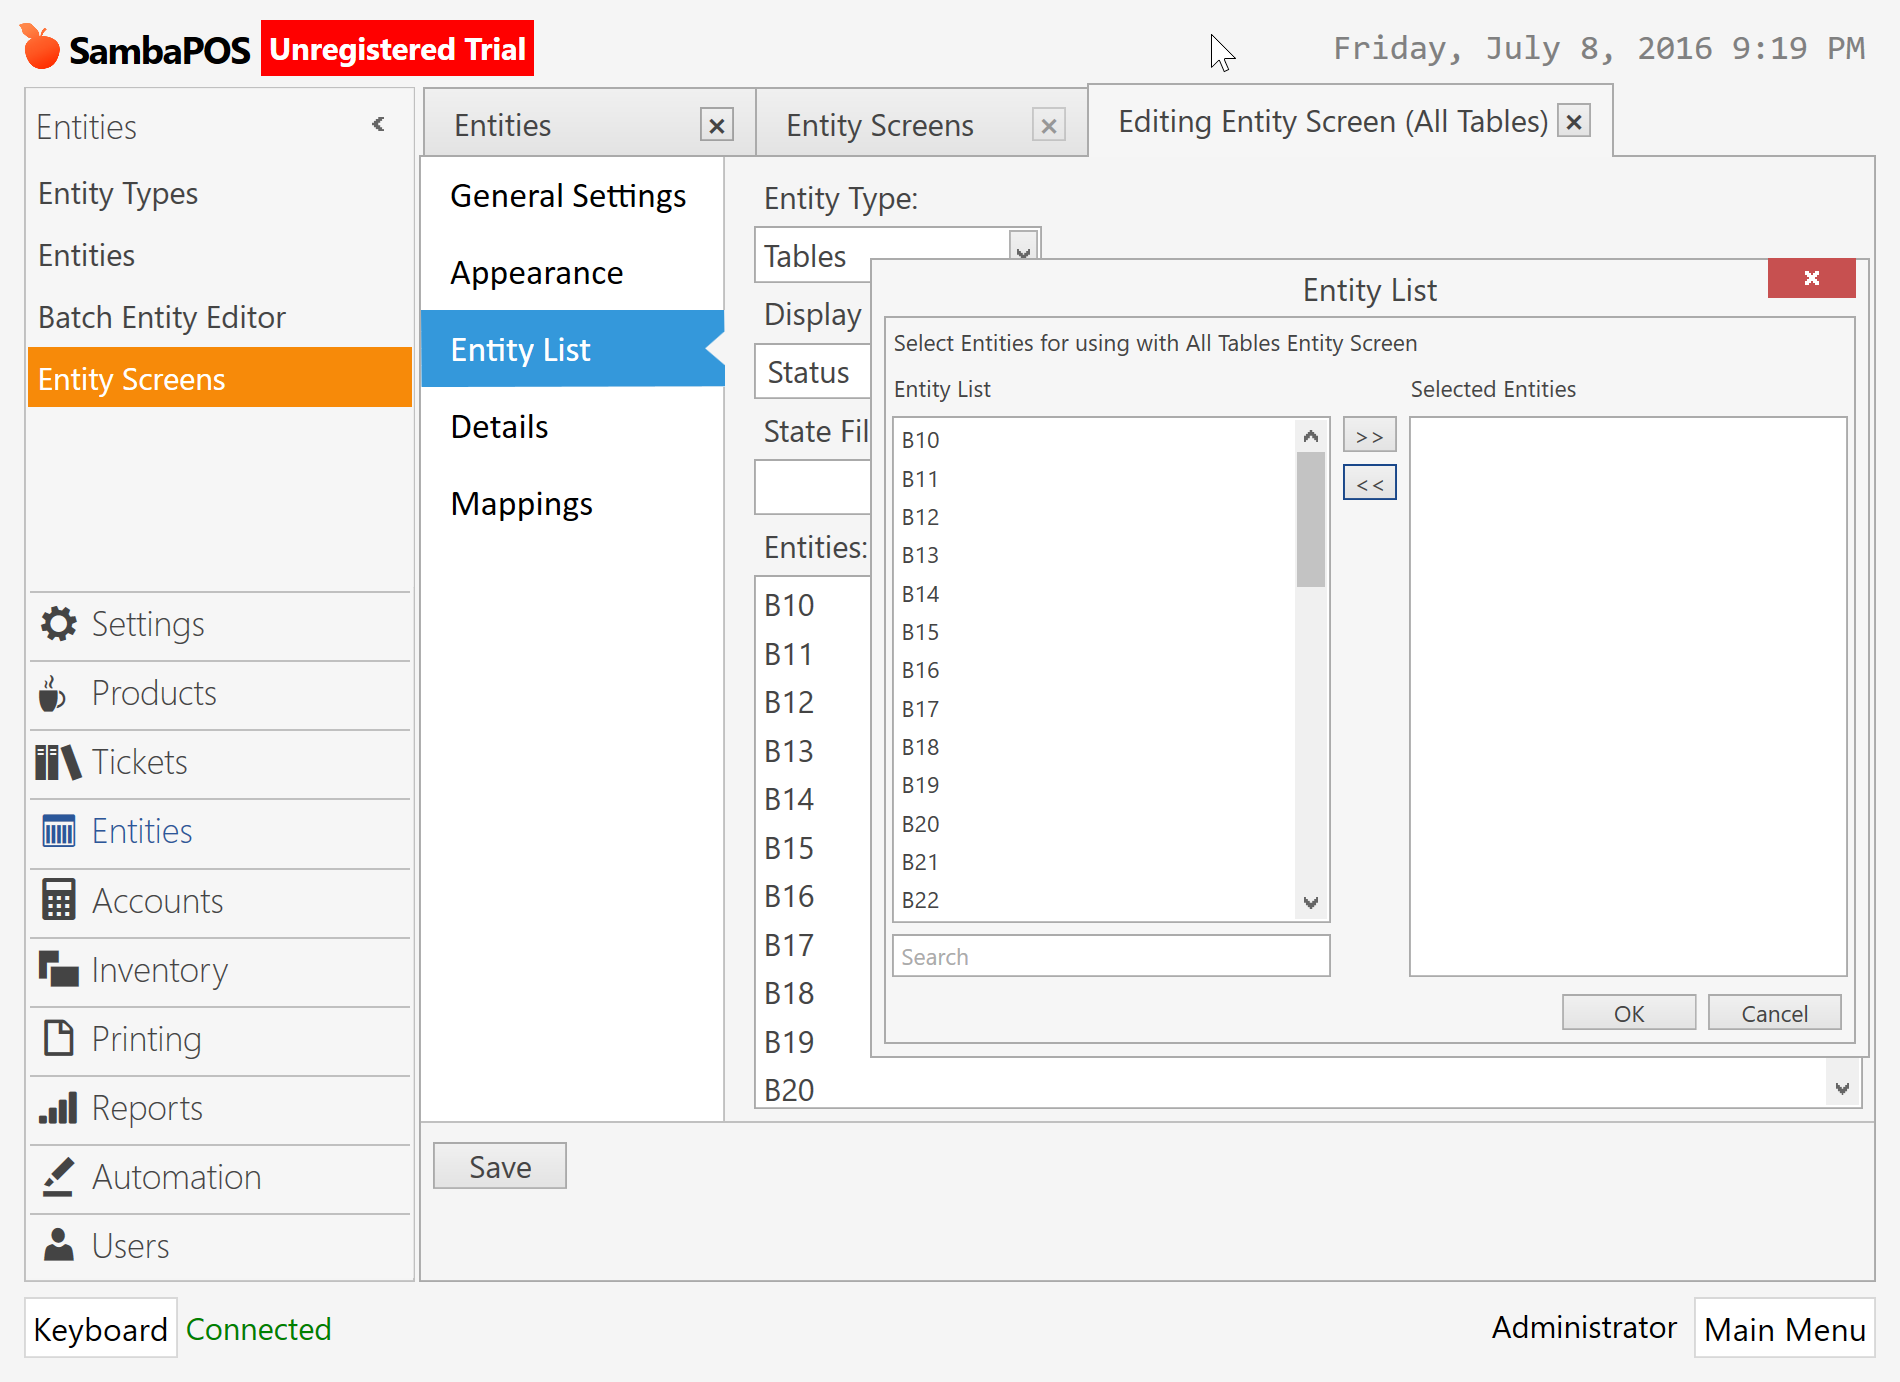
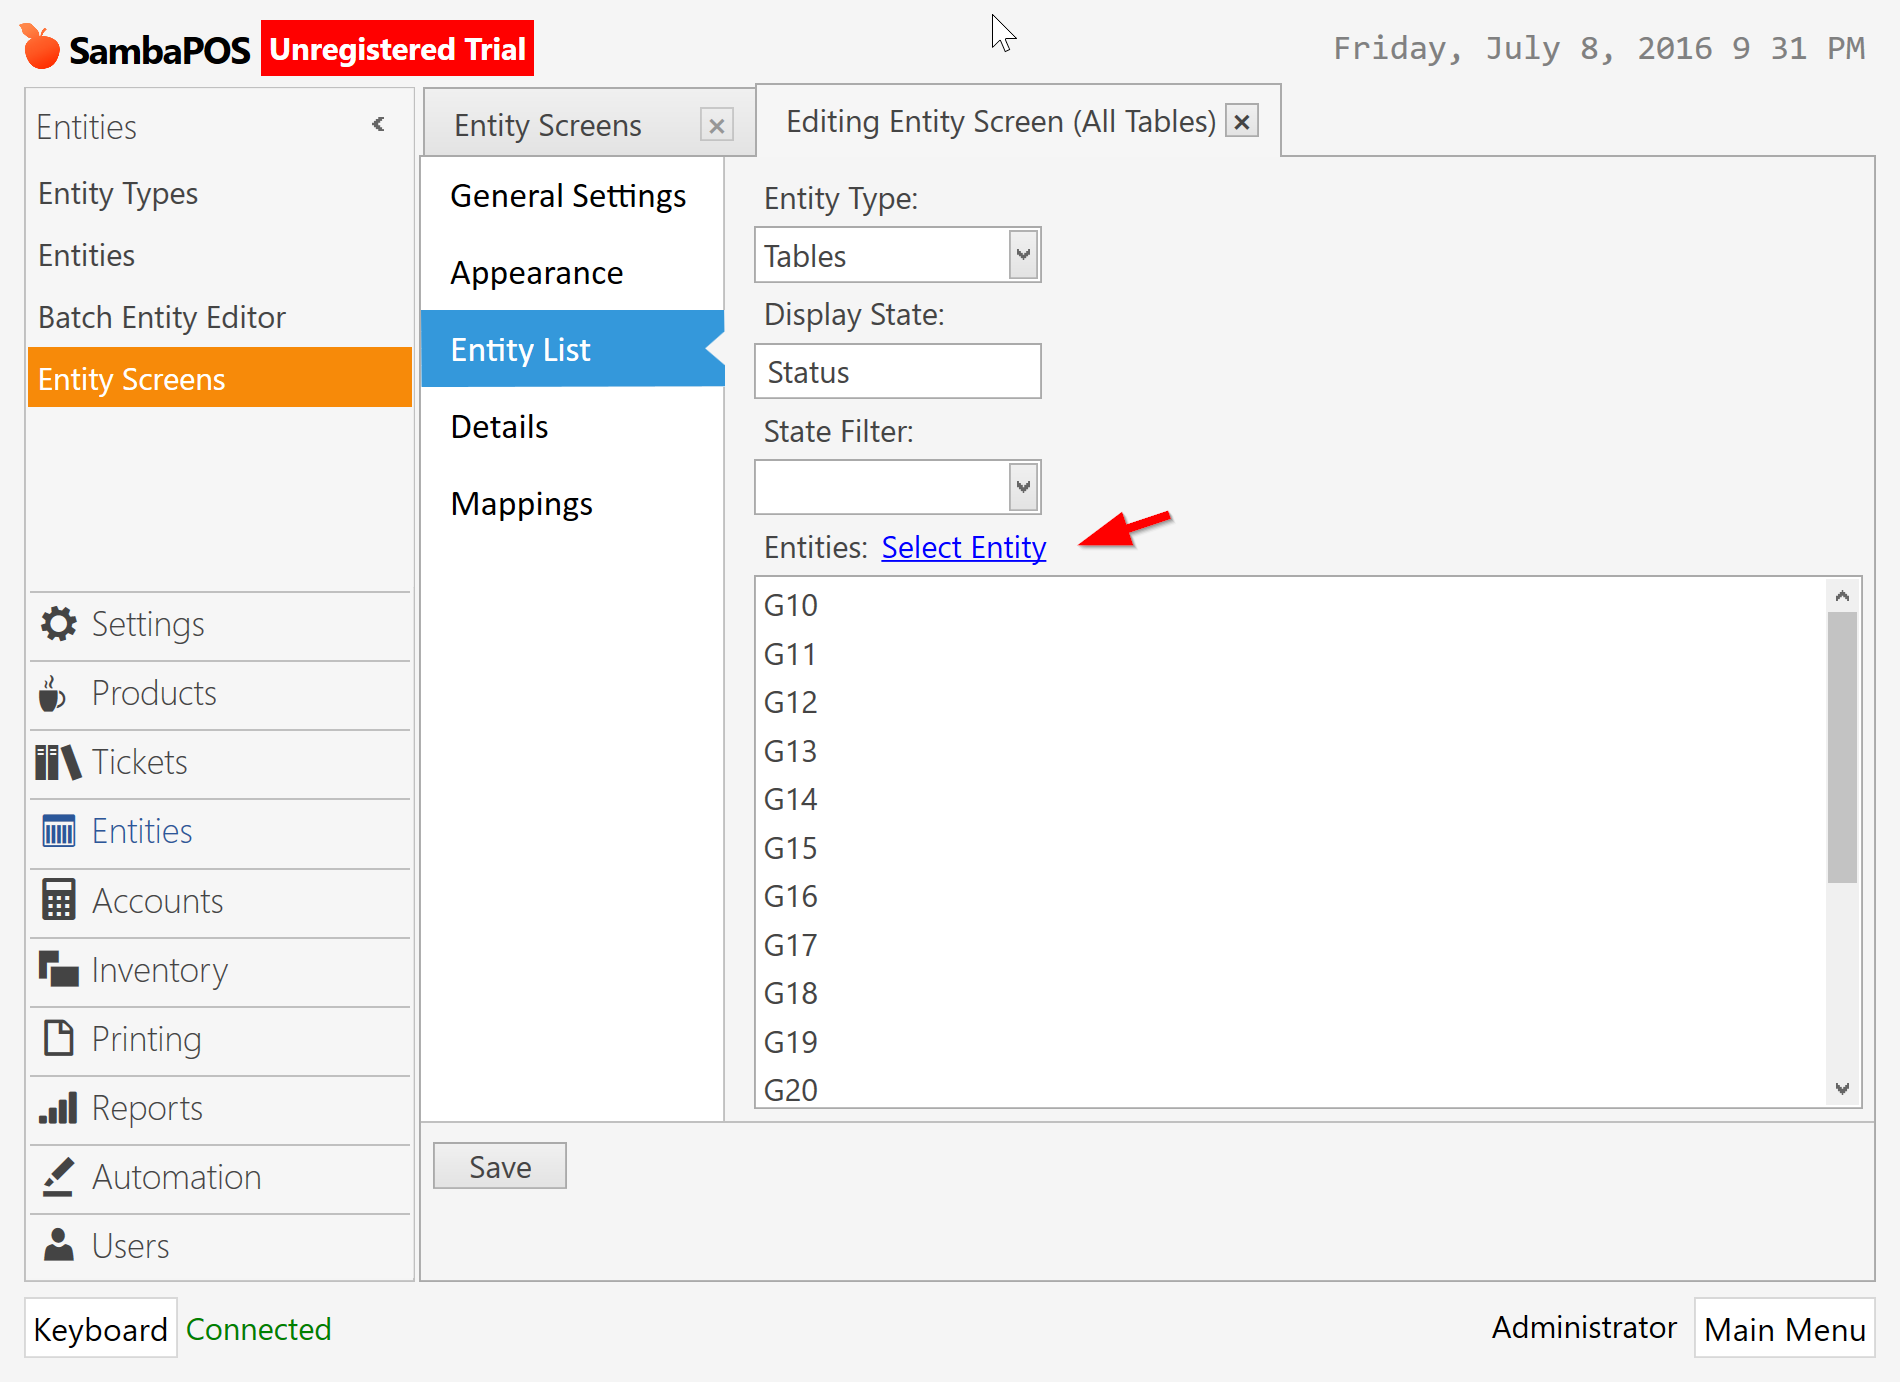
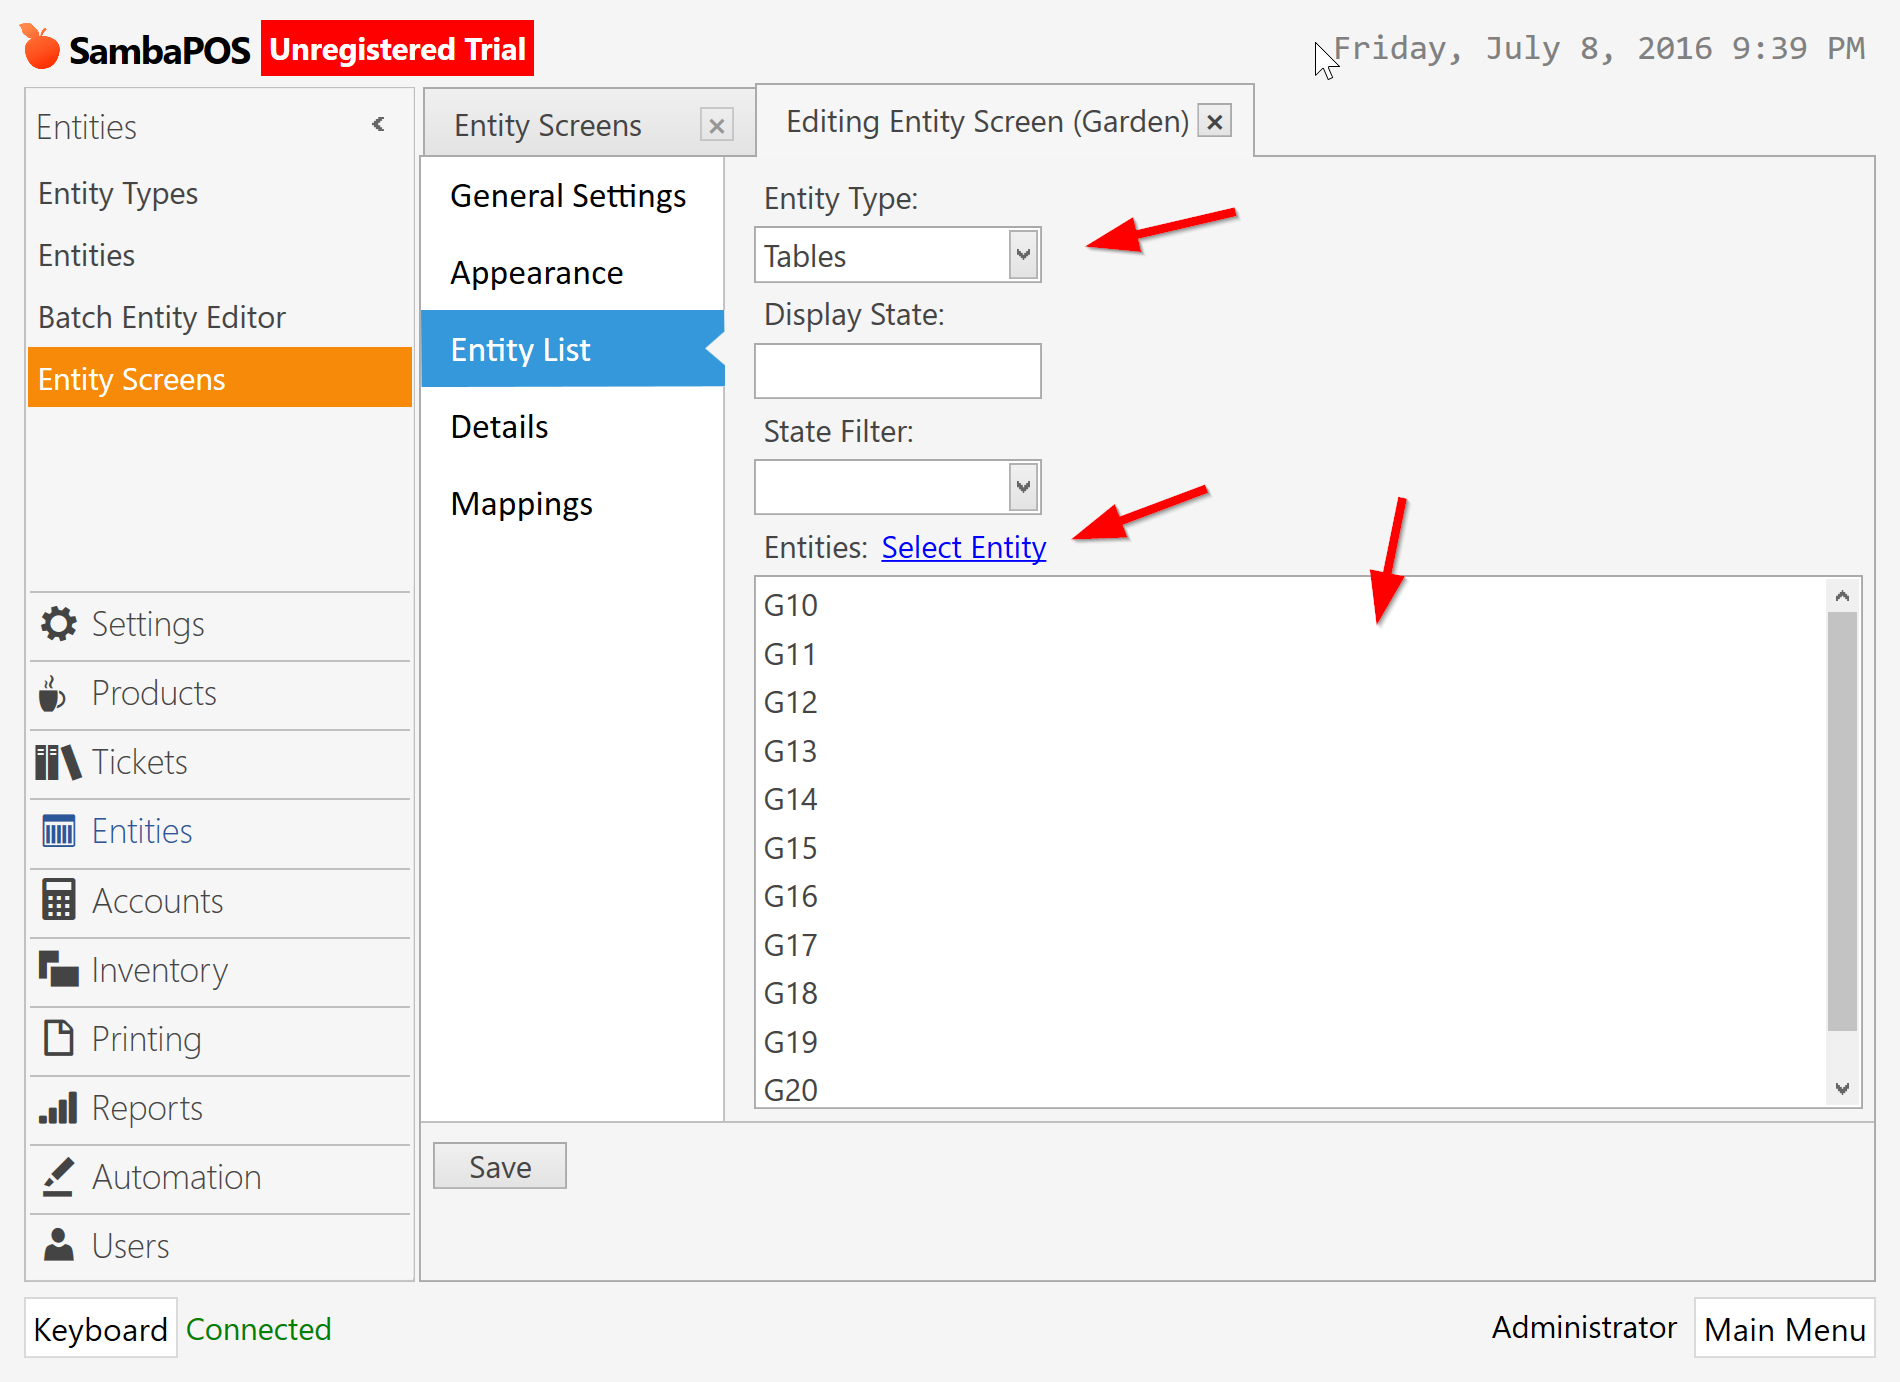
Navigate to Entities > Entity Screens. Edit All Tables screen and from Entity List tab remove all tables from that screen. Click Select Entity link, Select all items on Selected Entities section (with Ctrl+A) and click [<<] button to remove them from list.
Switch to Entities section. Select all Tables on Entities list and delete all.

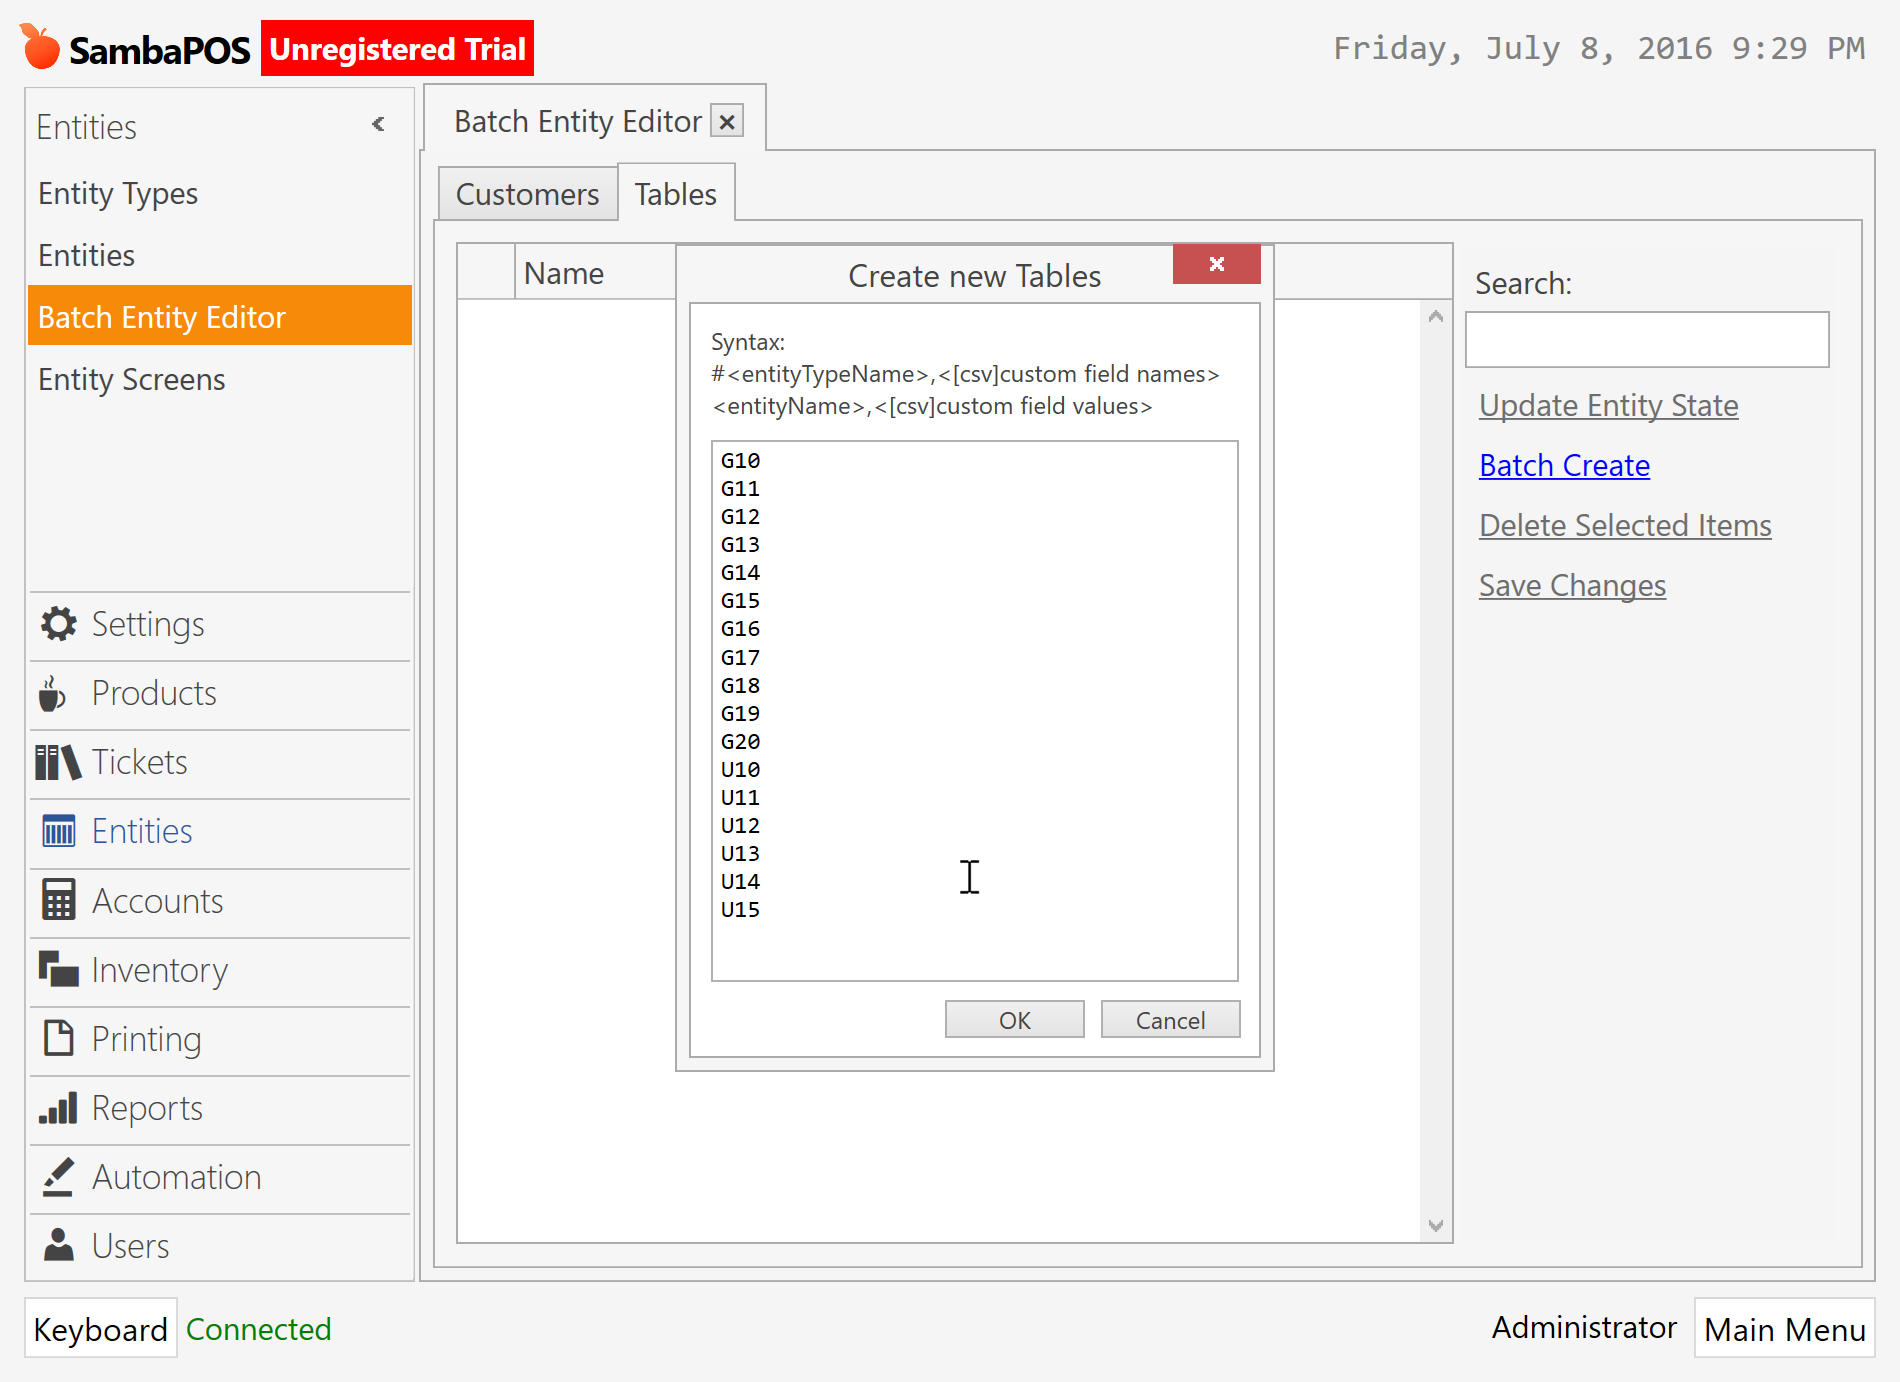
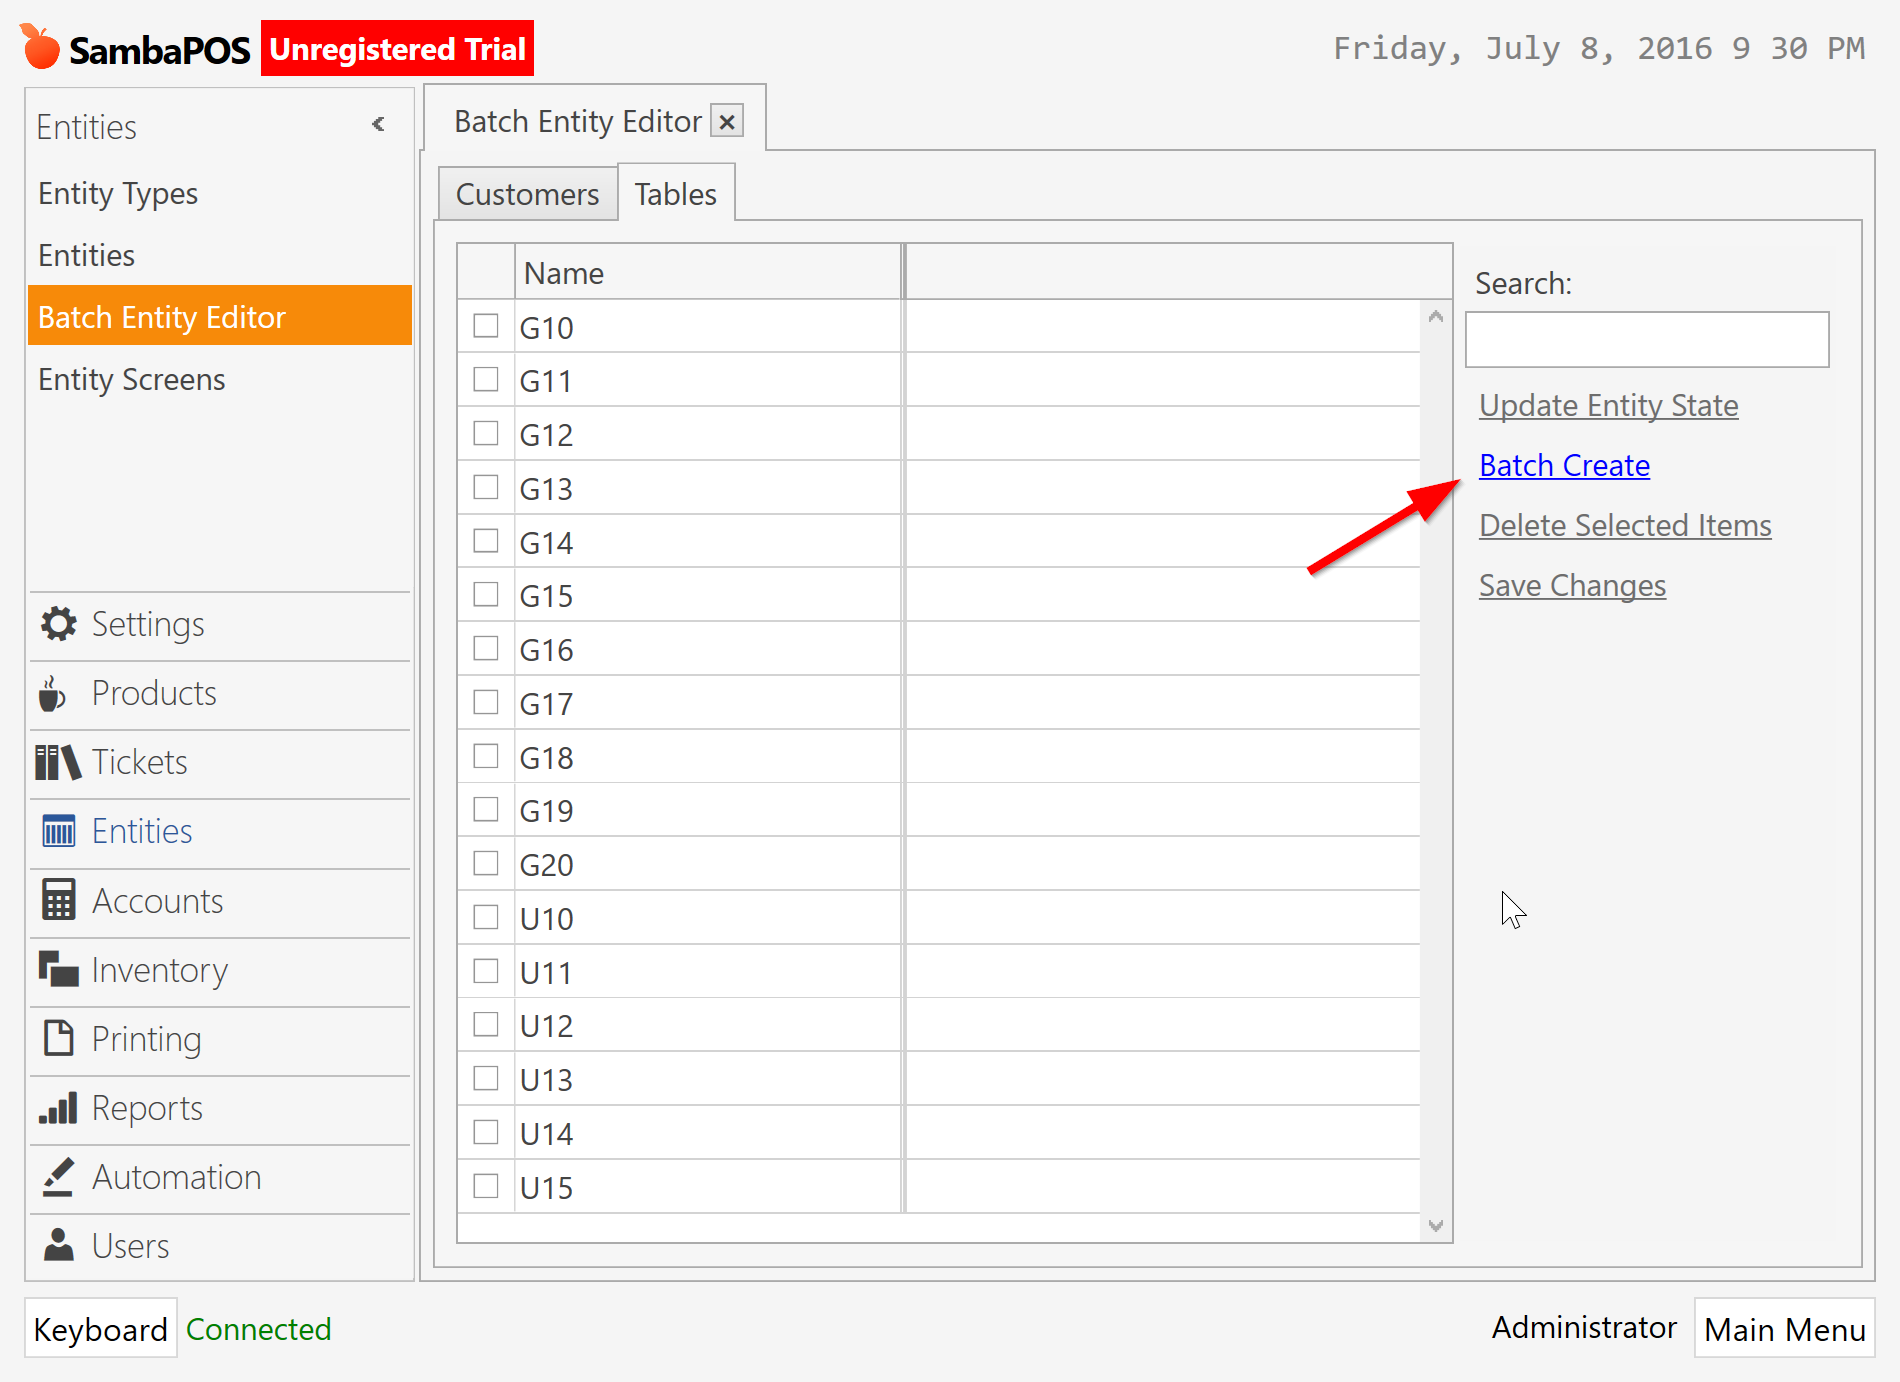
Navigate to Batch Entity Editor screen, switch to Tables tab and Click Batch Create link. A popup box will appear. Enter table names line by line.
When you need you can add more tables by clicking batch create link.
Go back to Entity Screens. Edit All Tables screen and add new created tables on Entities section.
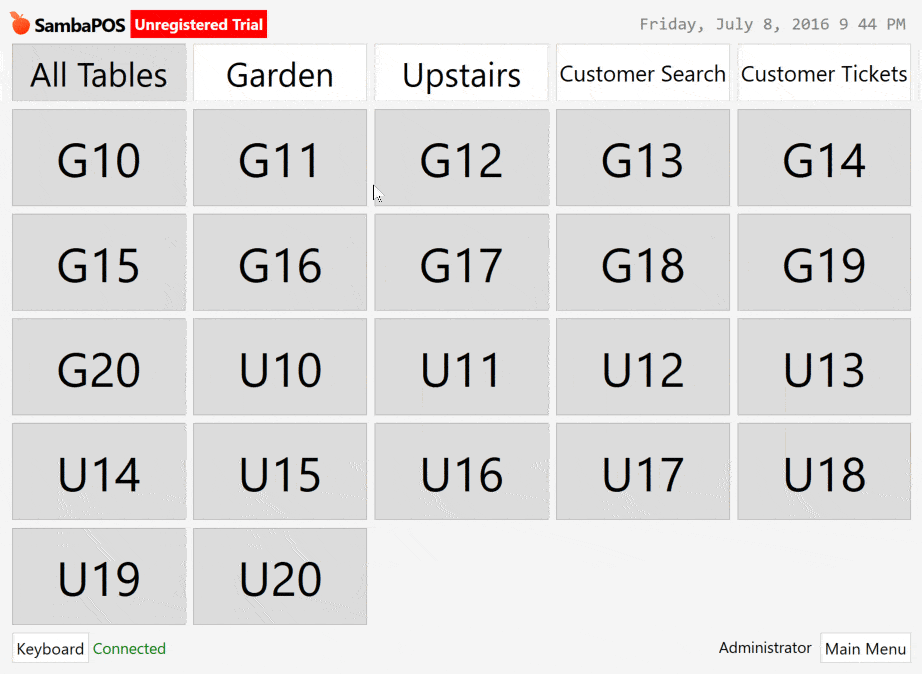
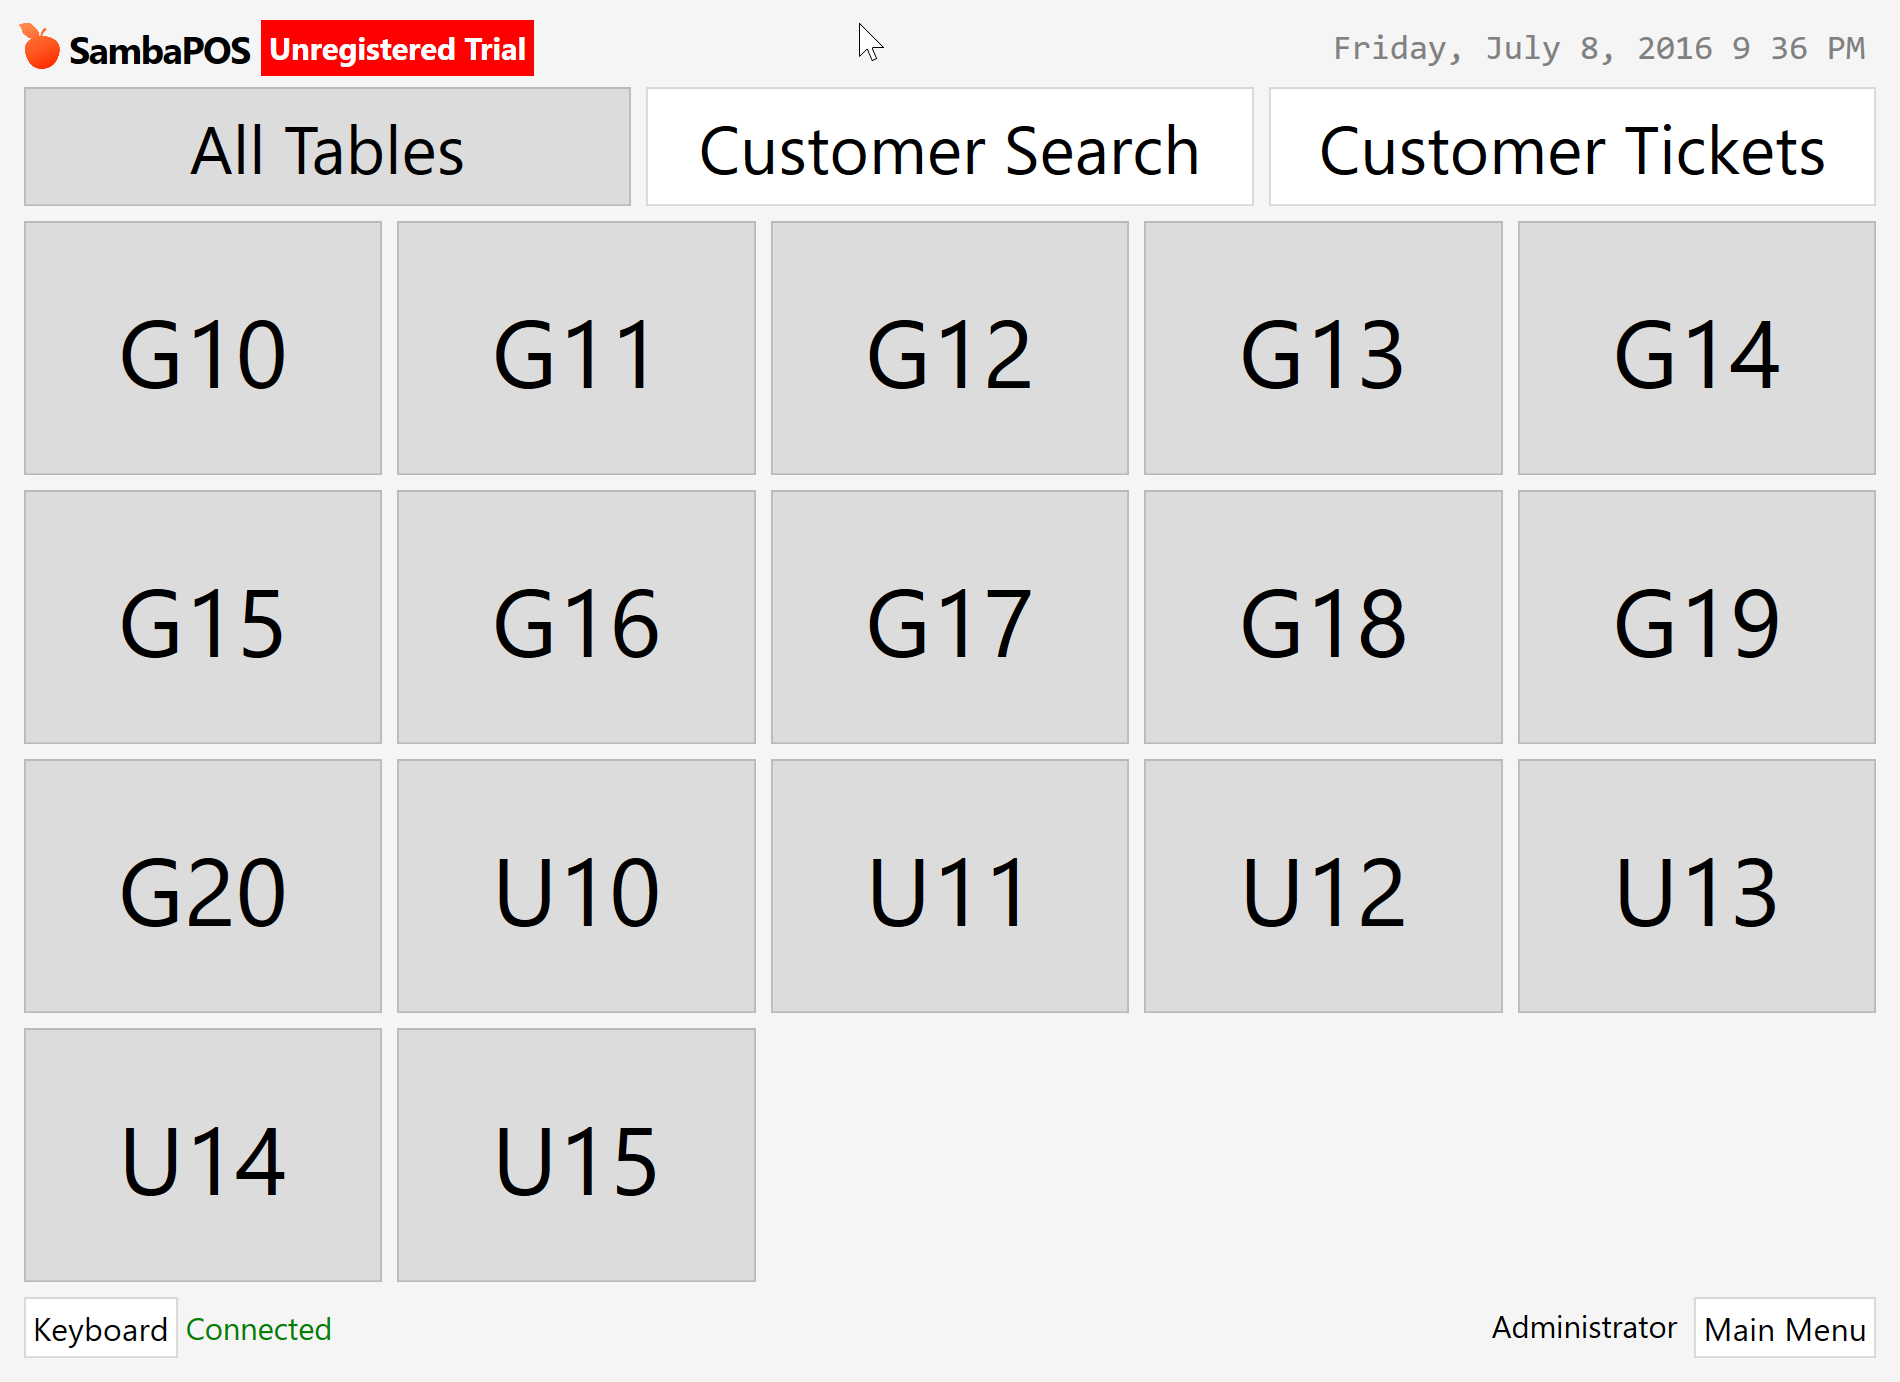
New tables should appear fine when you switch to POS Screen.
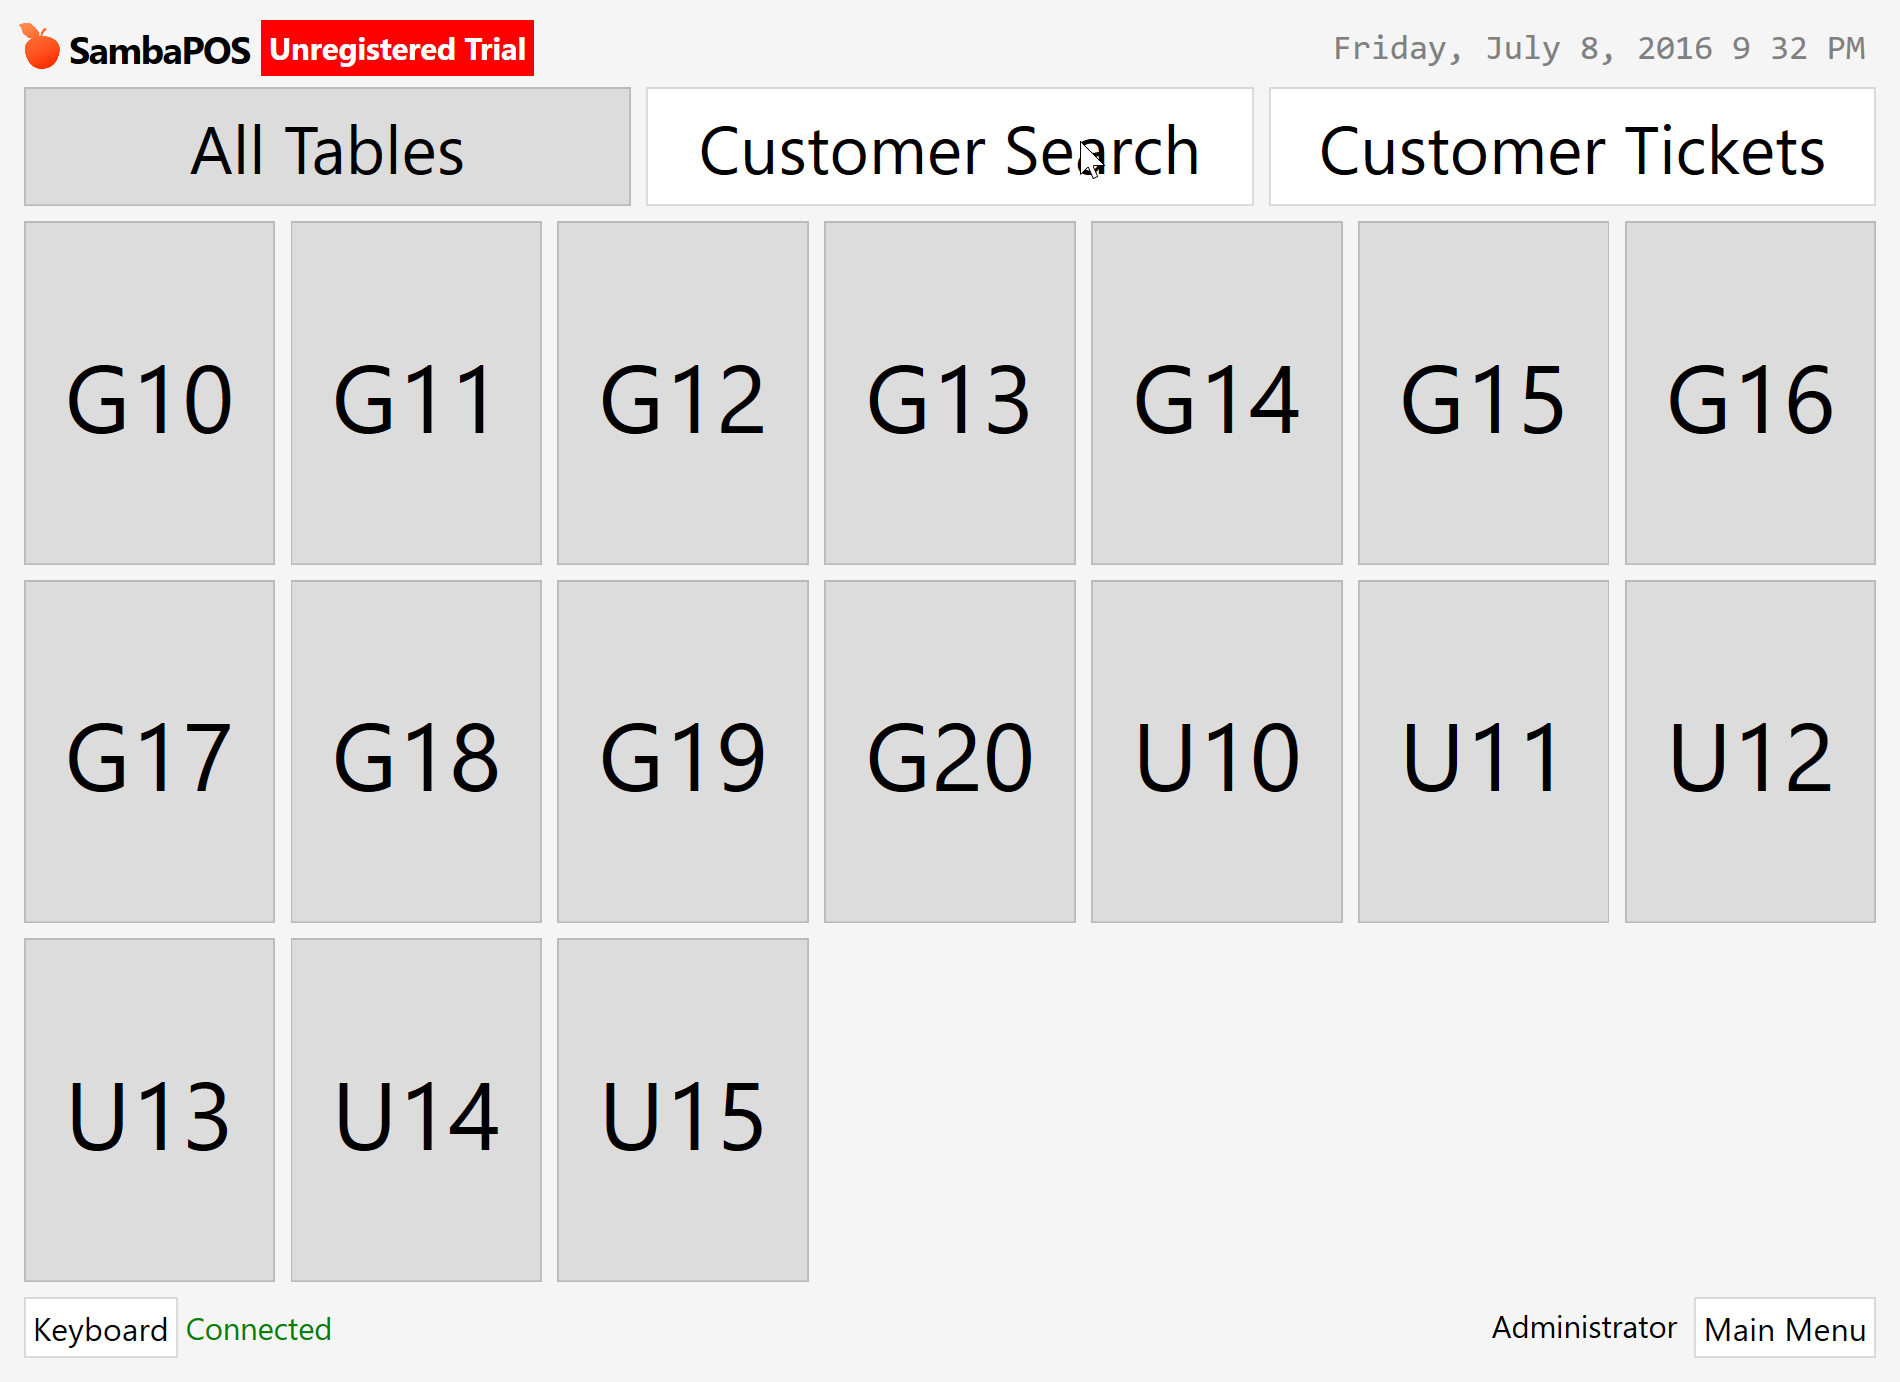
By default open tables appears in white and occupied tables appears in orange color. New created tables appears in gray and when you first use them their color will update.
We can change screen parameters to have different column row layouts.
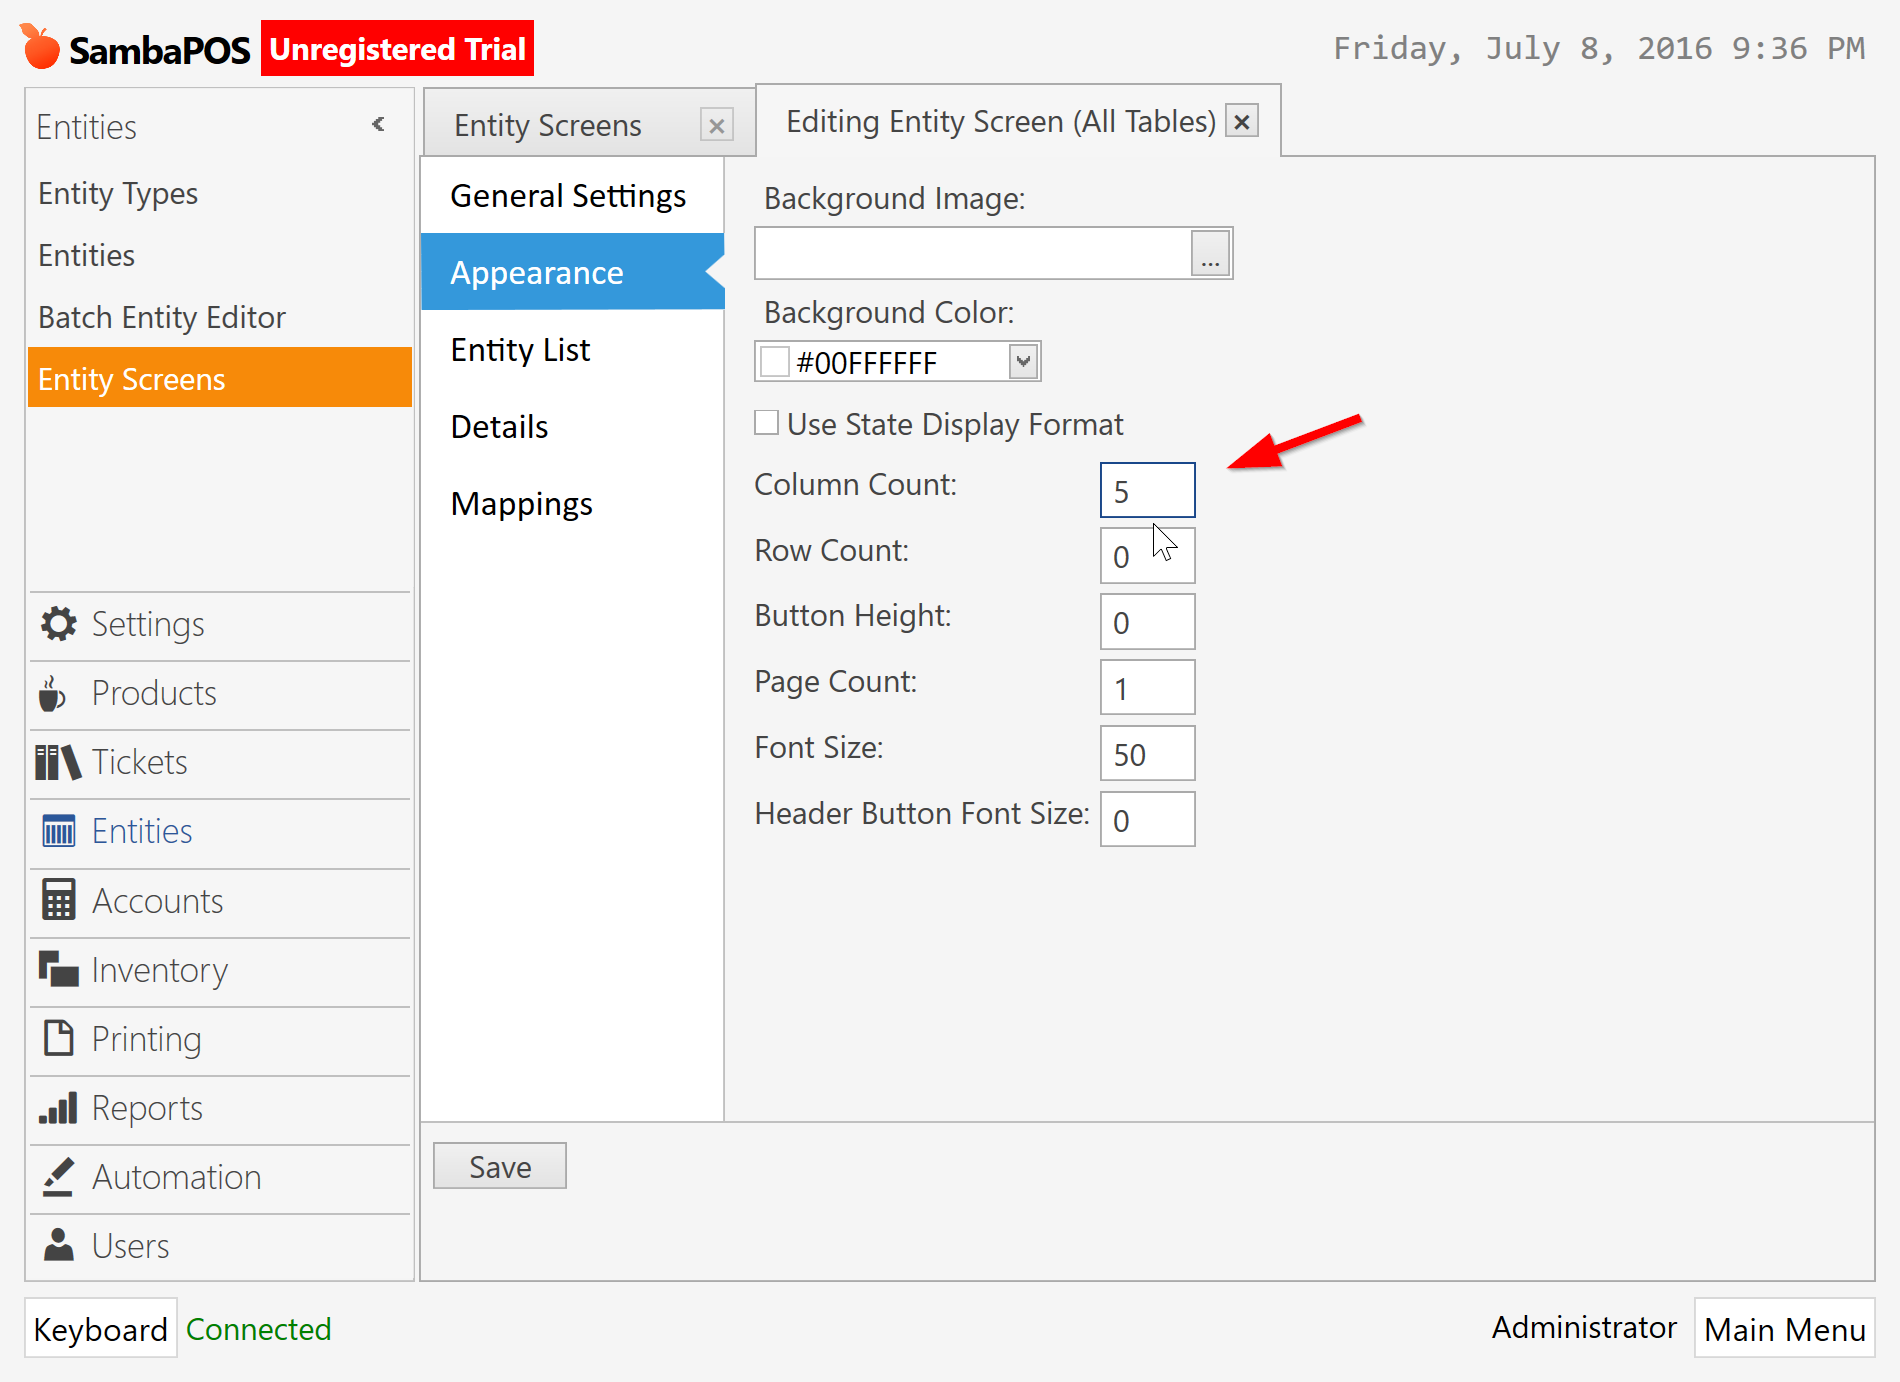
Buttons appears in 5 columns.
You can add more Entity Screens if you want.
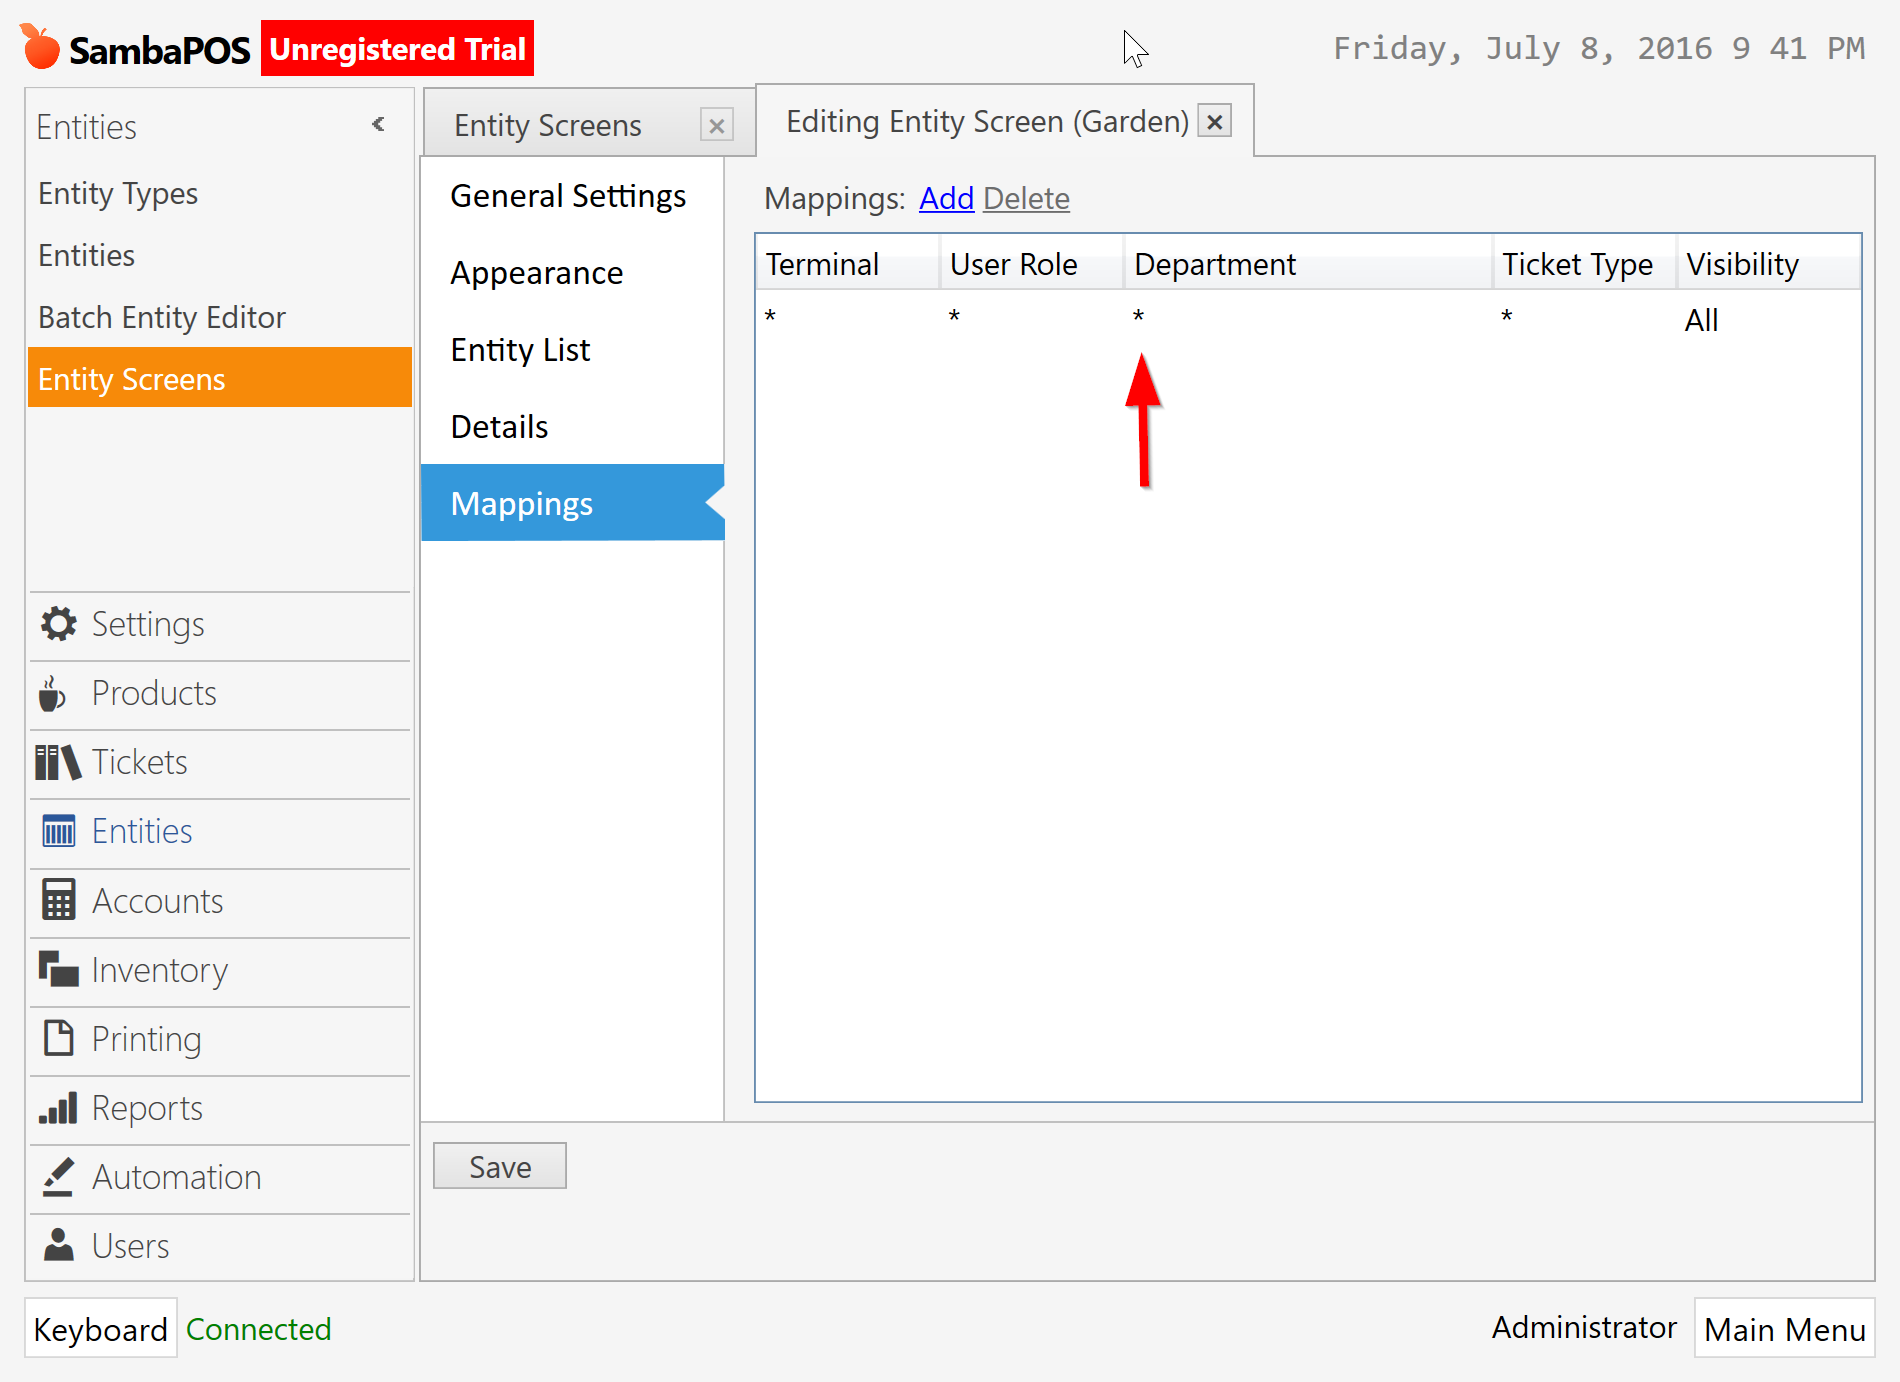
Set name and ticket type

Set entity type and add tables.
Add mapping.
Reorder screens as you want by dragging items on the list.
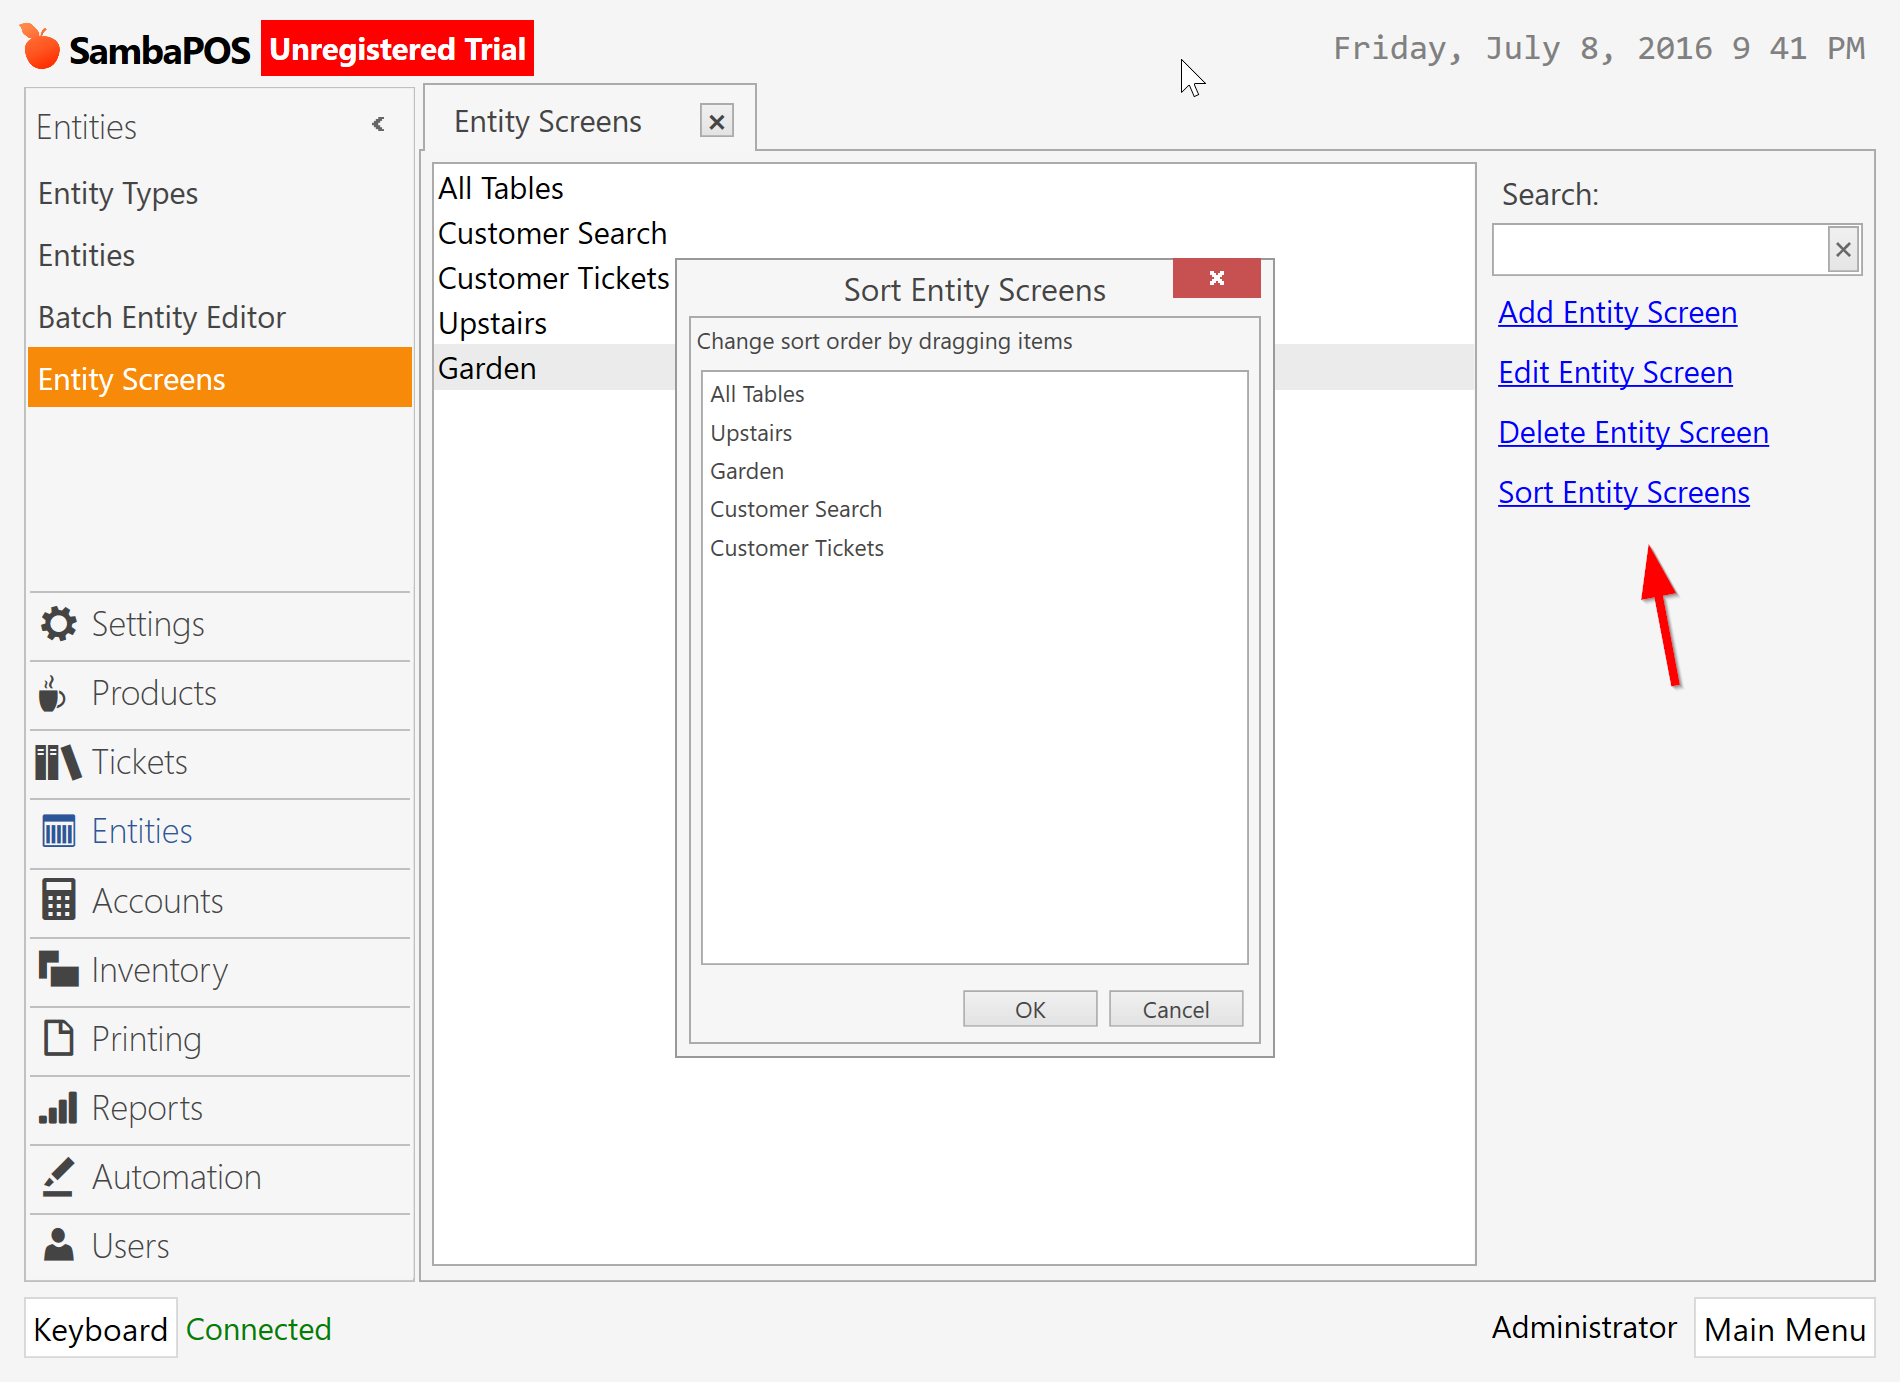
I added few more tables to upstairs screen and here is my result.