after i close the ticket, i want to print the order print template and the kitchen order template
i can’t do that in the same print job… correct?
when i put them together, it only prints the first template
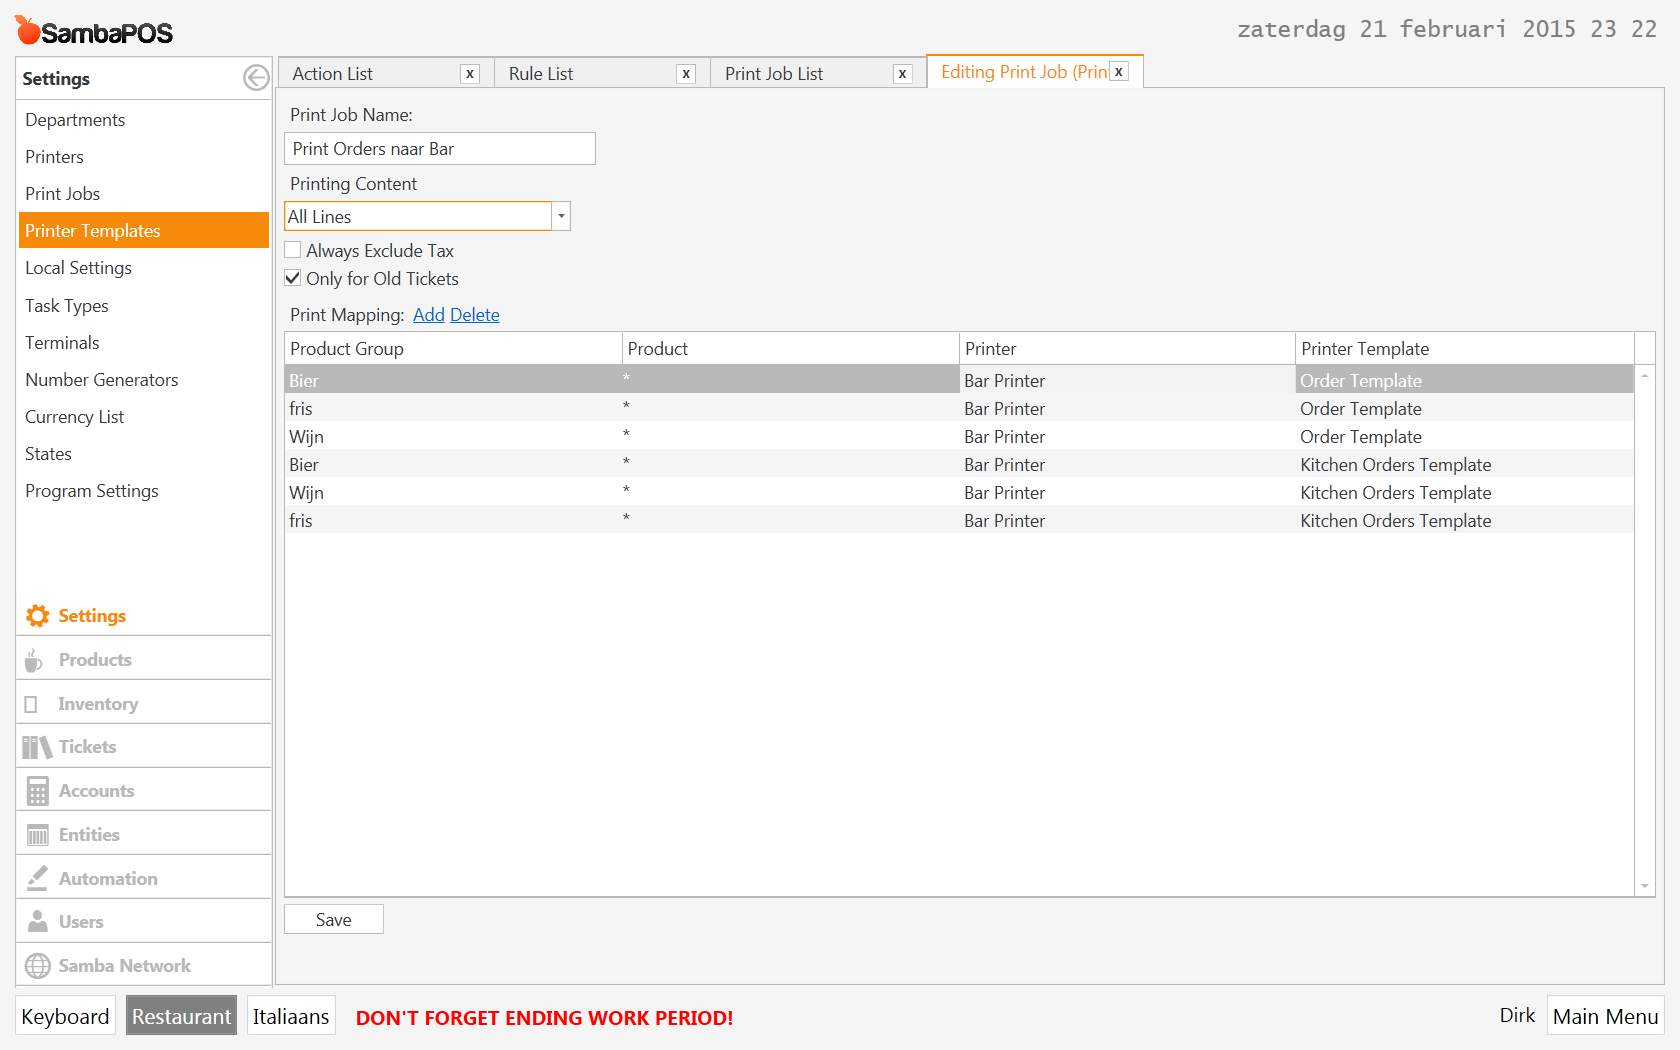
can you show your ticket closed rule to see what print job actions you have there, and also show us the two print job actions (order print template and kitchen order template)
Instead of putting them in same job make two jobs then make two actions one for each job and simply put both actions into the same rule.
sorry i misread i thought he had already created and put both actions into the same rule
that was my first setup, but i get an error with 1 out of 20 tickets = the cut command between both tickets doesn’t work and the last order line doesn’t print. So i tried to put both actions in the same job, but that doesn’t seem to work. What is the best practice? (how is it designed to work?)
both actions in the same rule should work fine, when the rule fires your first print job action will activate printing first receipt, then the second print job action will activate straight after and print the second receipt. that should work perfectly so there must be another issue.
Can you post screenshots of:
- Your rule with both print job actions
- Both print job actions
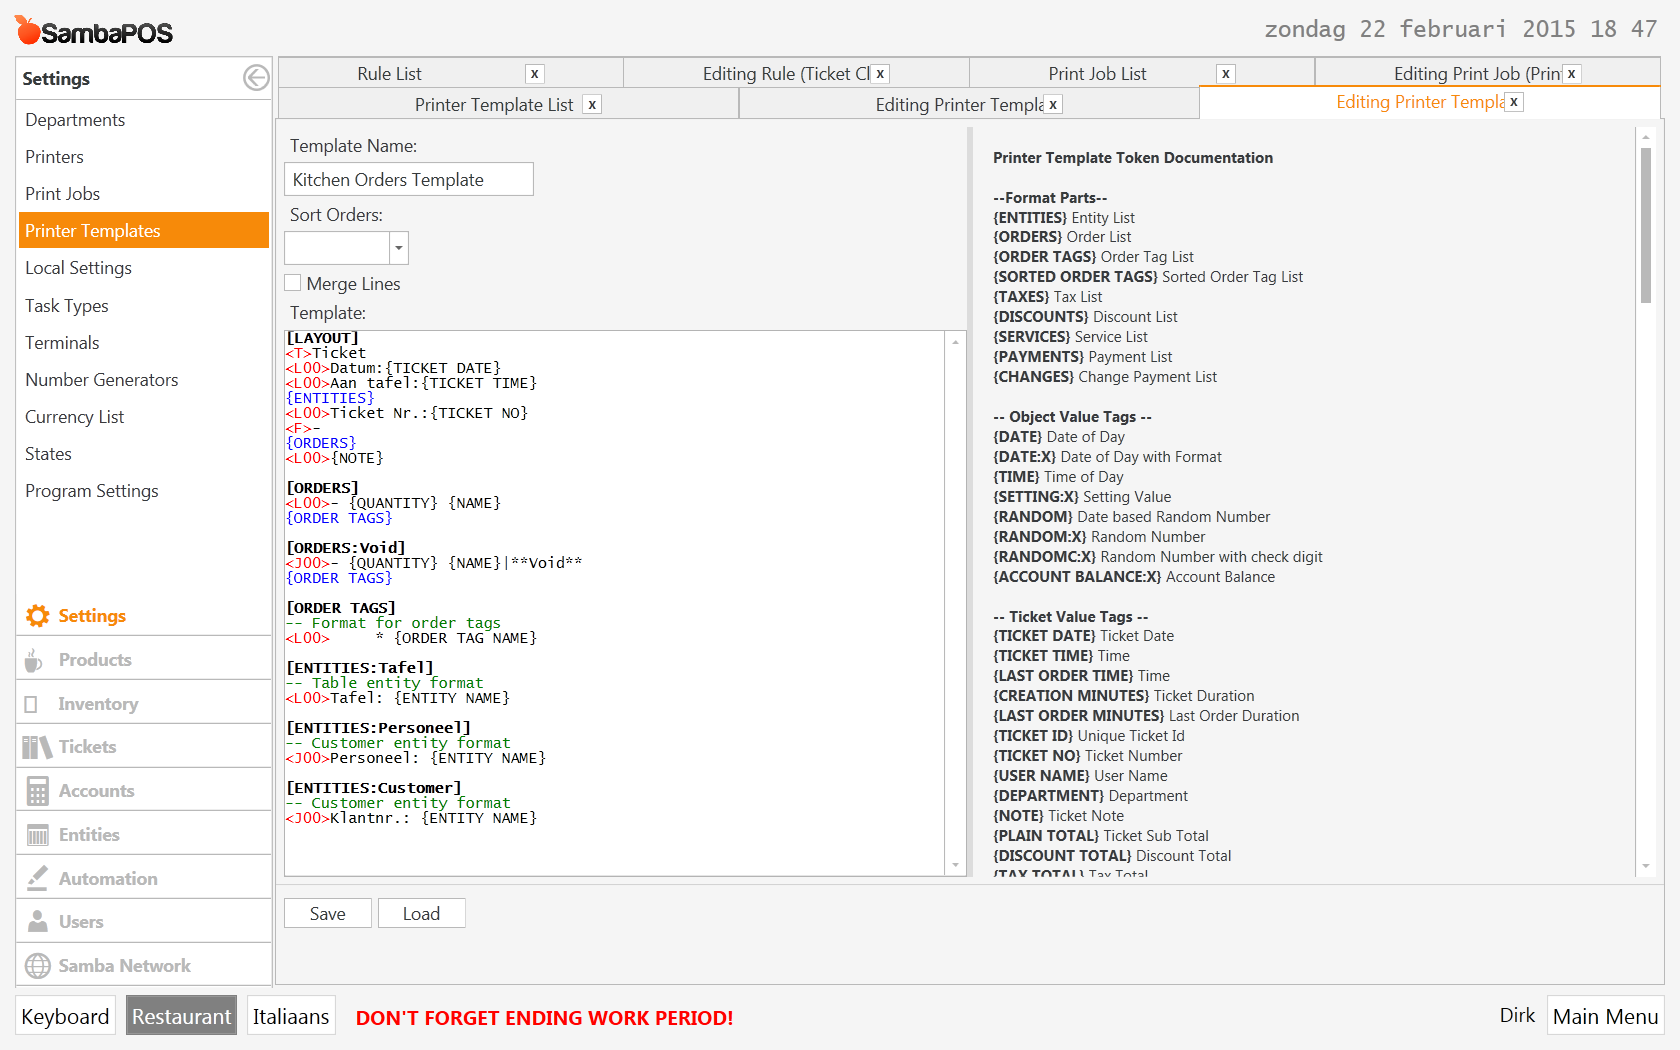
- Both print job setups showing the templates assigned
1 Like
There could be more issues at play here. What make and model of printer? How are they hooked up, USB, WIFI,Serial,Ethernet? Are they running the latest drivers?
BTP2002np connected trough serial via adapter. Latest drivers are installed. When we are testing, Everything seames ok. But the error ceeps comming Back when we are live. I know the issue could Be anything, but perhaps someone had the same problem, and knows the solution.
Do you configure the Cut command in the Printer Driver or Preferences, or are you sending a Cut Command via Printer Template?
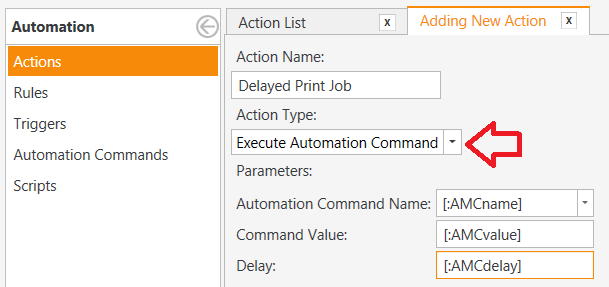
Either way, I am about to suggest that you fire both Print Jobs in the same Rule, but have the 2nd job Delayed by 1 second by sending it through an Execute Automation Command Action.
i used the standard samba printer templates.
My actions are in the ticket closing rule. How do i delay them bu 1 second?
Create a new Action for Execute Automation Command
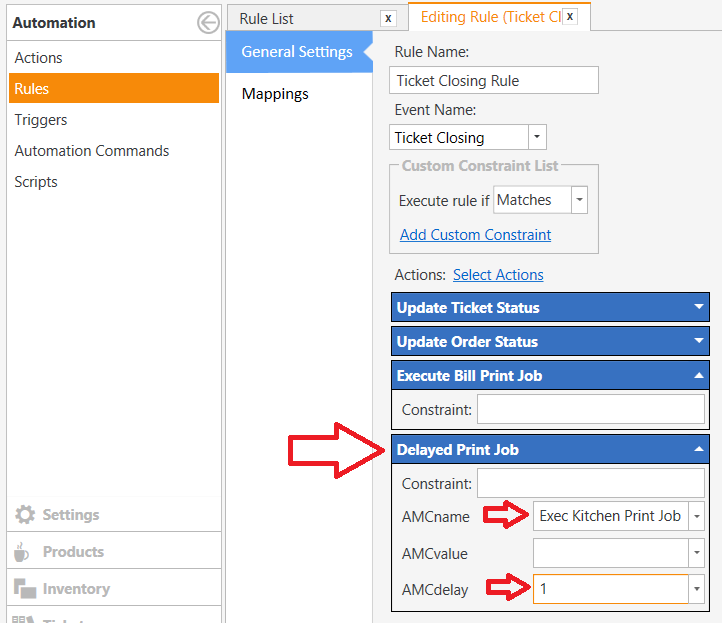
Add the Action to the Rule where you fire your Print Jobs (you said Ticket Closing Rule)
Add a new Rule to capture the delayed Automation Command execution
Be sure to have the Constraint for
Automation Command Nameexactly the same as you entered into the Action Parameter above (AMCname).
Add the Action for the desired Print Job. For example, since the first Rule executes the Bill Print, I chose to use the Kitchen Print here…

@QMcKay it doesn’t seem to work… did exactly what you explained.
The order of the actions in the ticket closing rule seems to be important!!
In your screen, the print job actions are at the bottom. Then nothing prints.
When i moved them at the top (before update ticket), only the first print job was executed (bill print).
…That’s why i tried to put everything in the same action (1 printjob), but that was my initial problem.
Did you add a Default Mapping to your New Rule? If you don’t do this, the Rule is Disabled, and won’t fire at all…
yep. have done that 
Ok, this was just a conceptual idea on how to make a delay between Actions - you may need to do more. But before we do that, let’s take a step back…
The real question is:
Why, when firing 2 different print jobs in immediate succession does it miss the last order line and not perform the cut on the (1st) print?
I do not believe SambaPOS has anything to with that behavior. It must be something “not quite right” in your Printer.
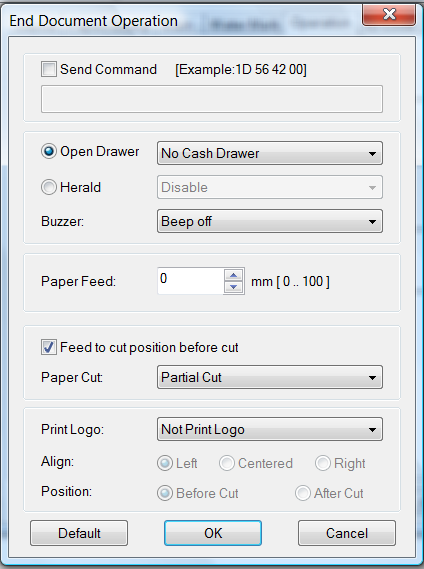
In your Printer Driver / Preferences / Utility, do you have control over the Cut behavior (i.e when to perform the Cut)? It might look like this…
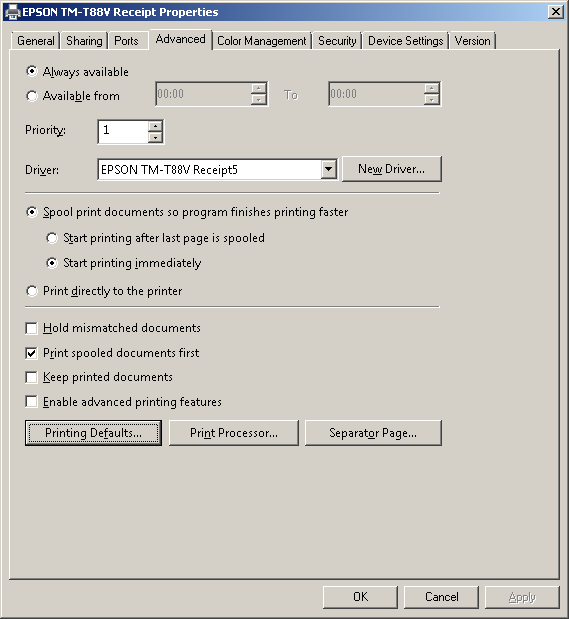
Have you messed with your Print Spooler Properties? Maybe there is a “buffering” issue. You may need to adjust…
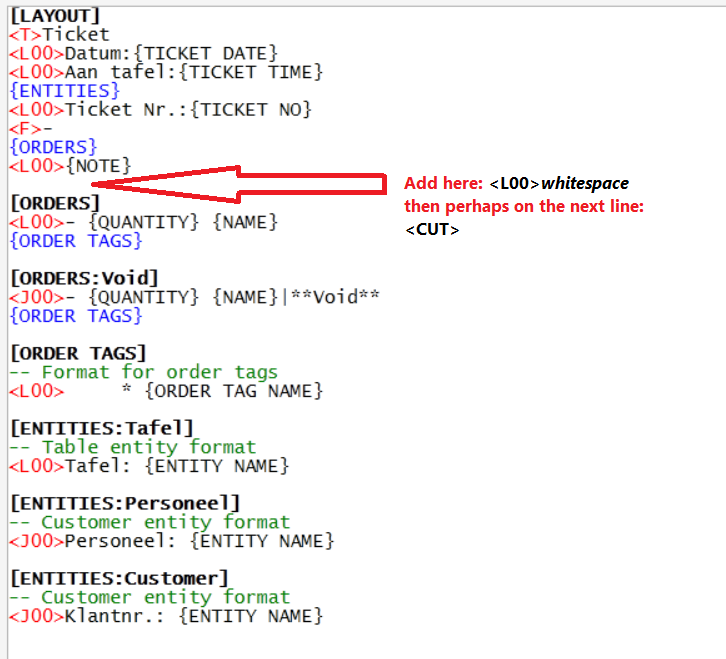
Have you tried adding a blank line, with just a white-space as the last line of your Template in the [LAYOUT] section, just before any of the other [SECTIONS], and then maybe followed by a <CUT> command? This could force the buffer/spooler to flush the last Order Line and perform the cut.
I can confirm that having two print actions in one rule does in fact print just fine on multiple printers I have used this in production for a while now. I am fairly certain others have as well. So there must be something else at play here.
1 Like
i have added the extra blanc line and cut command.
my standard settings look like this

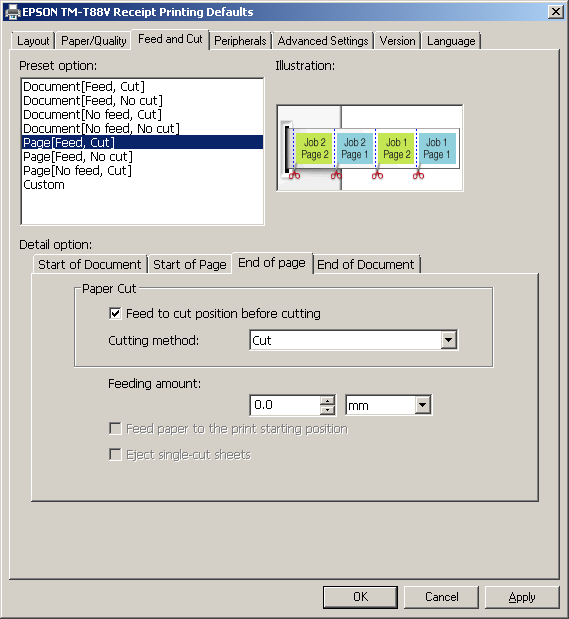
so i have changed the cut settings for end page operation.
(what is the difference between ‘end page’ and ‘end document’?)
it works fine in test (as before)
… hope that helps to prevent the error in production
thanks for the feedback!! 
Pretty sure mine is set to Document Cut.
In terms of receipt printing, each job should be a single page per document, so theoretically, having either of the options turned on should work. You could try both at the same time, but that might produce strange results.
That said, you should have at least one of them set to cut. This avoids having to send the <CUT> command in your Template - so you can probably remove that.
A document could be several pages, so for Document Cut, it would wait until all pages are printed before sending cut… essentially only 1 cut performed.
If you set it to Page Cut, it will cut after every page, so if the document had 5 pages, you would get 5 cuts.
It doesn’t make much sense in terms of receipt printers, because the only time the different methods should come into play is if you were printing a multi-page document from Word to your receipt printer. I supposed you could set up a document full of Coupons in Word, where each Coupon is on it’s own page. Setting to Page Cut should ensure there is a cut between each Coupon. Setting to Document Cut would print all coupons, then cut once at the end.