 It is not recommended to try this on a production (one used for everyday business) database. Use this on a practice machine/database or in Training Mode.
This will not break anything, but it can lead to annoying pop-ups.
When trying to come up with a new process or flow for your business it can be a little frustrating when things don’t go the way you planned and you want to see what is happening behind the screen. SambaPOS has a little tool that will help you test and/or see values that are being processed for a rule or action. That tool is the Show Message action.
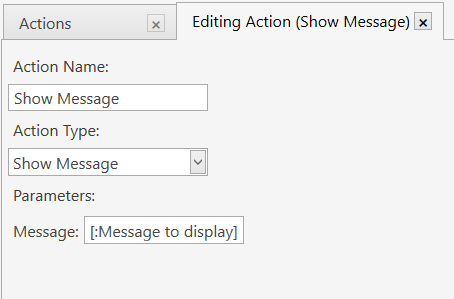
Let’s start this tutorial by making a Show Message action:
Manage->Automation->Actions ->Add Action
| Action Name: | Show Message |
| Action Type: | Show Message |
| Parameters: | [:Message to display] |
Save Action.
Now lets make a button so we can do some testing:
Manage->Automation->Automation Commands->Add Automation Command
| Name: | Test |
| Category: | (blank) |
| Button Header: | Test |
| All other settings: | (leave as default) |
| Mappings: | * Admin * * * * Ticket |
| * Admin * * * * Order Line |
Save Automation Command.
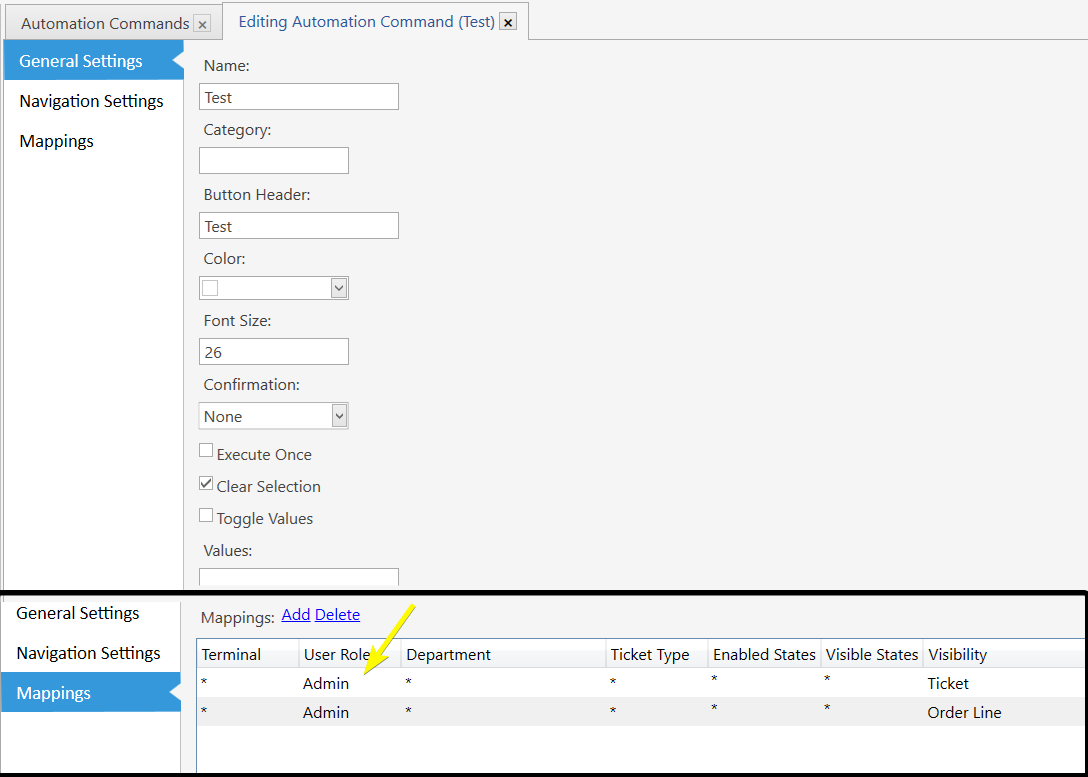
–Note– We are mapping to Admin so that non-Admin users do not see the button.
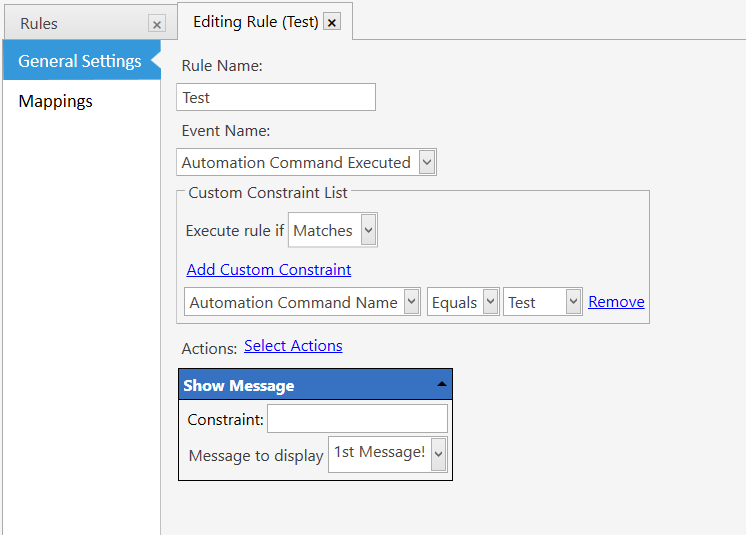
Now lets put the 2 new items we created together in a Rule.
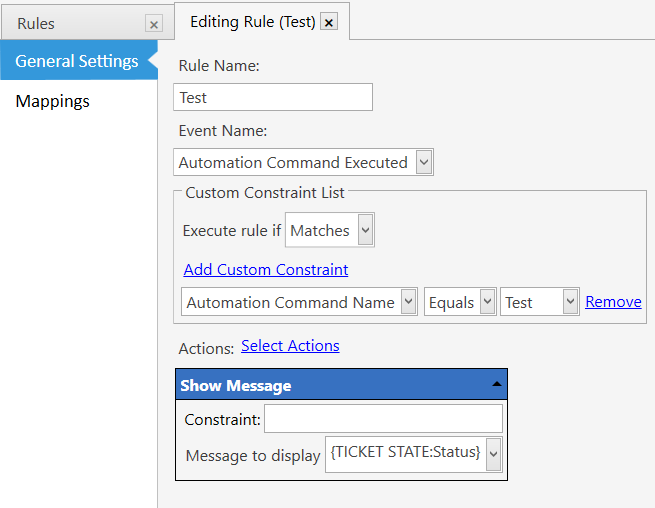
Manage->Automation->Rules->Add Rule
| Rule Name: | Test |
| Event Name: | Automation Command Executed |
| Add Custom Constraint: | Automation Command Name Equals Test |
| Select Actions: | Show Message |
| After adding the action | |
| Message to display: | 1st Message! |
Save rule.
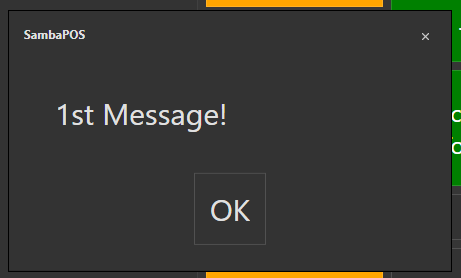
Now go to your POS screen. There should be a new button on the left of your screen with the word “Test” on it. When you press it a pop-up should appear with 1st Message!
If you want you can add an item to the ticket, highlight the item and you should see the Test button on Order Line screen. Pressing the button will show the same message. Cancel all items from the ticket and close the ticket.
Let’s head back to the Test rule and change the Message to display field.
Almost all of the Printer Templates fields will work in the Message to display field
Manage->Printing->Printer Templates->Add Printer Template
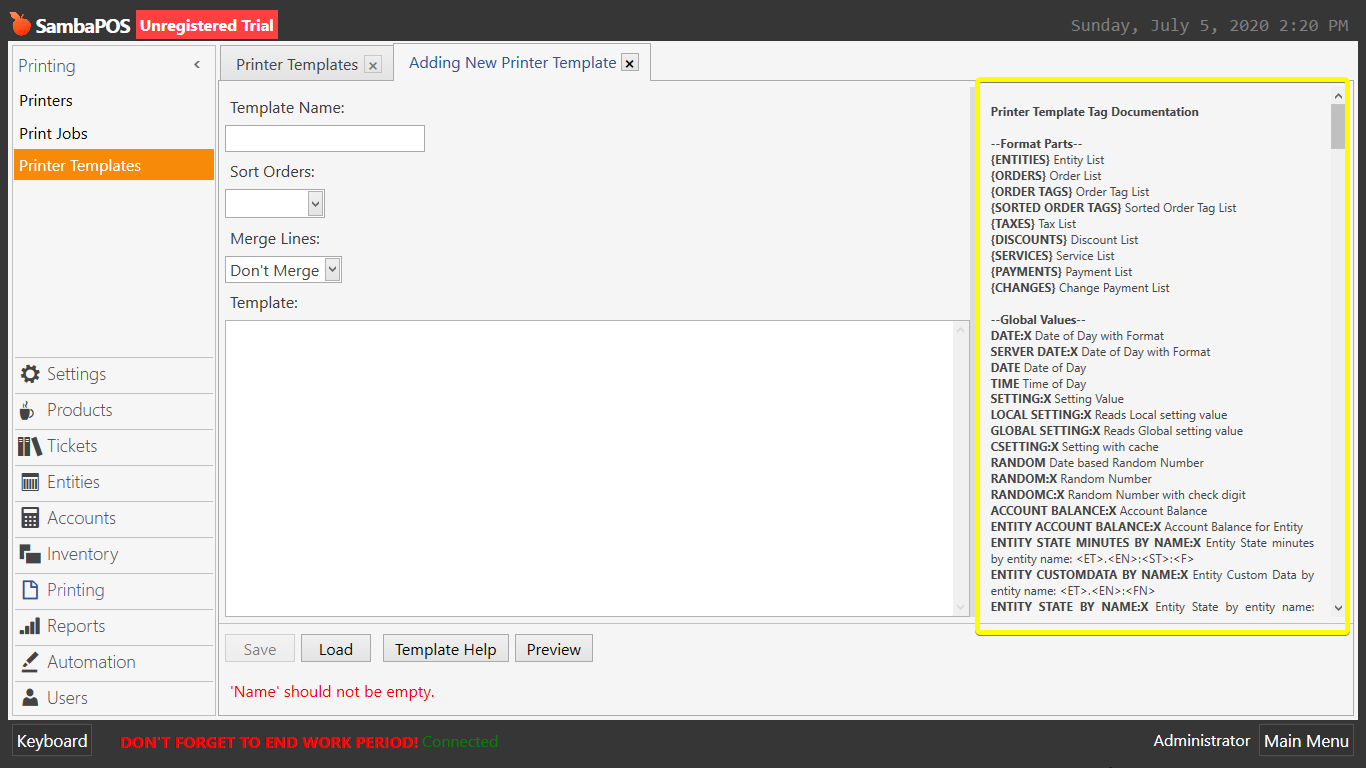
In the Message to display field lets put {TICKET STATE:Status}
Save the rule. And lets go back to the POS screen. Now press “Test” button.
…Hmmm, that is weird. Try pressing it again. Nothing happening, whats going on!!!
Lets add an item to the ticket.
Now press the “Test” button. NOW it works! It should show “New Orders”
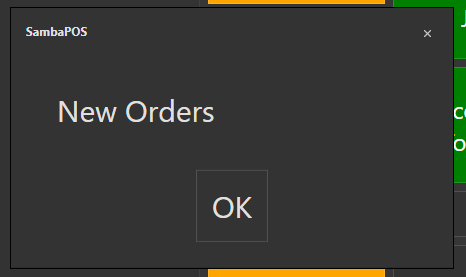
What is going on, you ask? When we pressed the Test button, without any orders, the Ticket did not have any State. No State meant no information to display. When we added an order, the ticket now had a state of “New Orders” and that was printer template tag we used to display that information.
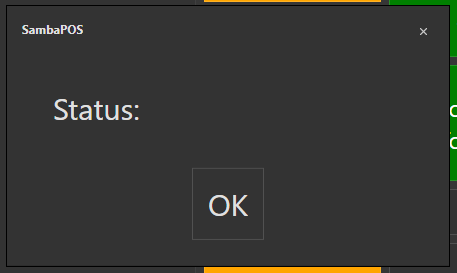
There is a way to force the Show Message action to always display when we want it to. Cancel all orders on the ticket and close the ticket. Head back to the Test rule. Now lets put a label in front of the {TICKET STATE:Status}. Lets put the word Status: . It should look like this: Status: {TICKET STATE:Status}
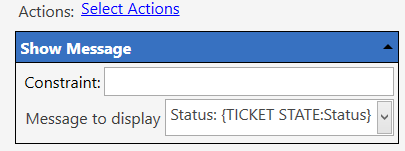
By putting a label in the Message to display field the Show Message action has something to show, regardless if the Printer Template Tag has information or not.
Now go back to the POS screen. Now when you press the Test button with an empty ticket. Now you will see a popup with just the word “Status:” on it.
You can add an item to the ticket and press the Test button. Now it should read “Status: New Orders”.
The Show Message action is not limited to just an Automation Command button. It can also be added to any set of actions in any rule.
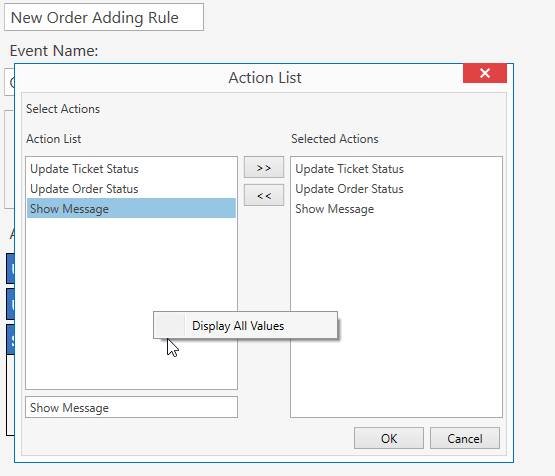
Let go back to all the rules list. In the list of rules, you should have an rule named New Order Adding Rule. Open the rule up, after clicking on Select Actions link, search for Show Message. Add that action but keep the dialog open. We want to add another Show Message action. To do that, we need to right click in the left box. A dialog will appear with the option “Display All Values”. Select that option and all the actions from the right will appear in the left box.
Select the Show Message action and add another one to the right. Click on 1 of the Show Messages from the right and drag it to the top.
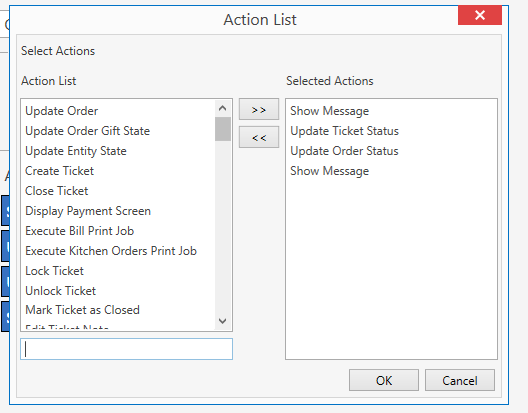
Click OK on the dialog.
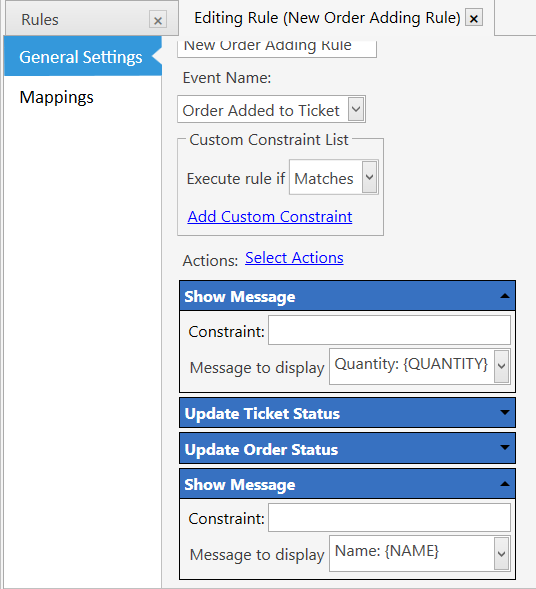
In the first Show Message action, in the Message to display field put Quantity: {QUANTITY}
In the last Show Message action, Message to display field put Name: {NAME}
Now go back to your POS screen. Add an item to the ticket. You will now be shown 2 popup dialogs every time you add an item to the ticket. One with the quantity that was added and another with the menu name that was added.
Let’s say that during your developing a new configuration you have a part working properly, but don’t want to the pop-ups to show any more. But you still might need them later. We can constrain them out of the rule so they will not fire. There are many ways to do this, the easiest I have found is to put 1==2 in the constraint field. Let’s try that in the above New Oder Adding Rule. Open the rule up and put 1==2 in both of the Show Message actions Constraints field.
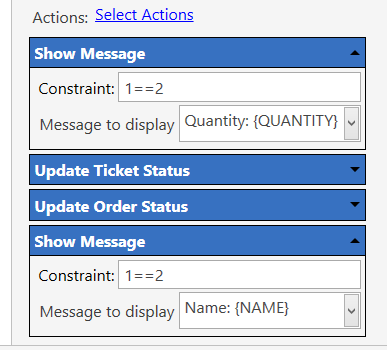
Now if you add an item to the ticket, the pop-ups no long appear. When you know everything is working correctly, you can remove the Show Message actions from your rules.
The Show Message action is not limited to Printer Templates. It can be use many other things, such as (but not limited to):
- Checking Syntax’s equations/formulas
- Checking Constraints
- Command Values
- Checking the manipulation of values
- Reading information
- Checking if a Rule is firing.
- and the list goes on and on.
All though the Show Message does not solve problems, it’s a tool to find out what does work and what does not work.
Searching the forum will help you find information that you need to display in the Show Message action.