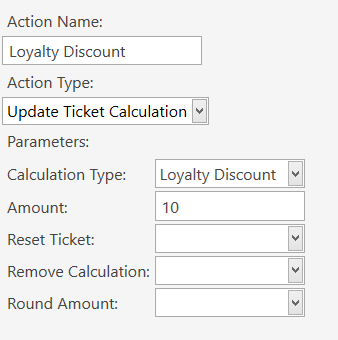
Either should work. The idea behind putting the Rate in the Action is that you only need a single Calculation (and a single Rule), and then you set the Calc Rate using an Action [:variable] parameter in the Rule.
So your Update Ticket Calculation Action would look like this, using [:variable] parameters:
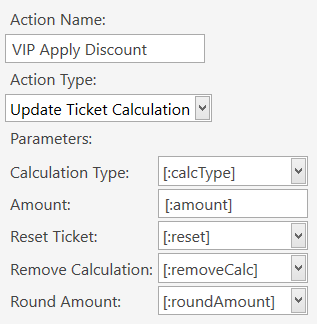
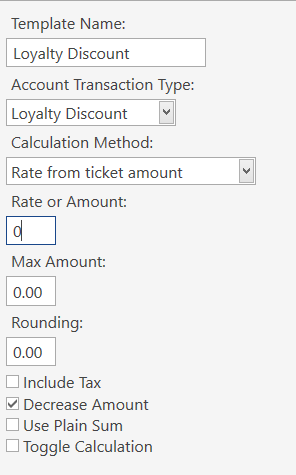
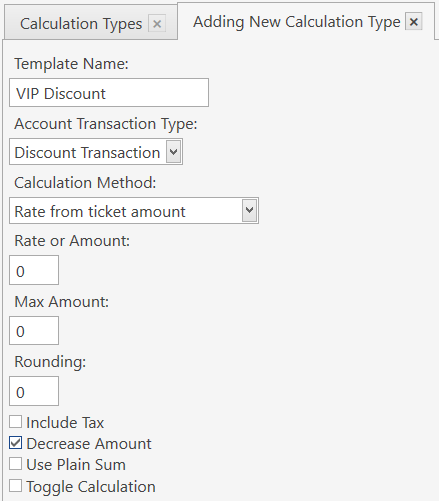
Your Calculation(s) would look something like this (the Rate/Amount can be 0 because we will set it in the Rule):
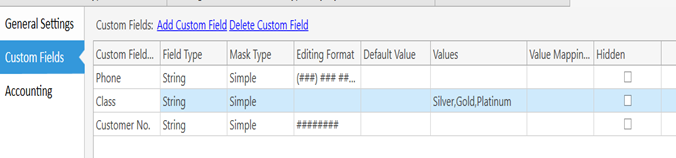
{ENTITY DATA:Customers:Class}
{ENTITY DATA:Class}
Regarding which one of those ^ to use, depends on the Rule in which the Tag is used. Some Rules can use either, while other Rules will only be able to access the Tag data using only one or the other.
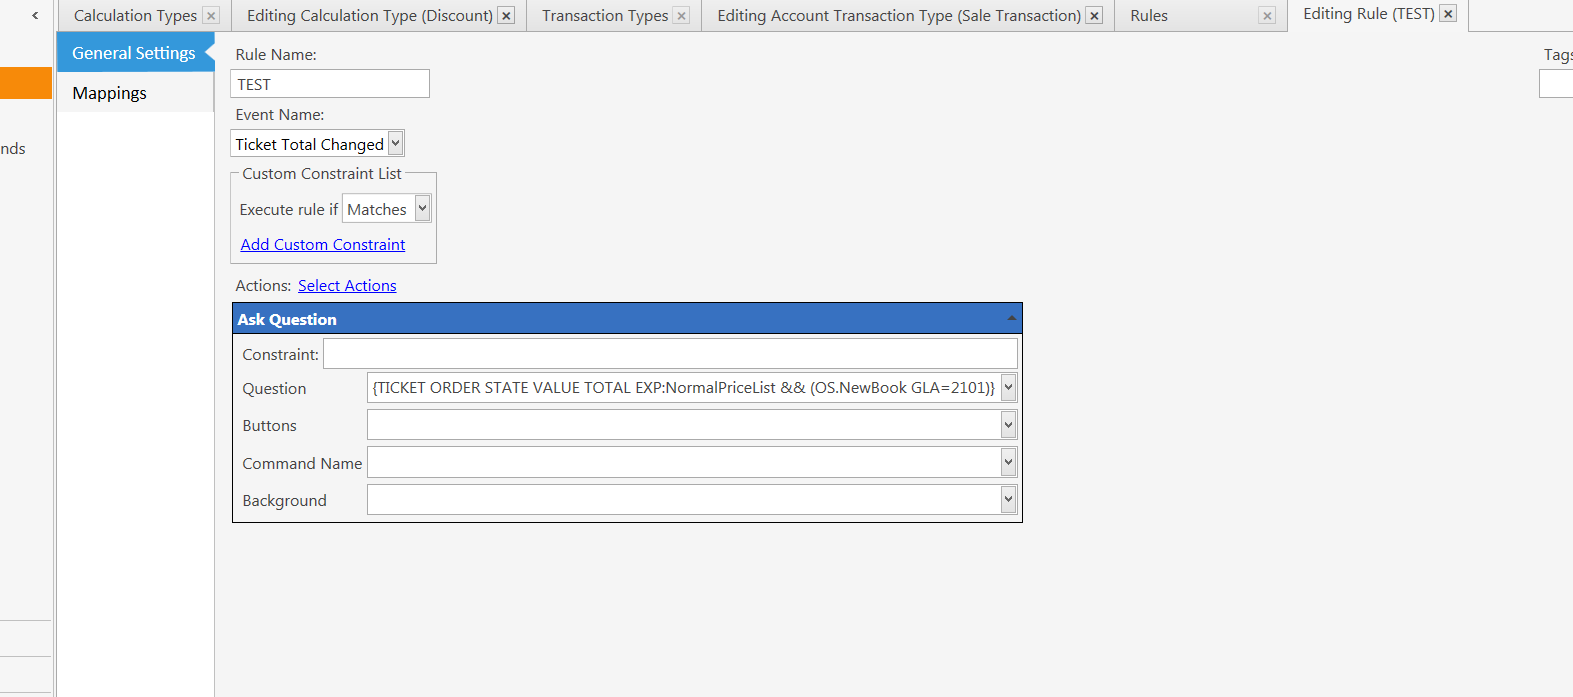
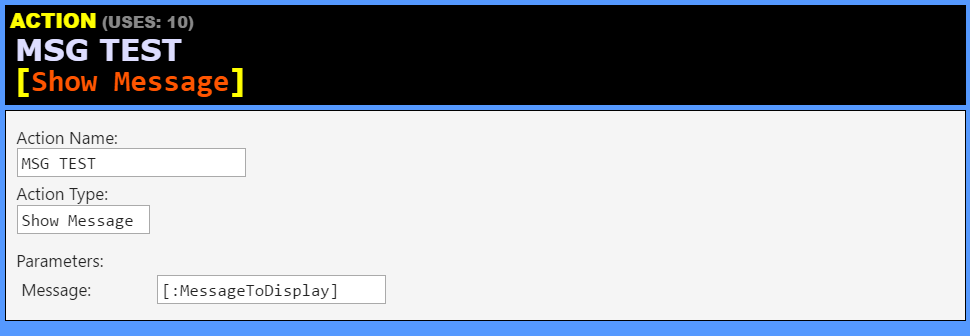
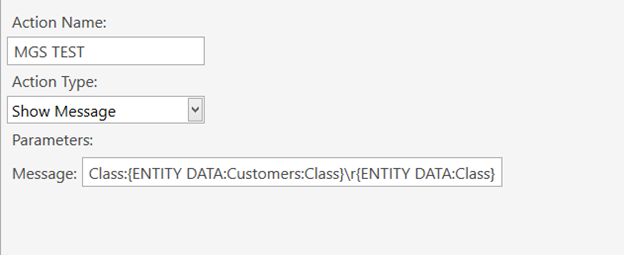
So make a Show Message Action that you can use for testing and troubleshooting:
Put that Action in your Rule and remove the Constraint for {ENTITY DATA:Customers:Class}.
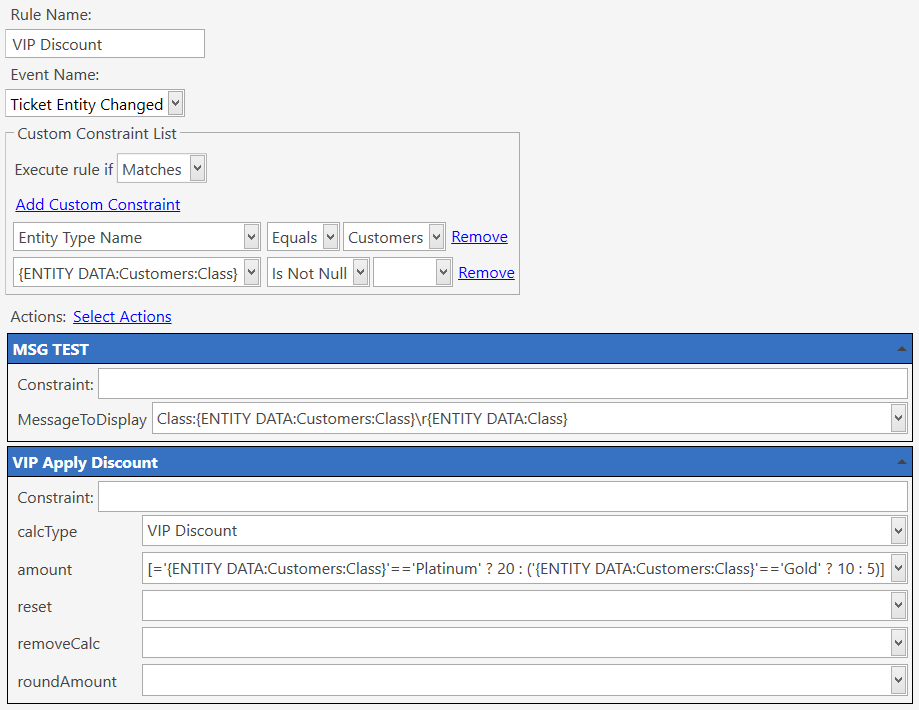
For the [:MessageToDisplay] variable parameter for the MSG TEST Action in your Rule, put this:
Class:{ENTITY DATA:Customers:Class}\r{ENTITY DATA:Class}
Now invoke the Rule and see which of the Tags in the Message dialog gives you a Result. Use the corresponding Tag for your Rule Constraint.
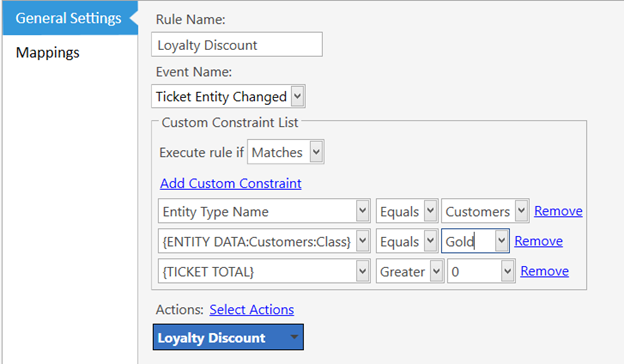
FYI, as it turns out, the Ticket Entity Changed Event, requires the Tag that uses the Entity Type, so you need to use this:
{ENTITY DATA:Customers:Class}
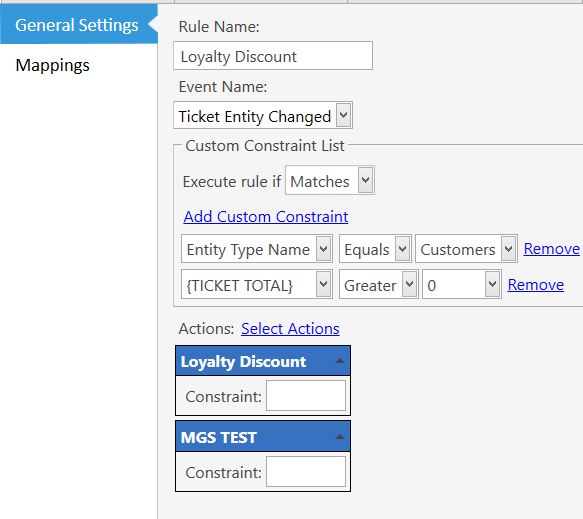
Finally, your Rule might look like this:
Once you are confident everything is working as expected, you can remove the MSG TEST Action from your Rule.