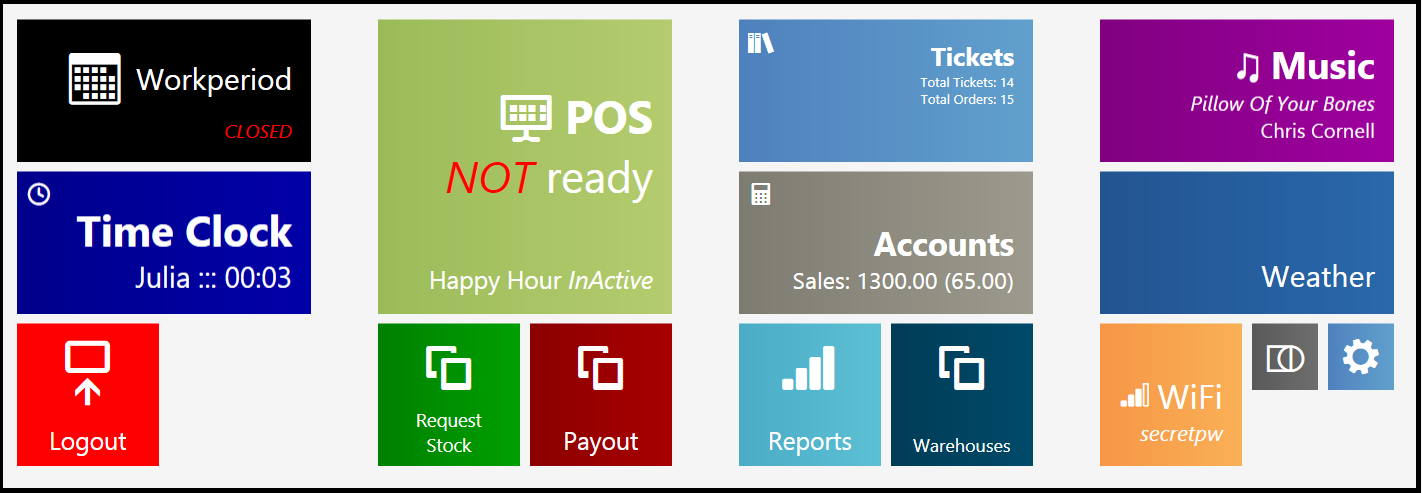
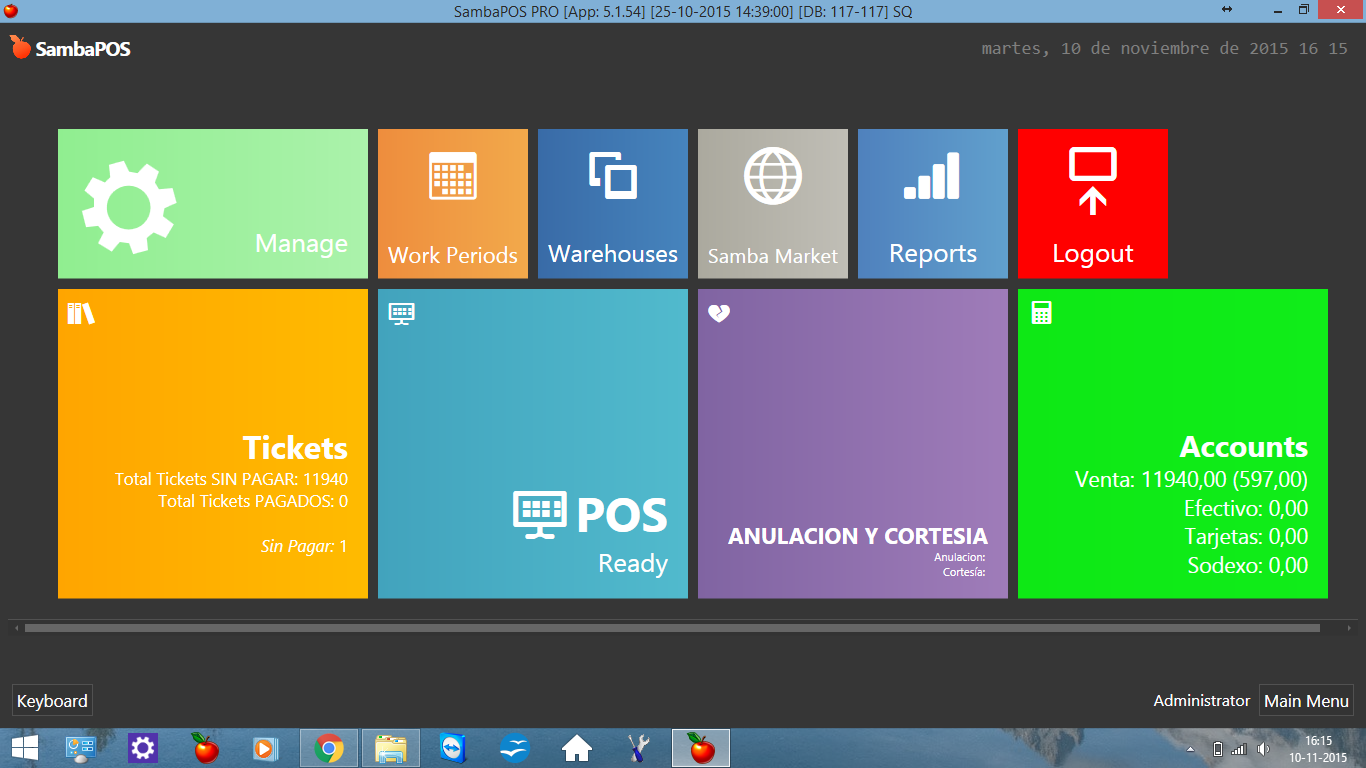
Navigation Screen customization
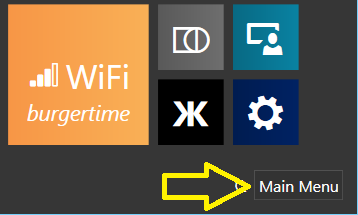
The Main Menu in v4 has been renamed to Navigation Screen in v5, and you can customize it’s appearance.
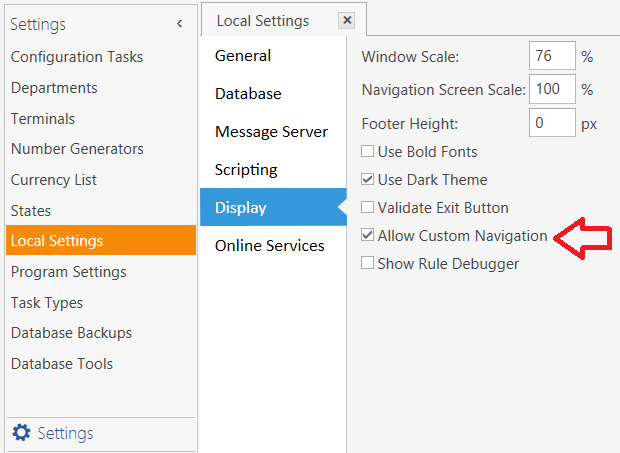
Enable Custom Navigation
Manage > Settings > Local Settings > Display > Allow Custom Navigation
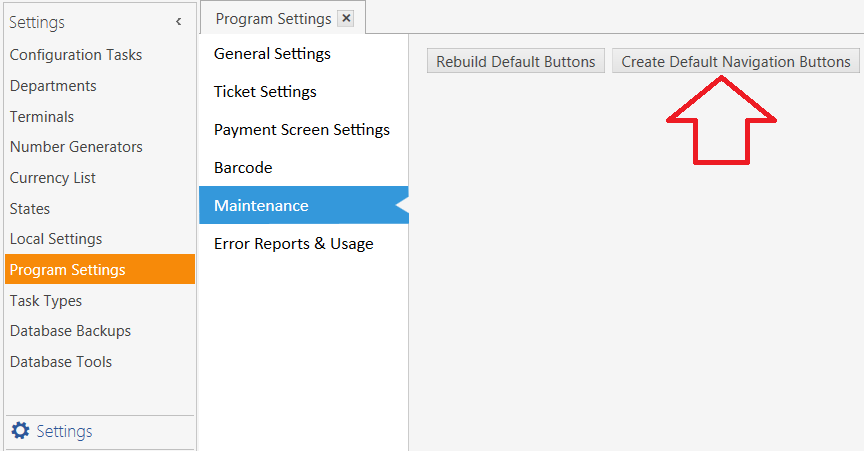
Nav buttons are Automation Commands
When Navigation Customization is Enabled, go to:
Manage > Settings > Program Settings > Maintenance
… and click the button for Create Default Navigation Buttons
Now the Navigation buttons have become Automation Commands mapped to the Navigation screen. You can change their appearance there, including their color and what text is displayed on them.
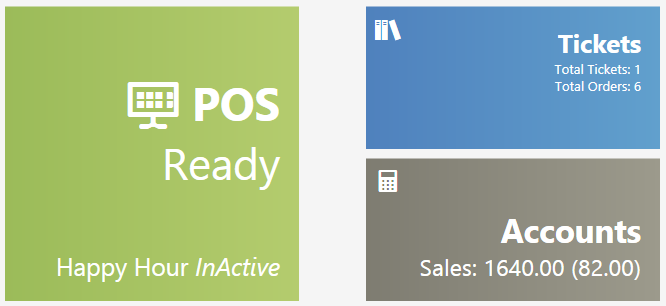
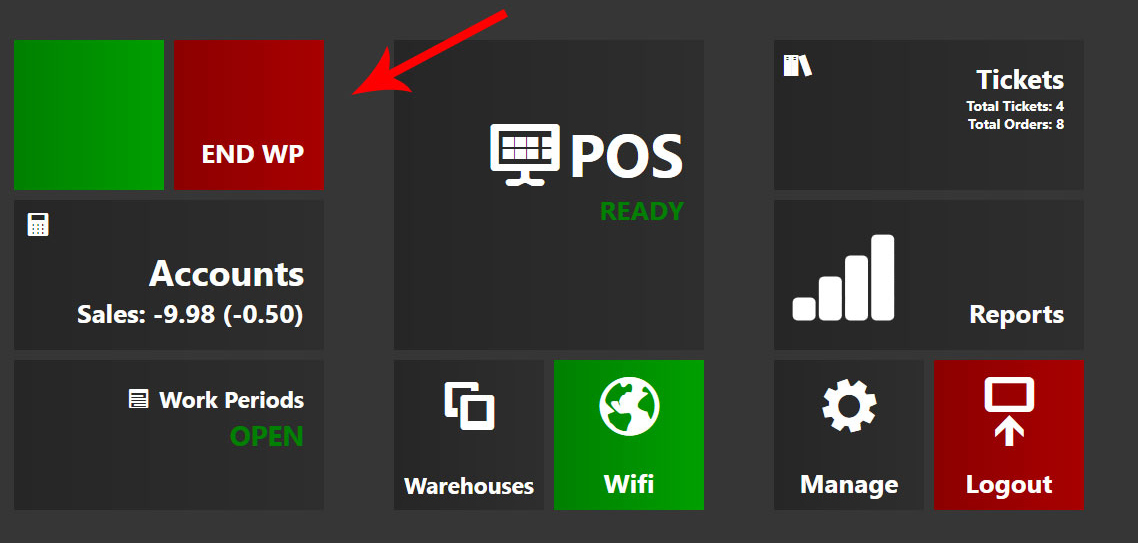
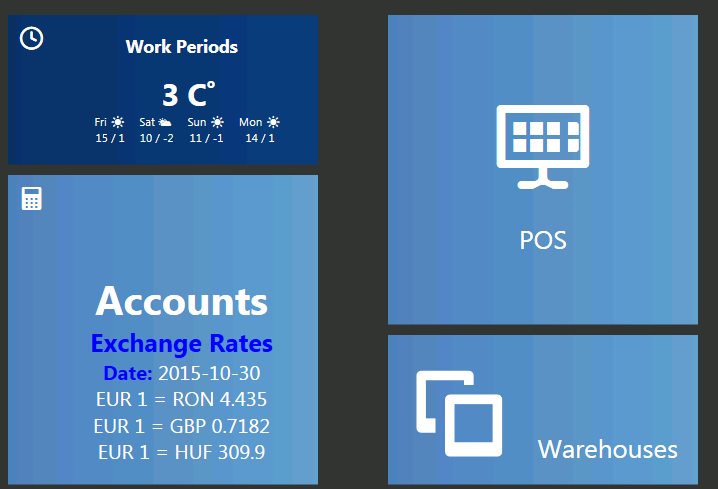
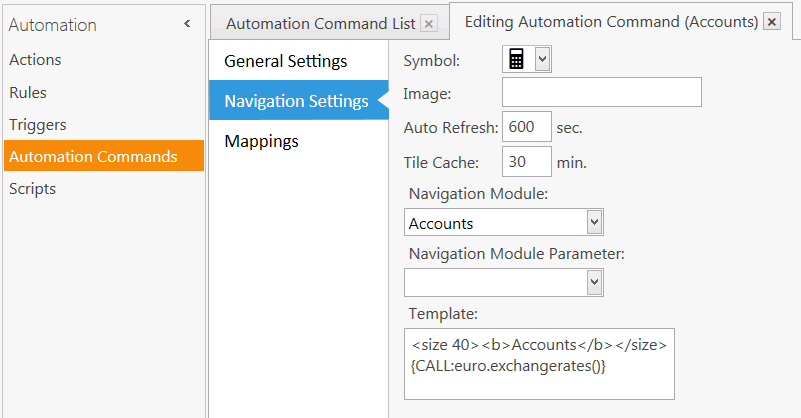
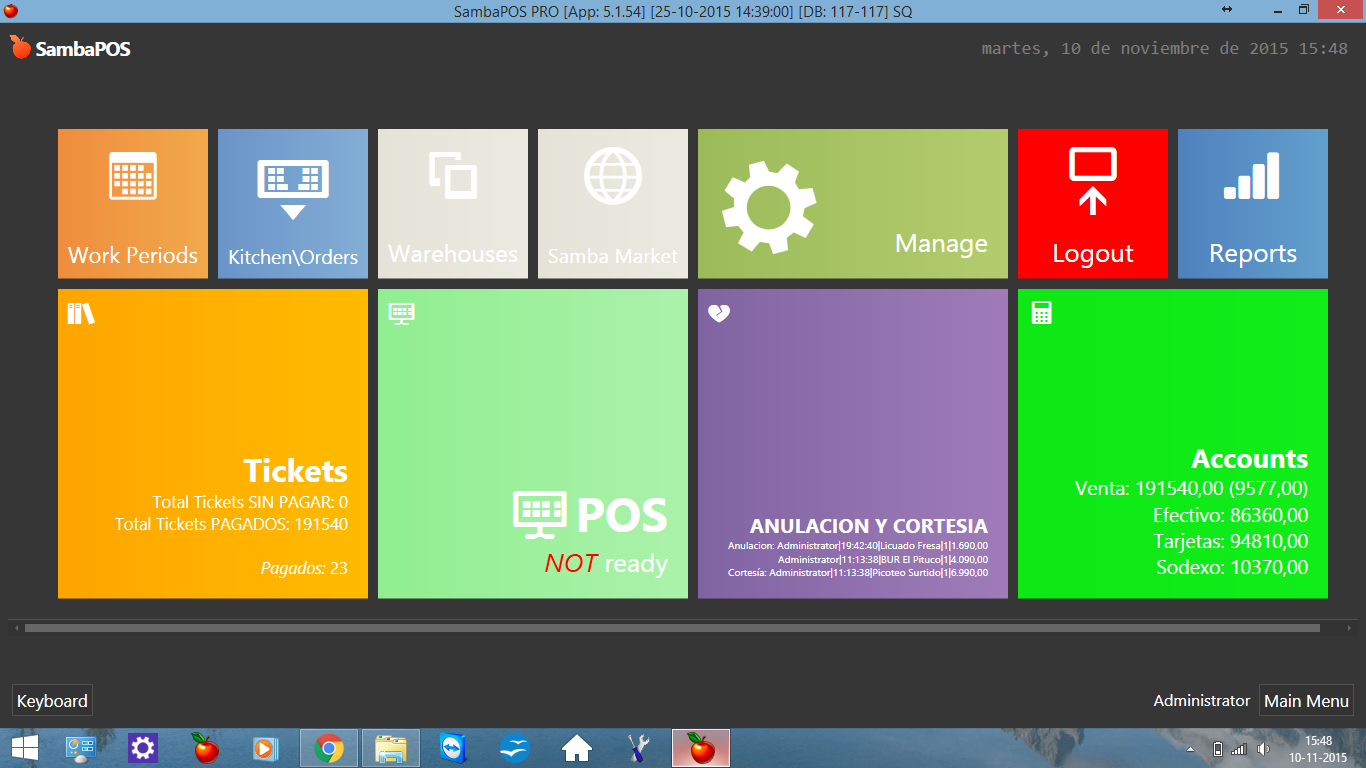
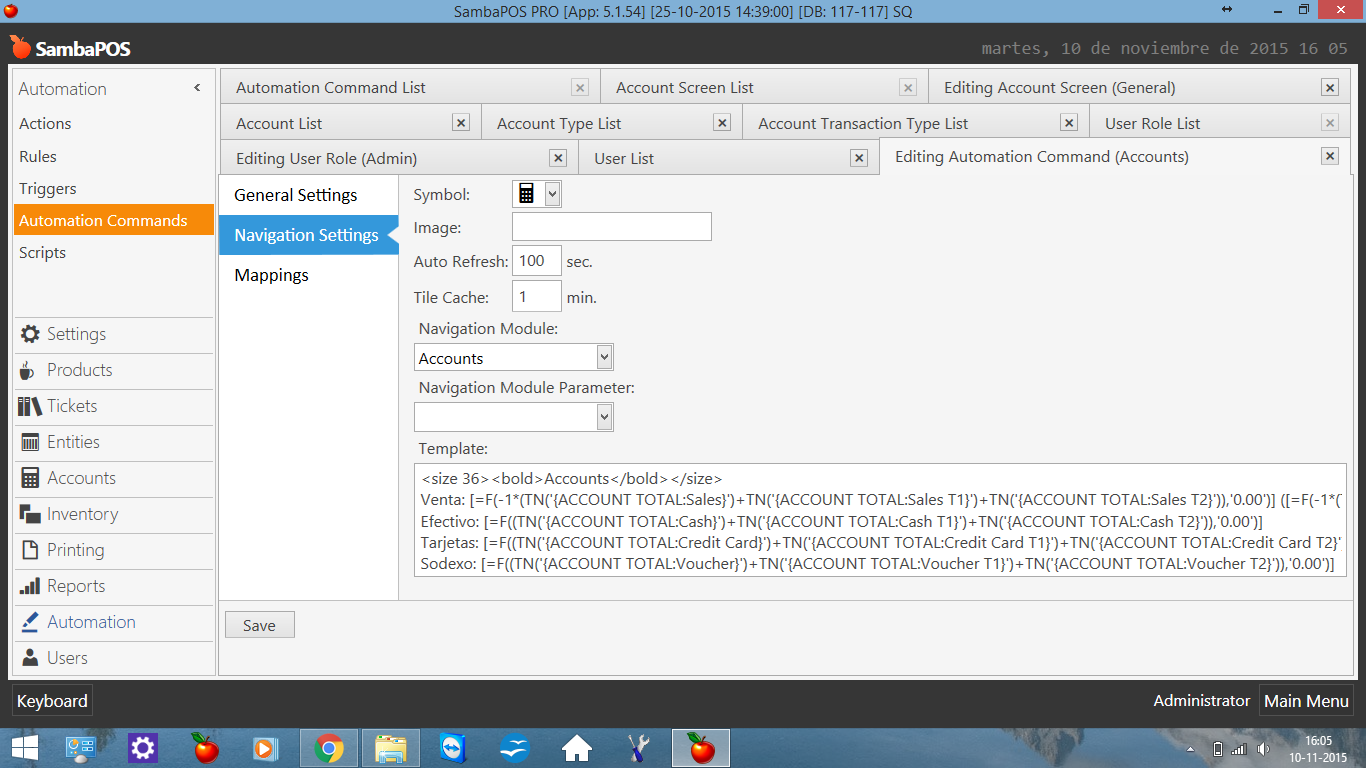
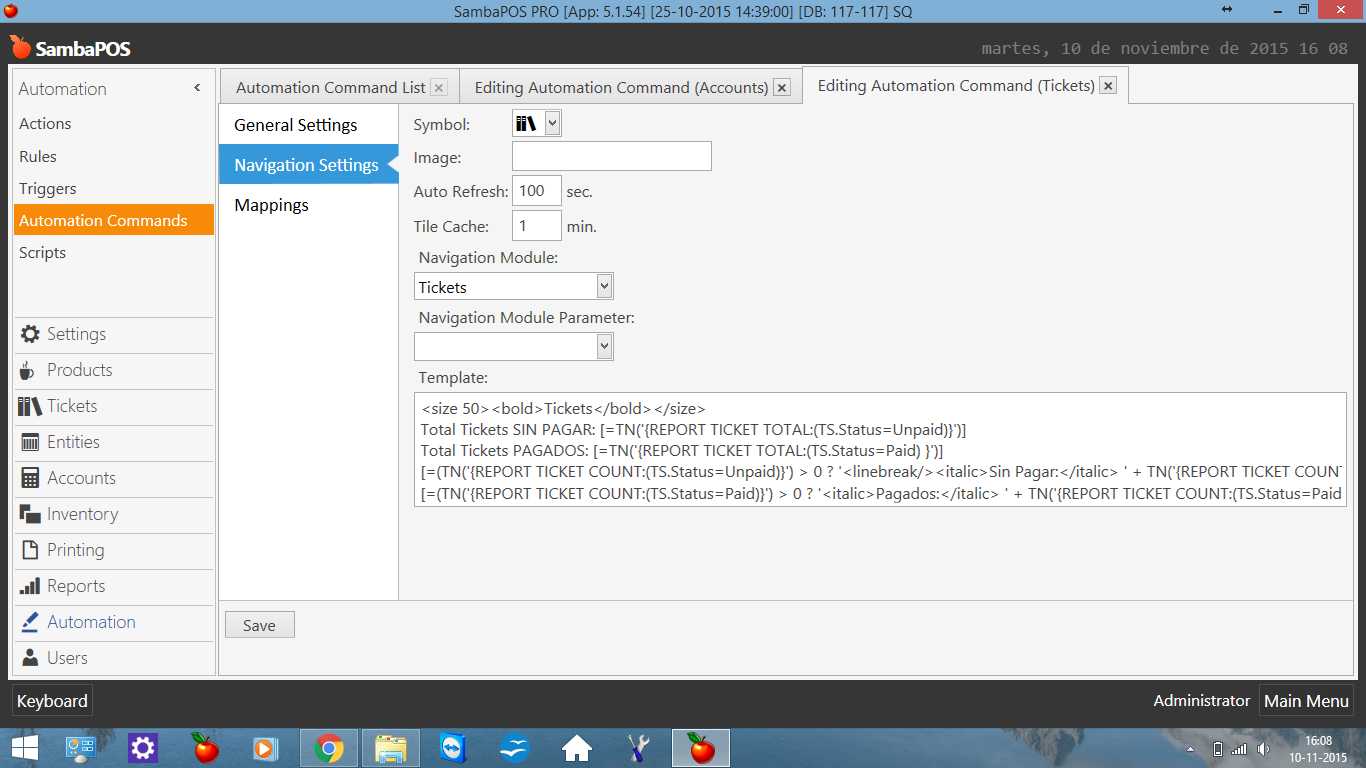
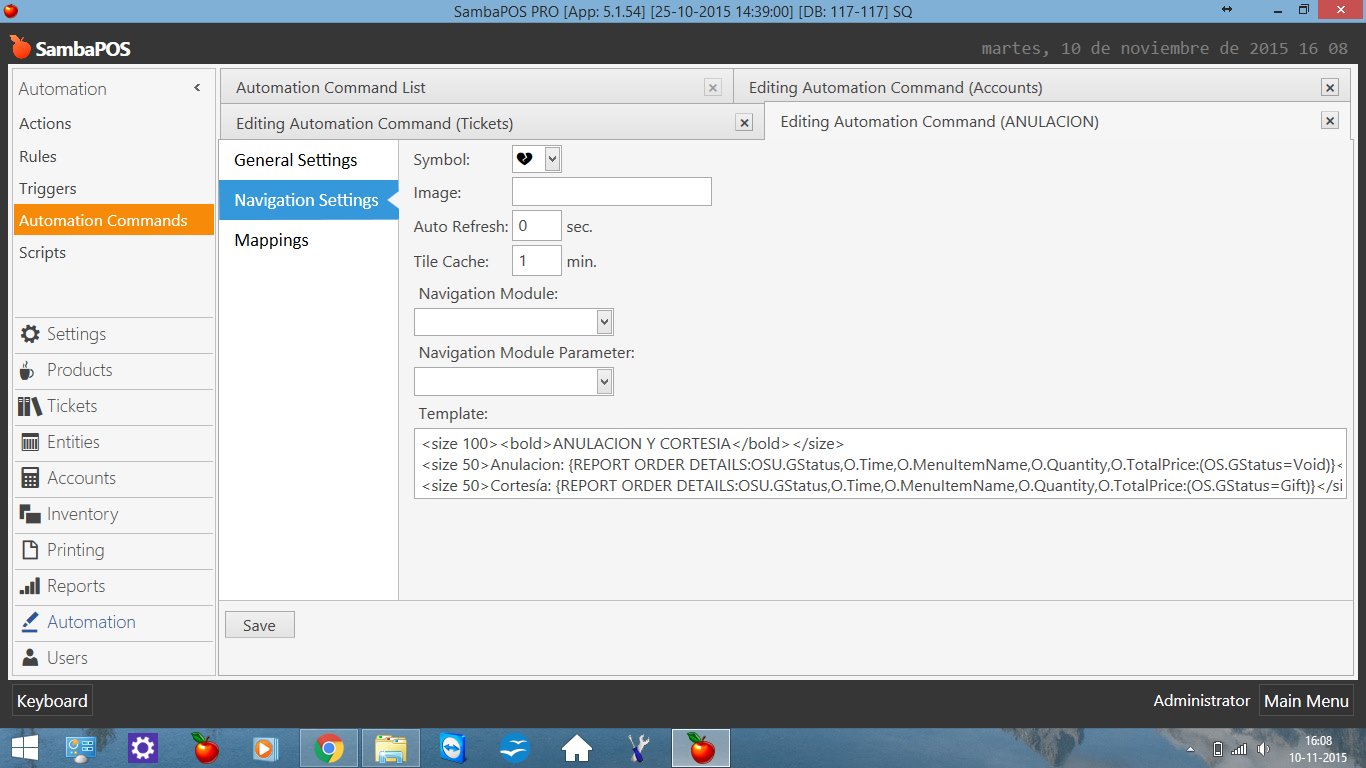
Tiles
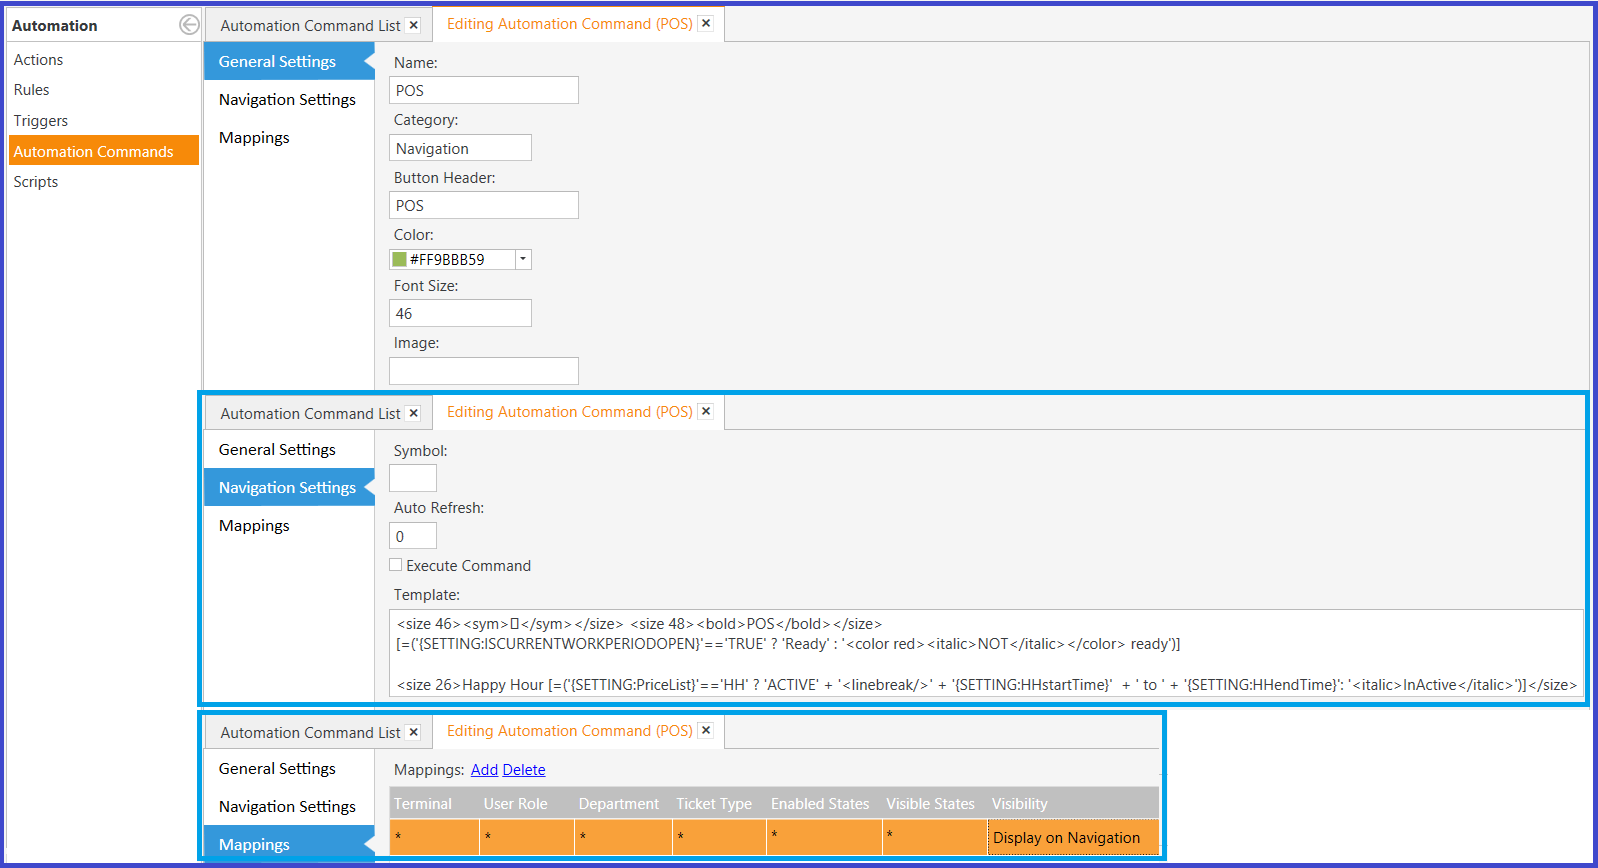
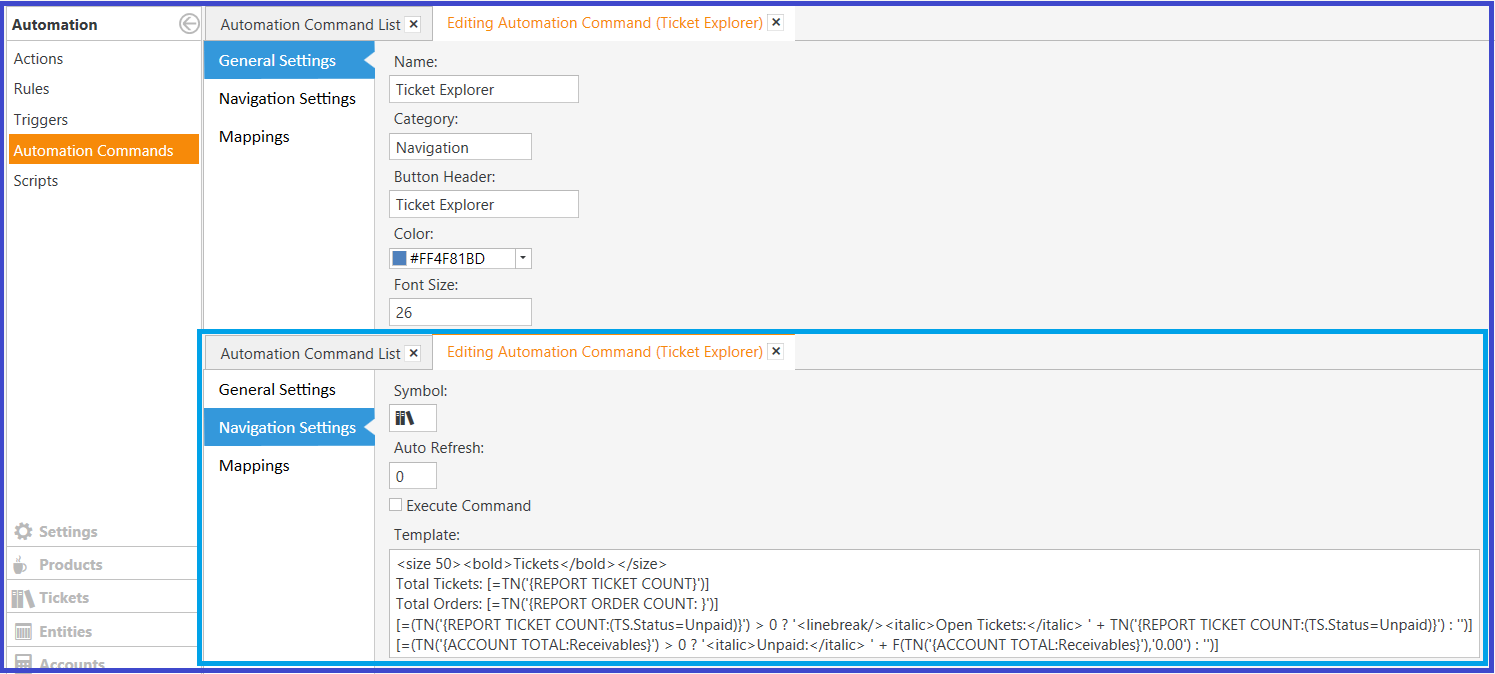
The Automation Command buttons, as they appear on the Navigation Screen are referred to as Tiles. Within the Automation Command properties under Navigation you can define a Template to control the Tile content, choose a Symbol to display, and set an Auto-refresh rate in seconds.

Tile Placement & Sizing
Right-click on the Nav Screen to enable customization of the Tiles, such as Size, Location, and Text Alignment.

Automation Behavior
- Mapping a rule is not needed if module button headers matches to module names.
- If you want to execute rules you can give a different name for button so it will execute rule instead of displaying module.
- Entering a content template also disables default command and executes automation command.
- Automation Command > Navigation section has a few settings for button display.
- Printer Template Tags and Custom Report Tags and @@SQL supported in the Template section.
- Navigation screen layout (button sizes and locations) are stored locally. Other settings (symbol, template, color, etc) are stored in database. This lets users adjust their screens locally on their Terminal.
New Action: Navigate Module
A new Action is available to accompany the custom Navigation which allows for a simple method to switch to various Screens.
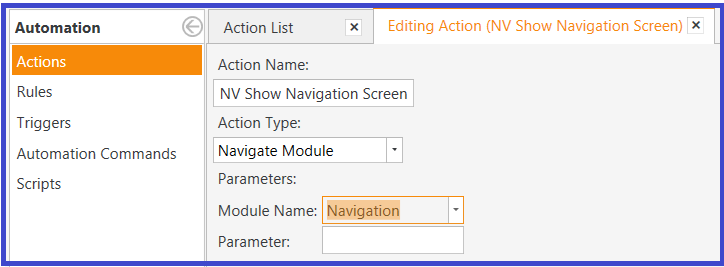
Module Name - specify the Screen to show
Management
Pos
Tickets
Accounts
Warehouses
Market
Reports
Navigation
Workperiods
Entity
Parameter - specify the Sub-Screen for the Module
Warehouses   > Warehouse Name
Tickets      > Filter Name
Reports      > Report Name
Entity       > Screen Name
Accounts     > Screen Name