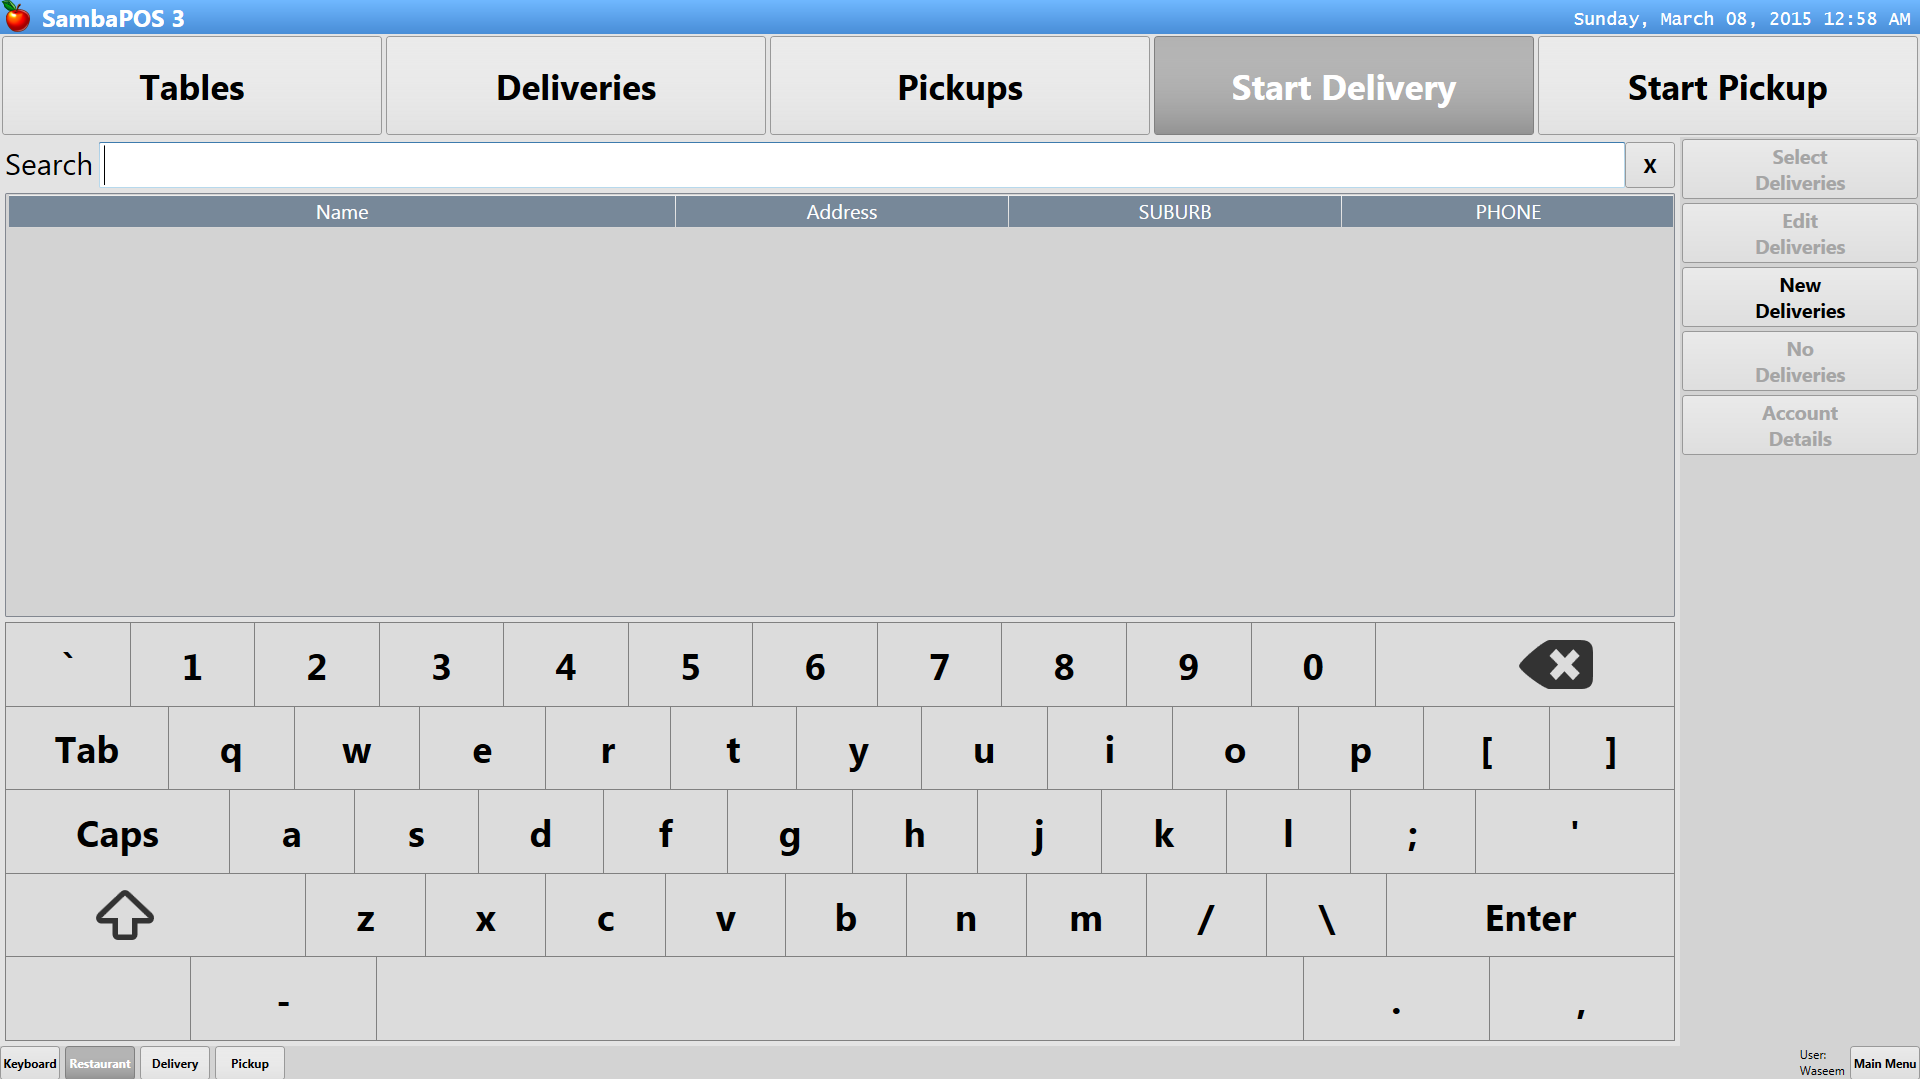
Deliveries and Pickups tab shows deliveries and pickups that are currently active. Start Delivery and Pickup allows me to create pickups and deliveries. Pretty Straight forward.
First of all, I want to merge the Deliveries and Pickups tab so 1 tab shows both.
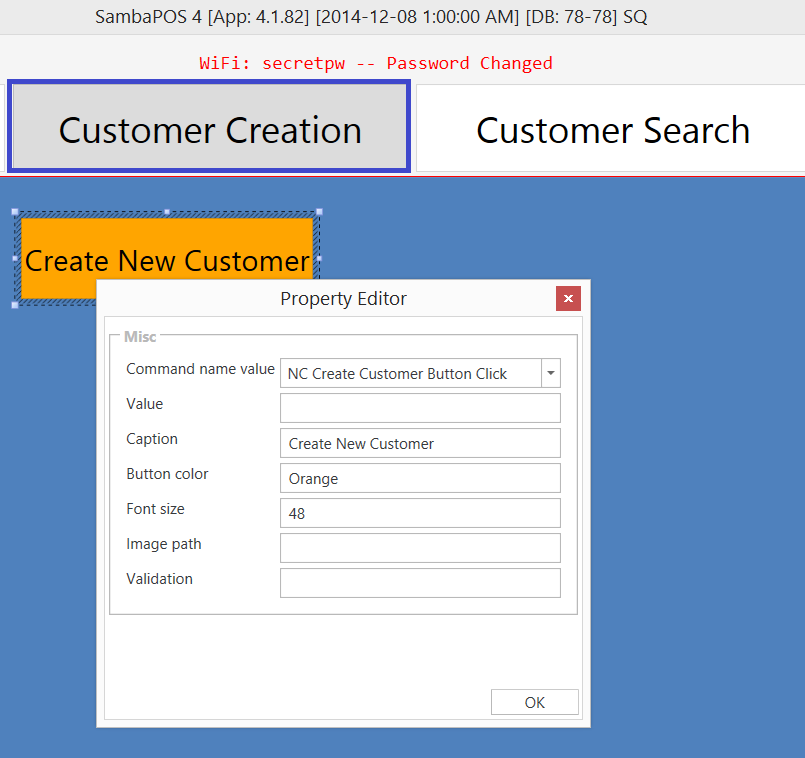
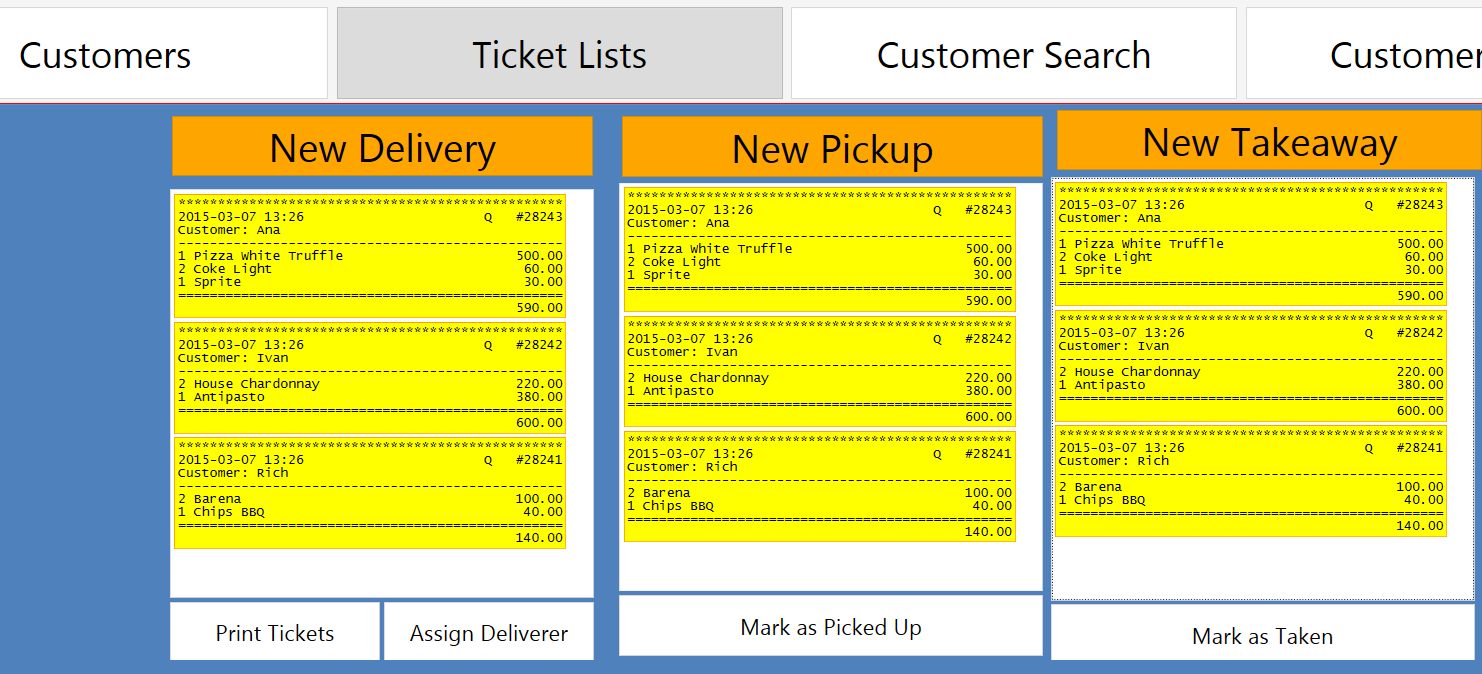
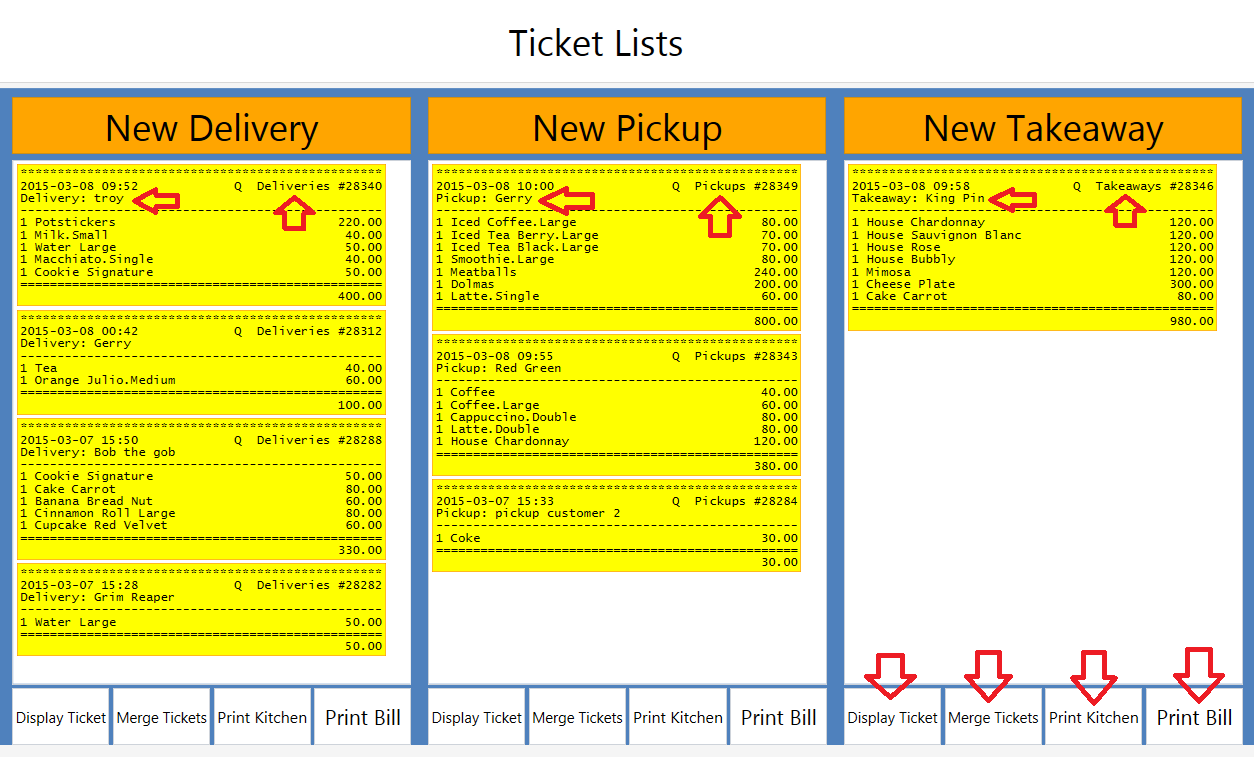
I want the layout to look like this with the active deliveries below the 3 buttons OR all open tickets in the tickets tab. I need a way to link the 3 buttons to the same entity screens as the current Start Delivery and Start Pickup buttons do.
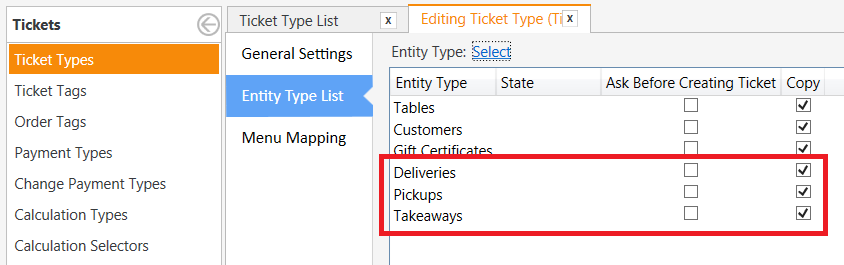
An Entity Screen is designed to show only a single Entity Type. So the first question: is Delivery, Pickup, and Takeaway all using the same Entity Type?
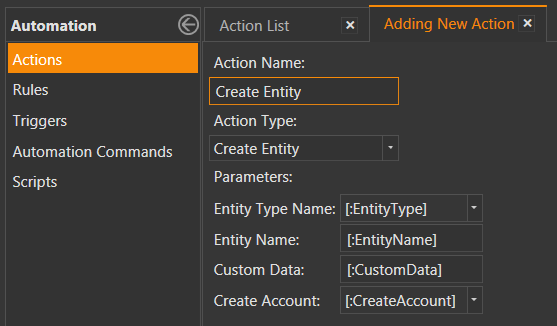
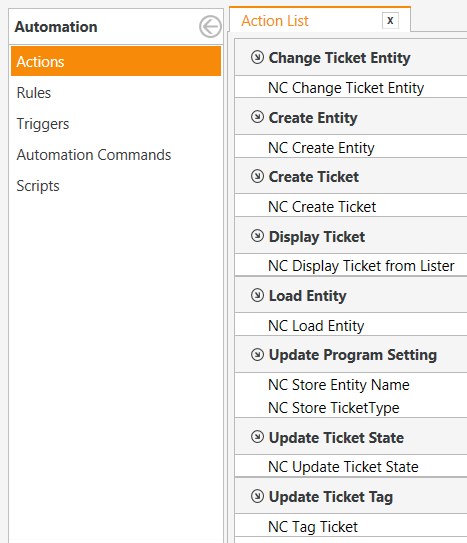
Is there an action called Create Entity in v3?
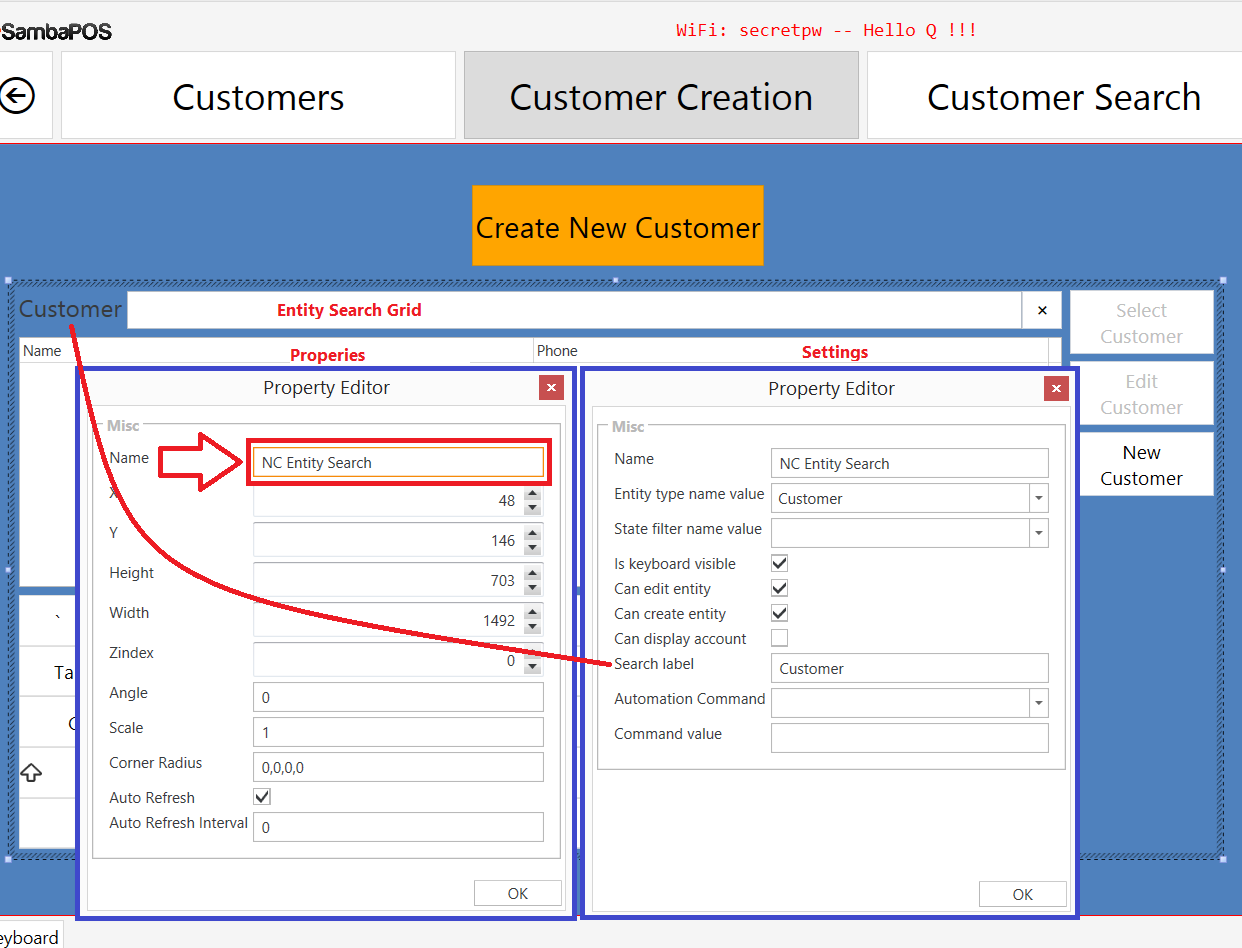
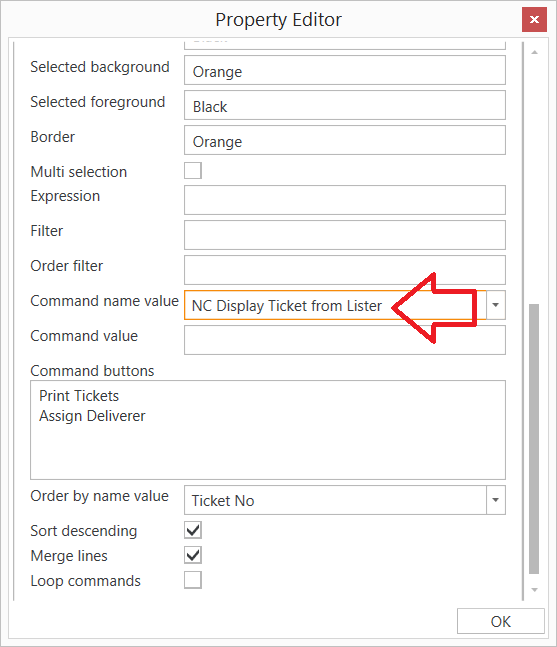
The “search” part is showing because you have your Entity Screen set to Search mode. Set it to Custom, and use Widgets to build your screen with Ticket Listers, Ticket Explorers, Entity Grids or Buttons and Automation Commands.
Make the move to upgrade to v4, because v5 is just around the corner, and you will be amazed at the new features.
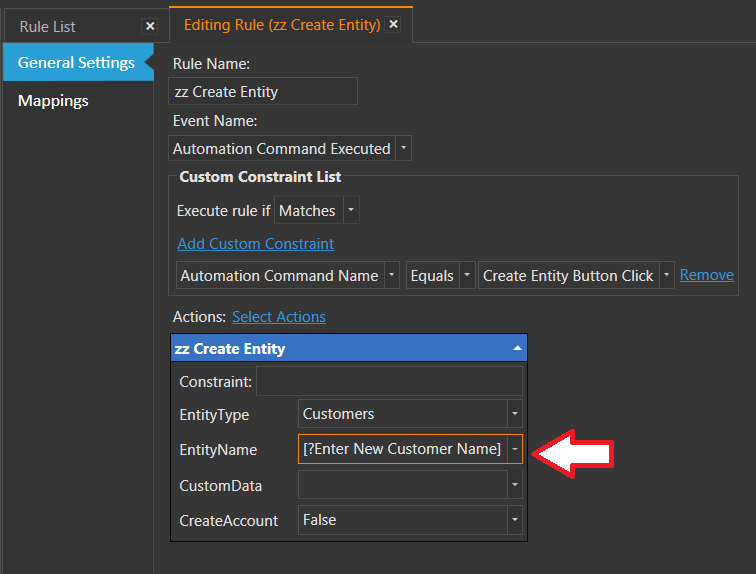
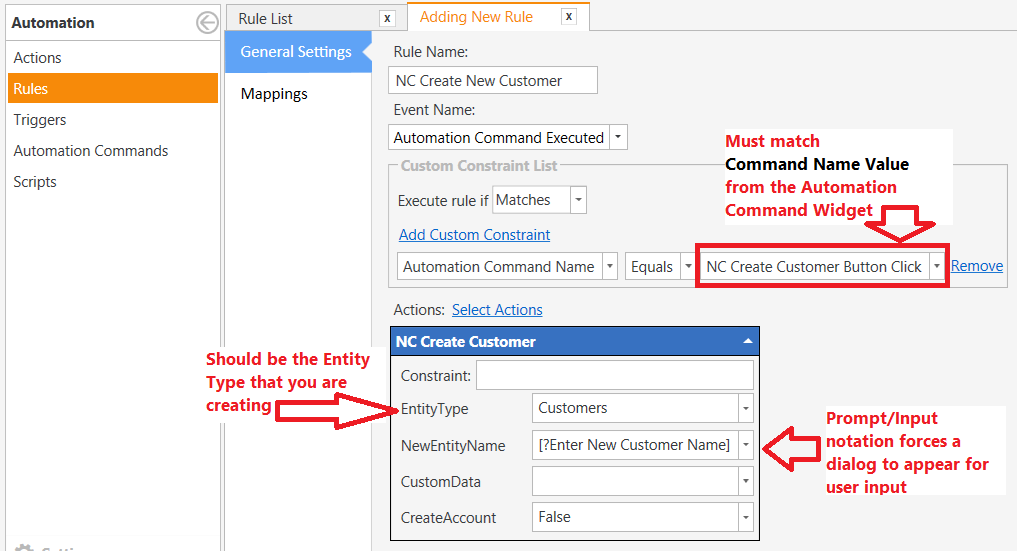
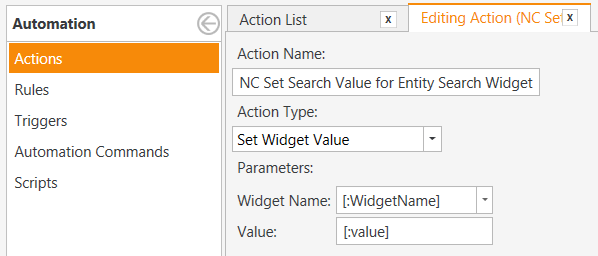
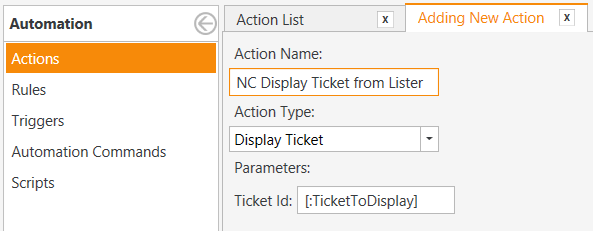
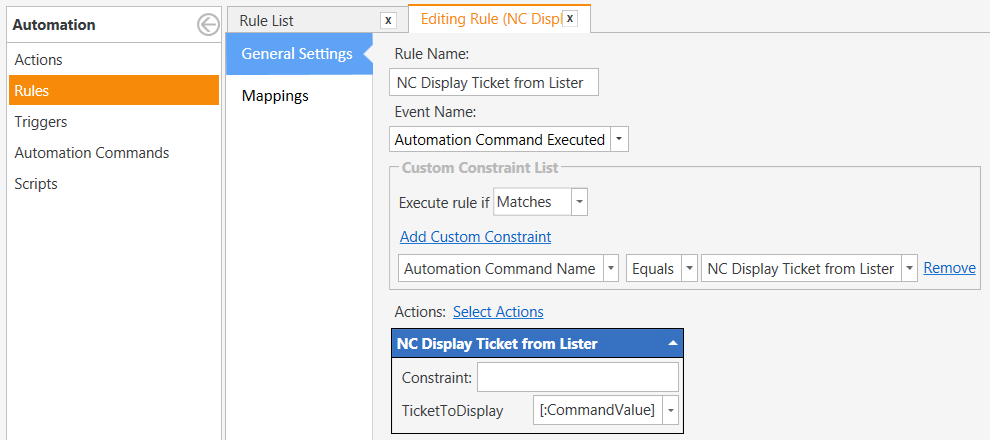
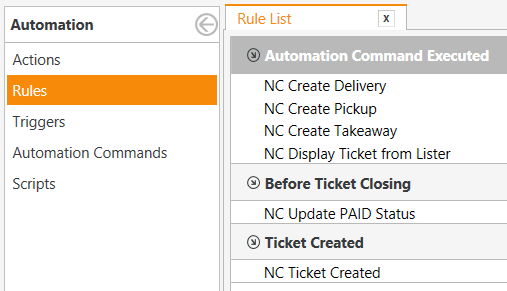
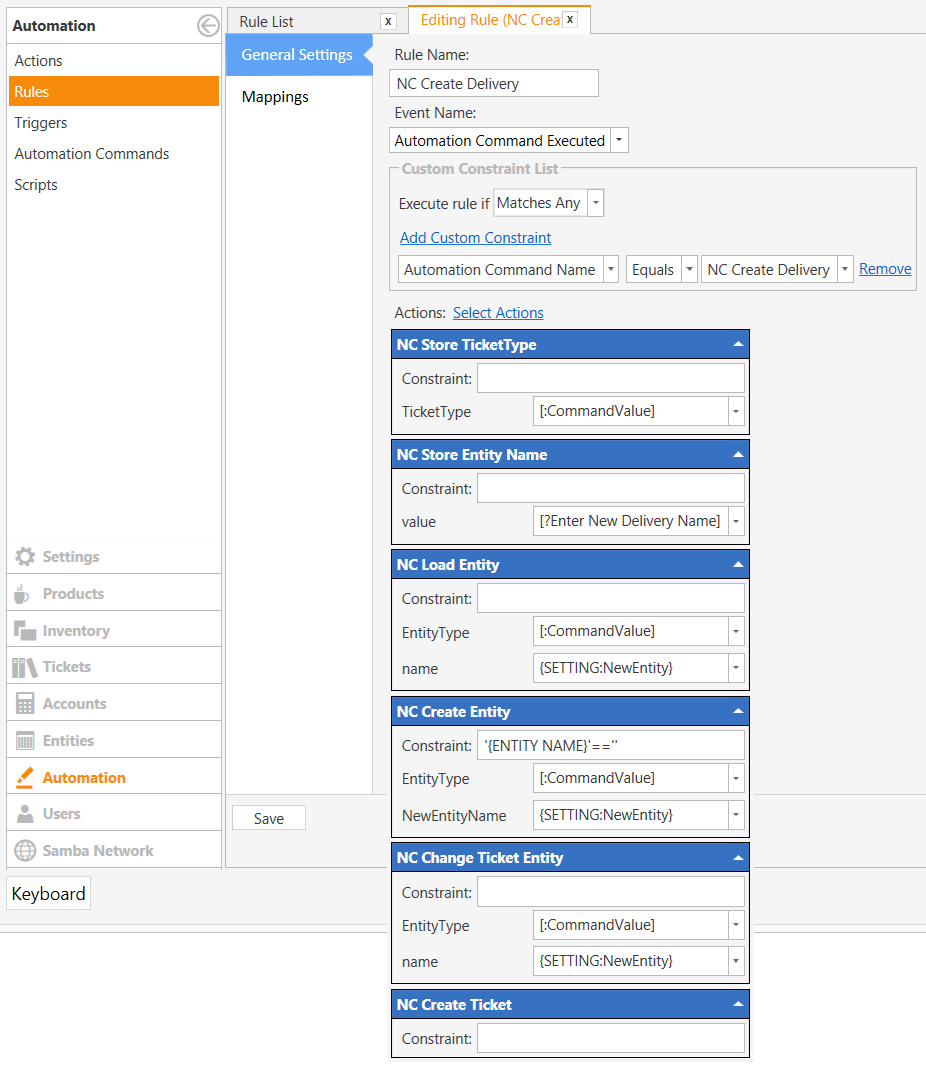
V3 does have Create Entity action, i believe i need to to create a rule to link an automation command and the action together, how would i go about setting this up?
Obviously, you will want it to behave more dynamically than this. I just showed you the flow of linking a button to an Action via a Rule.
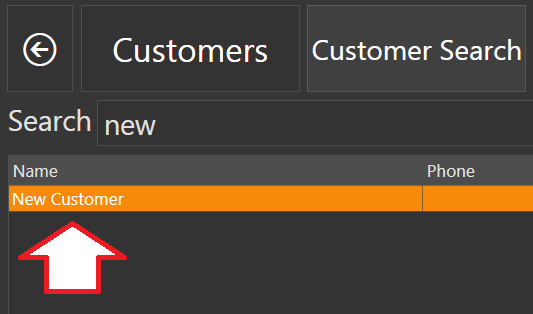
It uses static values (i.e. New Customer) so it isn’t really useful in this state. You would probably want to be prompted to enter the new Customer’s name instead. The problem is: there is no provision for that in v3.
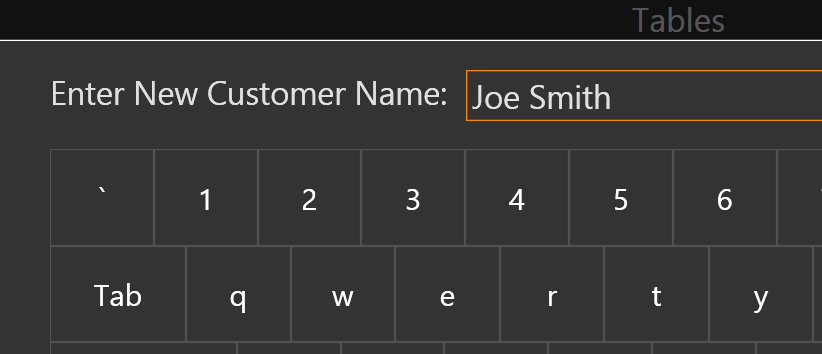
v4 has Ask Question Action and [?prompt] notation which would work great for this, but alas…
In fact, if you have [?prompt] notation, you would do this:
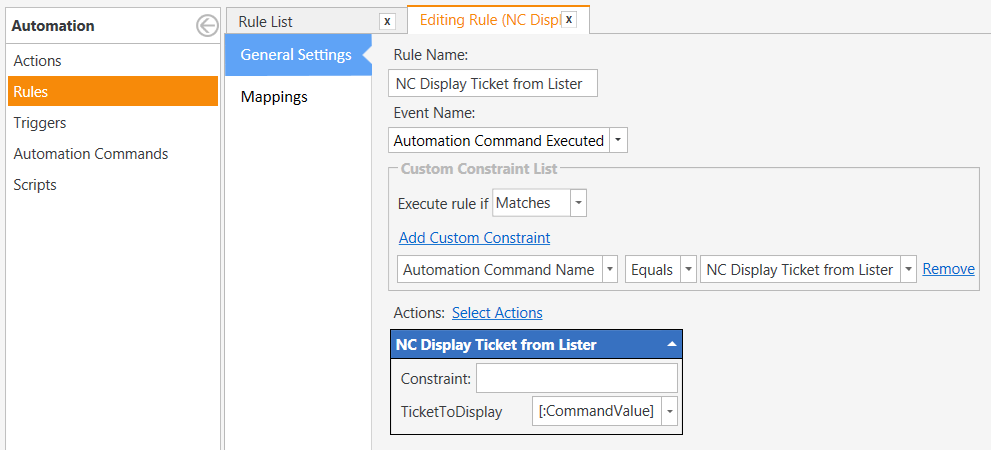
That last screenshot is exactly what im looking for. I have V4 going on my home pc where I’m testing all this. Would you be able to get an example going and send me the files so i can break down what you did? So far I haven’t been able to reproduce anything you’ve done in those screenshots. I might be missing mappings or using the wrong names in some of the fields.
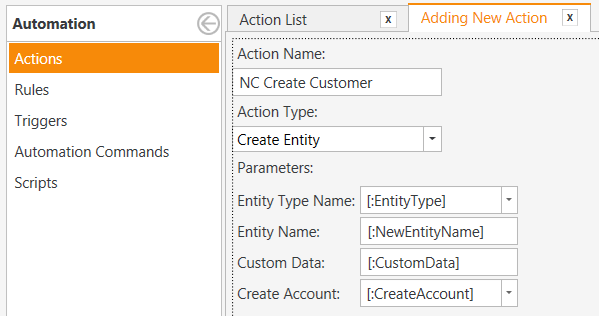
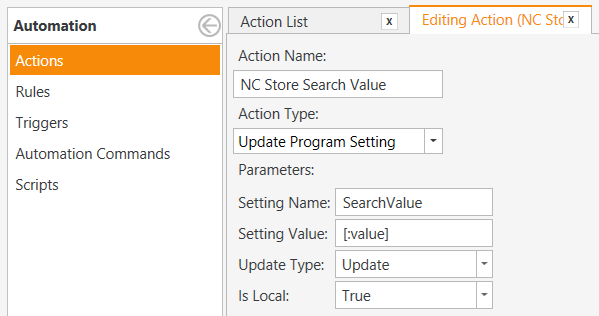
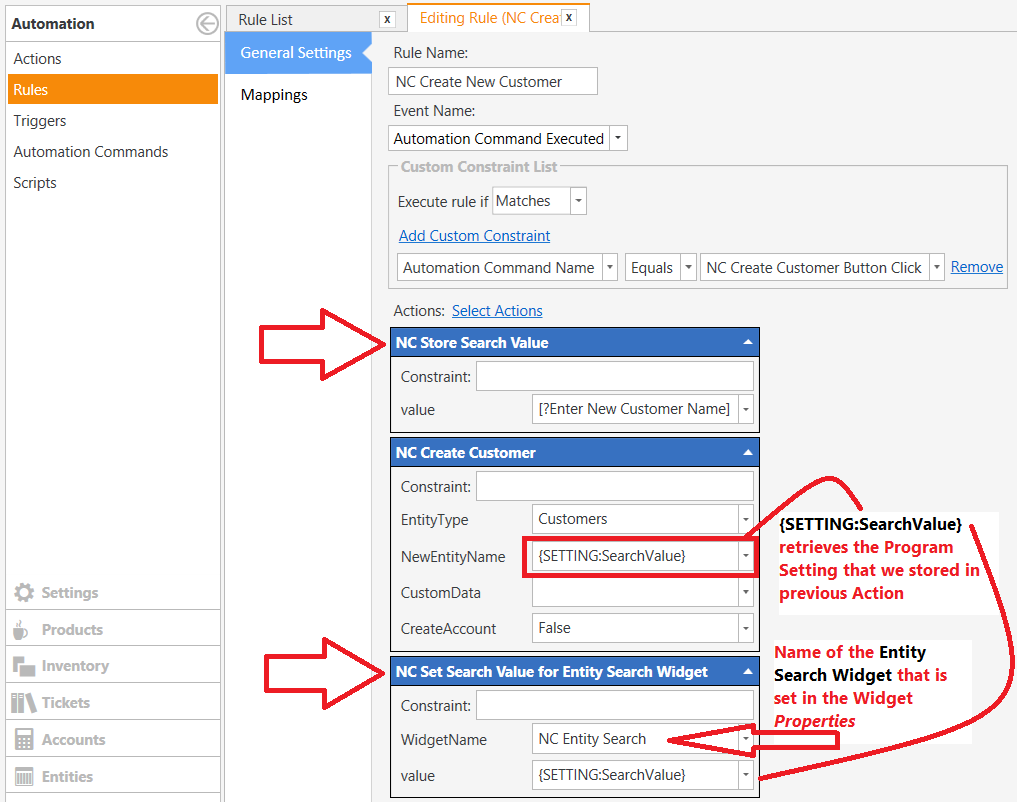
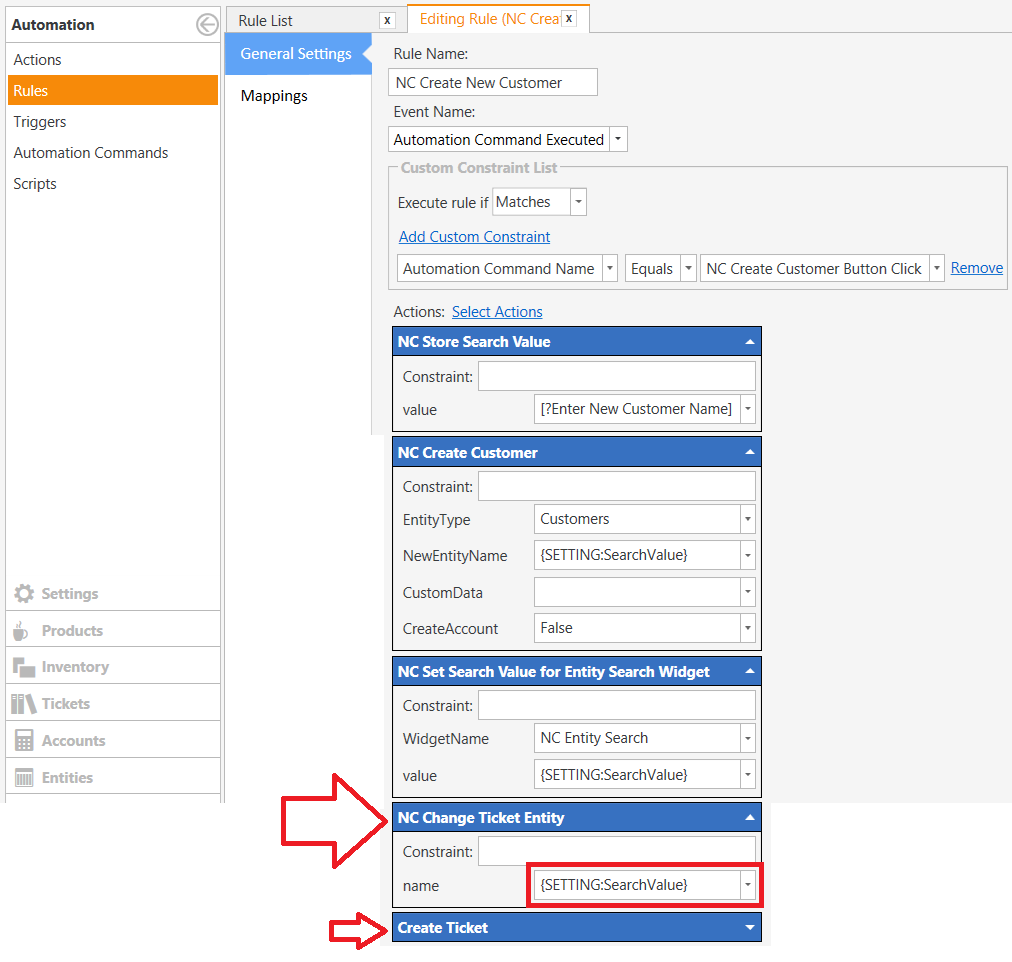
We use [:VariableNotation] for the Parameters to make the Action dynamic. This way we can set the Parameter values inside the Rule. The names of the variables are not important, but the [:syntax] is.
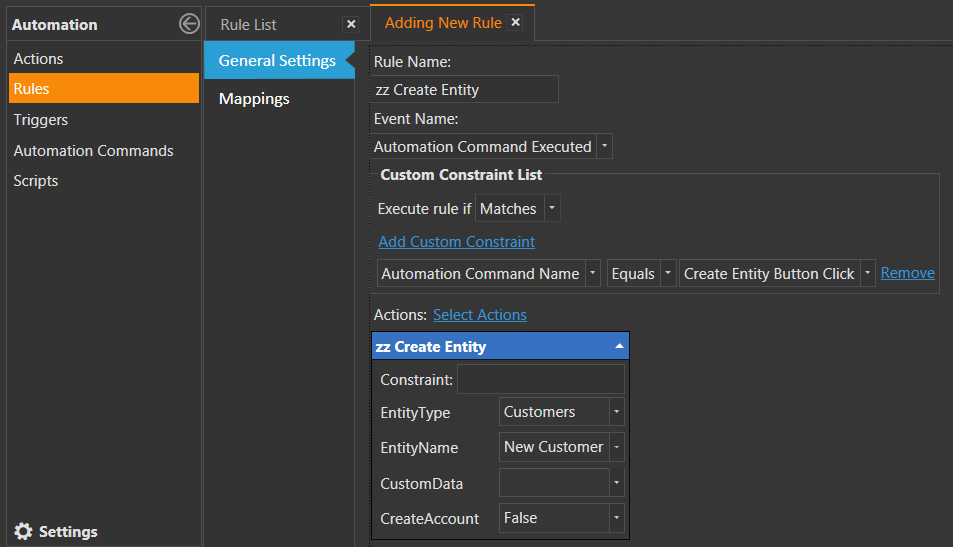
Rule that ties it all together.
You must add a Default Mapping to the Rule - without it, the Rule will never fire because it is essentially disabled.
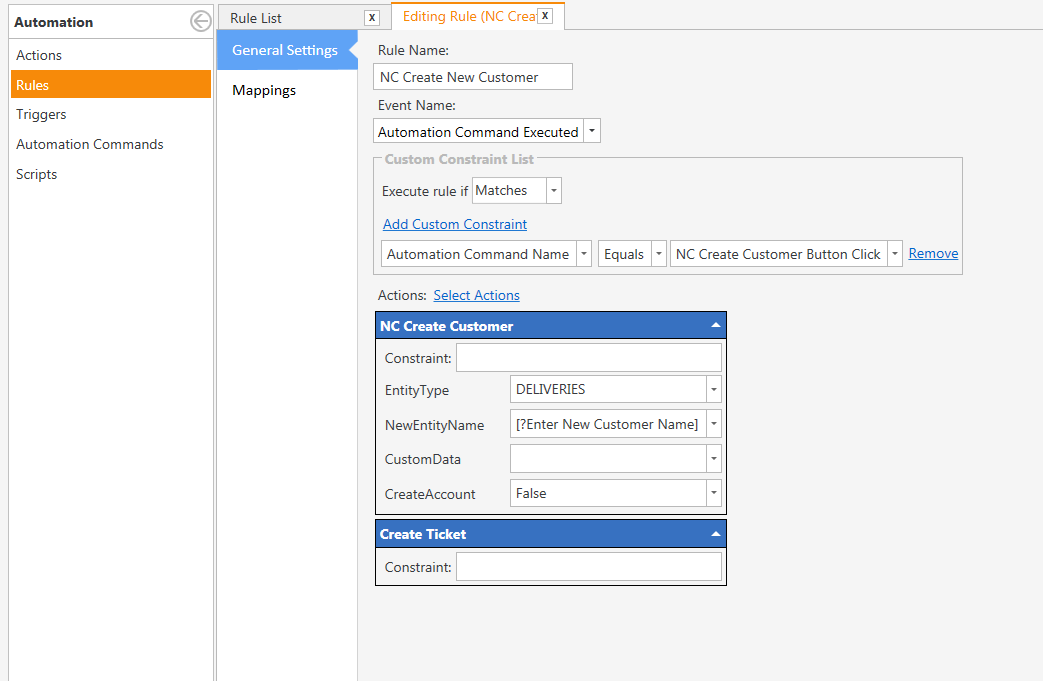
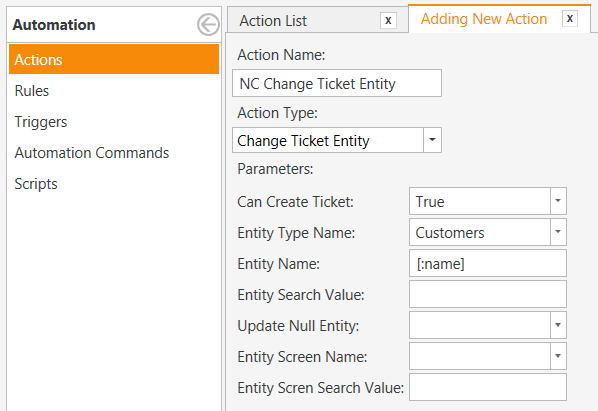
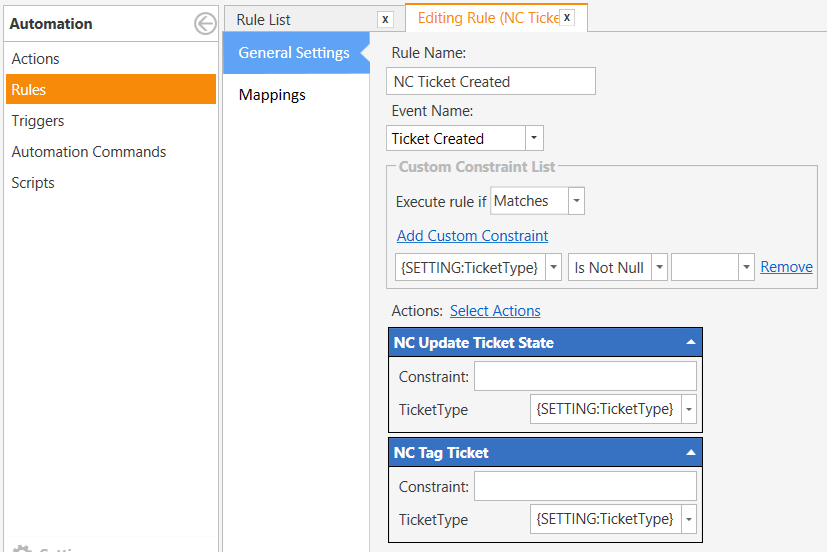
Okay so far so good, now I did the following, added create ticket action after the create customer. So when I press the button, It asks for the name and once I hit enter it moves onto the menu screen like i want it, the only problem up ahead is it doesn’t carry the name over, what would i do for this?
BTW this is going down the correct path and I appreciate all the help so far
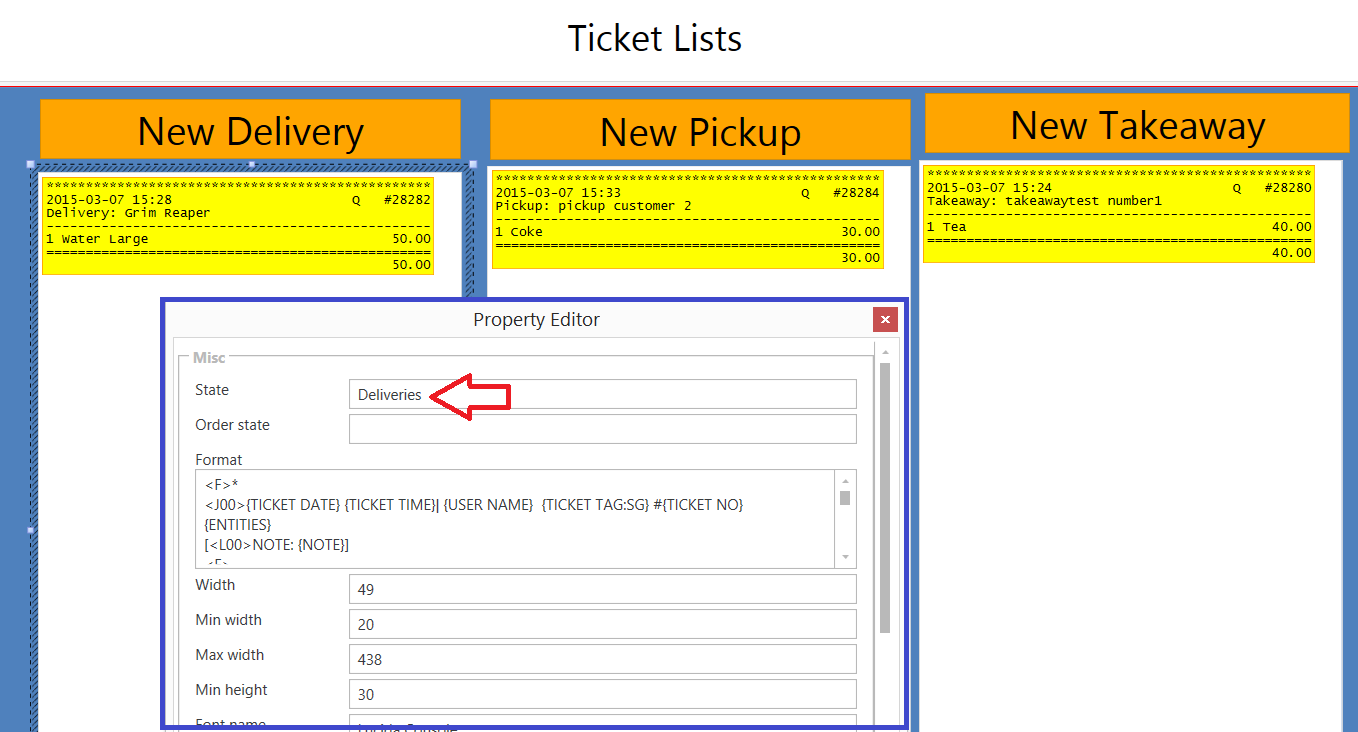
Perfect so far, One last thing before I head off to bed. How would I change Multiple items on the ticket. At the moment, when i create a ticket using this method, in the ticket explorer it shows the ticket as Restaurant. Where as with my older method of creating tickets it would list as Deliveries and Pickups. There a way to change this tag within our setup so far?
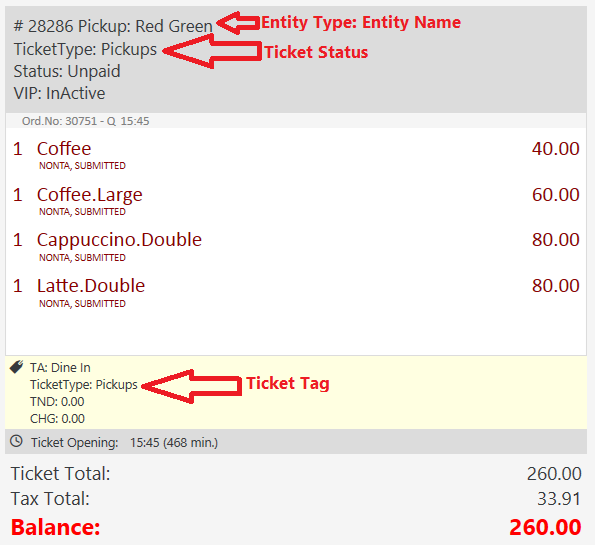
Also I want use the grid method for showing tickets instead of explorer. I know I need to unify the ticket type. But can I still add a tag somewhere to separate Pickups and Deliveries? As I need it for my printer templates.
Ticket Tags?
Order Tags?
Ticket States?
Order States?
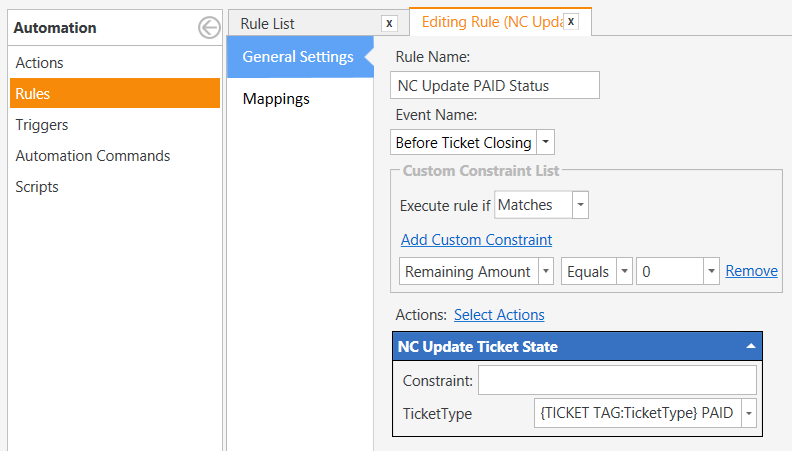
There are actions available for setting and/or changing these via Automation. It sounds like Order States could be the way to go for you, because Order States can be filtered on Ticket Lister Widgets and in Printing. But a Ticket State may work as well. It depends on how granular you need to be: Ticket Based or Oder Based?
You can have multiple Ticket Lister Widgets on the same screen, each filtered by Ticket Status if you want, and the Orders shown on those Tickets can be filtered on Order State via the Lister’s Template.
There is also an Action called Change Ticket Properties, and another one called Set Active Ticket Type, both of which lets you set the Ticket Type.
Yes, working with multiple Departments and Ticket Types can be cumbersome. You shouldn’t need to do it that way unless there is some specific reason to do so.
I’ve been using the Ticket Types to keep them Separate, So it needs a separate Entity screen to show either. I’m going to Unify them tomorrow and see what happens.
I think I did it this way because It shows Pickups and Deliveries separate on the Work Period Report. I would like to keep it that way.
Well Really what I want to do is separate Pickups and Deliveries within the grid, Say Picksups first then a separator then Deliveries or Different Colors. Since it allows us multiple grids, I figured we can attach different commands to each and have them display different results.
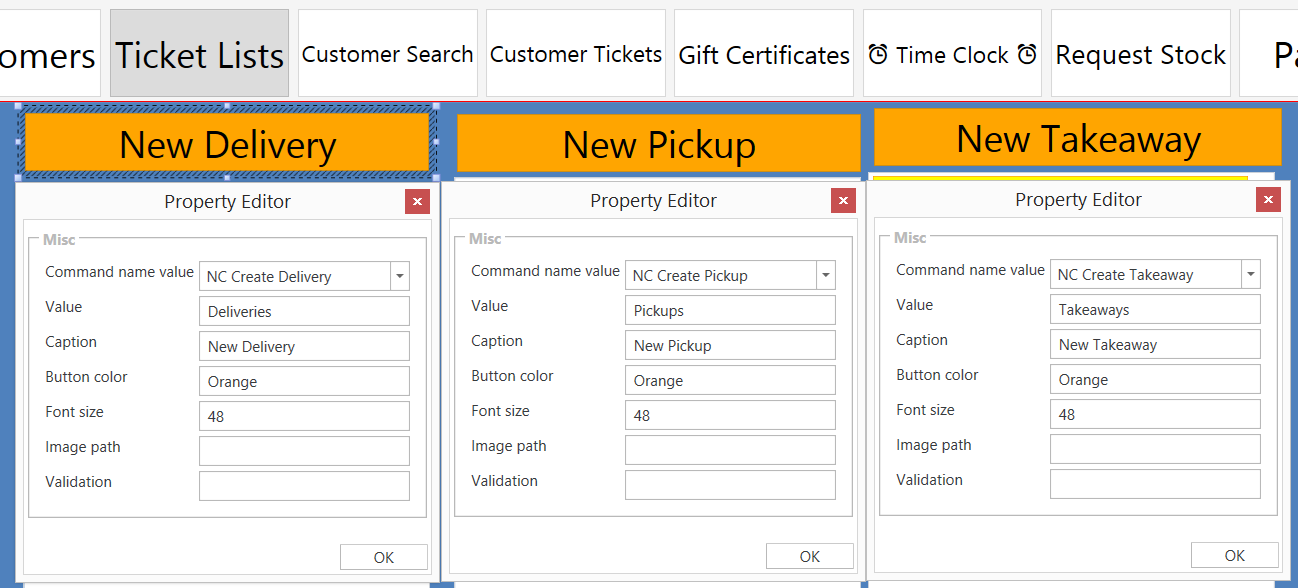
Okay So I want to make 3 of the Button we’ve created. One for Pickup, One for Delivery and One for Takeaway. When I click on the button and it asks for the name, I want it to attach a tag at the same time representing the button I pressed. Then I want to be able to print that tag within my templates.