Because the informations are scattered everywhere in the forum I decided to create a step by step tutorial.
-
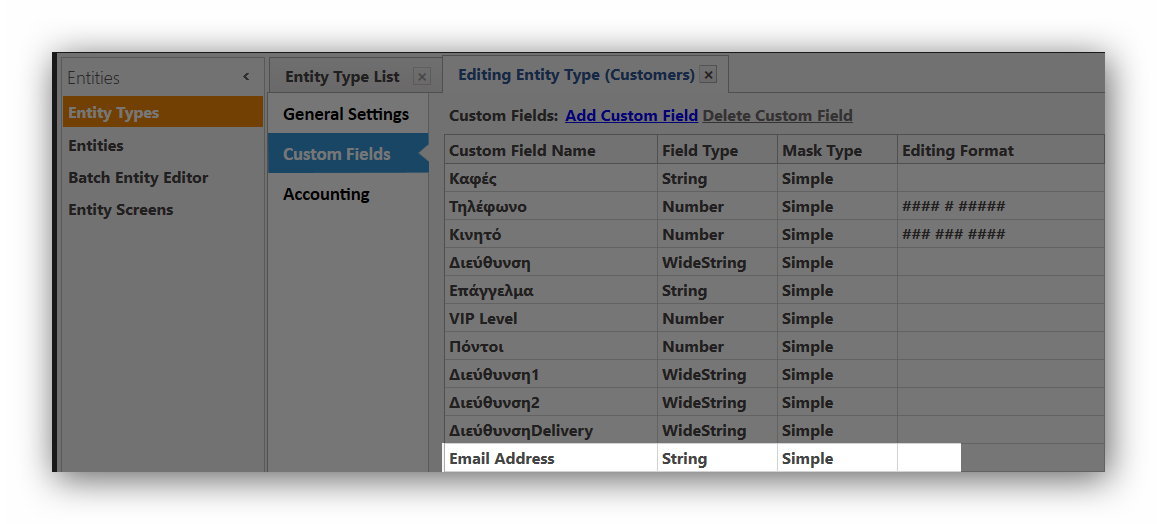
Create a custom field “Email Address” in your Customers Entity.
-
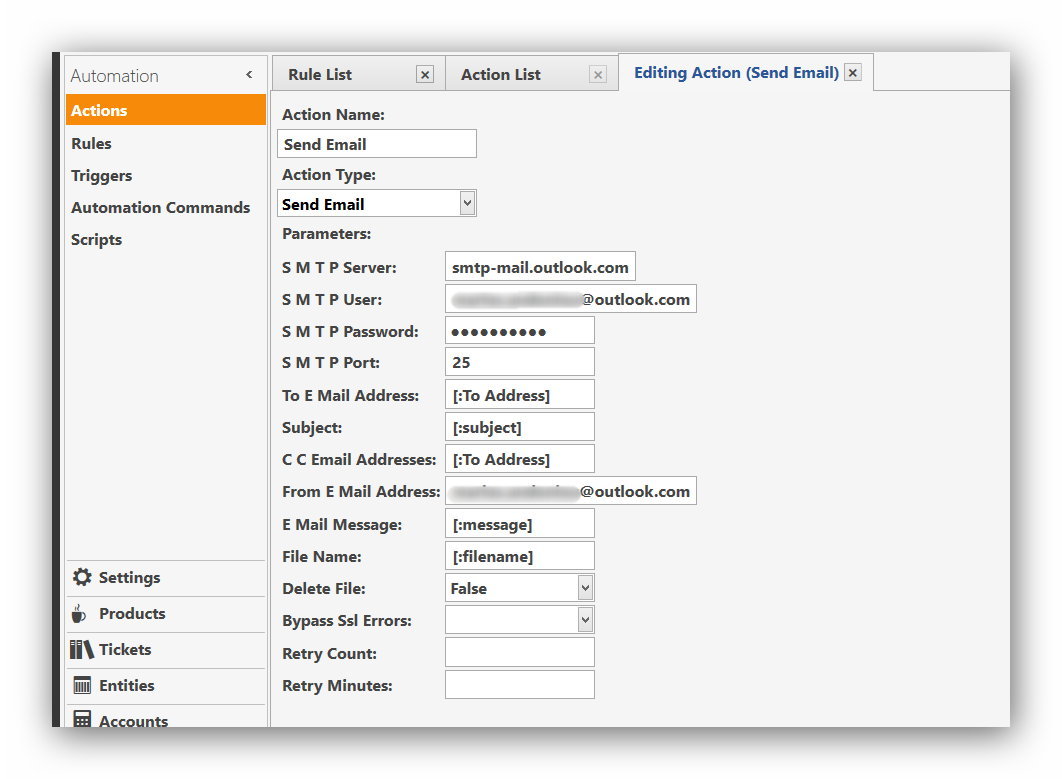
In Automation Menu create an Action with the following settings
Action Name:Send Email
Action Type:Send Email
Parameters:
S M T P Server: your email service SMTP Server
S M T P User: your email username (usualy is your email)
S M T P Password: your email password
S M T P Port: your email service Port
To E Mail Address: [:To Address]
Subject: [:subject]
C C Email Addresses: [:To Address]
From E Mail Address:
E Mail Message: [:message]
File Name: [:filename] (filaname is used to send attachment files read below)
Delete File:
Bypass Ssl Errors:
Retry Count:
Retry Minutes:
I don’t recommend Gmail because it has very restricted security settings, but Outlook is working fine using this settings, or if you own domain name/hosting even better.S M T P Server: smtp-mail.outlook.com
S M T P User: youremail
S M T P Password: yourpassword
S M T P Port: 25
To E Mail Address:
Subject:
C C Email Addresses:
From E Mail Address:
E Mail Message:
File Name:
Delete File:
Bypass Ssl Errors: False
Retry Count:
Retry Minutes: -
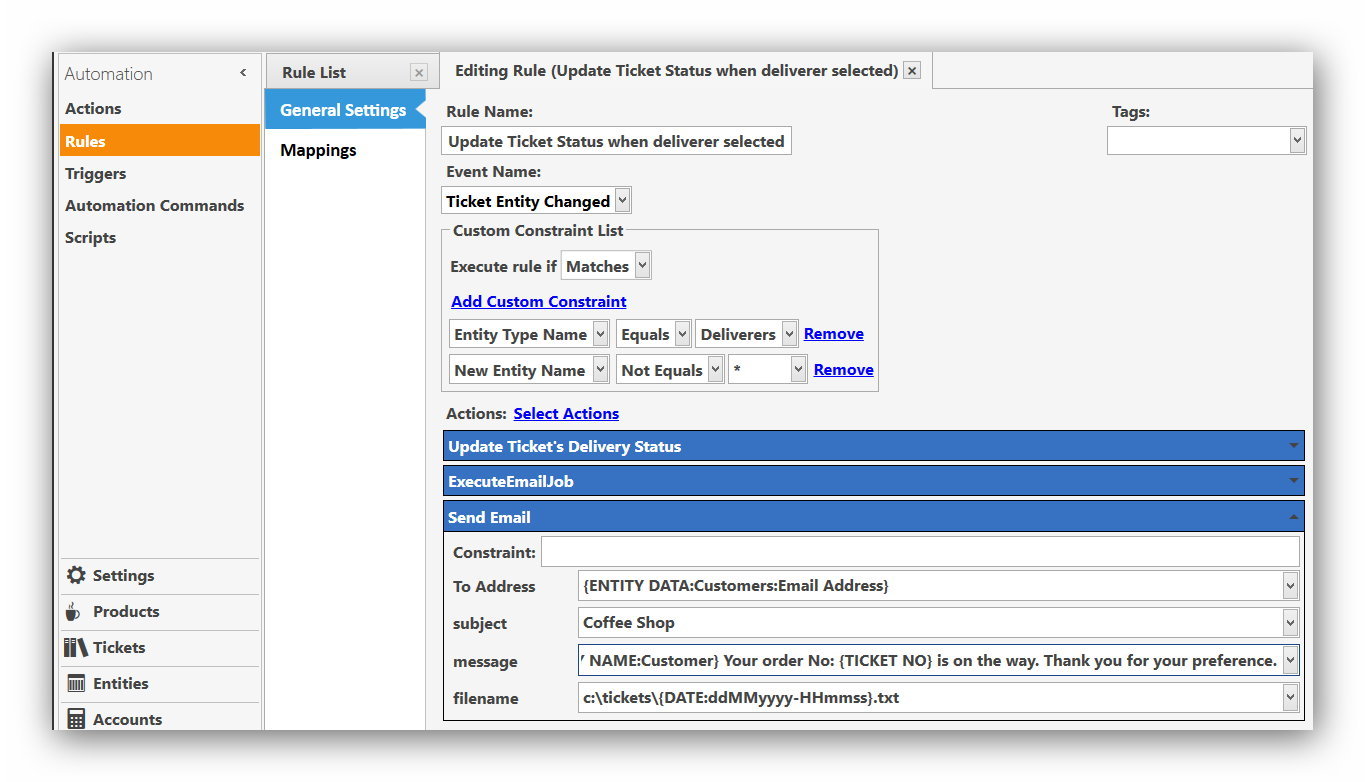
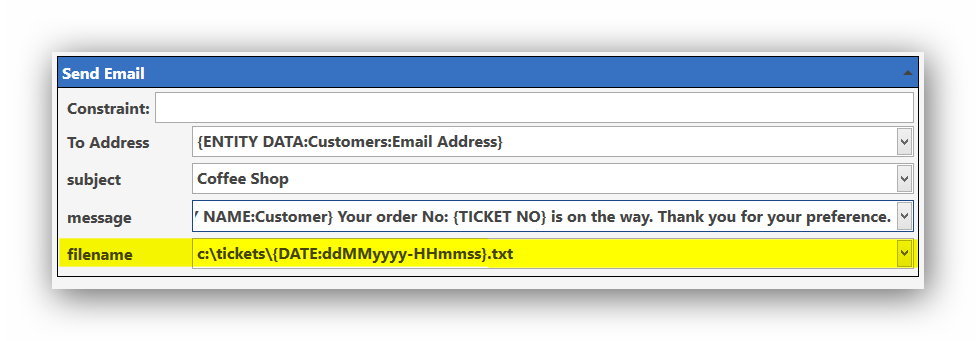
You implemment the action in the rule you want to execute (i used it for sending email to Delivery Customers as soon as their order is ready).
Constraint:
To Address: {ENTITY DATA:Customers:Emai| Address}
subject: what ever you want for subject
message: Your message (REMEMBER: Email message body does not support multiple lines)
filename: attach files to email (read below)
If you want to send attachment with you email do the following steps:
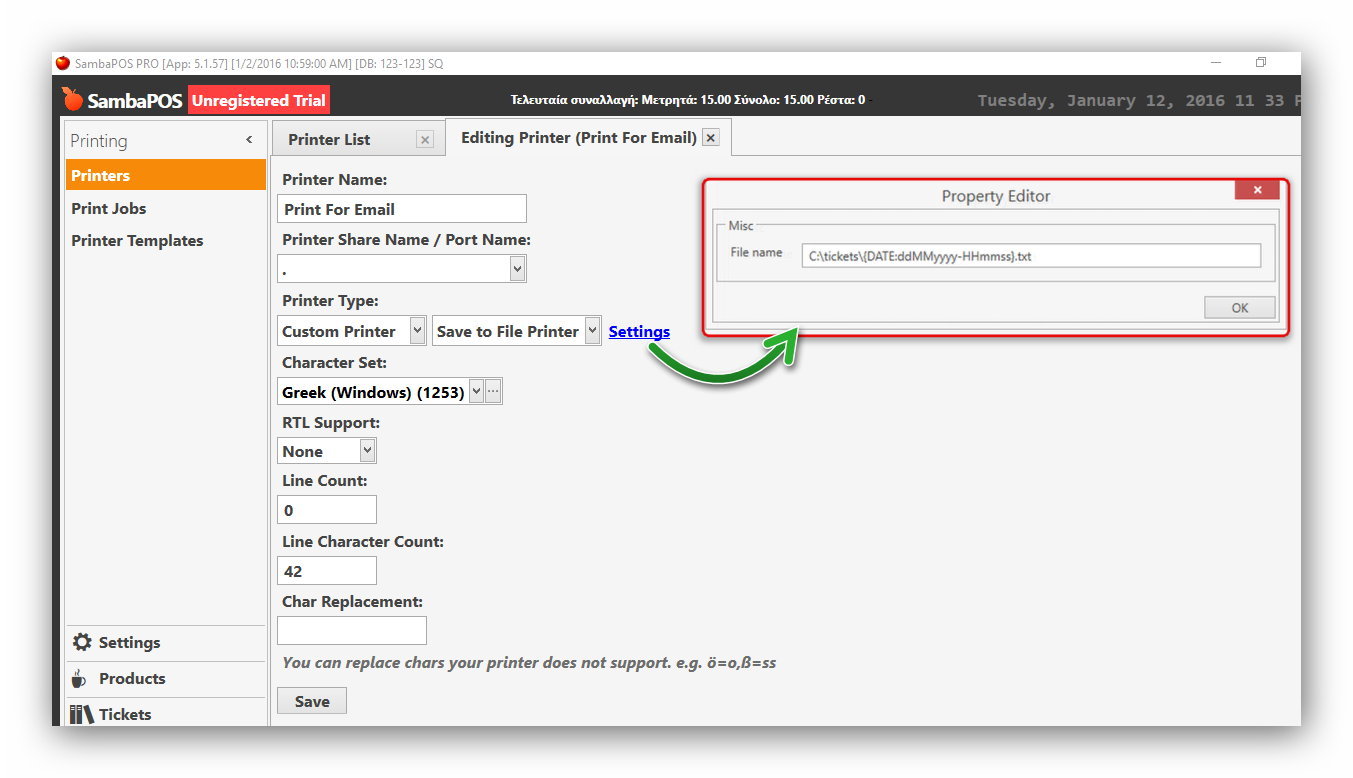
a) In Printing menu add a printer with settings:
Printer Name:Print For Email
Printer Share Name / Port Name: .
Printer Type: Custom Printer -  Save to File Printer
Character Set:
RTL Support:None
Line Count:O
Line Character Count:42
In settings menu you must add the path that txt files are stored. You must have already create the folder /s
b) Create a ticket template
I use a simple one just for customers quick information
[LAYOUT]
-- General layout
<T>Coffee Shop
<C>***
<C>Date: [=FD(ADD('{TICKET DATE}',0),'dd/MM/yyyy')]
<C>Time: [=FD(ADD('{TIME}',0),'HH:mm')]|
{ENTITIES}
<C>Order #:{TICKET NO}  {TICKET TAG:SG}
<L00>{TICKET STATE:Status}
{ORDERS}
<F>=
<EB>
<J00>      Thank You
<CUT>
[DISCOUNTS]
<J00>{CALCULATION NAME} {CALCULATION AMOUNT}% |{CALCULATION TOTAL} €
[PAYMENTS]
[<J00>Change: |{CHANGE TOTAL} €]
<J00>{DESCRIPTION}
[ORDERS]
-- Default format for order
<J00>{QUANTITY} {NAME} ({PRICE TAG})|{TOTAL PRICE}
{ORDER TAGS}
[ORDERS:Gift]
-- Format for gifted orders
<J00>- {QUANTITY} {NAME}|**GIFT**
{ORDER TAGS}
[ORDERS:Void]
-- Nothing will print for void lines
[ORDER TAGS]
-- Format for order tags
<J00> * {ORDER TAG NAME} | {ORDER TAG PRICE} €
[ENTITIES:Table]
-- Table entity format
<L00>Table: {ENTITY NAME}
[ENTITIES:Customer]
-- Customer entity format
<J00>Customer: {ENTITY NAME}
[<J00>Tel:{ENTITY DATA:Telephone} | Mobile:{ENTITY DATA:Mobile}]
[<J00>Address:{ENTITY DATA:DeliveryAddress}]
<L>
<EB>
[<C00>Points: {ENTITY DATA:Points}]
[<C00>Account Balance: [=F(0-TN('{ENTITY BALANCE}'))] €]
<DB>
<L>
[TAXES]
<J00>{TAX NAME}|{TAX AMOUNT} €
[ENTITIES:Gift Certificate]
<C00>Card: {ENTITY NAME}
<C00>Balance: [=F(0-TN('{ENTITY BALANCE}'))] €
<L>
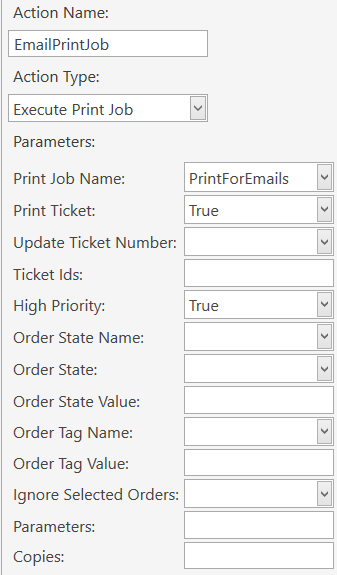
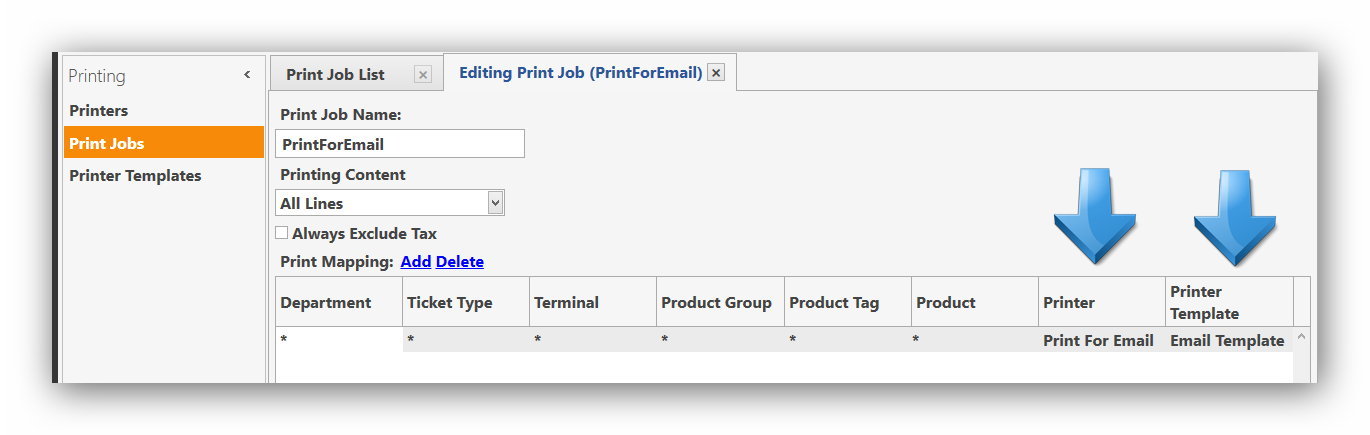
c) Add a print Job
d)Next go to the Rule and add the txt file path to filename
I hope this tutorial will help you …