QMcKay
September 7, 2015, 11:04pm
1
You need this (which is mentioned in V5 Feature Compilation topic) …
{REPORT INVENTORY:<inventory item name>:<warehouse name>}
This Report tag added to read specific inventory item’s inventory level. Other than reporting we can use this tag to display inventory level on specific menu item buttons or test specific inventory levels on the fly
IMPORTANT : Inventory level calculation needs processing of all tickets and all inventory transactions created in current work period (for each inventory item). So to avoid unnecessary network traffic try to use this feature for few menu items that really have mission critical meaning.
NOTE : Inventory Level calculation is approximate
Product Name is the same as your Inventory Name
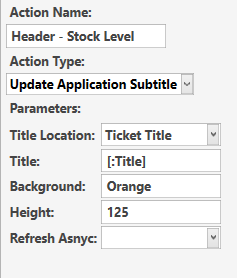
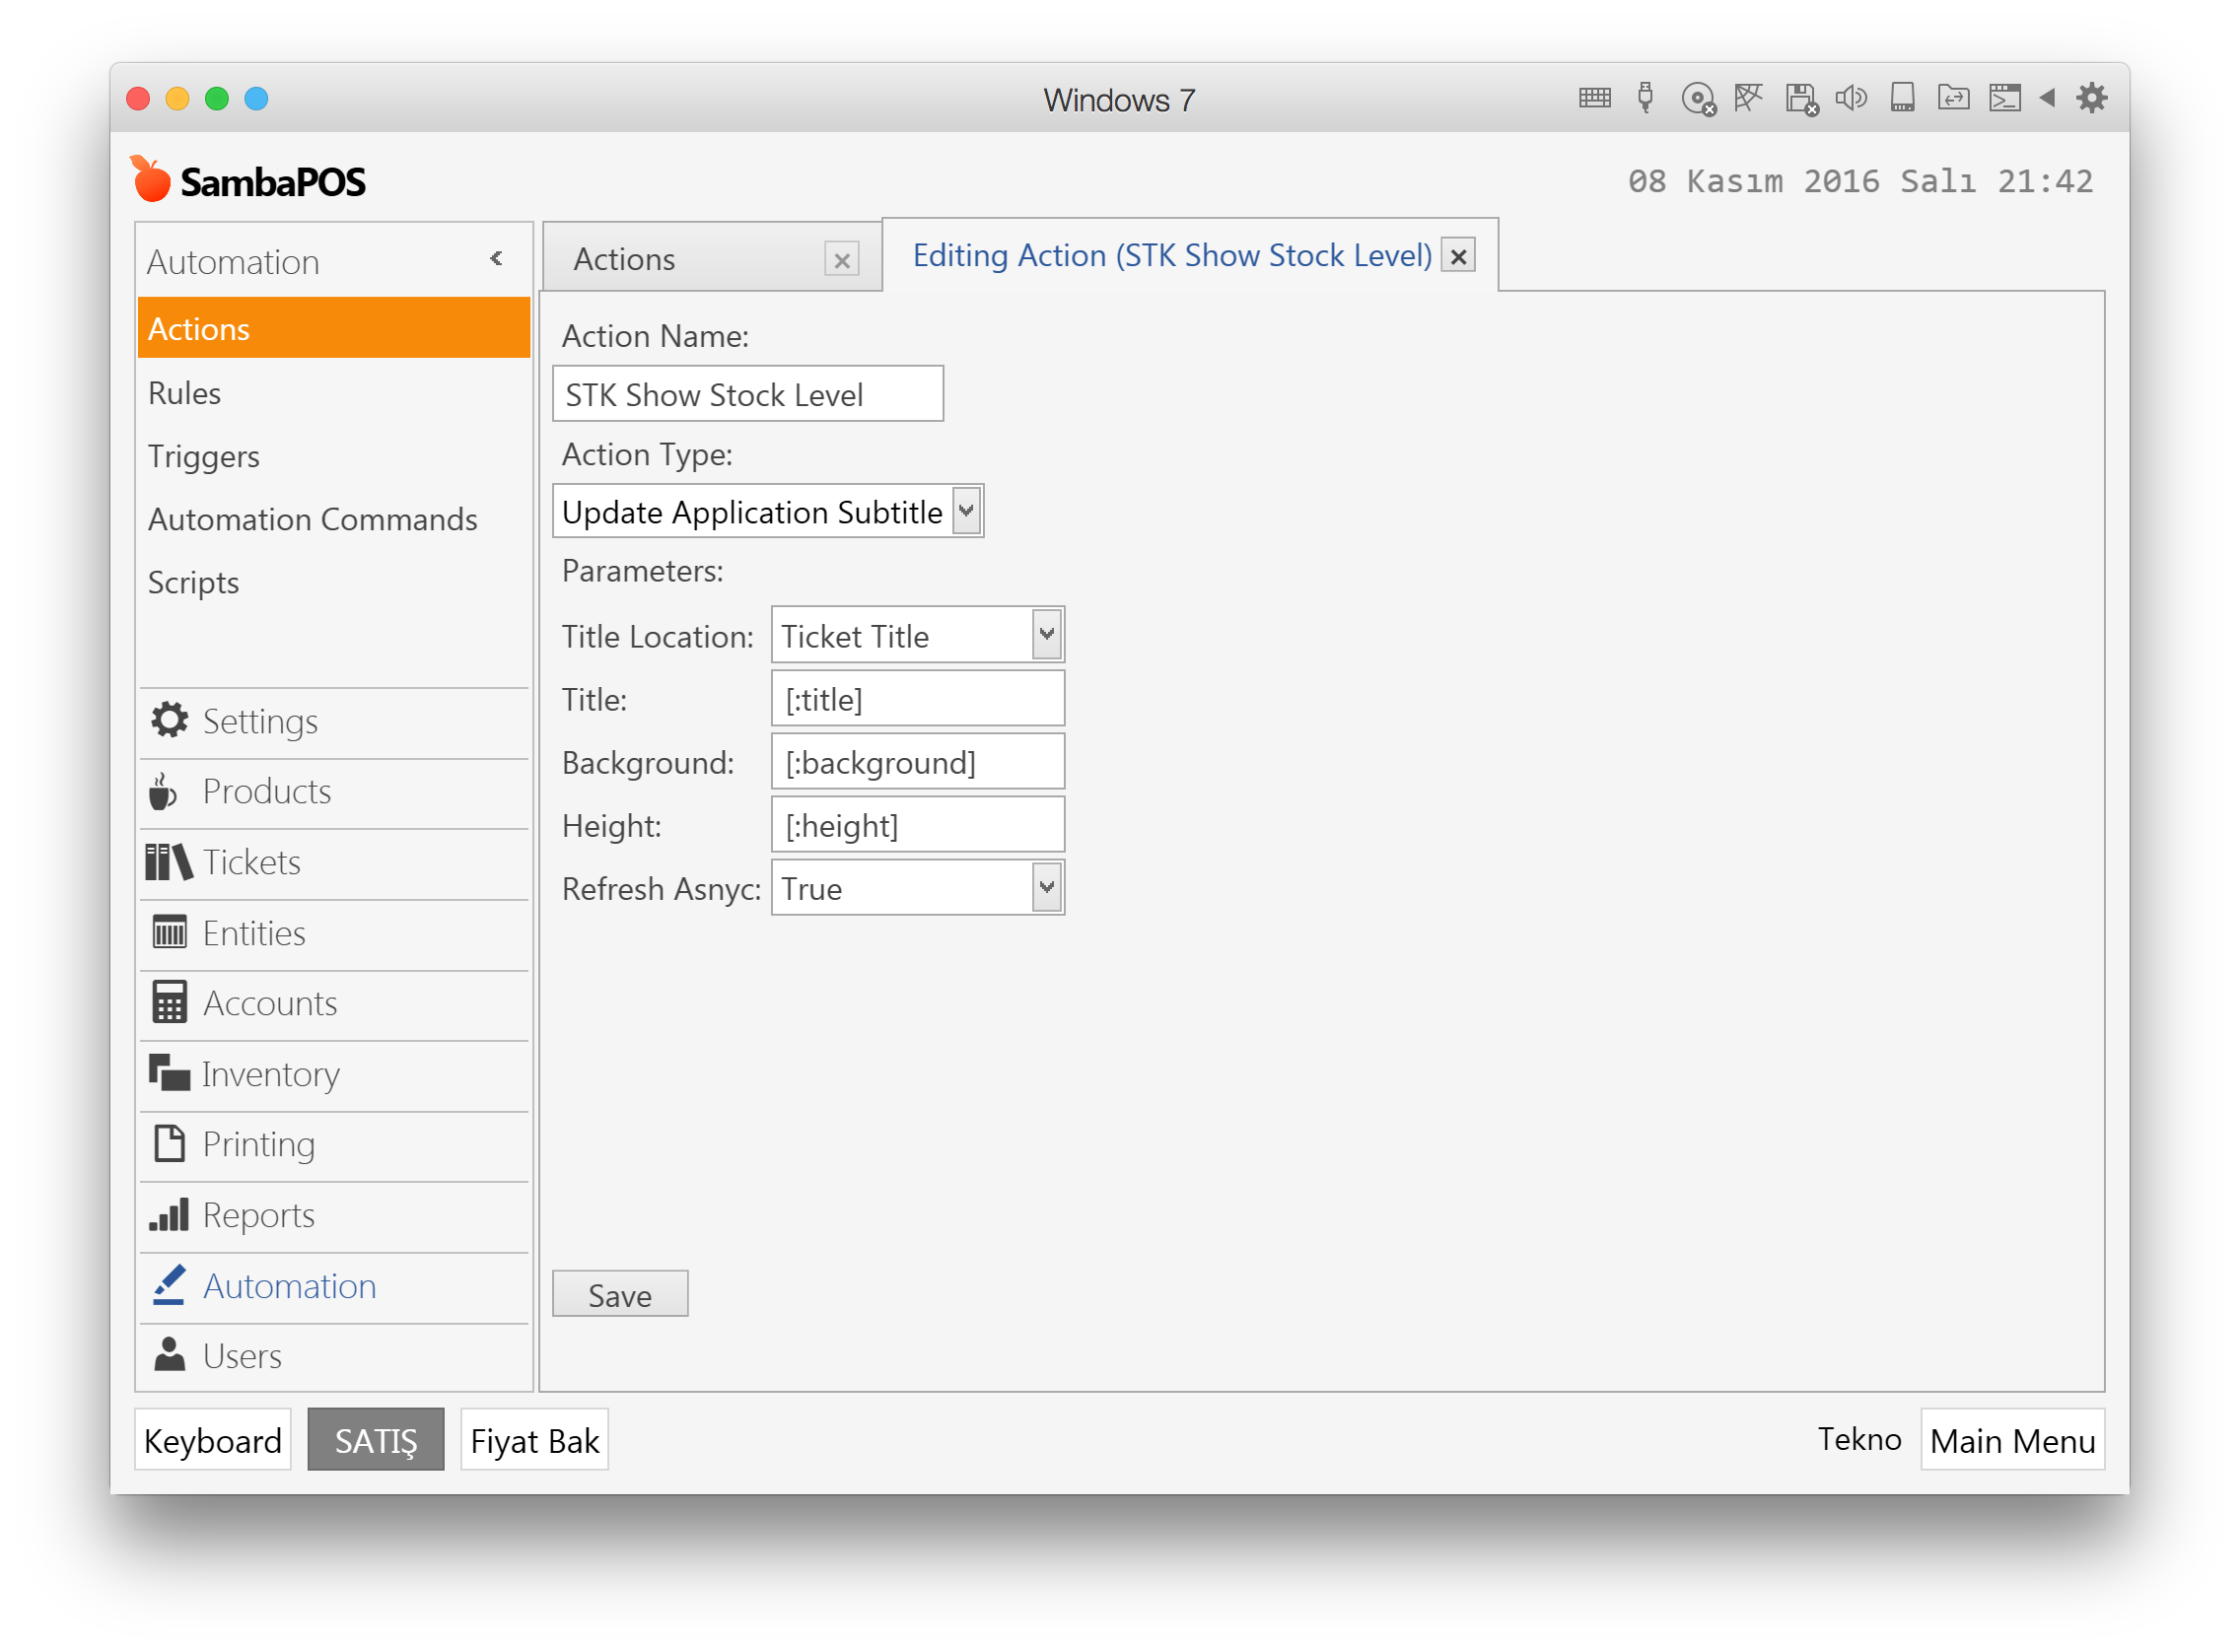
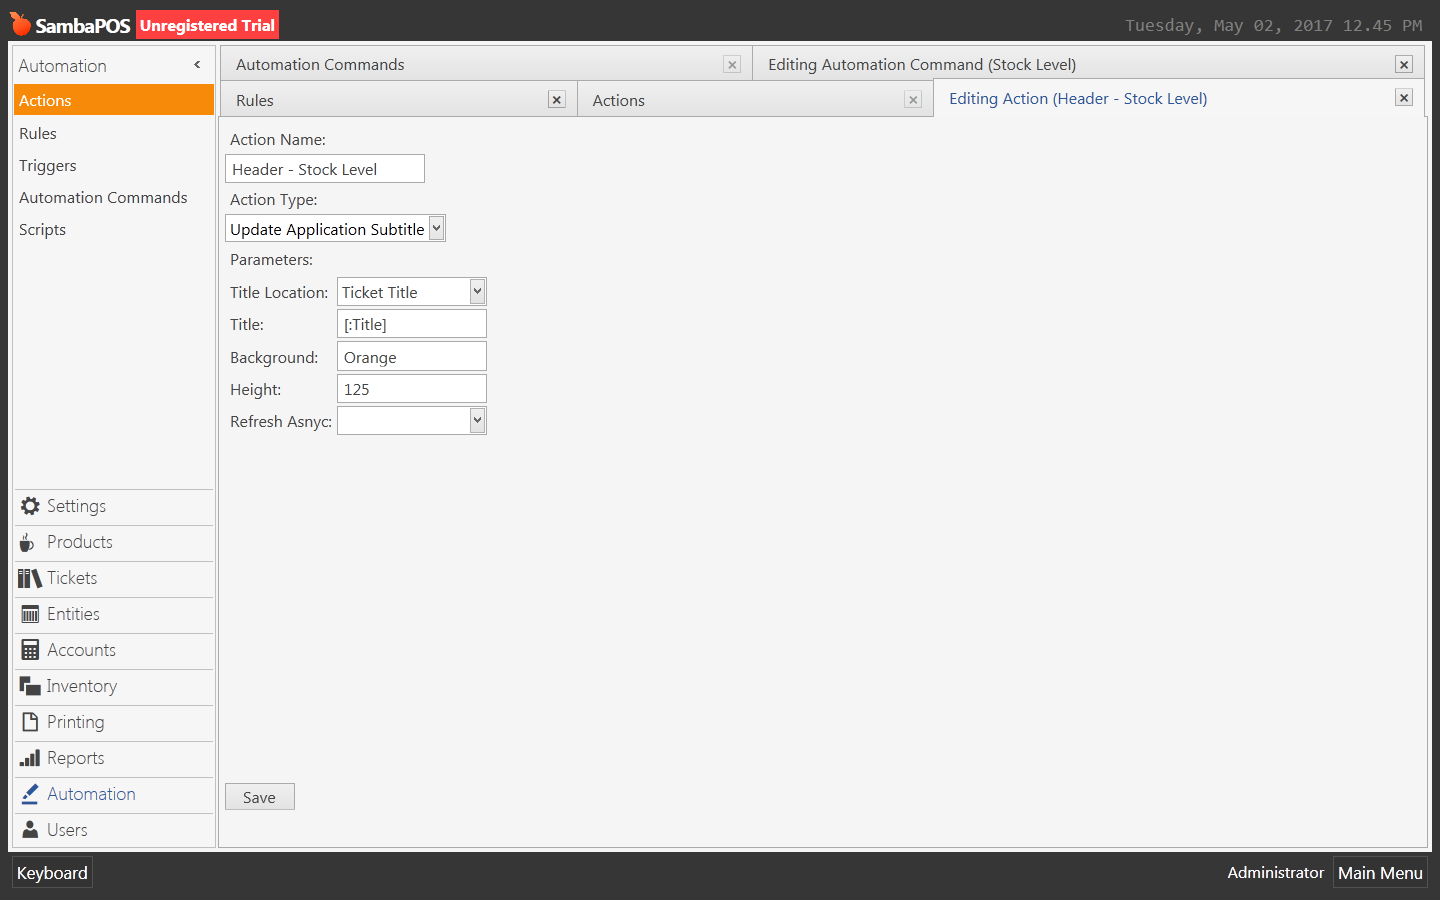
###Action - Update Application Subtitle
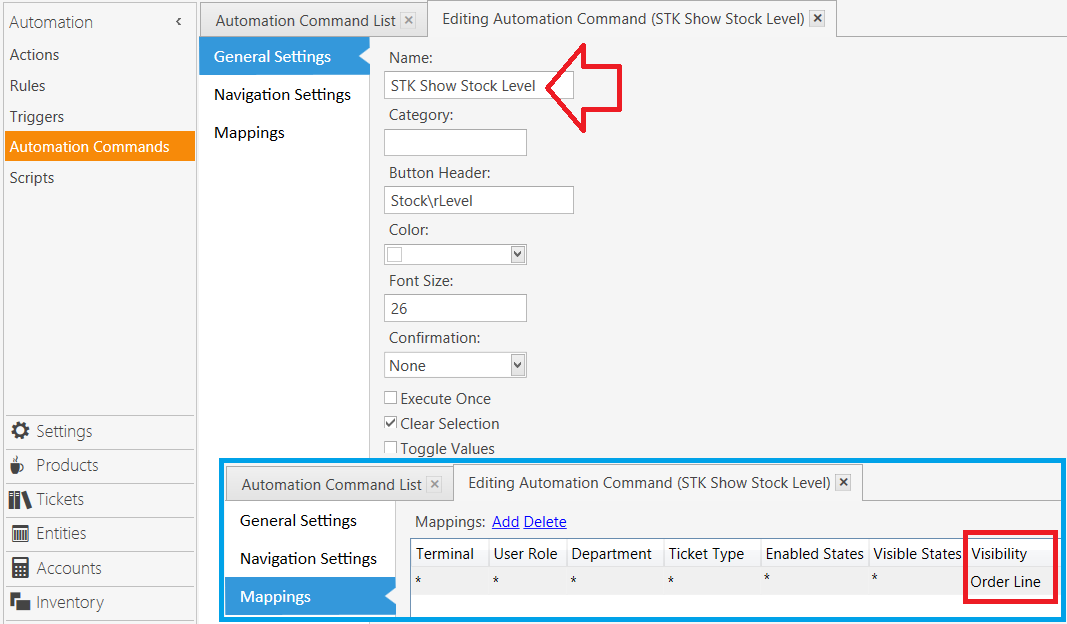
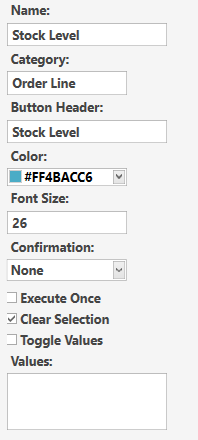
###Automation Command for Stock Level button
Map the Automation Command to Order Line
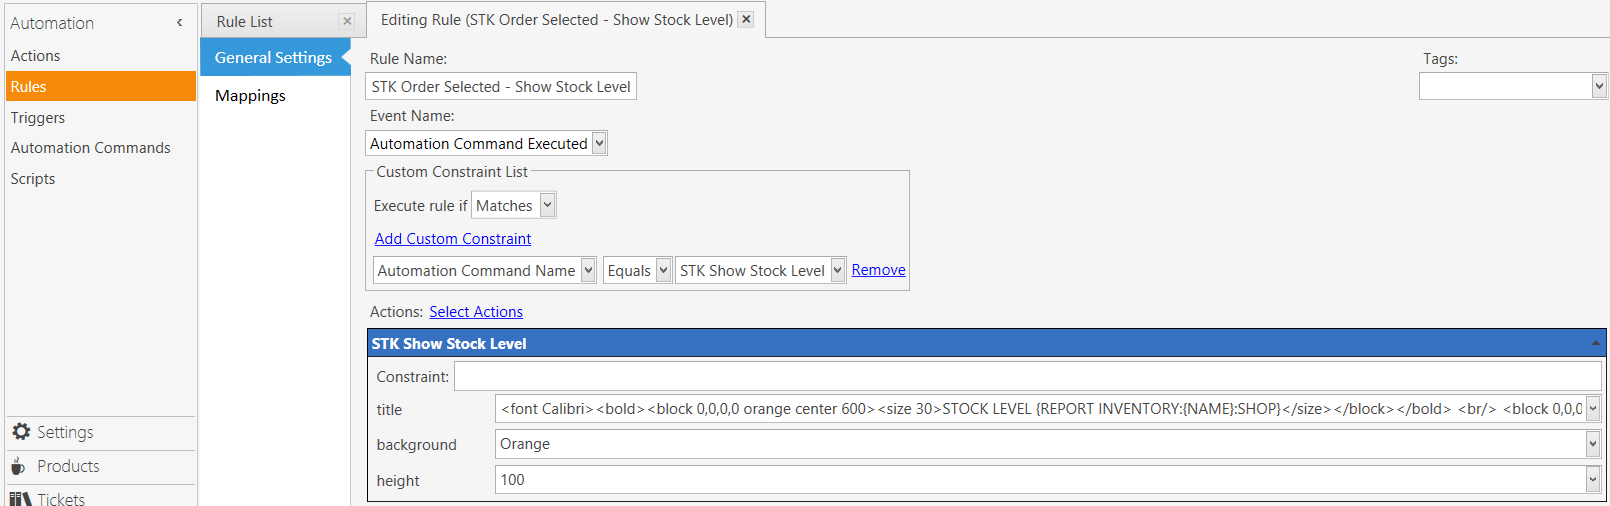
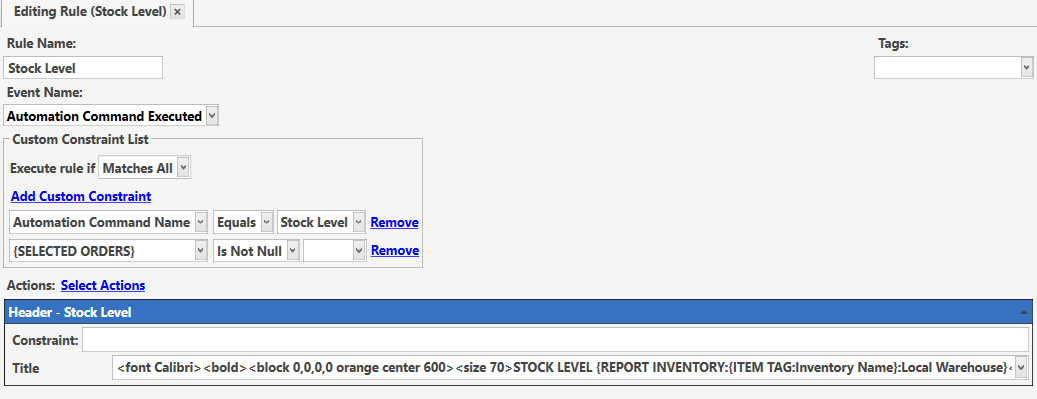
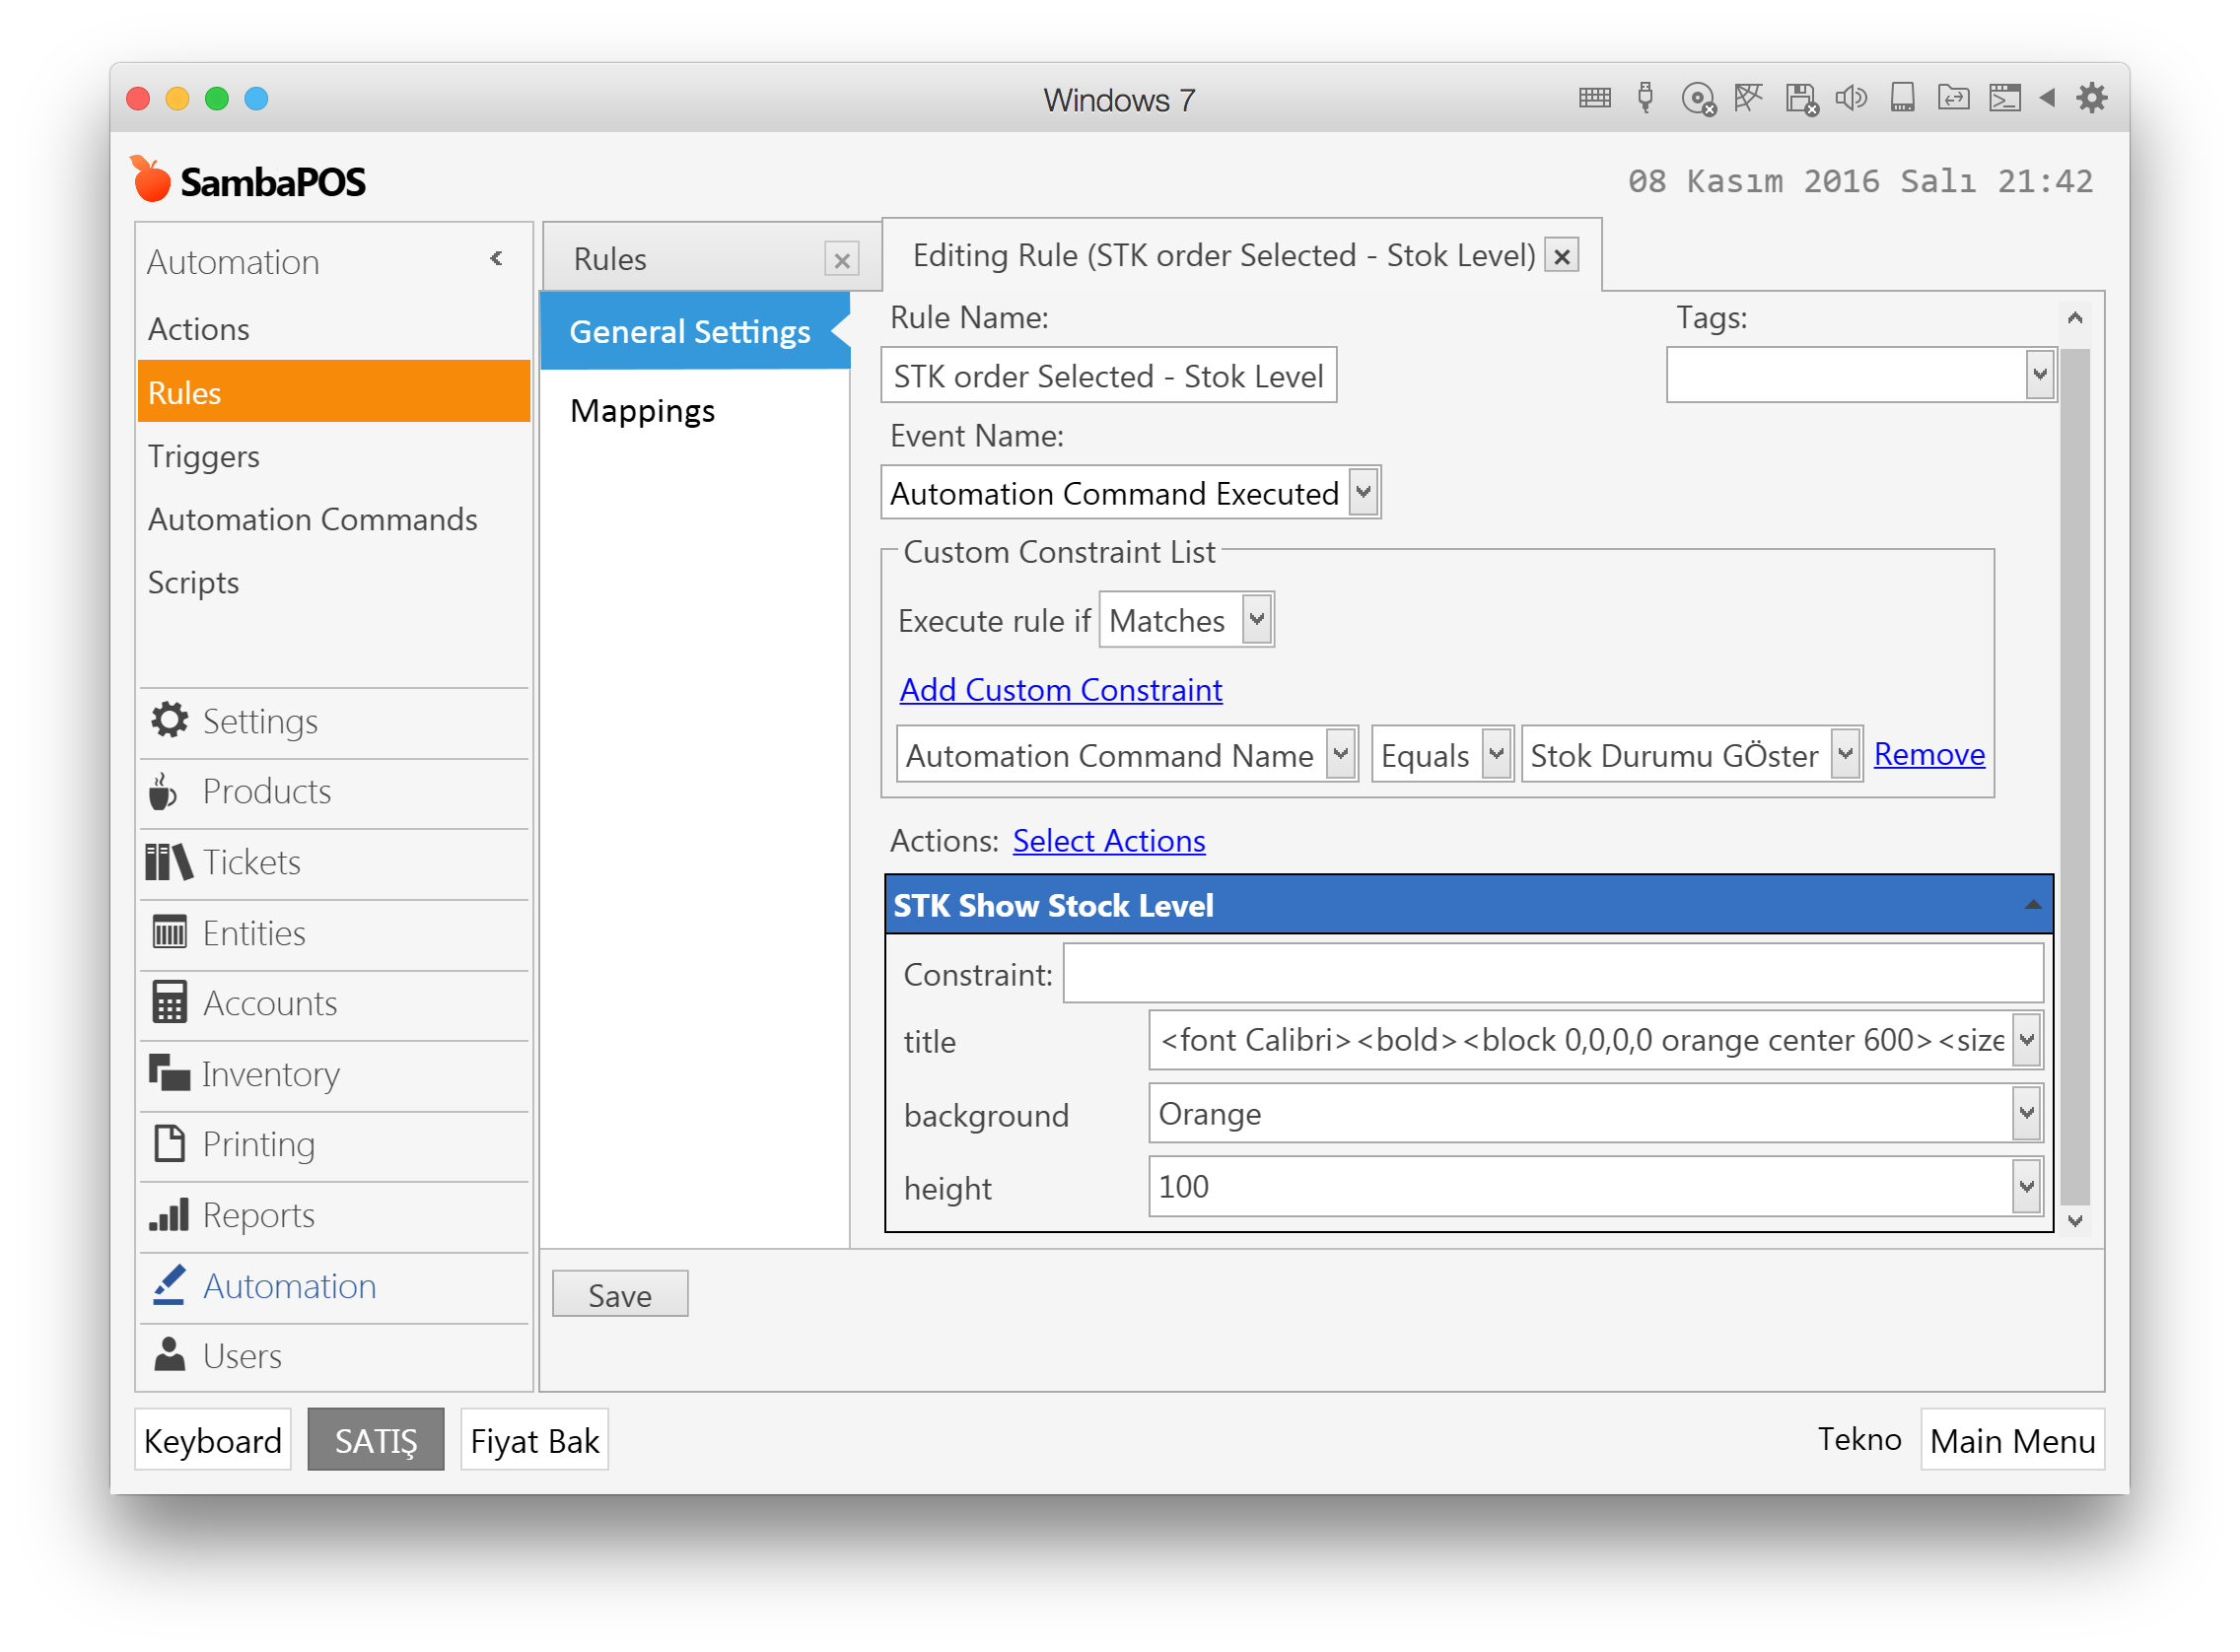
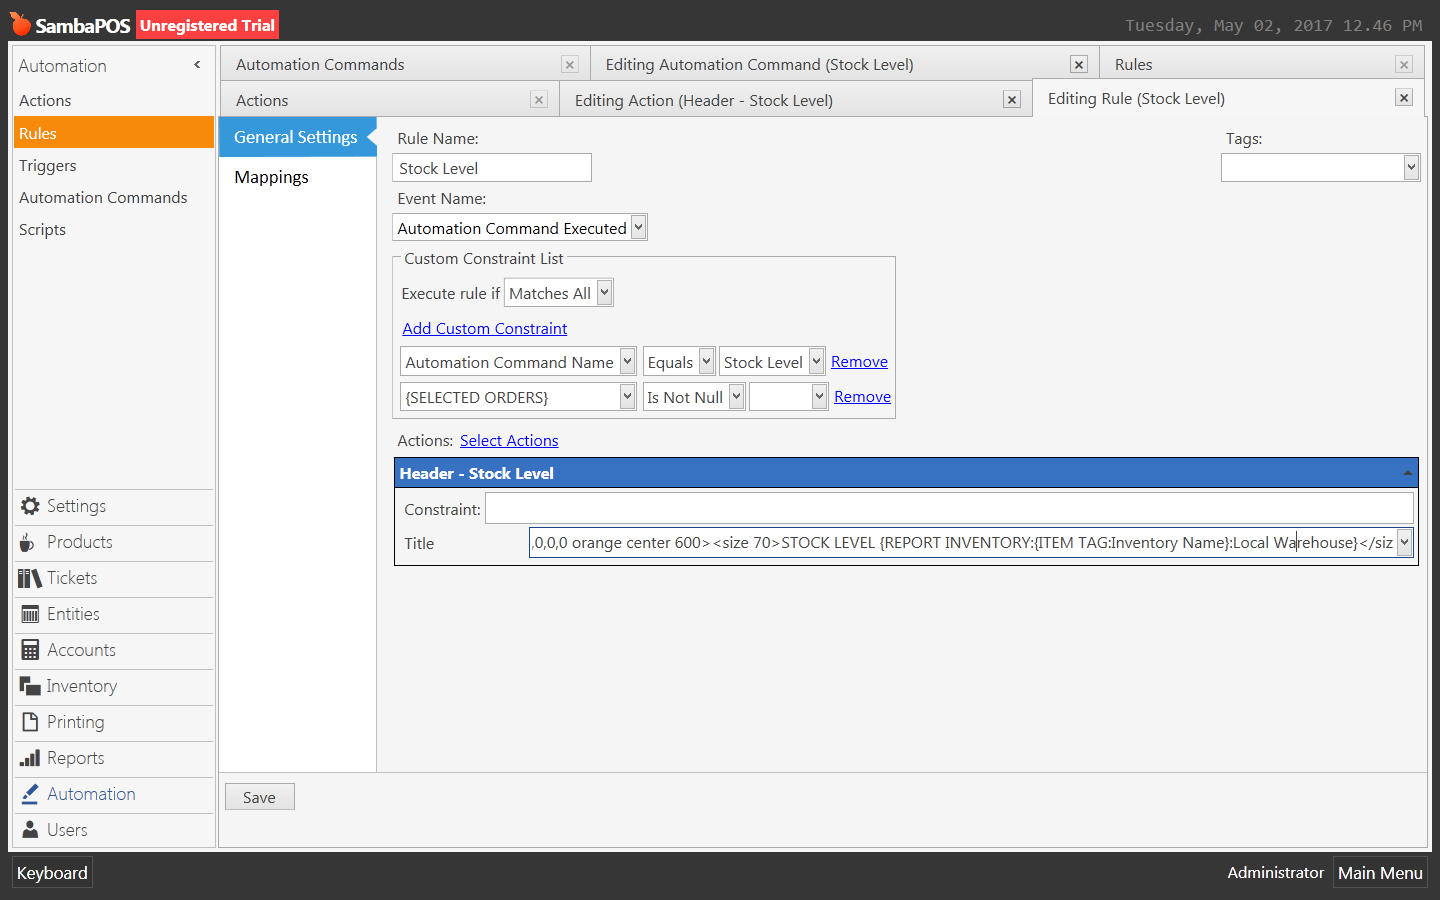
###Rule - Handle Automation Command
Code for Title
Product Name is the same as your Inventory Name
<font Calibri><bold><block 0,0,0,0 orange center 600><size 30>STOCK LEVEL {REPORT INVENTORY:{NAME}:Local Warehouse}</size></block></bold> <br/> <block 0,0,0,0 orange center 600><size 30>{NAME}</size></block>
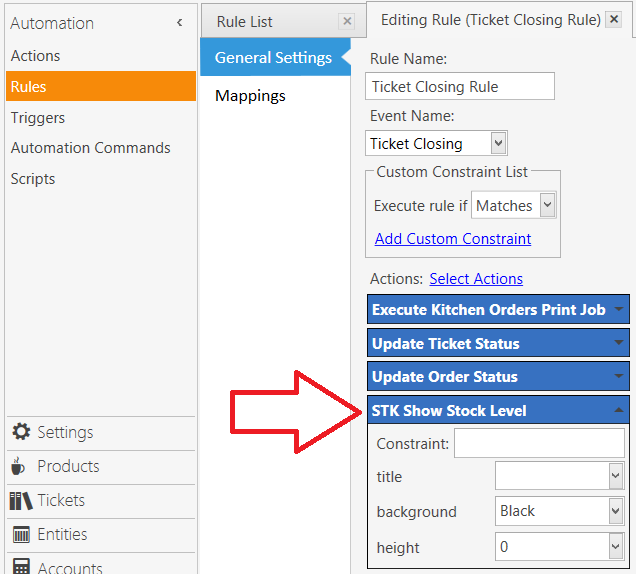
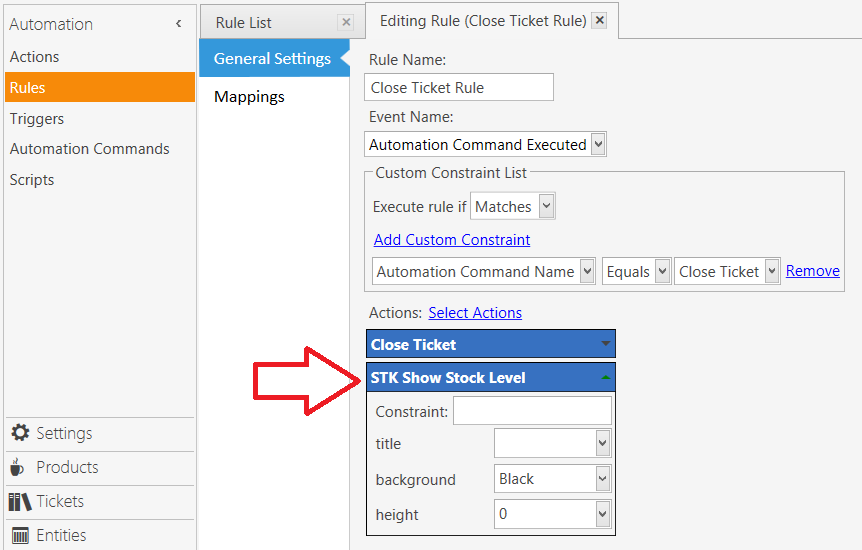
###Reset the Ticket Header when Ticket Closes …
2 Likes
RickH
September 7, 2015, 11:08pm
2
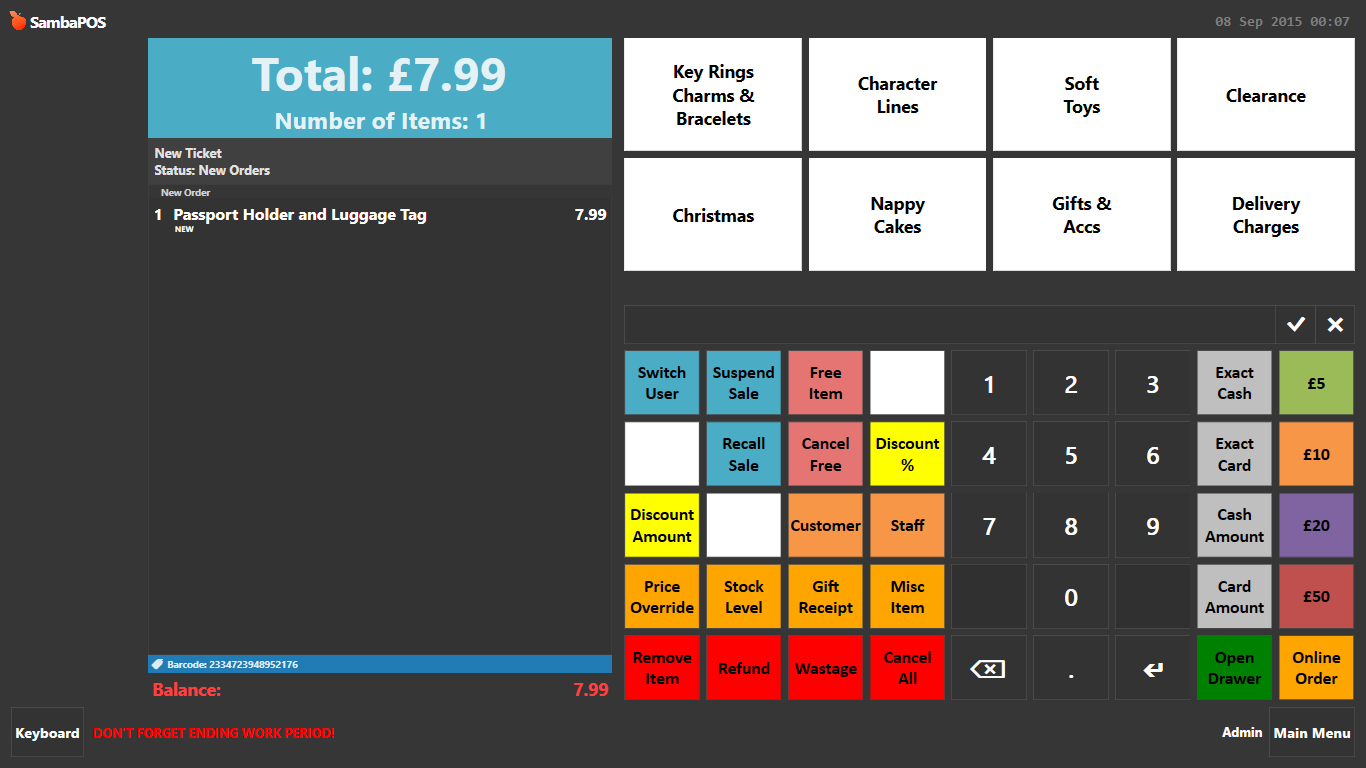
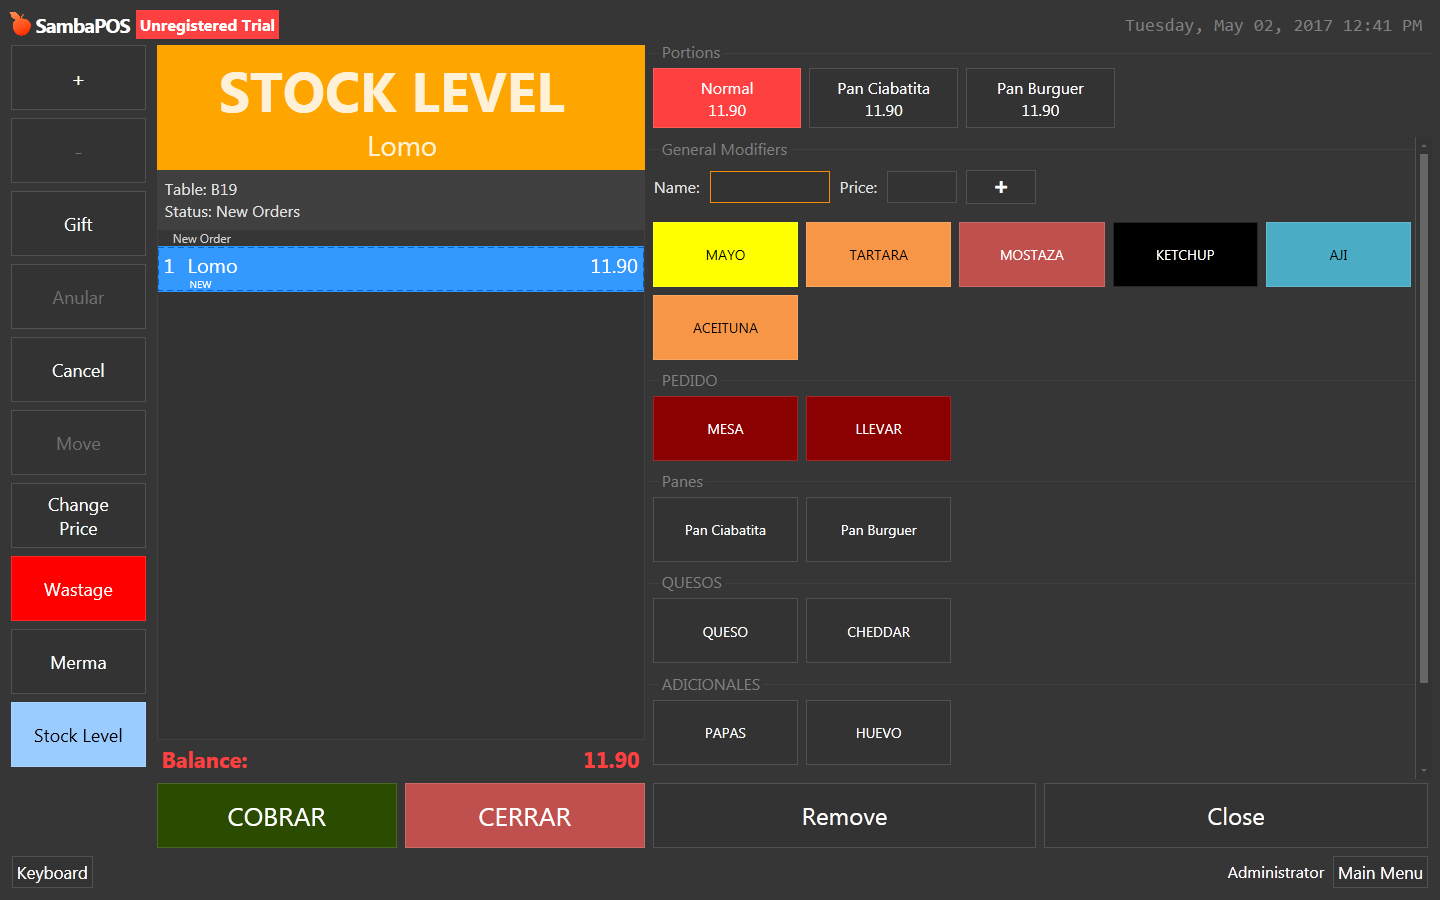
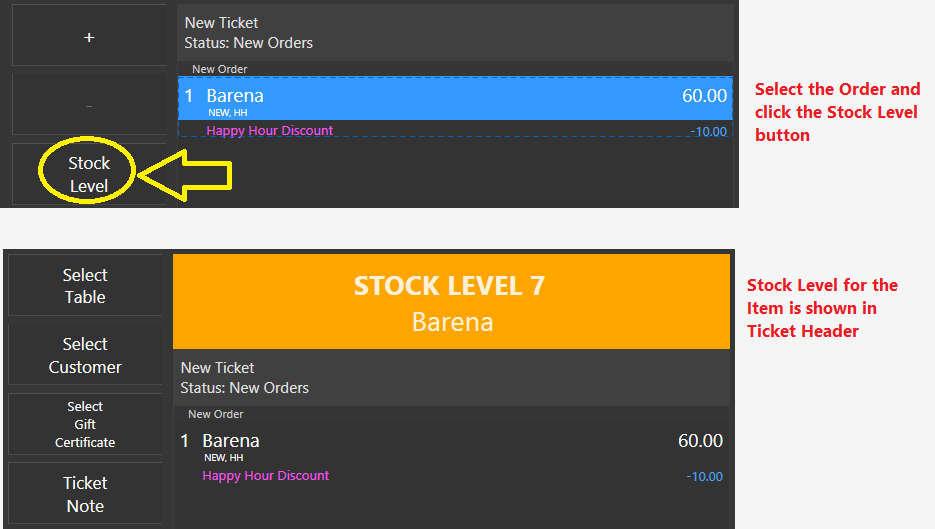
add order to ticket
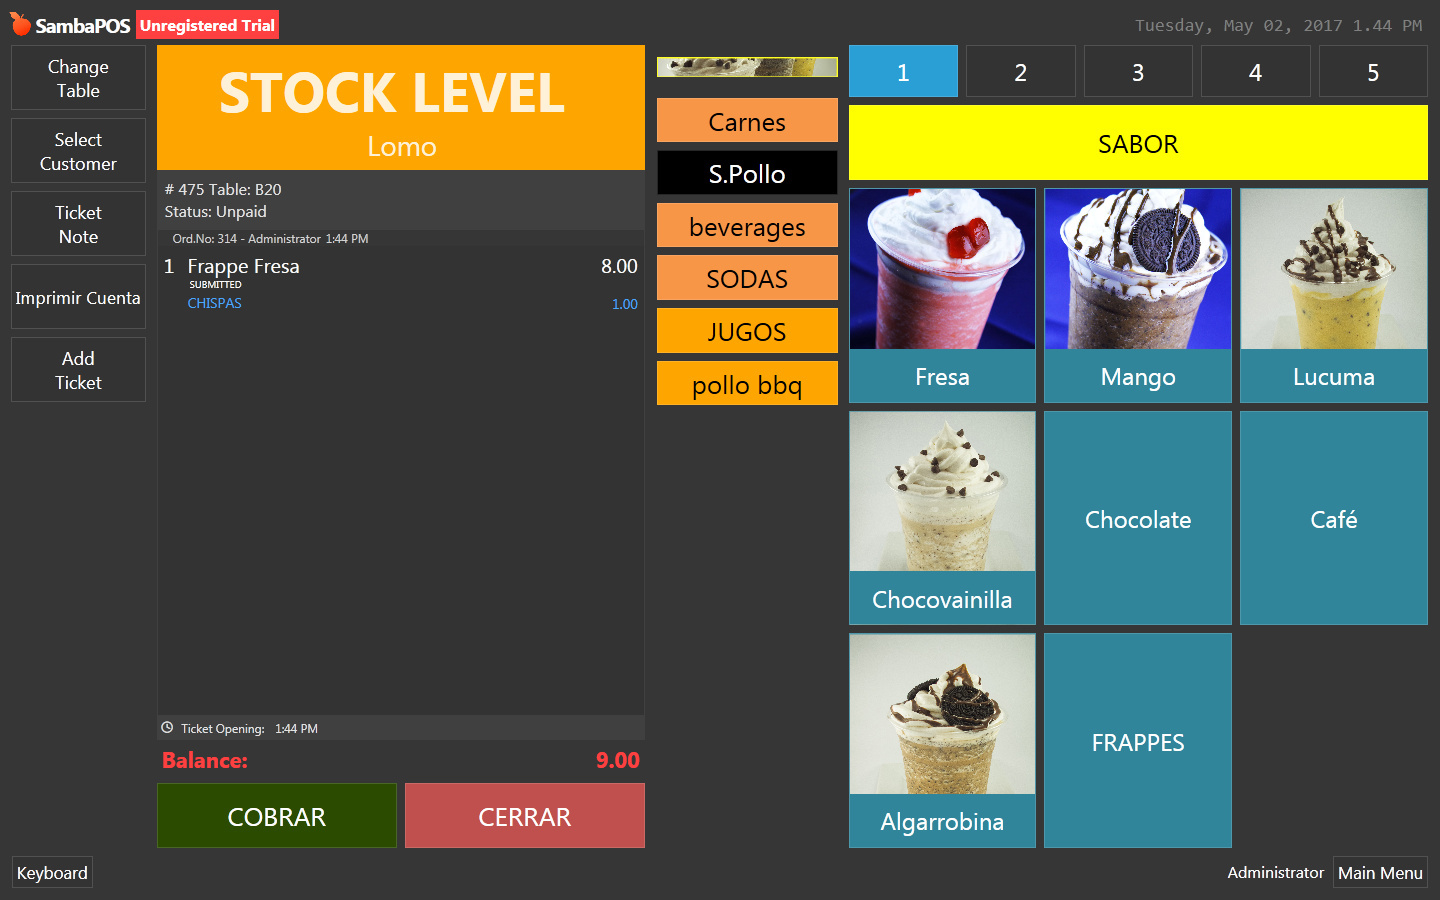
select order
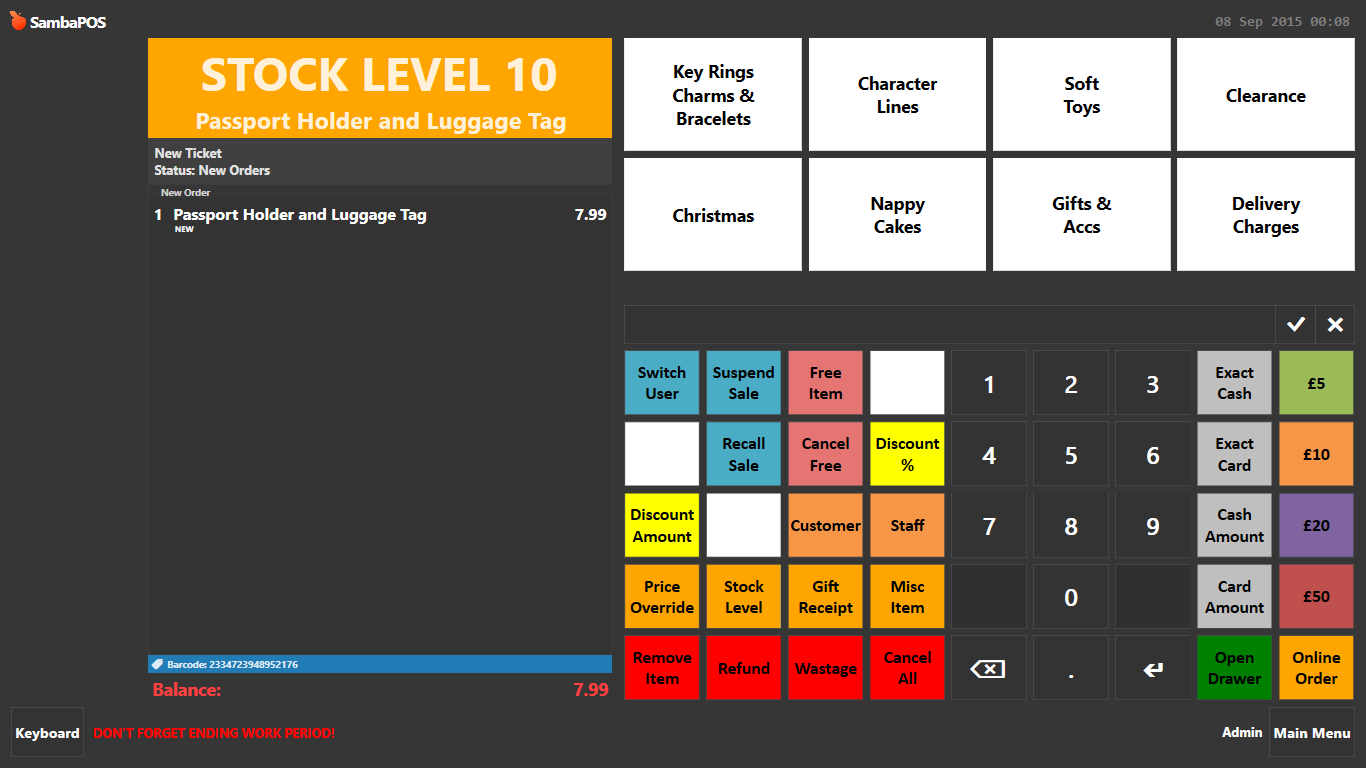
press stock level button to display quantity and product name in ticket header
1 Like
RickH
September 7, 2015, 11:13pm
3
create auto command button
create update application subtitle action
create auto command executed rule
My title formatting
<font Calibri><bold><block 0,0,0,0 orange center 600><size 70>STOCK LEVEL {REPORT INVENTORY:{ITEM TAG:Inventory Name}:Local Warehouse}</size></block></bold> <br/> <block 0,0,0,0 orange center 600><size 35>{NAME}</size></block>
3 Likes
RickH
September 7, 2015, 11:14pm
4
instead of using the ticket header you could simply use a display message action or ask question action to display the stock level information in a ‘pop up’ box that you can close
1 Like
spanky
September 8, 2015, 10:51am
5
Great! very simple!
emre
September 8, 2015, 11:57am
6
@spanky you can find more information about that on SQL Server forums but I won’t recommend it as there is a high chance to have performance and stability issues.
<block 0,0,0,0 orange center 600><size 30>STOCK LEVEL {REPORT INVENTORY:{NAME}:Local Warehouse}
My Show Message Command is not reading this correctly and is displaying exactly like this.
RickH
August 24, 2016, 6:53pm
8
Can you show screen shots of where youre using it, actions and rules
Also did you change you warehouse name from local warehouse?
1 Like
Not Work
code
<block 0,0,0,0 orange center 600><size 30>{REPORT INVENTORY:{NAME}:Local Warehouse}
How can i add Blue Header Total / nbr Item ?
Thanks
emre
November 12, 2016, 2:33pm
11
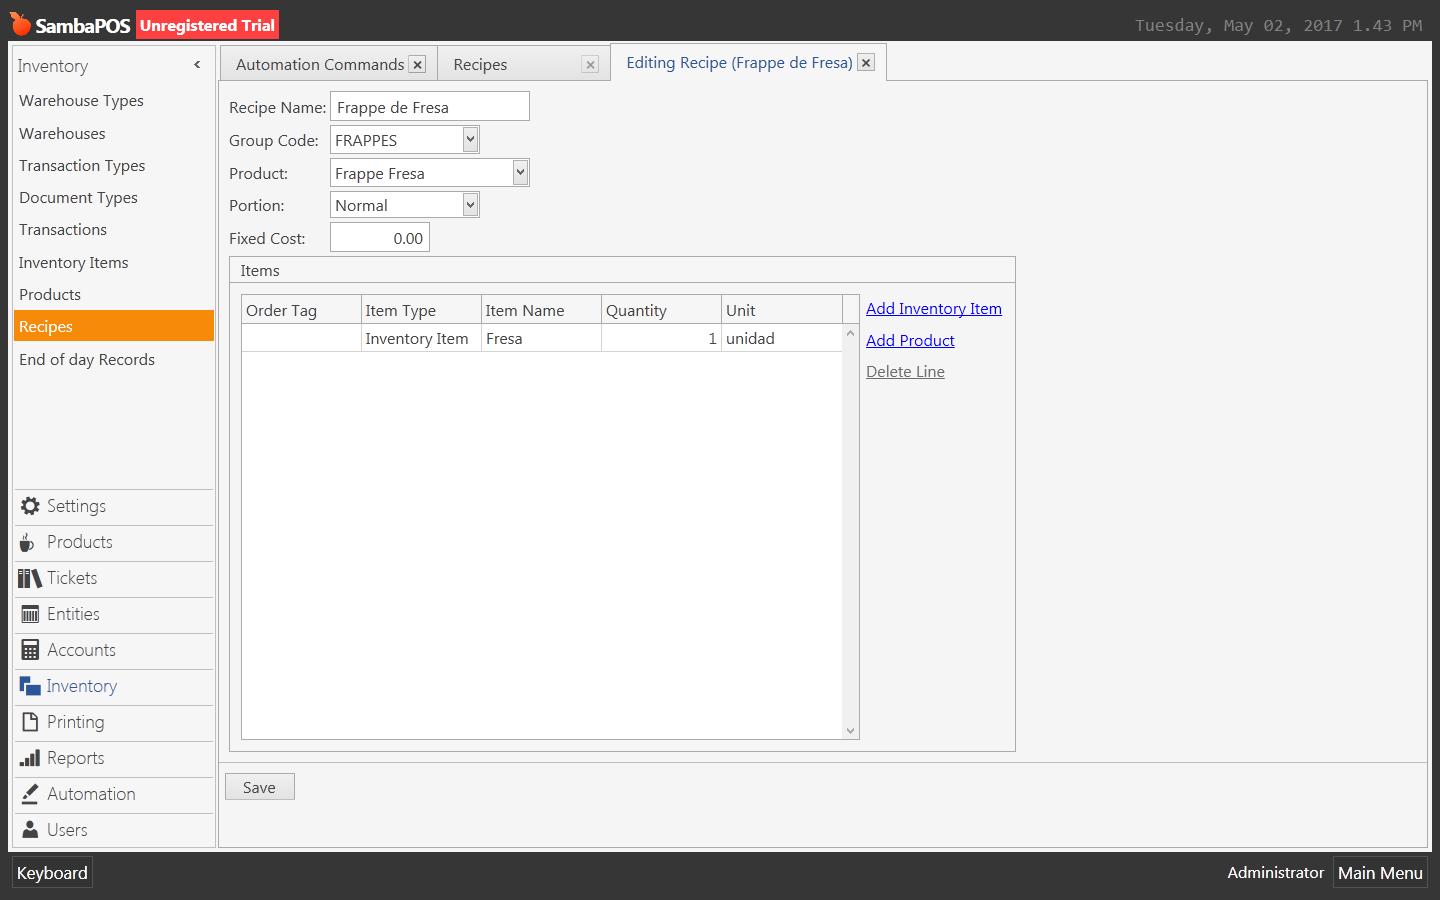
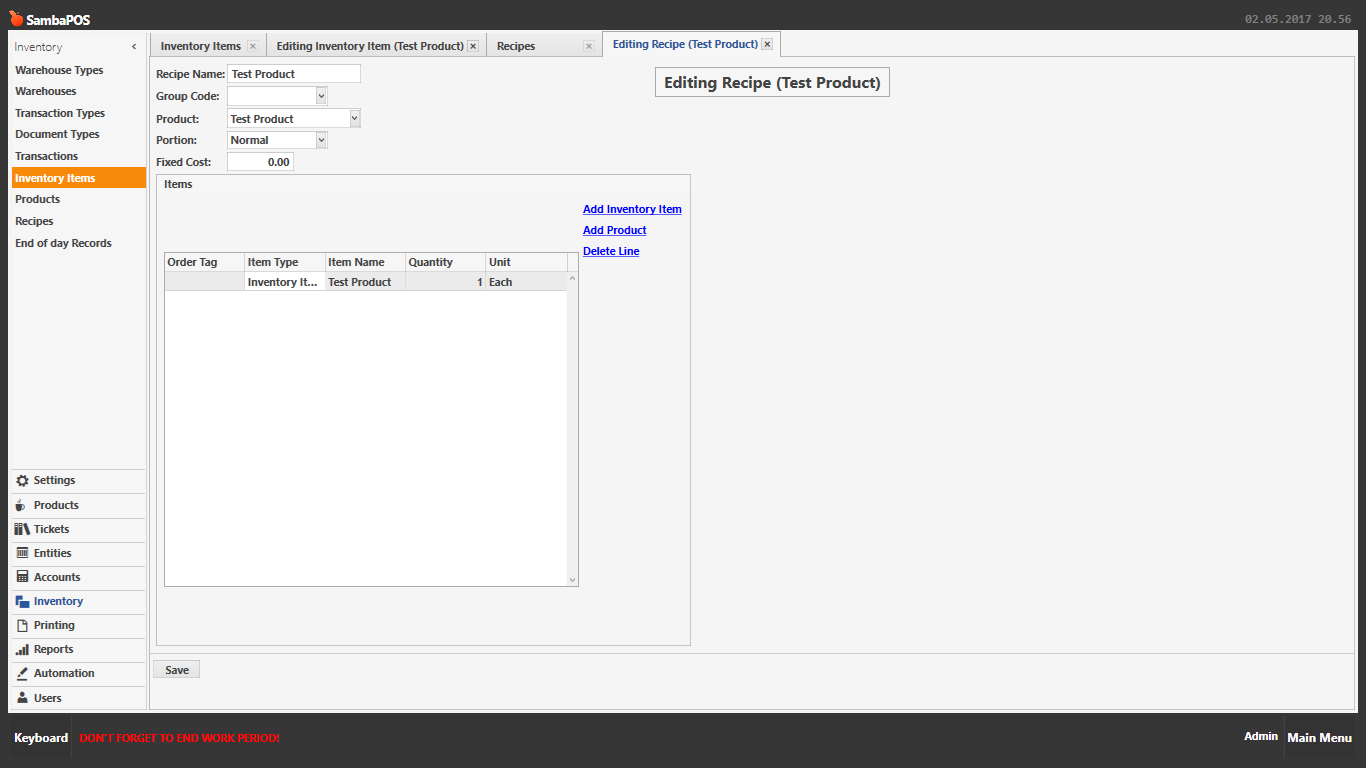
@Emre_Yilmaz did you created Inventory Items and Recipes to keep track of the inventory?
works… thank you @emre
EDER
May 2, 2017, 5:50pm
13
Hello RickH I tried to follow your tutorial about
here my action and rules
My warehouse name is Local Warehouse
RickH
May 2, 2017, 6:15pm
14
Its all case sensitive too so is your item tag Inventory Name correct? And not inventory name or Inventory name etc
The expression itself looks ok, im just going to check my on my system now to double check
RickH
May 2, 2017, 6:26pm
15
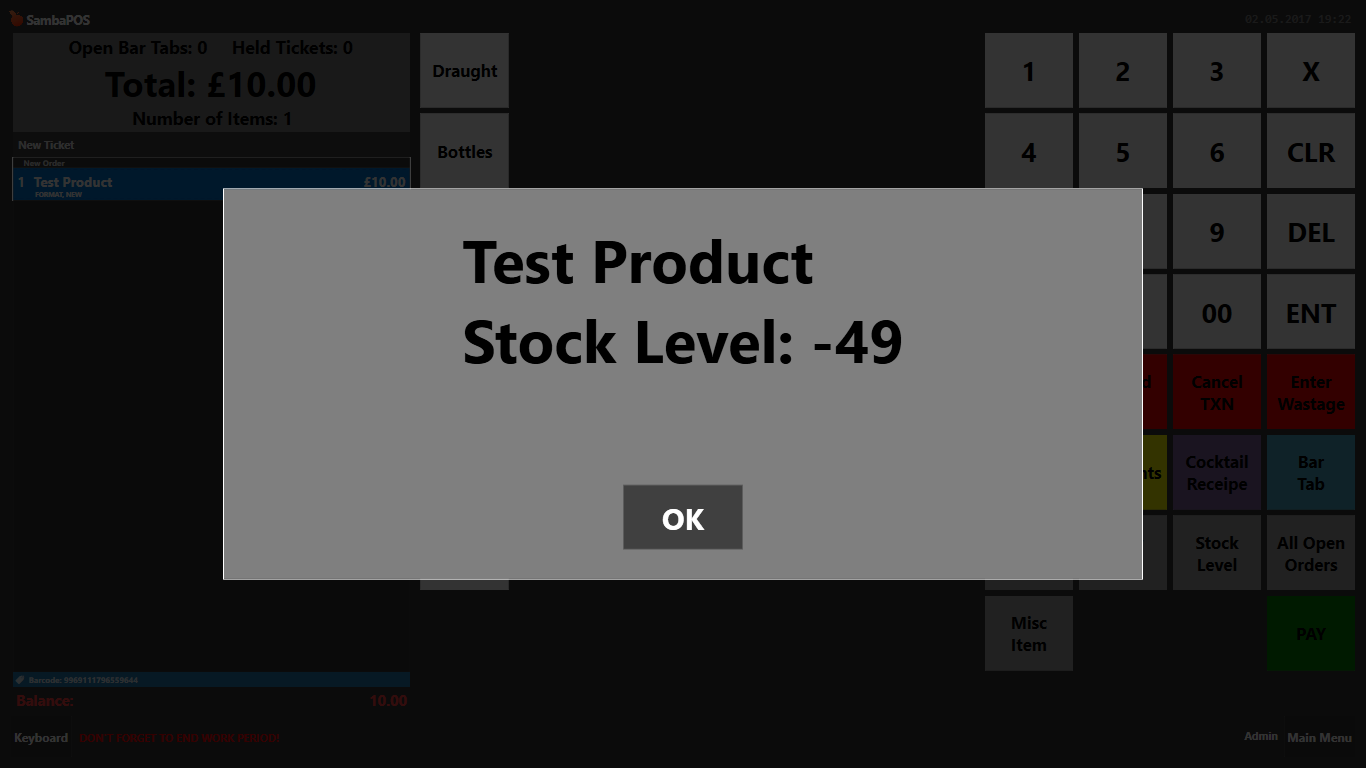
yep so it definitely works, this is my expression:
<color black><bold><size 60>{NAME}\rStock Level: {REPORT INVENTORY:{ITEM TAG:Inventory Name}:Local Warehouse}</size></bold></color>
and this is my result on the POS screen:
Things to check
Case sensitivity and spelling of your ITEM TAG and Local Warehouse
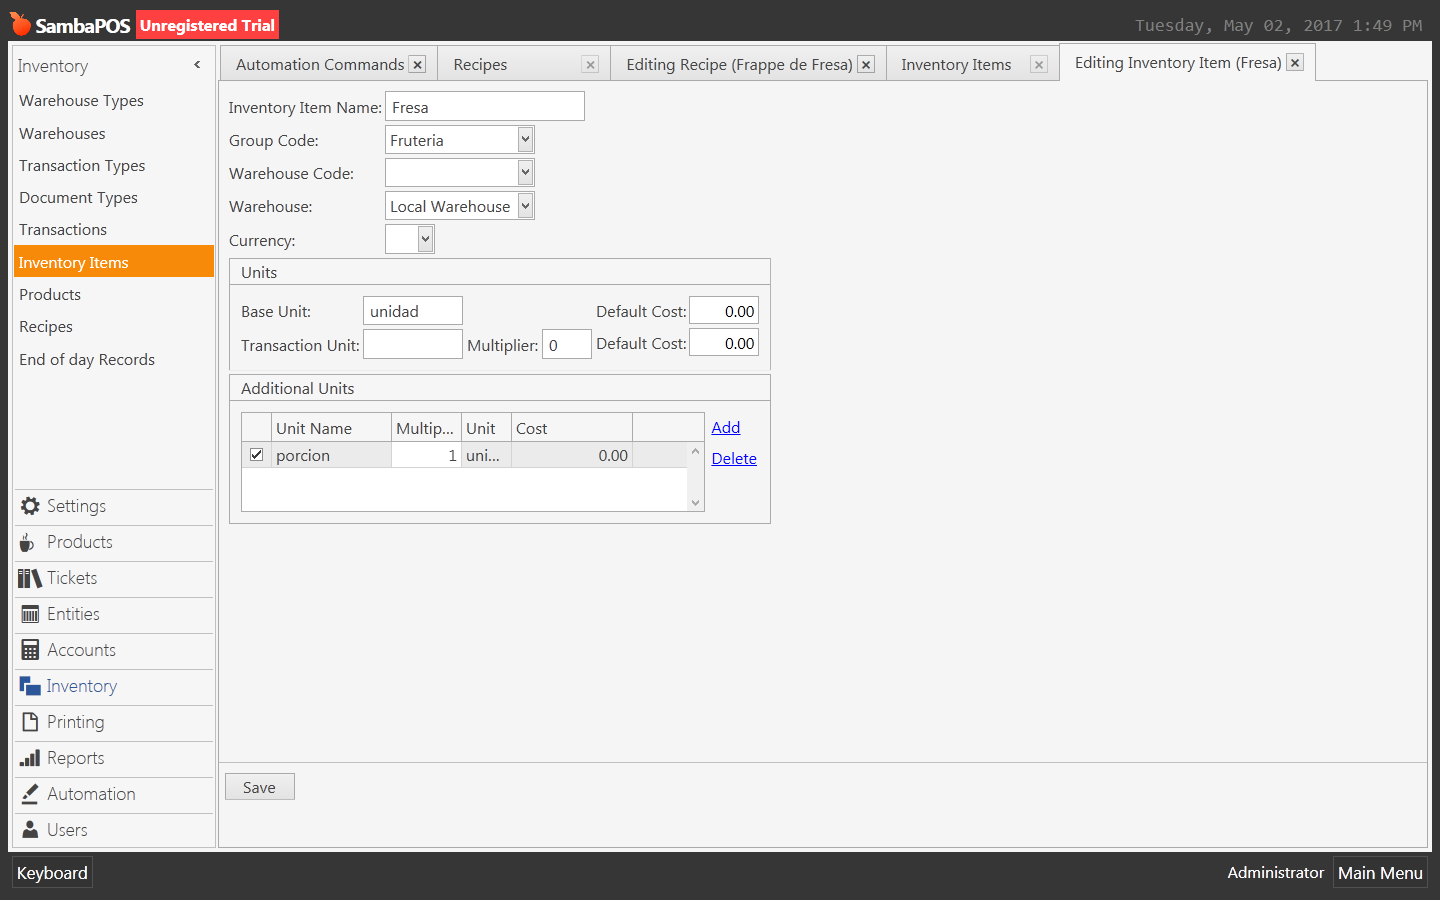
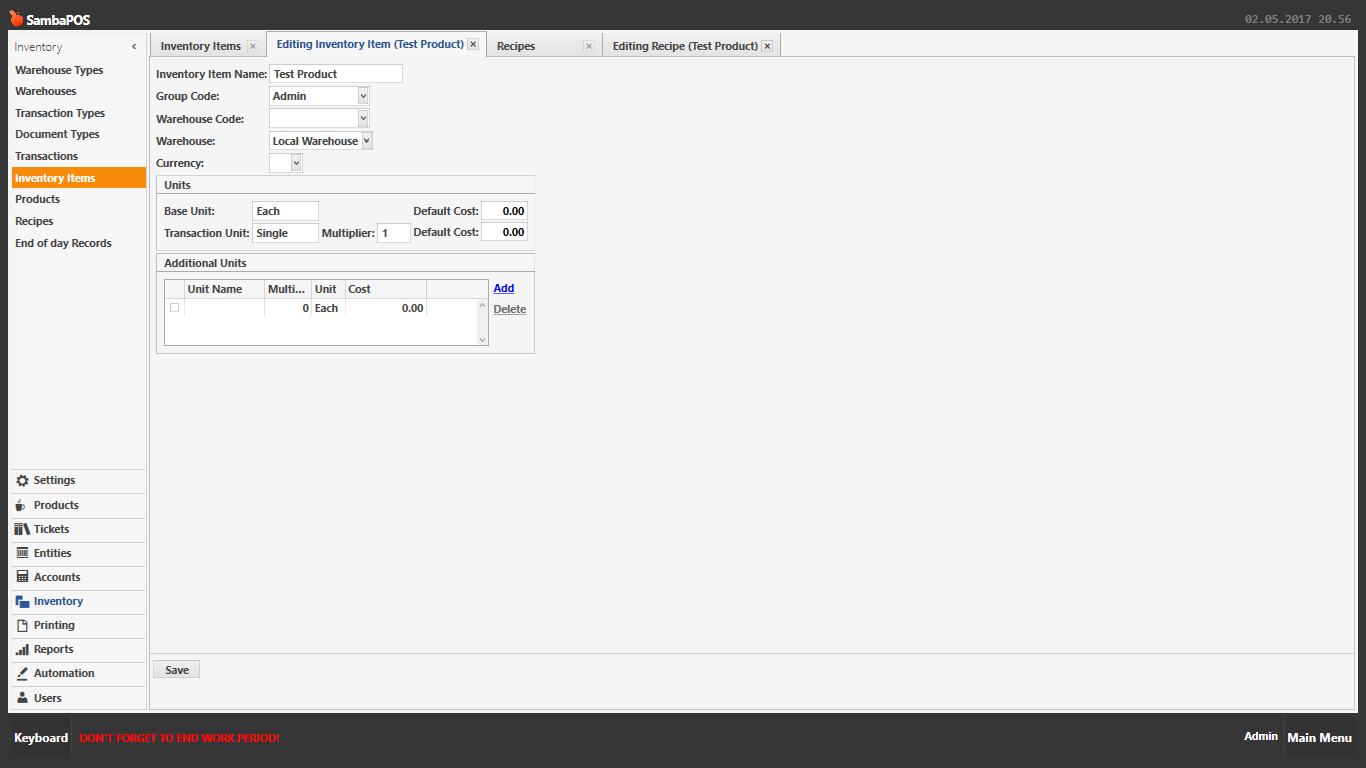
Have you setup the inventory item
Have you assigned the inventory tag in the product setup screen
Show screenshots of all of the above so we can see
1 Like
EDER
May 2, 2017, 6:56pm
17
I could not understand what do you mean by :
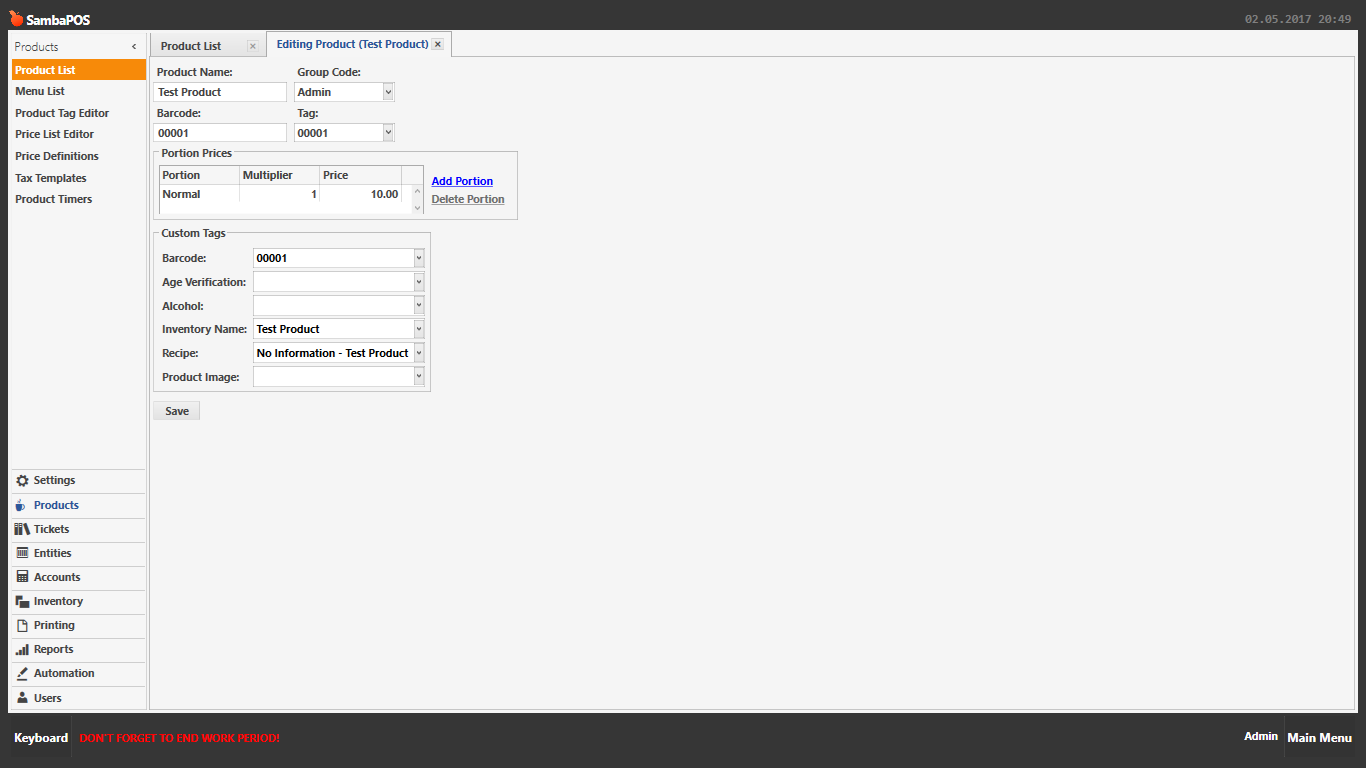
Your refering to {ITEM TAG:Inventory Name} which is looking at the product custom tags, on the product tag editor tab you should have a Inventory Name which presumeably should be the name of the inventory item relating to that product in order for it to know what inventory item to look at.
2 Likes
RickH
May 2, 2017, 7:52pm
19
You need to firstly have setup the Item Tag here:
Settings>Program Settings>General Settings
Enter Inventory Name in the Product Tag Captions Box as below (comma separate list with no spaces)
This then adds those product tags to the product setup screen as shown below:
Next to the Inventory Name field add the inventory name for your product, ive kept my inventory name the same as the product name
1 Like
RickH
May 2, 2017, 7:59pm
20
the only other things you need are
2 Likes
This assumes that your Product Name is the same as your Inventory Name