Has anyone here ever configured the kitchen display to use a bump bar instead of a touch screen for selecting orders and changing the state as order ready to clear it from the kitchen display?
Or even if we could take just a simple number pad keypad and program the keys to it so that it can control the samba ticket lister widget. I know that right now i cannot use a keyboard to control the ticket lister widget so not sure if this is even possible.
Main reason is touch screen monitors are expensive and there is alot of grease and heat in the kitchen and your hands are usually dirty and would make the touch screen a mess… Regular monitors are much cheaper and a keypad or bumpbar would keep the screen from getting dirty with finger prints… it also would allow you to mount the monitor a little higher so you dont have to try to look over people shoulders to see whats on the screen if it is a big kitchen.
While the Ticket Lister Widget does not accept keyboard input, there are some Widgets that do.
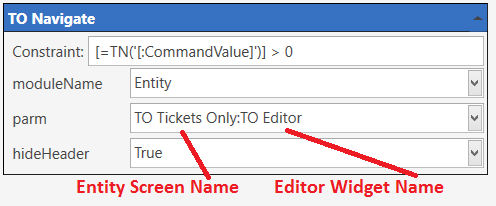
In particular for this case, you could try an Editor Widget on the same screen as the Ticket Lister and use automation to receive the editor input (via physical keyboard, or this device) and “do something” with that input.
You would have to show me some examples because im not too sure how i could even go about doing that… everything ive seen for the editor widget is to change the value of a item not to select and change the state of a ticket. Would it be hard for @emre to allow keyboard input on the ticket lister widget for this purpose? Or is there a command that we can emulate with some type of hotkey program so when keys are press the hotkey program enters the command.
Editor Widgets are simple. They allow input from an on-screen keyboard or physical keyboard.
To access a single Ticket within the lister, we use the Ticket Id, so the same would apply for the Editor Widget Automation. To know which Ticket to work on, we need to:
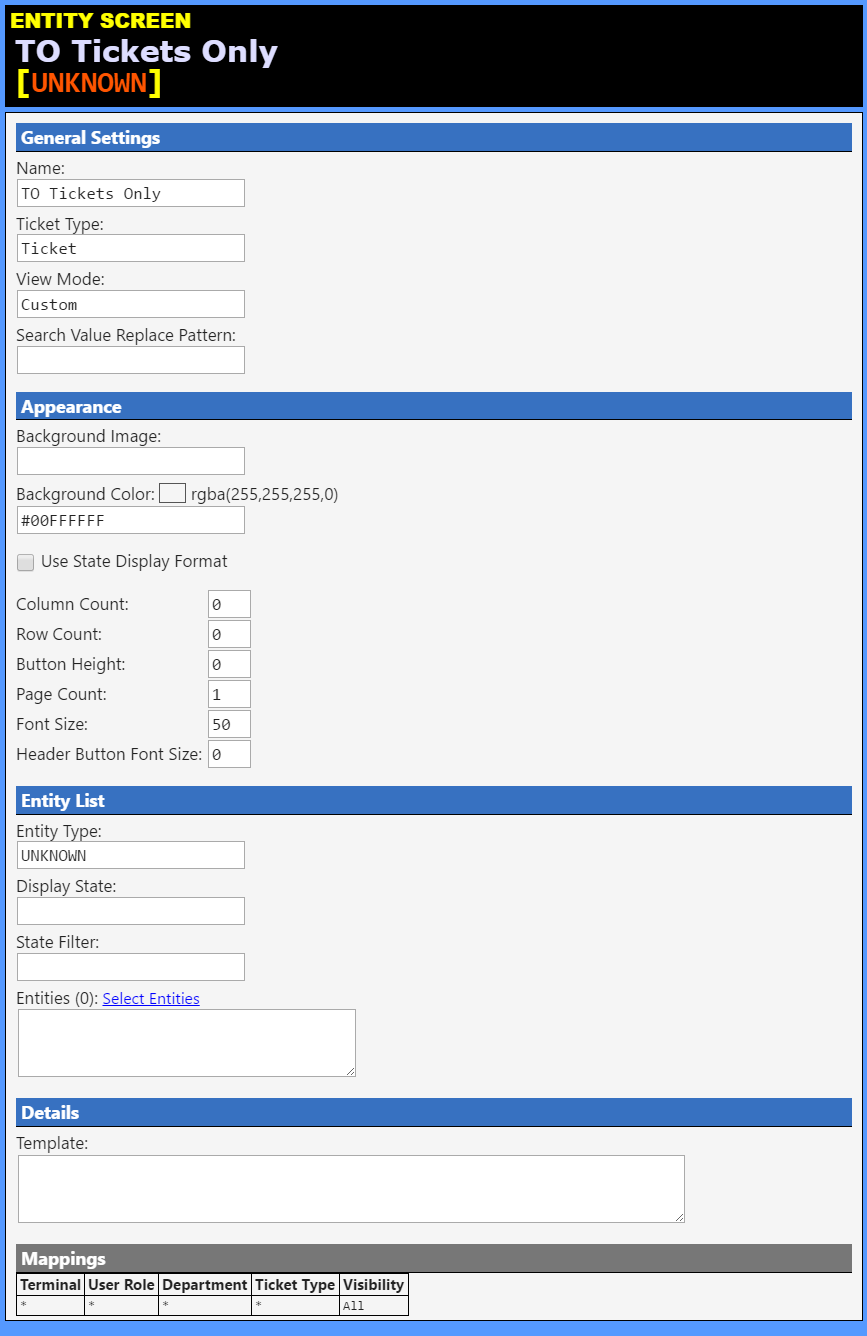
Show the Ticket ID in the Ticket Lister Widget, so we can see it to know which to select
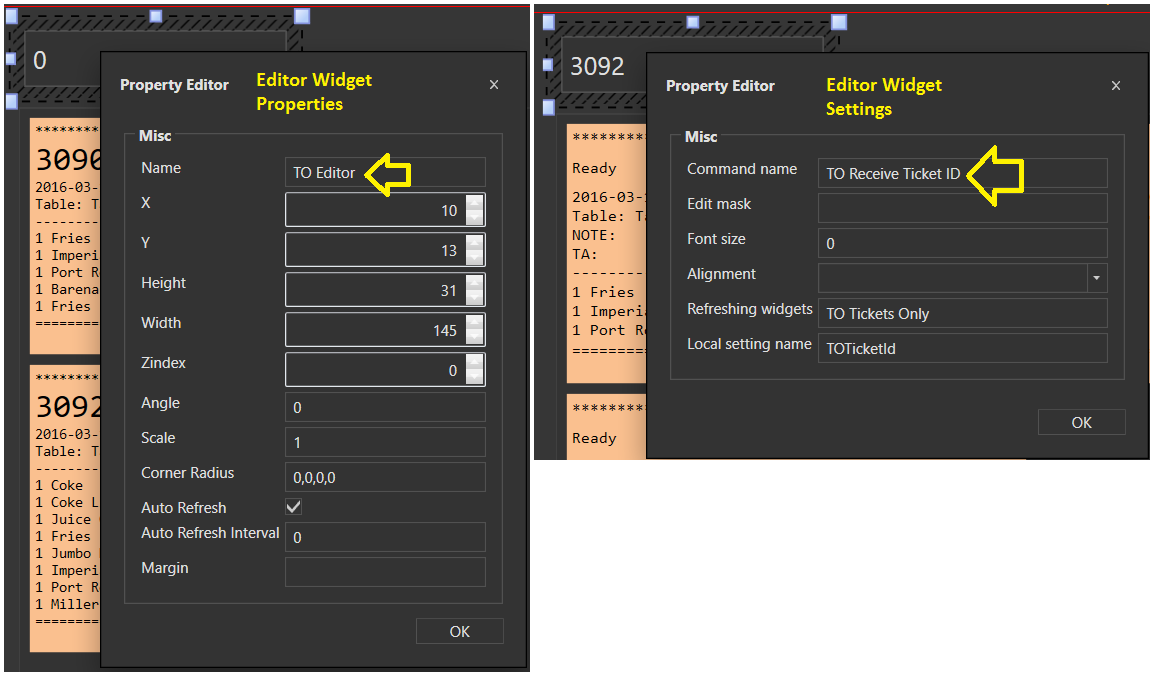
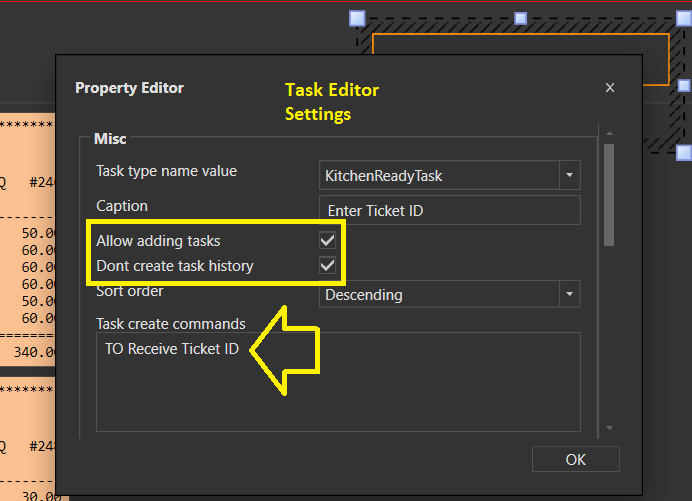
Receive input of a Ticket Id from Editor Widget
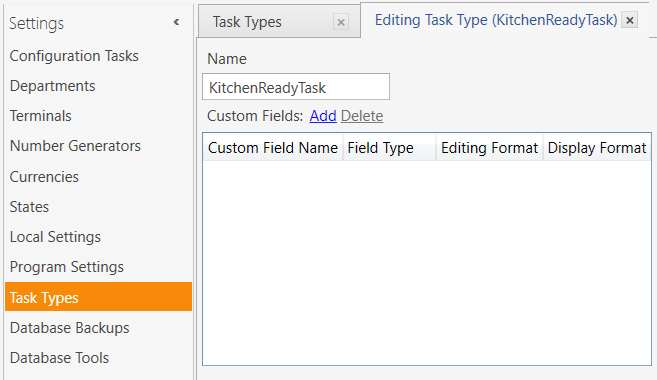
Perform an Action (Ticket KitchenStatus State change)
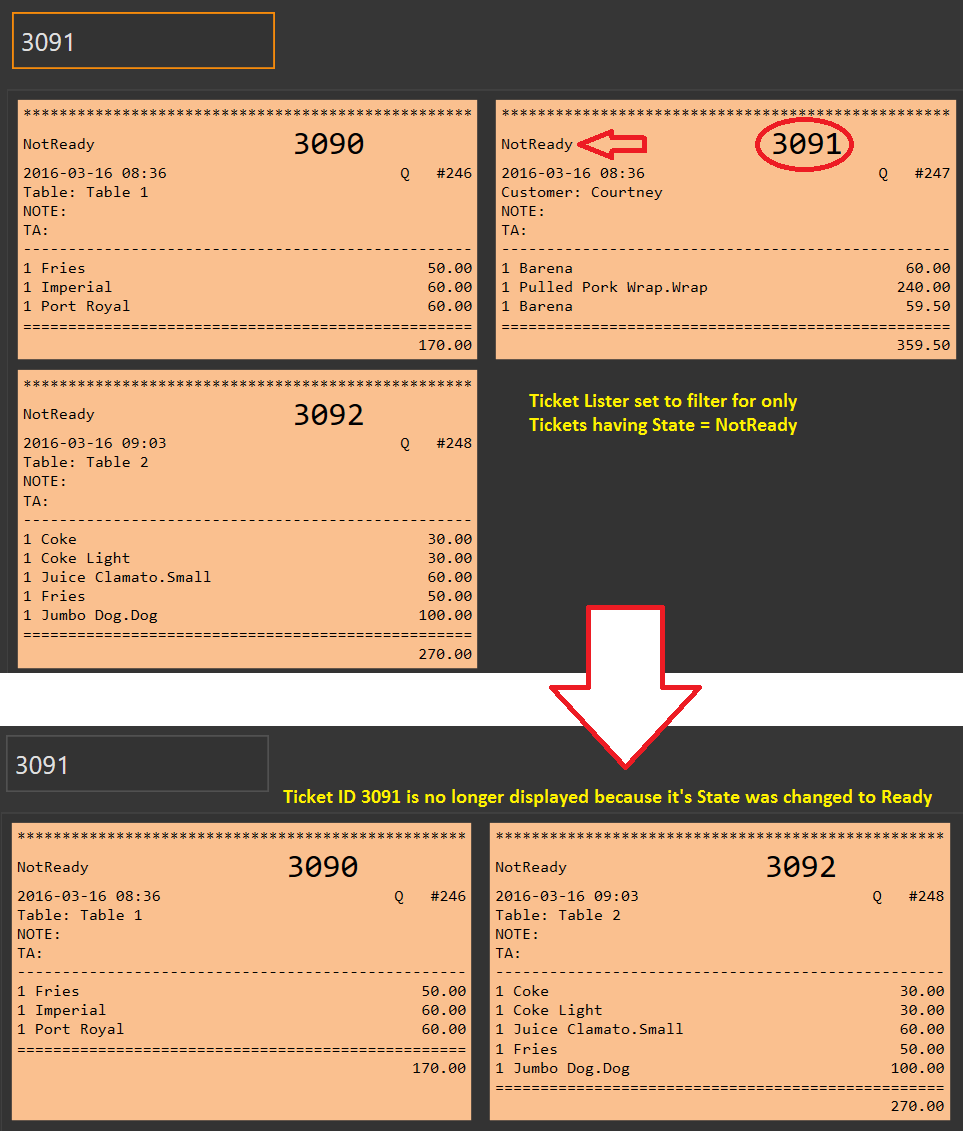
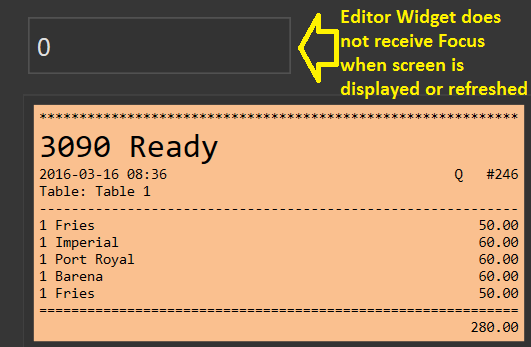
This is simply Proof-of-Concept to show how the Editor Widget can be used to change a Ticket State so that the Ticket Lister Widget removes a Ticket from the display. There may be much more Automation required in the end for full working implementation, depending on your desired flow.
Editor widget at the top. We are going to change the KitchenStatus Ticket State of Ticket Id 3091 from NotReady to Ready …
No it does not. I thought it would, but this is not the case… at least, it does not get focus when on the same screen as a Ticket Lister Widget.
EDIT: In fact, I have Editor Widgets on many screens with various other Widgets, and none of the Editors receive focus automatically. The only Widget I know of that does receive automatic-focus in the Entity Search Widget…
I tried messing with Z-index on both of the Widgets, and also the order in which the Widgets were added to the screen, but no changes…
Does the Ticket Lister Widget accept keyboard input?
Yea it just sucks you can’t just use a arrow and select the ticket you are working on cause if you have more than 10,000 tickets i could see alot of typos happening… arrows to highlight/select a ticket and then being able to press a button to change it to ready just seems much simpler for a fast paced kitchen… those bump bars were designed specifically for that and have been around for years so they are proven solutions to get food orders out fast and easy to use.
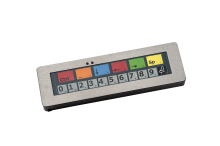
The bump bar is basically just a programmable keyboard. It mounts somewhere easy to reach so that the kitchen staff can use it to select the order on the kitchen display and then change the order state to ready or even selecting an item and marking it as ready. It depends on the software but the main point for using one is its fast and easy to use because most kitchen display monitors are mounted higher up and out of reach. They are also water proof and approved to be used in a kitchen setting by the health department.
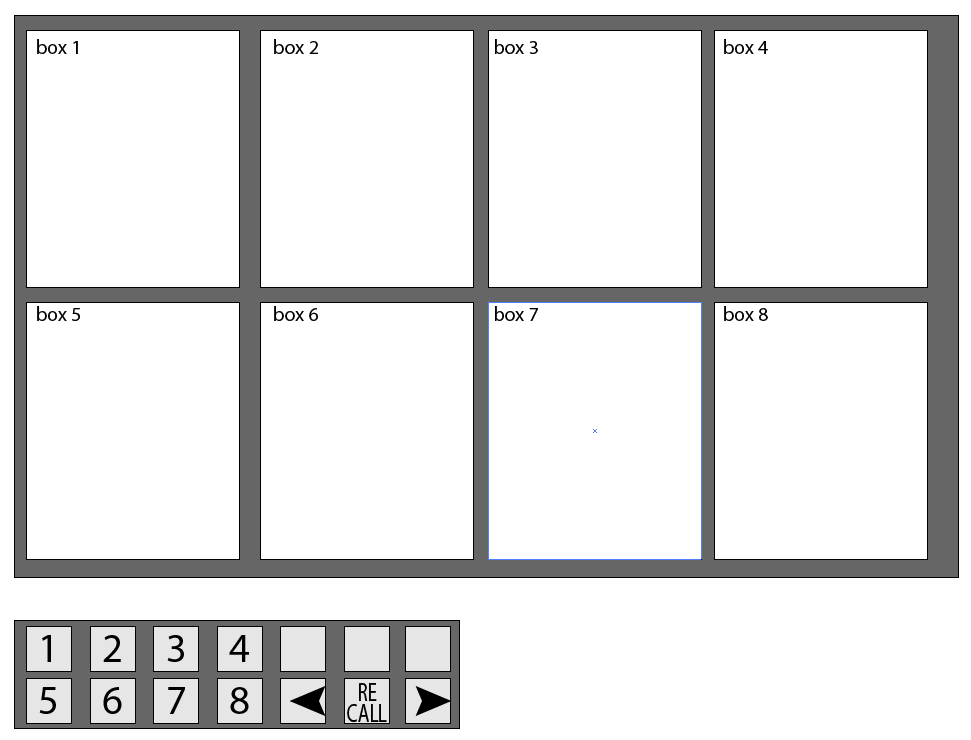
When I worked with a kitchen screen and bump bar, the screen was broken up in to 8 boxes. Each box had a corresponding number. When an order was ready in the 2 second box the cook would simply press the 2 button on the bump bar and that order would clear.
the orders would come in and be listed in sequential order. so box 1 had the oldest orders, box 2 is the second oldest, box three is the third oldes…and so on… After an order cleared the the 8th box was for recalling past orders and the arrows were used to cycle thru them.