Description
In this tutorial, you will be able to accomplish order grouping using the new Update Ticket Grouping feature found in the latest SambaPOS V5 Version 5.2.12.
For this to work, please ensure you have SambaPOS V5 Version 5.2.12 or higher installed.
For Versions below 5.2.12 the course change will work but you may not be able to see the grouping the same way as shown in the end result at bottom of screen.
This tutorial is intended to show you how to setup default order courses, and group them based on the course e.g. Starters,Mains, Desserts etc…. Then be able to change the course on the fly _e.g. Have a “Mains” show under Entreé, or Have an Entreé item under Mains.
It is intended for restaurants that would like to apply and print courses to the kitchen, and change item courses on the fly while the grouping feature allows better highlighting of the order groups.
Scenario
A customer wishes to order a Mains as an Entree.
A customer wishes to have an Entree as a main or with a Main course.
You would be able to select the item, press Change Course and select a different course.
This will in return move the item into the course you have selected and when the order is sent to kitchen, the kitchen knows to cook and prepare an Entreé to be sent with a Main, or have a Main as an Entreé
 Click on arrows to expand tutorial section
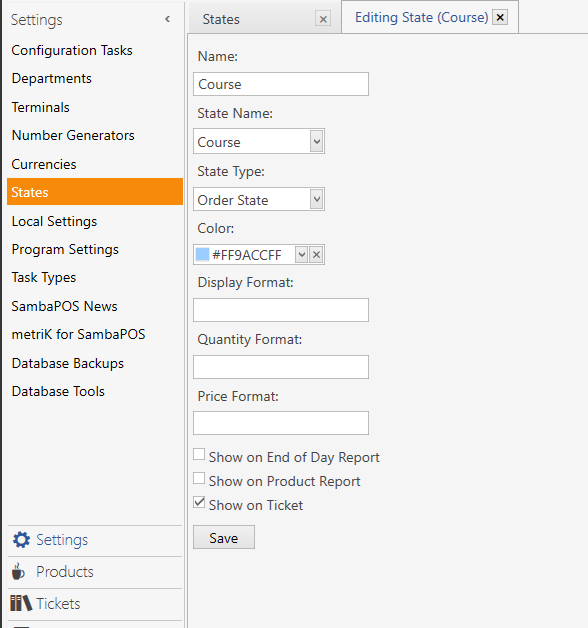
Step 1: Creating Product Tags
Step 1 Create Product Tag
-
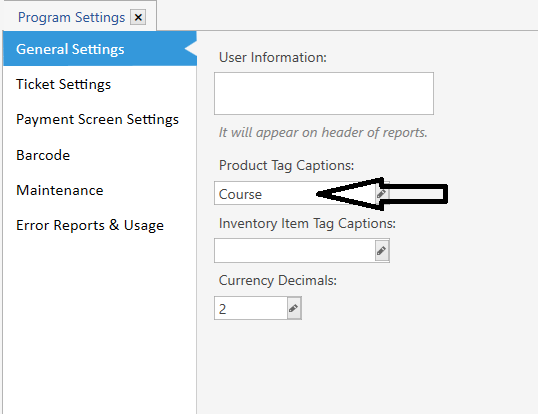
Go to Manage>Settings>Program Setting>General Settings
-
In Product Tag Caption Type :Course
-
Press Save
Step 2: Creating Automation Command Buttons
Step 2 Create The Auto Command Button
Go to Automation>Automation Commands & click Add Automation Command

- Name:Change Course
- Button Header:Change\rCourse
-
Values:Add Entree, Mains, Dessert
(You can change these names to whatever you wish to call your courses)
Mapping Click Mapping & make it look like it shows below.

- Set Visibility to Order Line
- Click Save
Step 3: Creating Actions
Step 3 Create 2 actions
Action 1: Update Course Group State
Go to Automation>Actions & Click Add Action
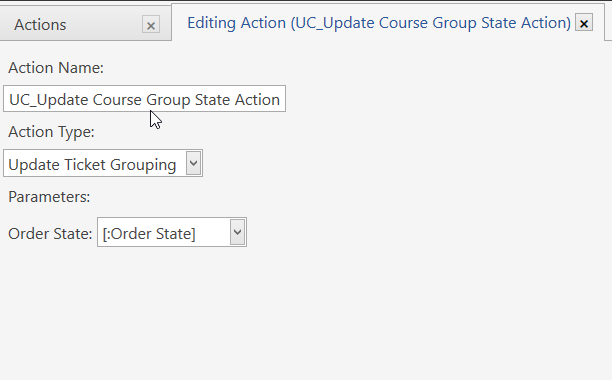
- Action Name: UC_Update Course Group State Action
- Action Type: Update Ticket Grouping
- Parameters:
Order State : [:Order State]
Action 2: Update Course Group State
Go to Automation>Actions & Click Add Action
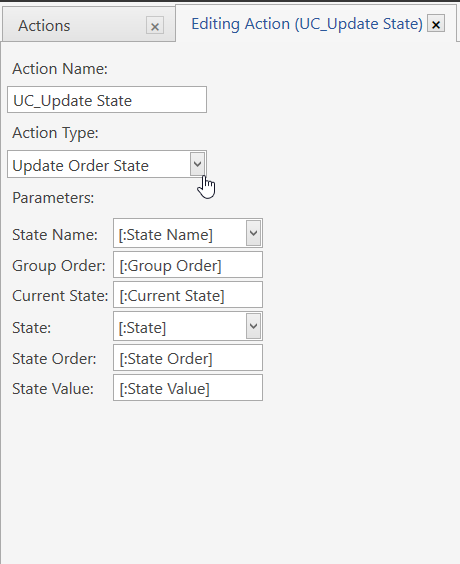
- Action Name: UC_Update State
-
Action Type: Update Order State
Parameters:
-* State Name:[:State Name]
-* Group Order:[:Group Order]
-* Current State:[:Current State]
-* State: [:State]
-* State Order: [:State Order]
-* State Value: [:State Value]
Step 4: Creating Rules
Step 4 Create 2 Rules
Rule 1: Update Course
Go to Automation>Rules & Click Add Rule
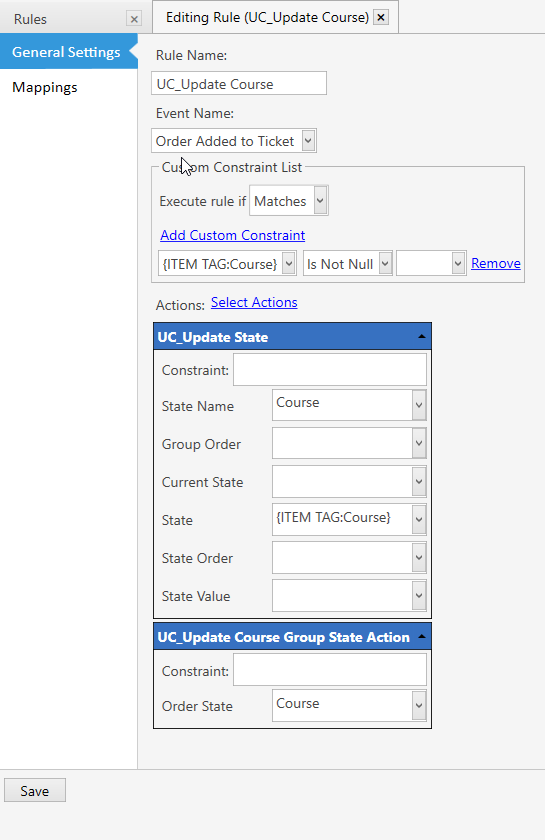
Rule Name:UC_Update Course
Event Name: Order Added to Ticket
Click Add Custom Constraint
Type: {ITEM TAG:Course} == Is Not Null == Leave Blank
Click Select Actions
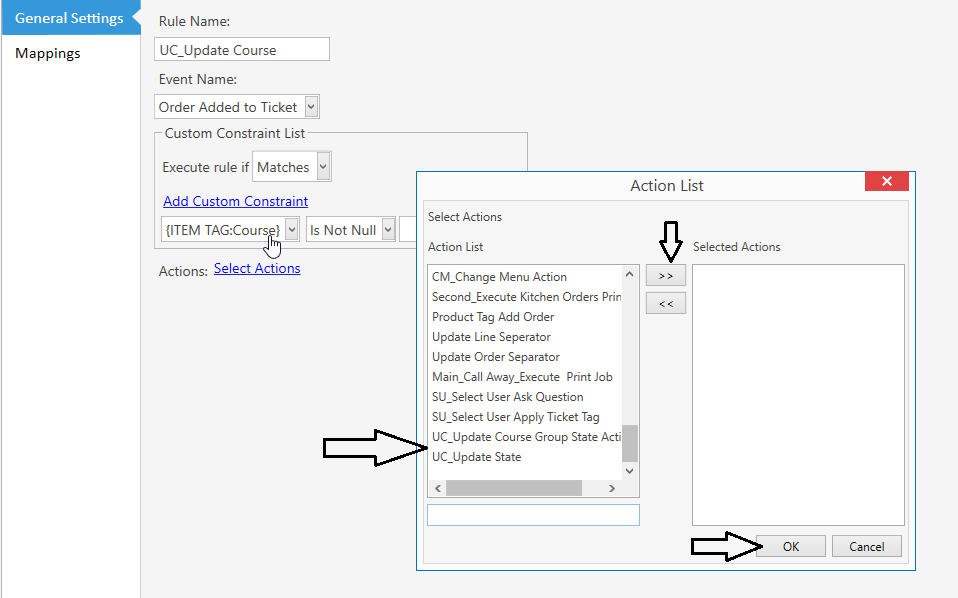
-
Select UC_Update State & UC_Update Course Group State Action
-
Press OK
-
In Action UC_Update State
-* Under State Name, Type: Course
-* Under State, Type: {ITEM TAG:Course} -
In Action UC_Update Course Group State Action
-* Under Order State, Type: Course -
Click Save
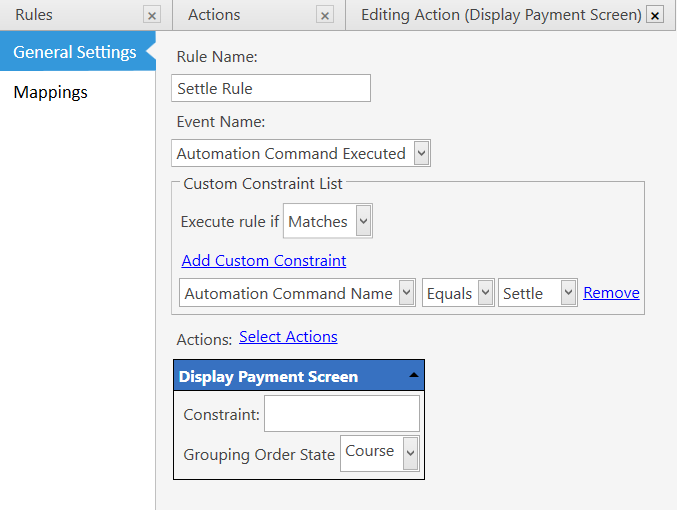
Rule 2: Change Course State
Go to Automation>Rules & Click Add Rule
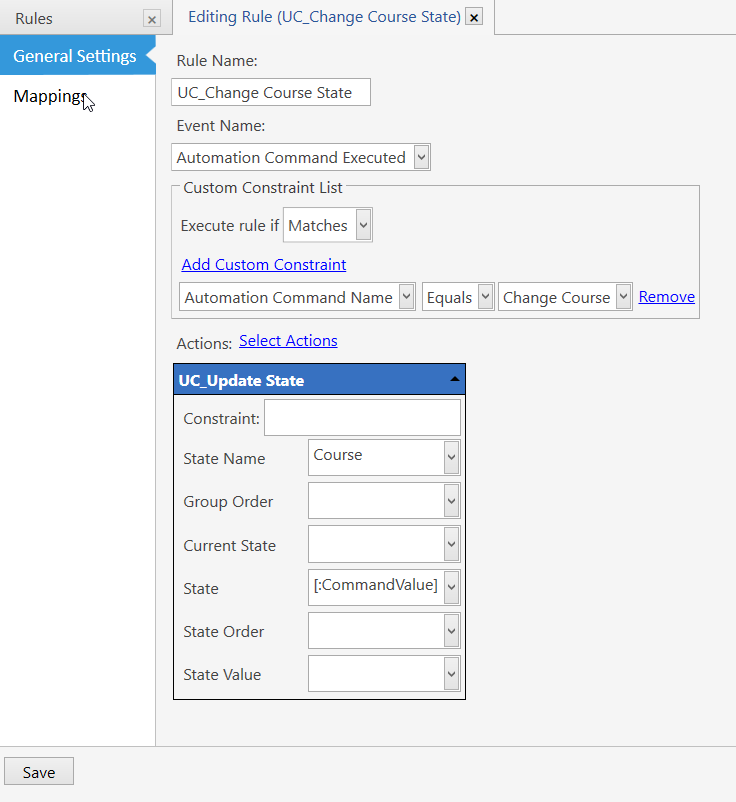
Rule Name: UC_Change Course State
Event Name: Automation Command Executed
Click Add Custom Constraint
Type: Automation Command Name == Equals == Change Course
Click Select Actions
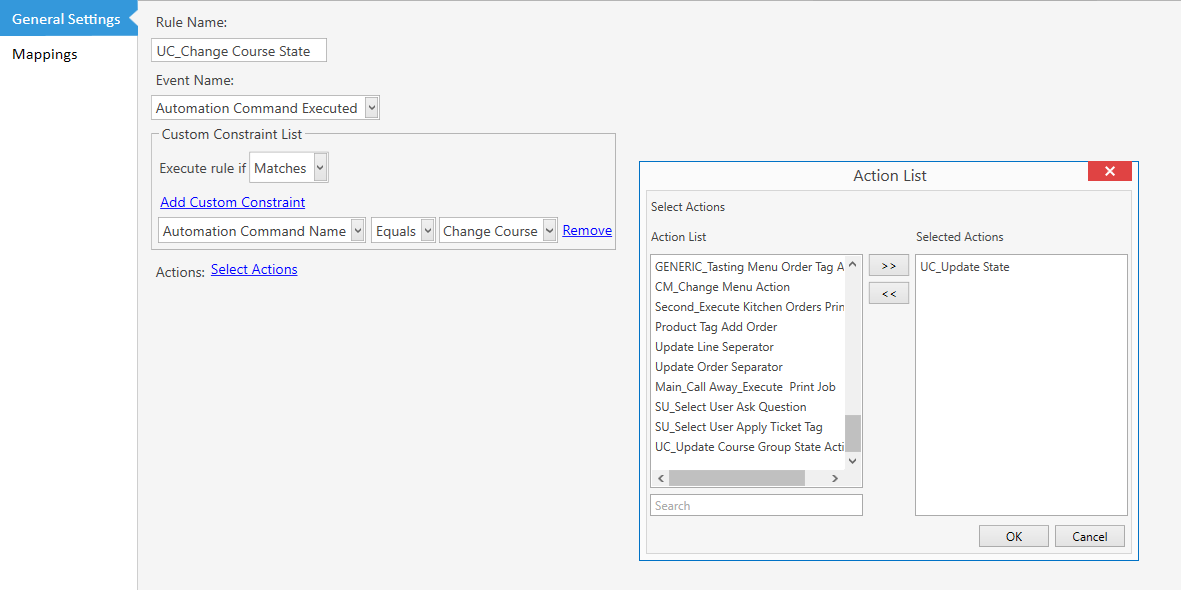
Select UC_Update State Action
Press OK
- In Action UC_Update State
-* Under State Name, Type: Course
-* Under State, Type: [:CommandValue]
Press Save
Step 5: Updating Printer Templates
Step 5 Update Kitchen Orders Template
Go to Printing>Printer Templates
Select Kitchen Orders Template & Click Edit Printer Template
Add the following section in your template
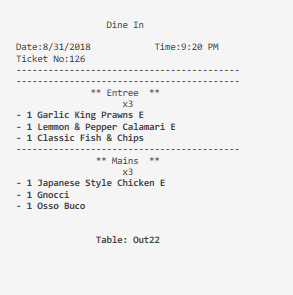
[ORDERS GROUP|ORDER STATE:Course:Entree,Mains,Desserts]
<C00>
<F>-
<C11>** {GROUP KEY}  **
<C00>x{QUANTITY SUM}
<C00>
So it should look like this
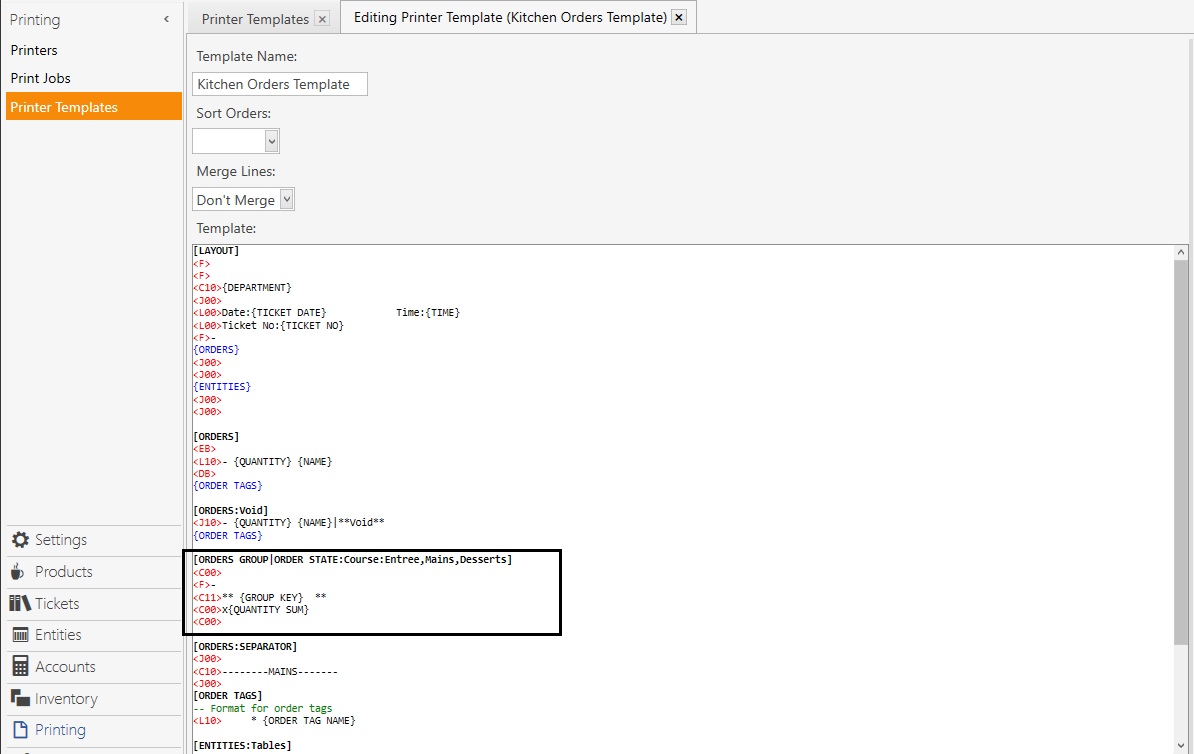
Press Save
Step 6: Setting up Courses for Products
Step 6 Apply Course by typing course in Product Tag Editor
Go to Products>Product Tag Editor
For each of your products, in the “Course” tab type the default course name just like shown in the screenshot below.
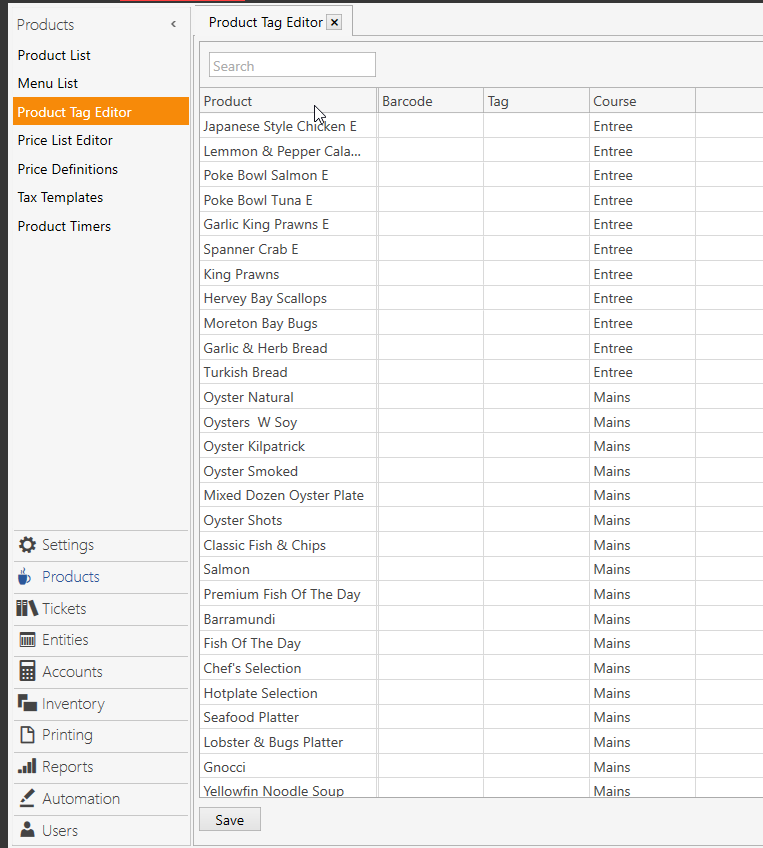
Press Save
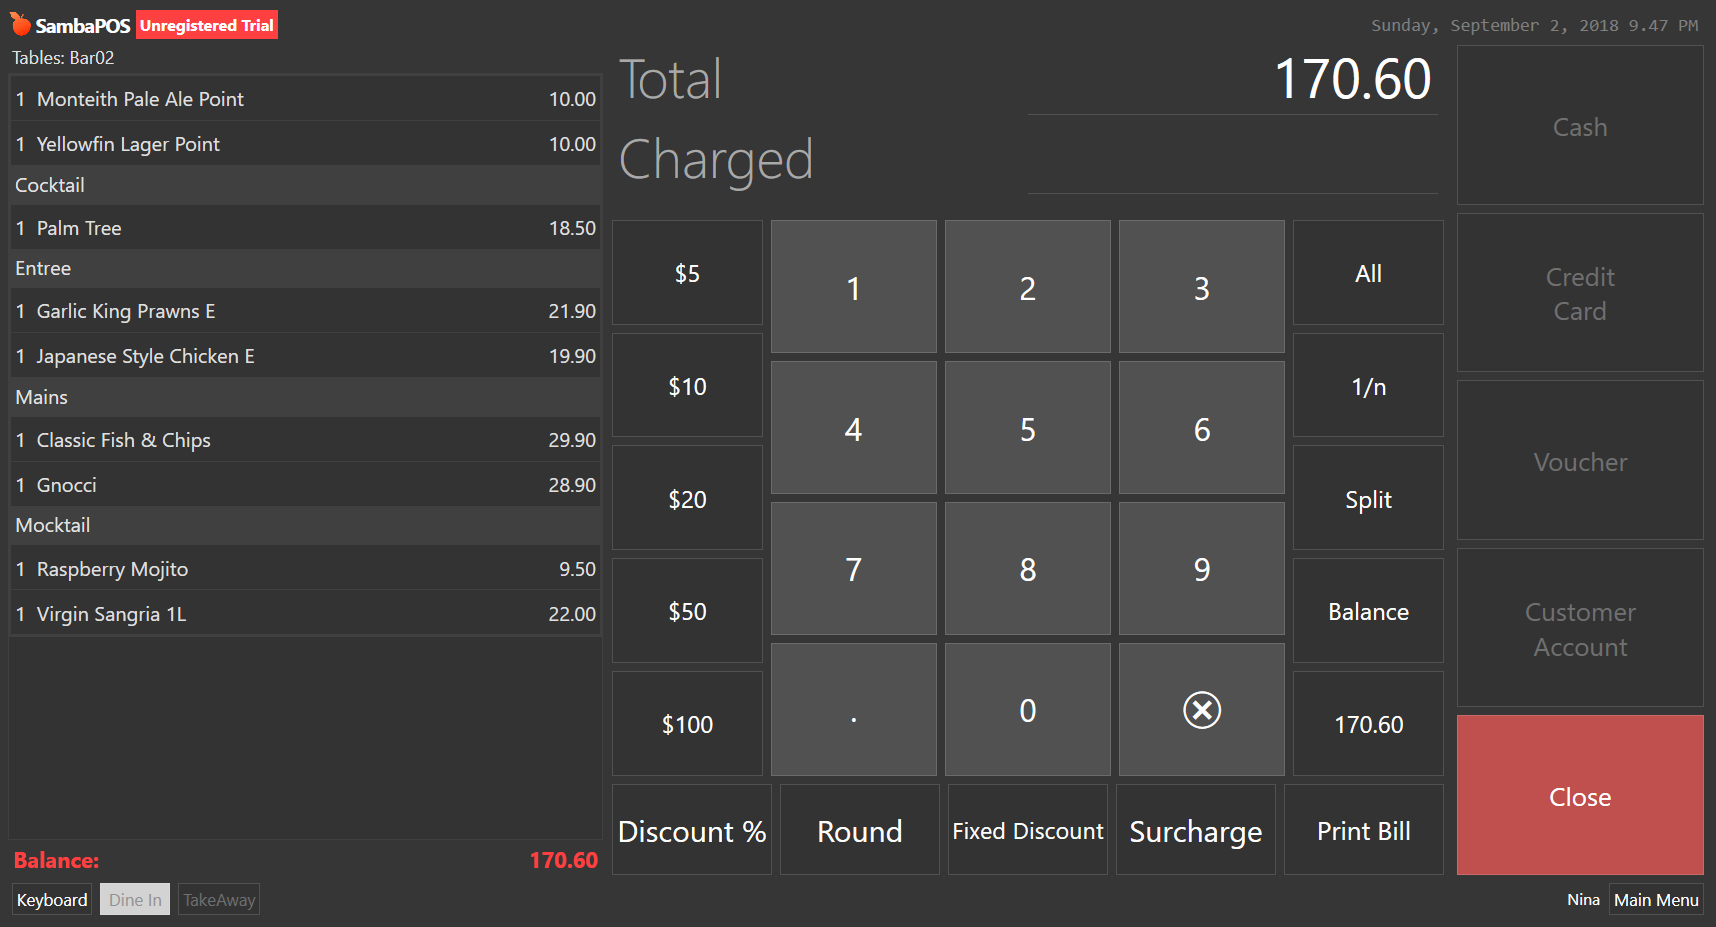
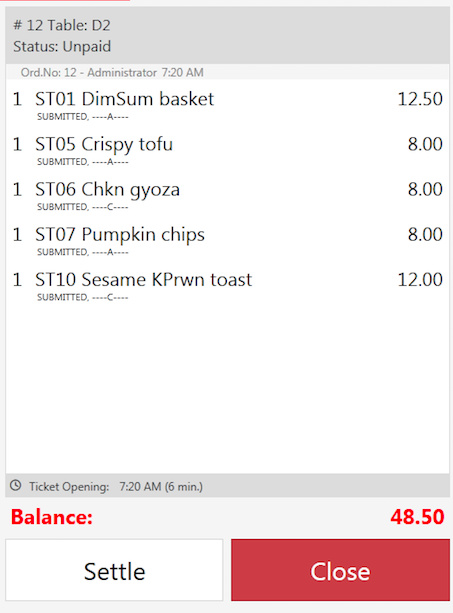
Finished Result
The Result?
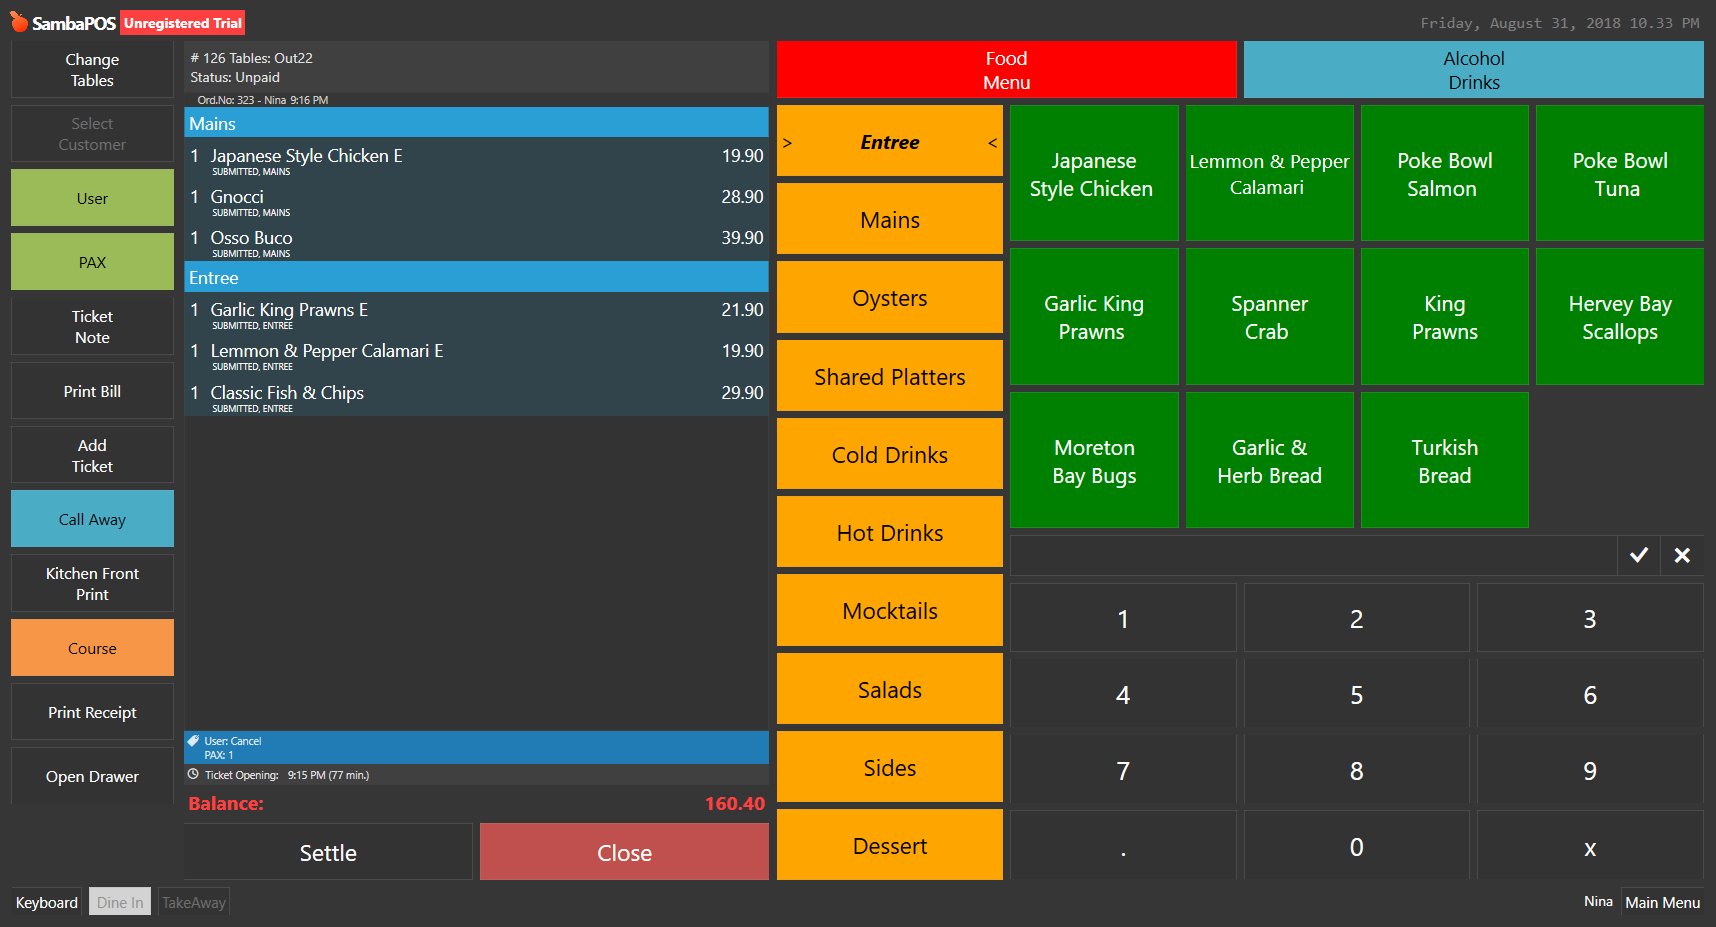
You should be able to your products been grouped as shown and when printed to kitchen, kitchen should be able to see something like the screenshot below
I hope you guys found this tutorial easy to follow and useful.
If you have any comments or suggestions regarding my tutorial please let me know, I always am looking at ways to improve.