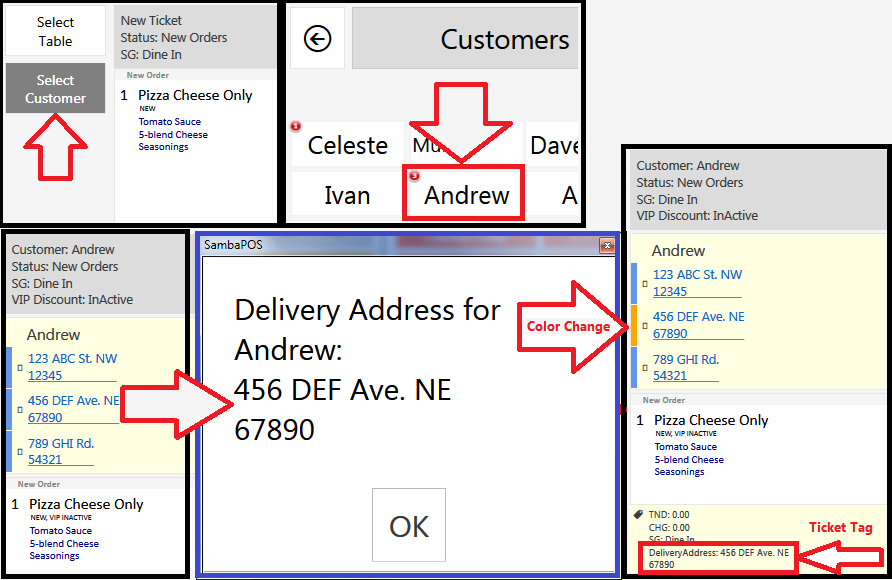
Here is how I set this up. This is similar to what I already posted, but it is in-reverse. Instead of storing Customer Addresses in Entity Notes, it is more natural to store them in Custom Data Fields, if for no other reason: it’s easier to edit them through various methods.
:heavy_exclamation_mark: Requires v4.1.76 or later
Database Tools Import file:
DeliveryAddress_Automation.zip (1.0 KB)
###FLOW:
###SETUP:
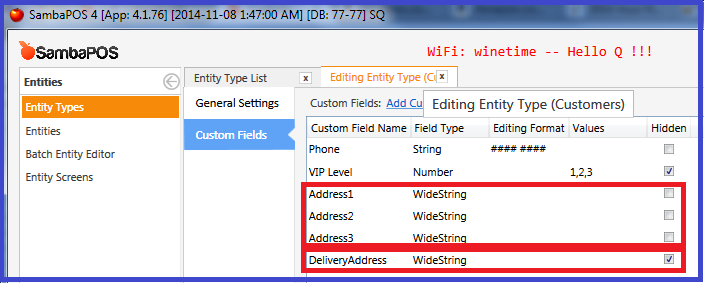
Entity Custom Data Fields: (add as many AddressX fields as you require and a single DeliveryAddress field that we will update when a Customer Entity is selected for a Ticket)
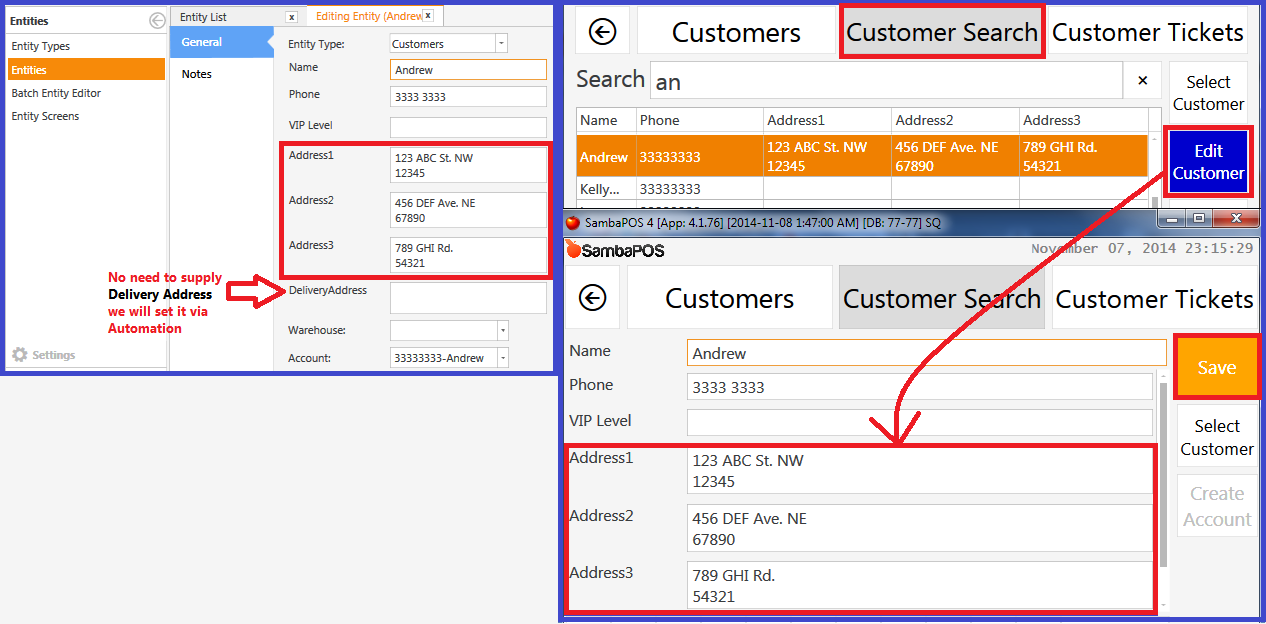
Edit your Customer Entities via Manage > Entities or via Customer Search so that they have their required addresses: (no need to fill in all AddressX fields - just those that you require, and DeliveryAddress should be left empty since we will update it dynamically)
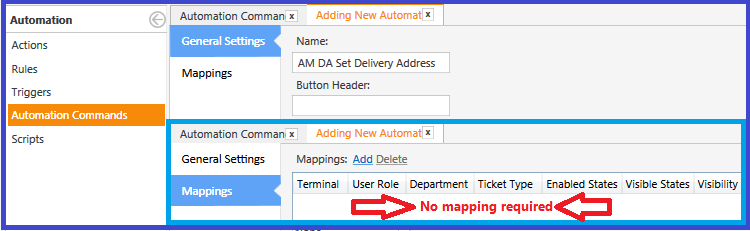
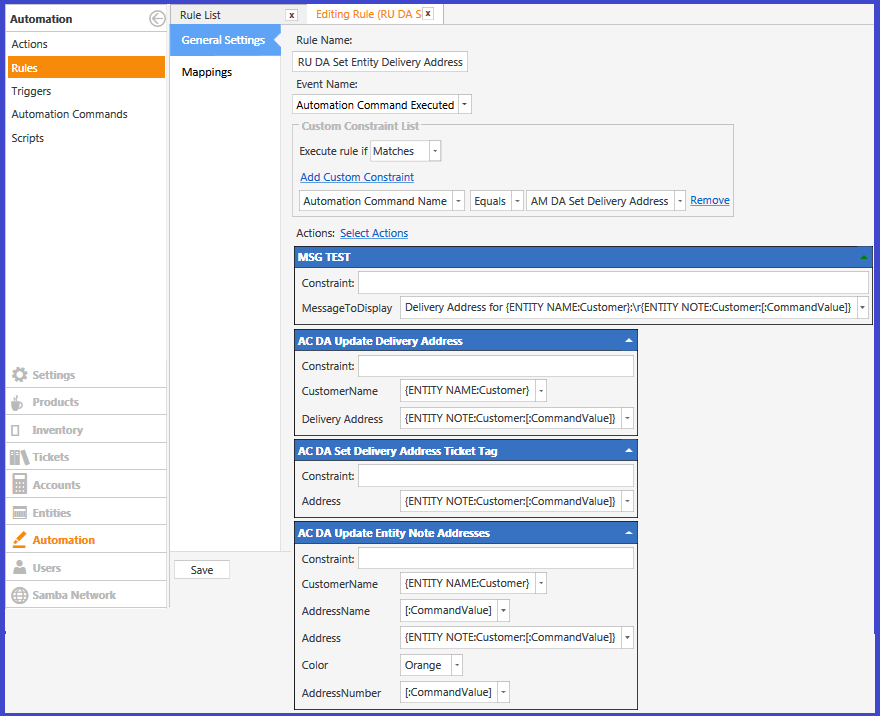
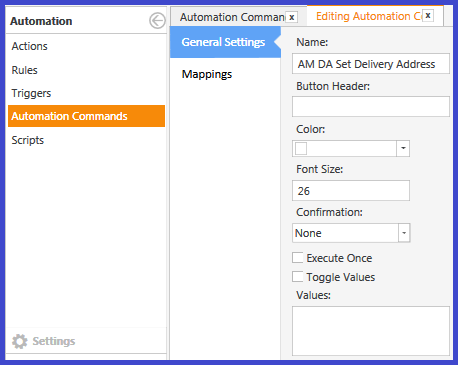
Automation Command to execute to set DeliveryAddress via Notes:
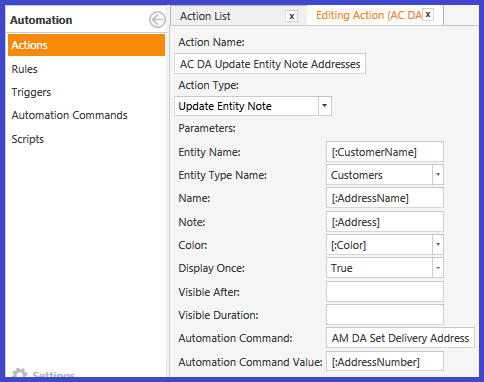
Action to dynamically build Entity AddressX Notes for the Customer for User Selection:
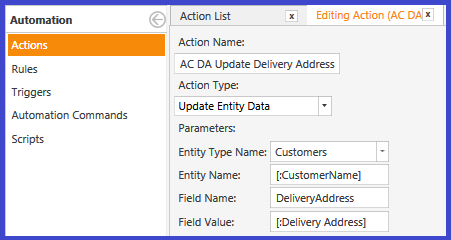
Action to update Entity Data DeliveryAddress field upon User Selection:
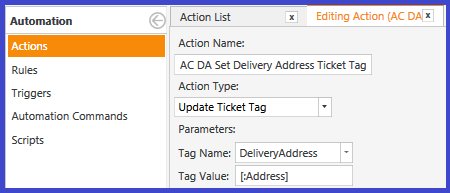
Action to Ticket Tag DeliveryAddress upon User Selection:
Rule to update/build Entity Notes for AddressX fields:
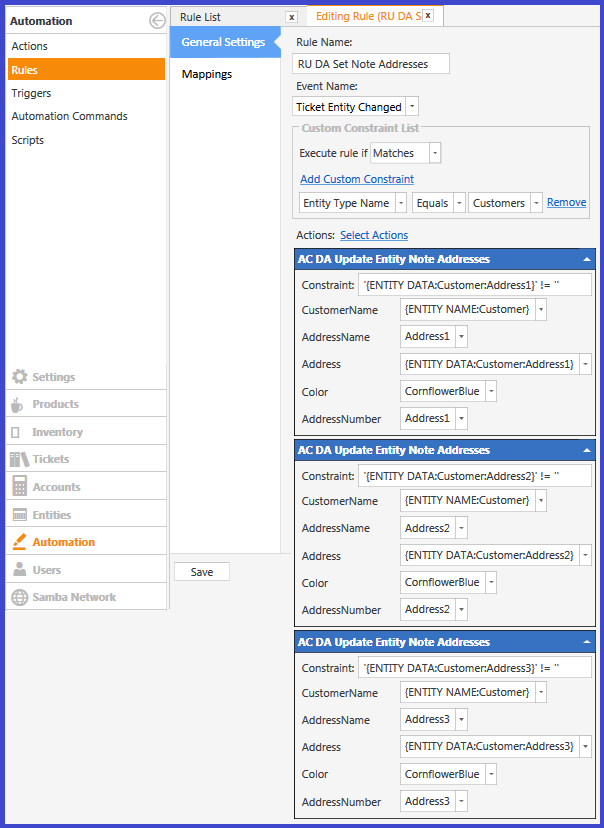
Action Constraints: '{ENTITY DATA:Customer:Address1}' != ''
CustomerName: {ENTITY NAME:Customer}
AddressName: Address1
Address: {ENTITY DATA:Customer:Address1}
Color: CornflowerBlue
AddressNumber: Address1
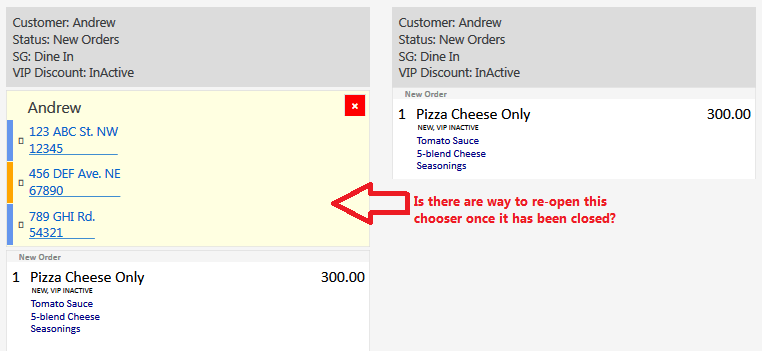
 Tip for adding the same Action more than once to a Rule: Right-Click in the left chooser and click Display All Values, then add the Action as many times as required.
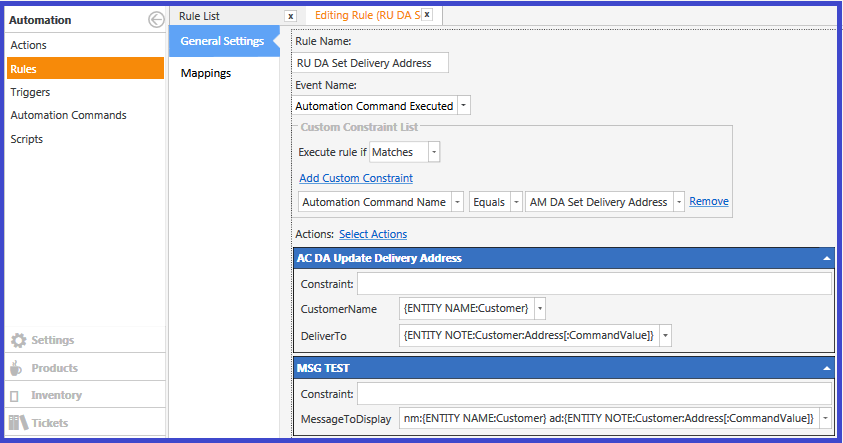
Rule to Update Entity Data DeliveryAddress field to contain chosen address, set the Ticket Tag and change the Color of the Note from Blue to Orange:
CustomerName: {ENTITY NAME:Customer}
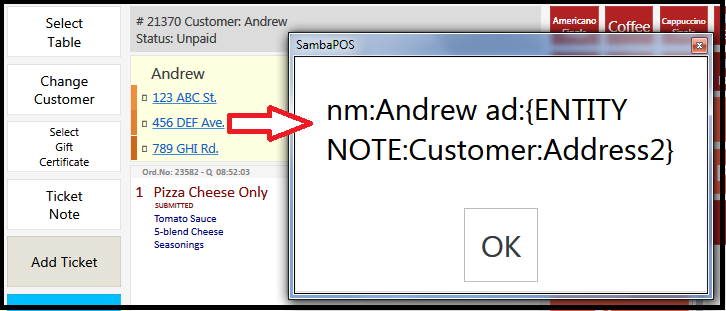
Delivery Address: {ENTITY NOTE:Customer:[:CommandValue]}
Address: {ENTITY NOTE:Customer:[:CommandValue]}
CustomerName: {ENTITY NAME:Customer}
AddressName: [:CommandValue]
Address: {ENTITY NOTE:Customer:[:CommandValue]}
Color: Orange
AddressNumber: [:CommandValue]
 The
The Show Message Action (MSG TEST) shown above is optional, but is helpful because it gives some feedback that an Address has been chosen. This is the message displayed:
Delivery Address for {ENTITY NAME:Customer}:\r{ENTITY NOTE:Customer:[:CommandValue]}
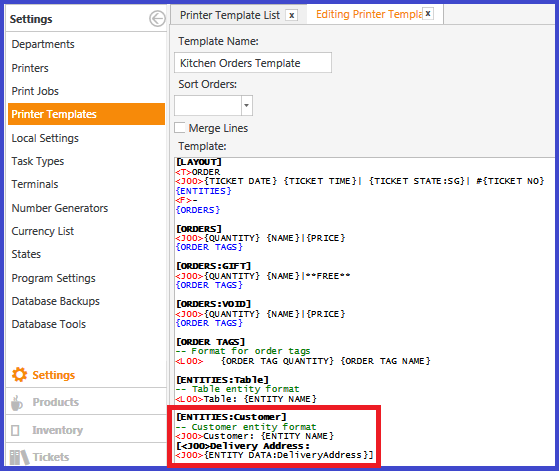
Printer Template Tags:
Using Ticket Tag (place this anywhere in the Template where you want the Address displayed):
[<J00>Delivery Address:
<J00>{TICKET TAG:DeliveryAddress}]
Using Entity Data:
[ENTITIES:Customer]
-- Customer entity format
<J00>Customer: {ENTITY NAME}
[<J00>Delivery Address:
<J00>{ENTITY DATA:DeliveryAddress}]


 . I’ll add them for next release.