In this tutorial I’ll show you how to change Table Screen buttons to display things other than Table Number.
As you know Table’s are Entities and Table selection buttons color determined by Entity States. When we create a new Ticket, Table Entity’s State becomes New Orders and it displayed as Orange color.
On V5 other than button Color, button caption can also be changed by configuring a Display Format for state. So when we create a ticket, both table color and caption can change. Let’s see how it can be done.
###Changing Table State Display Format
First of all I’ll enable Use State Display Format setting to enable custom state display for selected Entity Screen. We may not want to display a custom state for all entity screens.
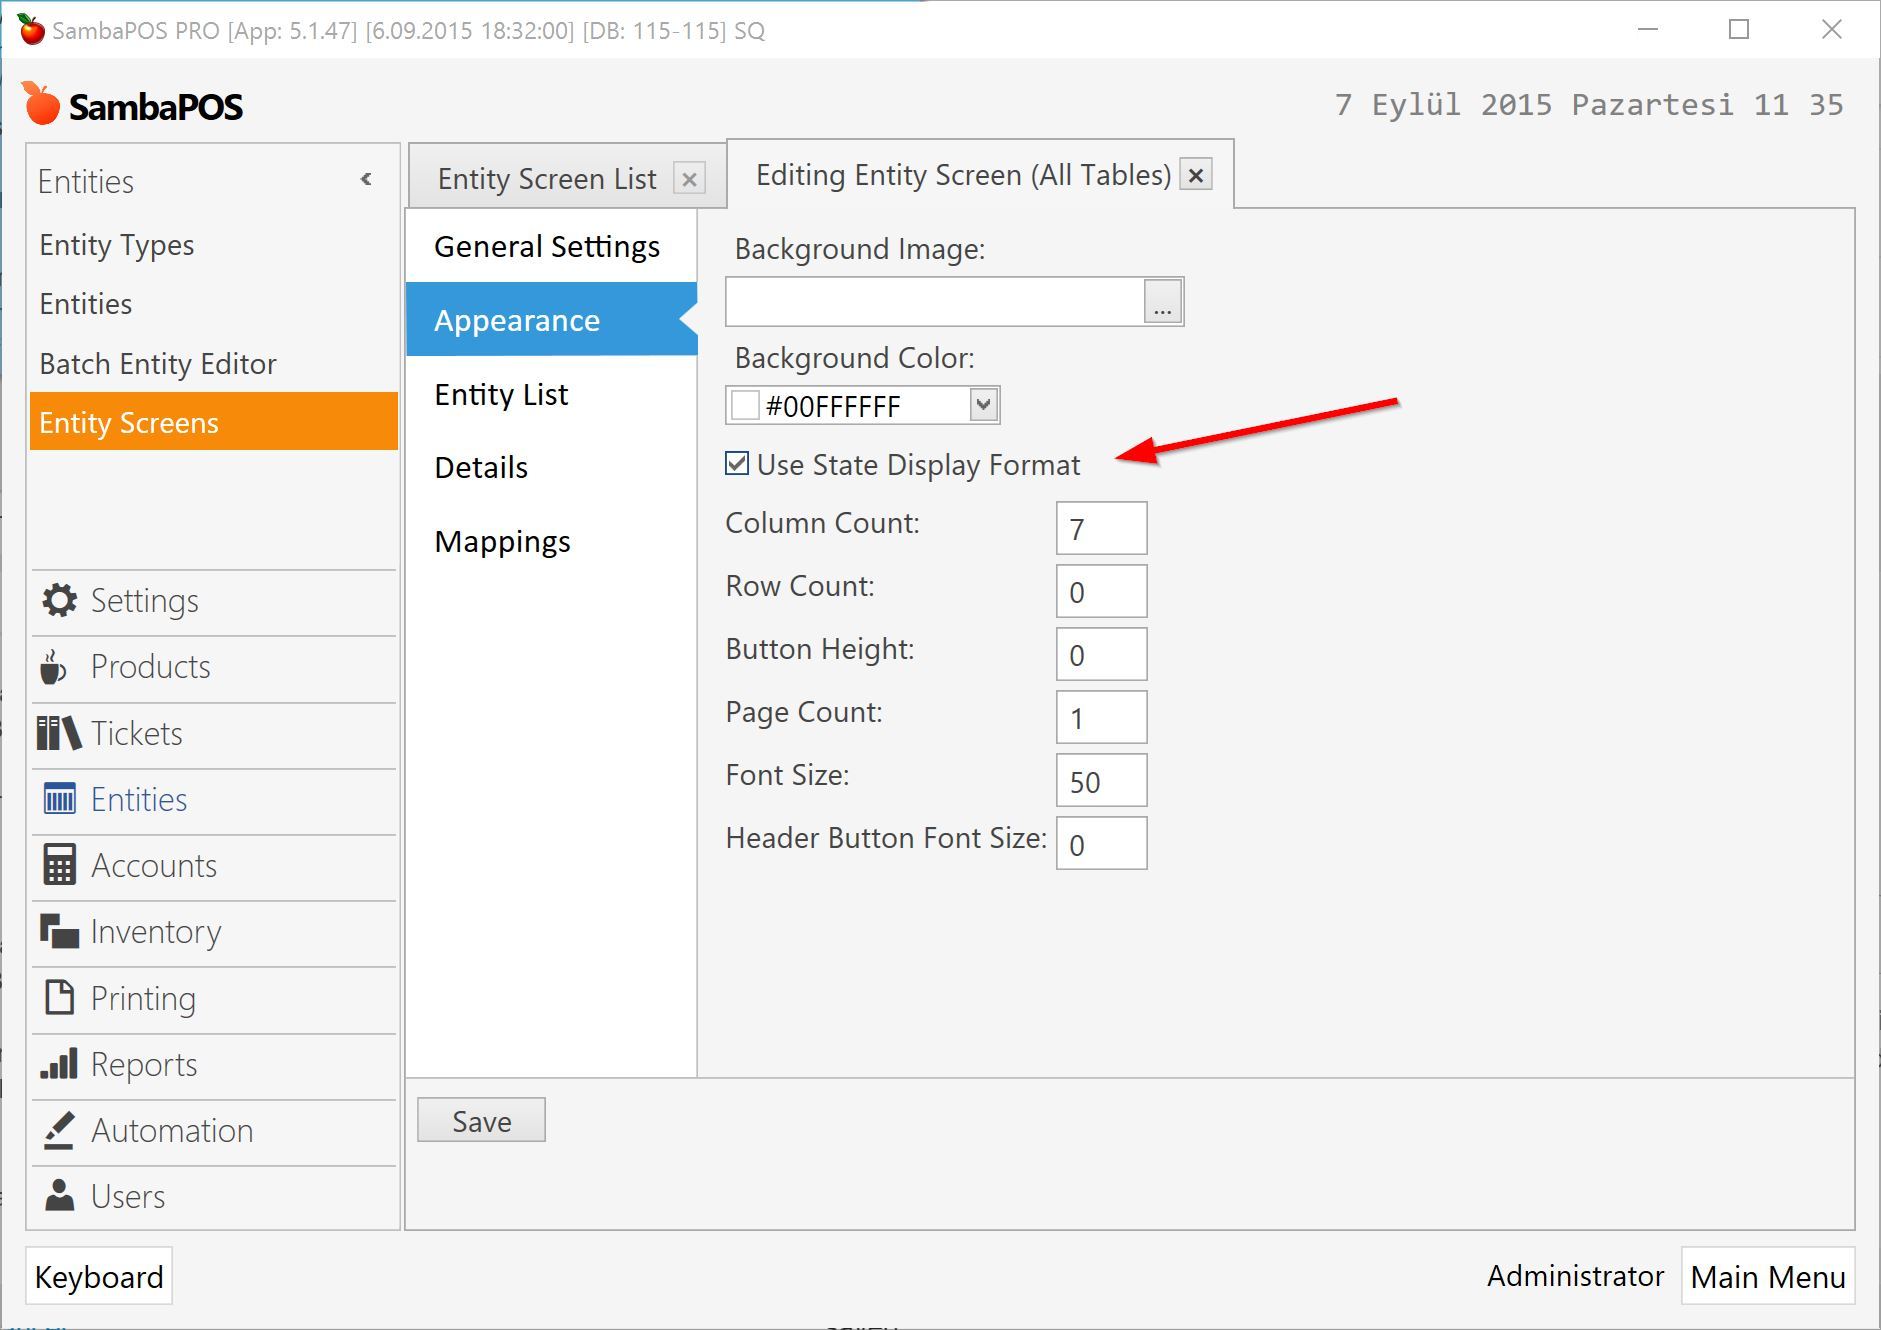
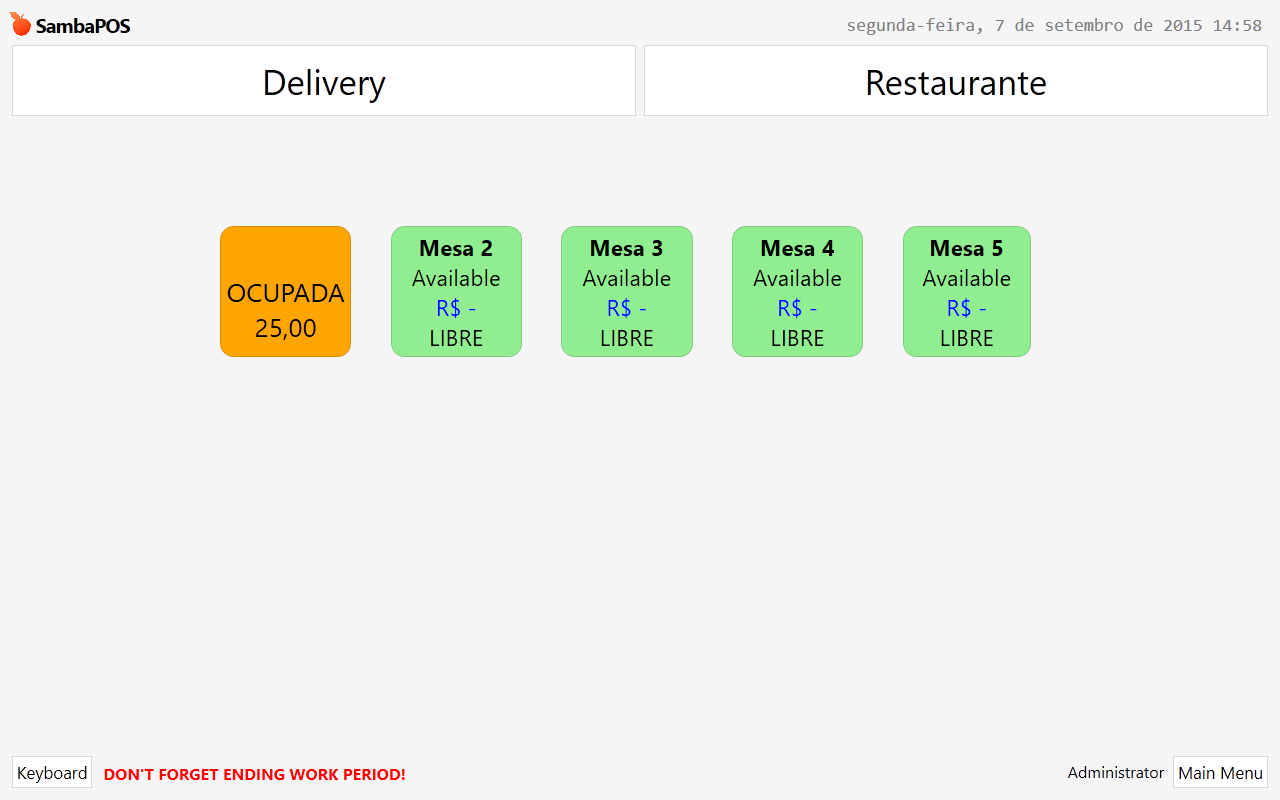
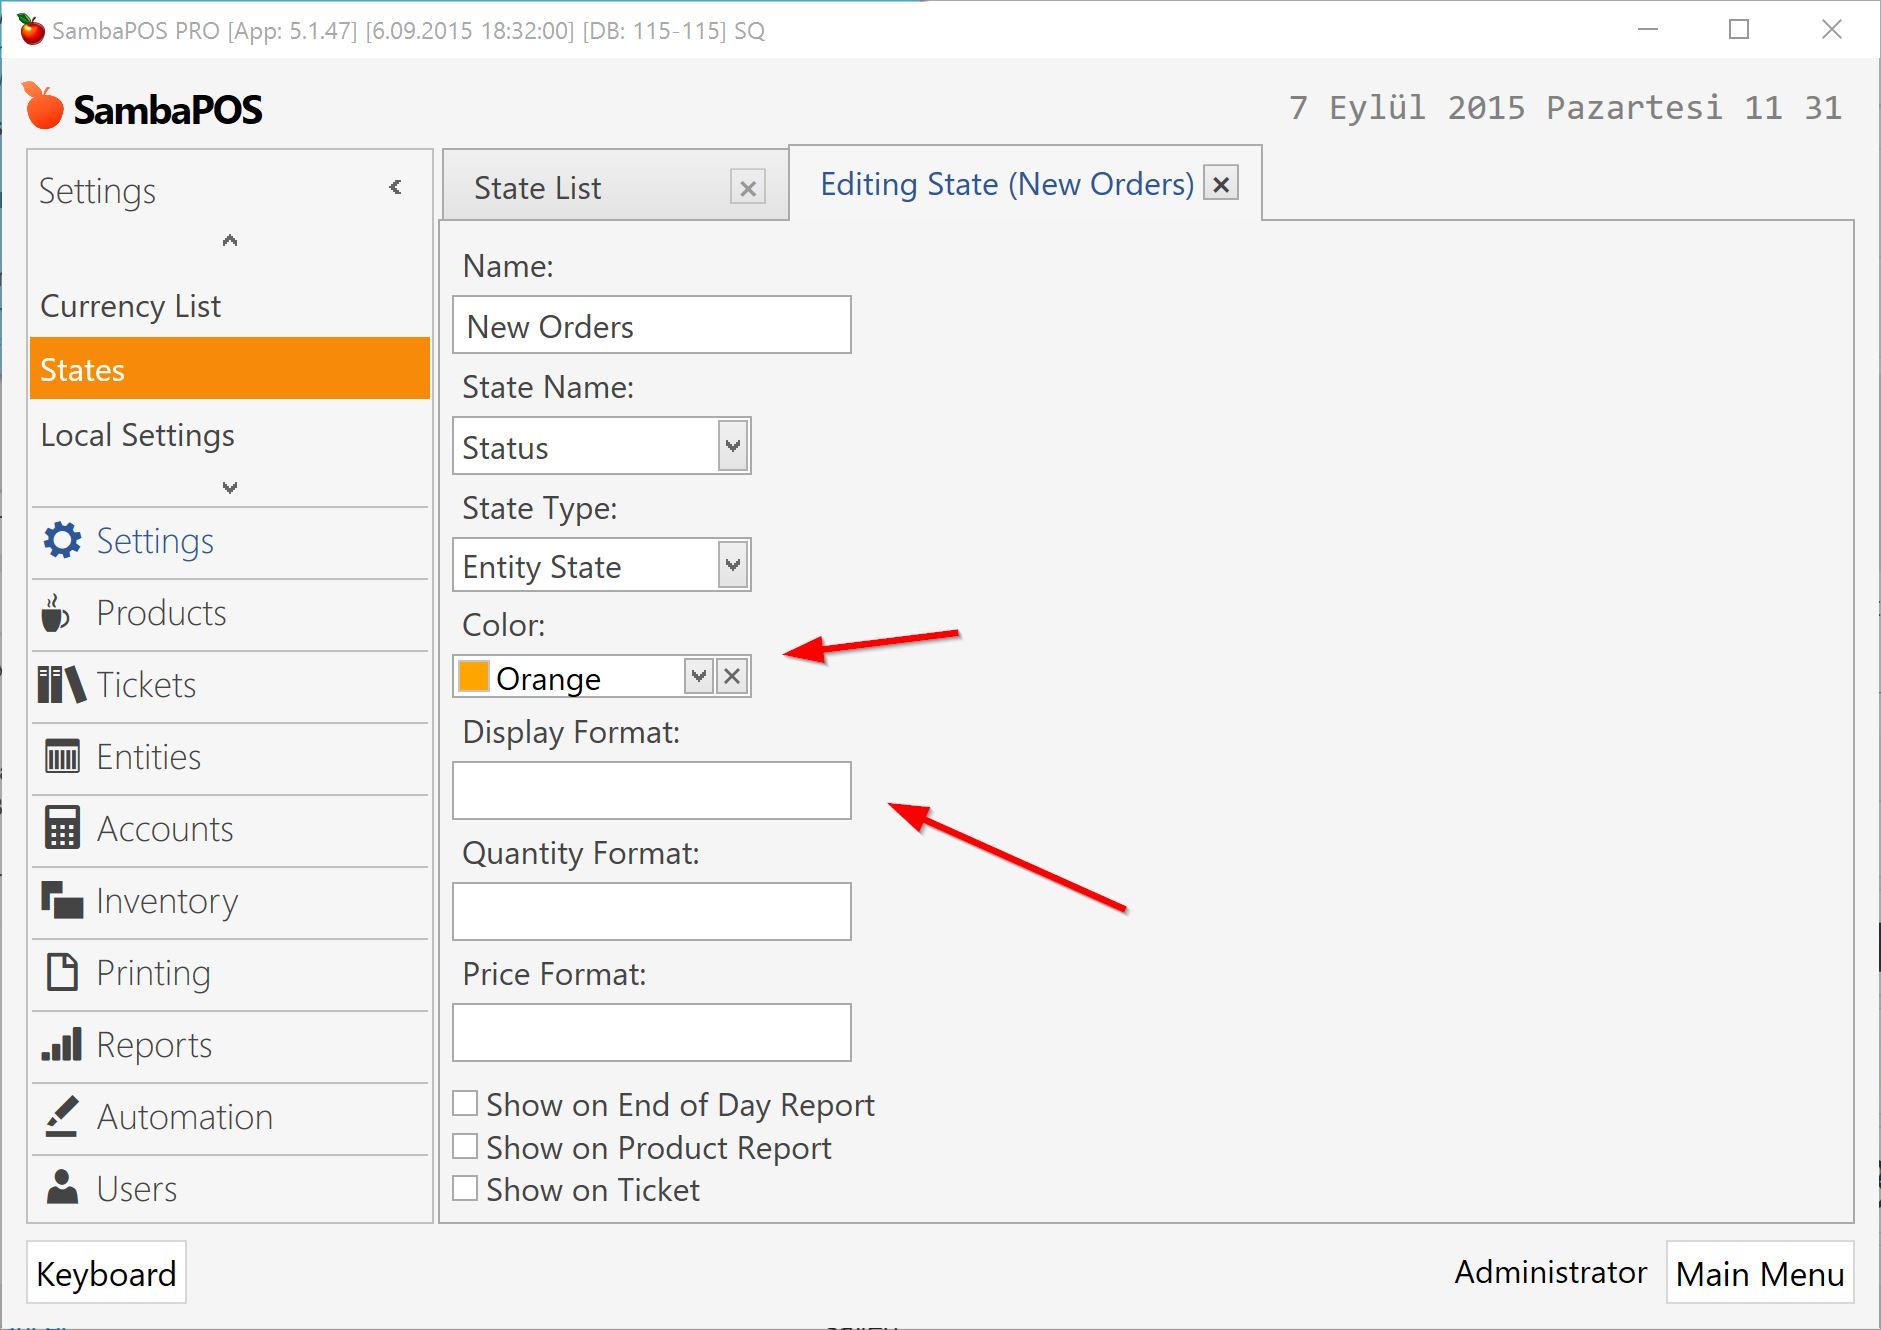
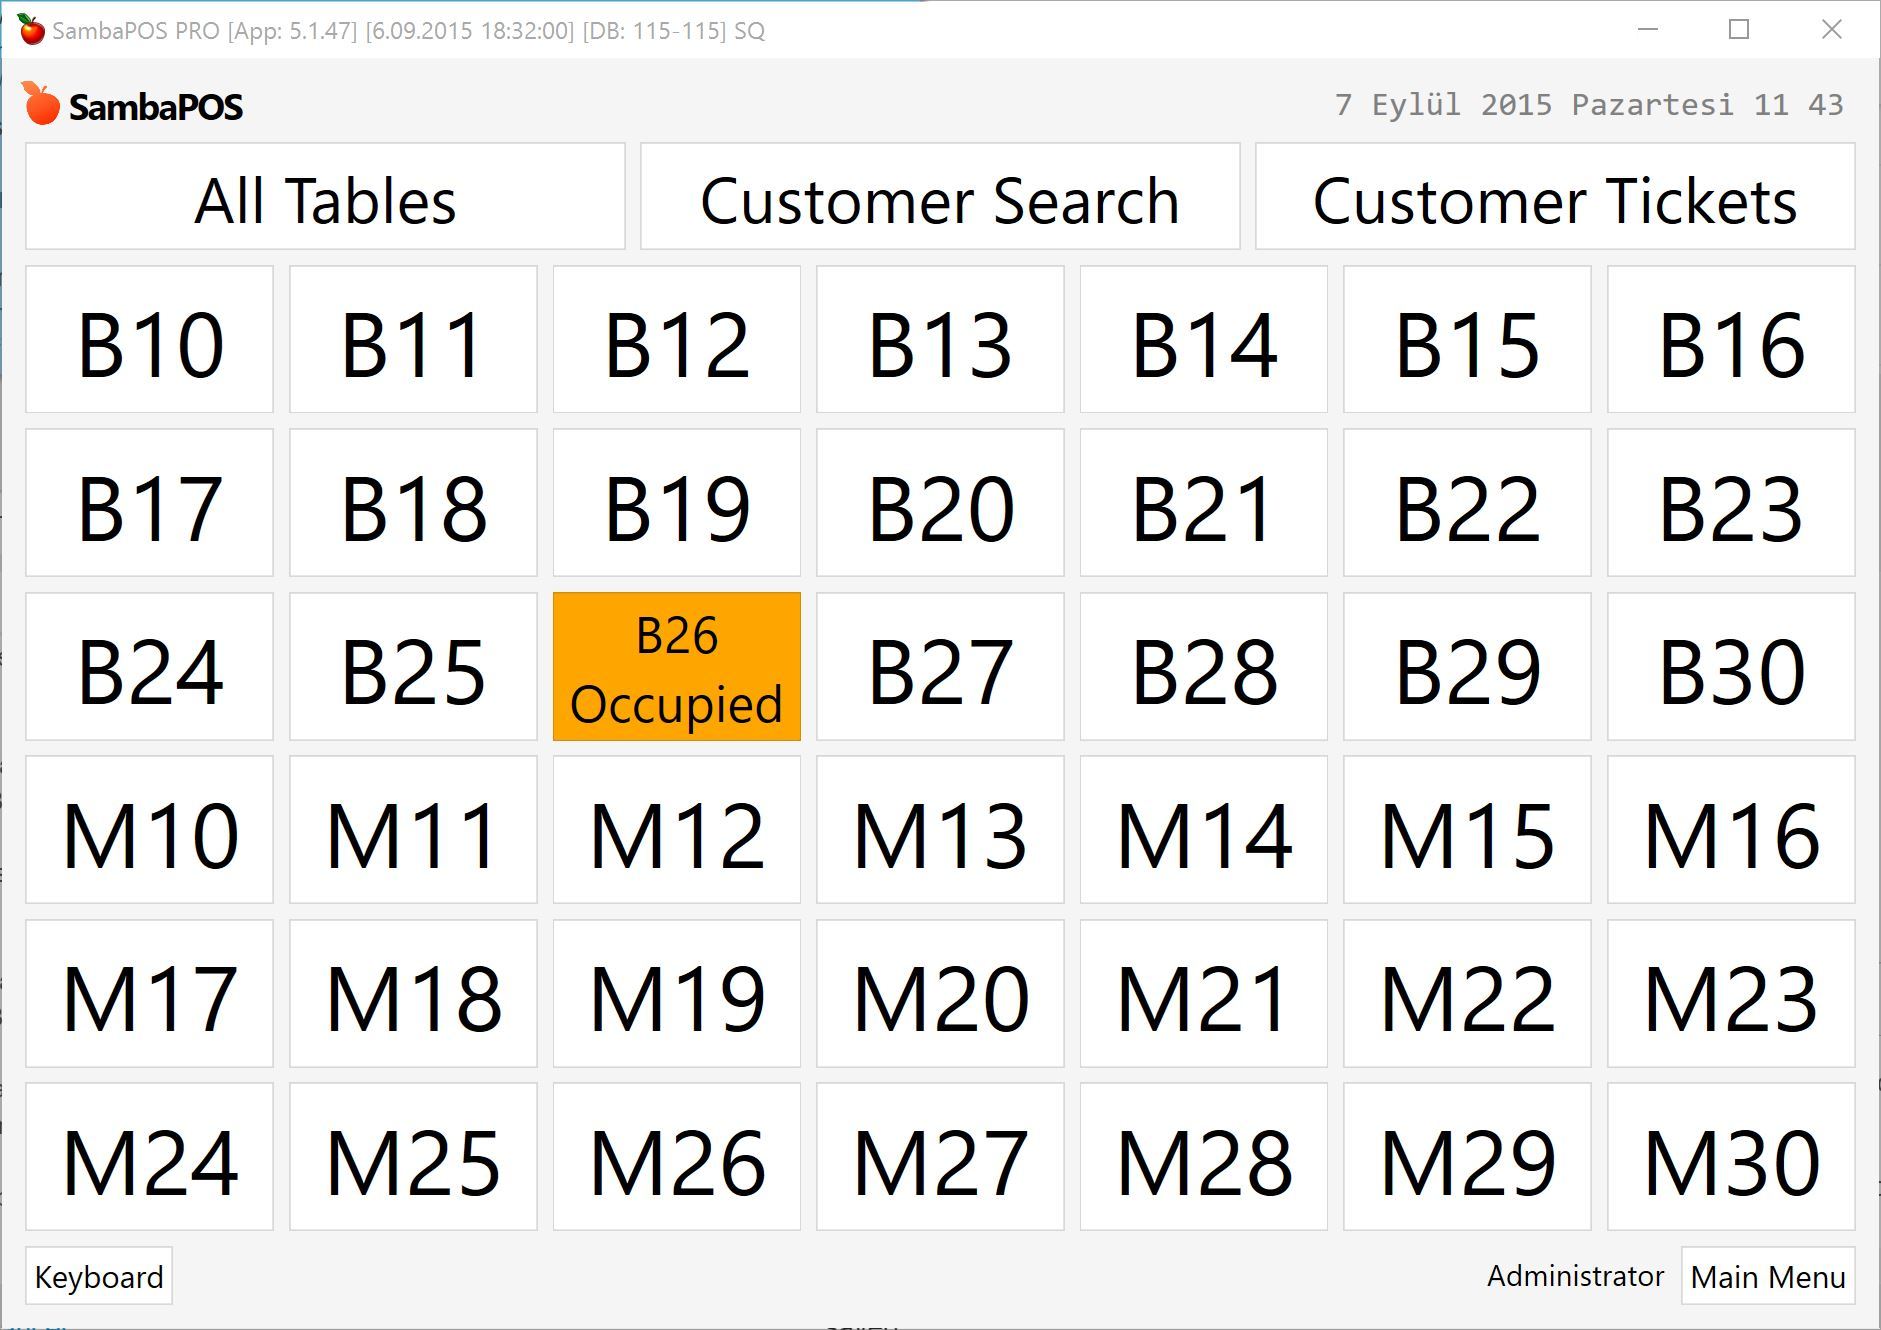
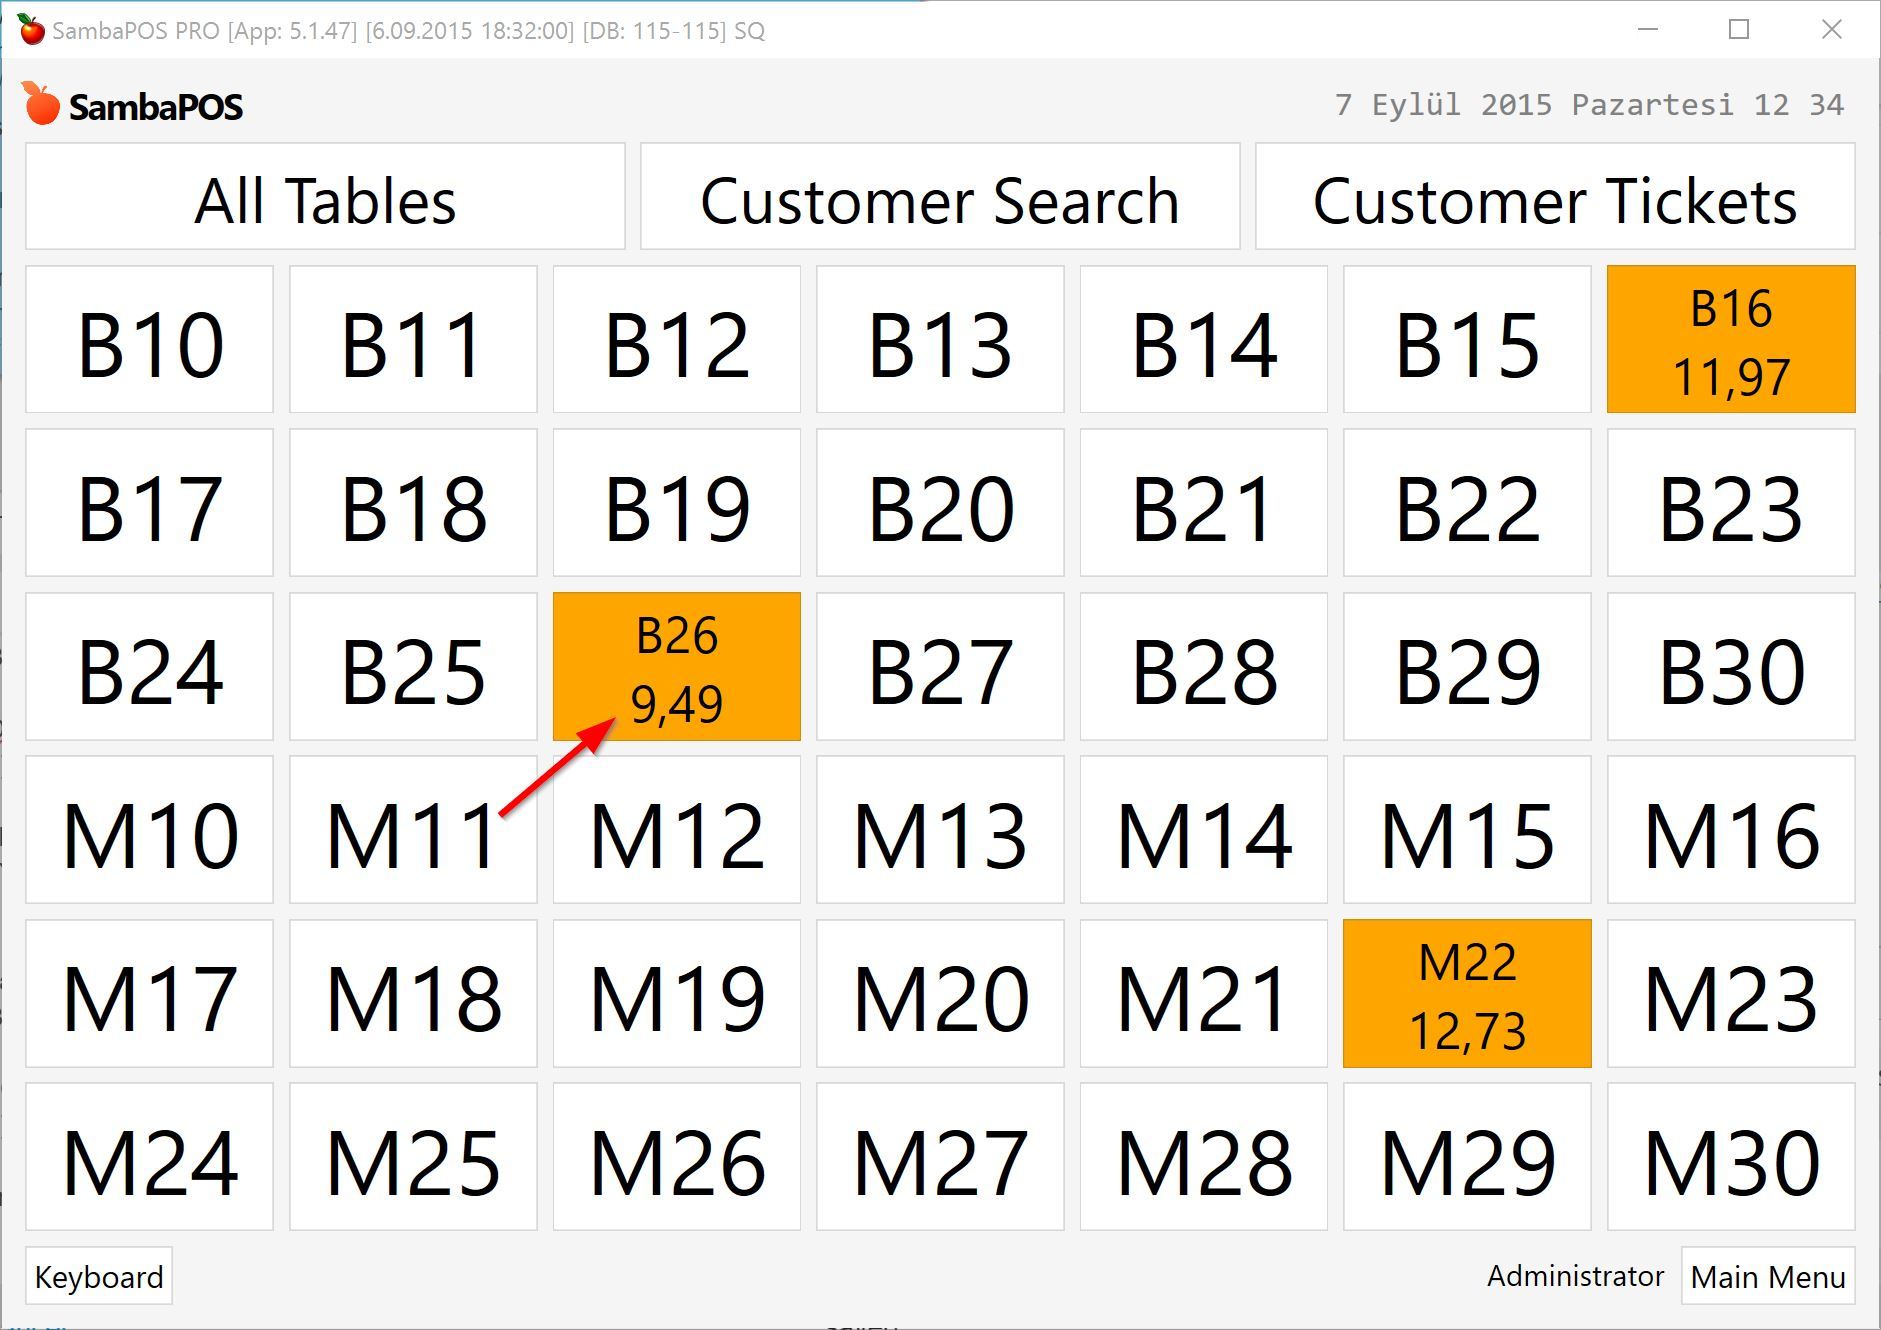
After enabling State Display Format for All Tables screen I’m editing New Orders state to display Occupied label under Table Number.

$1 determines where table number will appear. While updating button caption $1 will replace with Table Name (entity name).
<br/> tag adds a line break to the caption and on second line Occupied word will appear.
Due to caching that may not apply immediately. Visit
Customer Ticketsscreen once and come back toAll Tablesscreen to refresh cache.
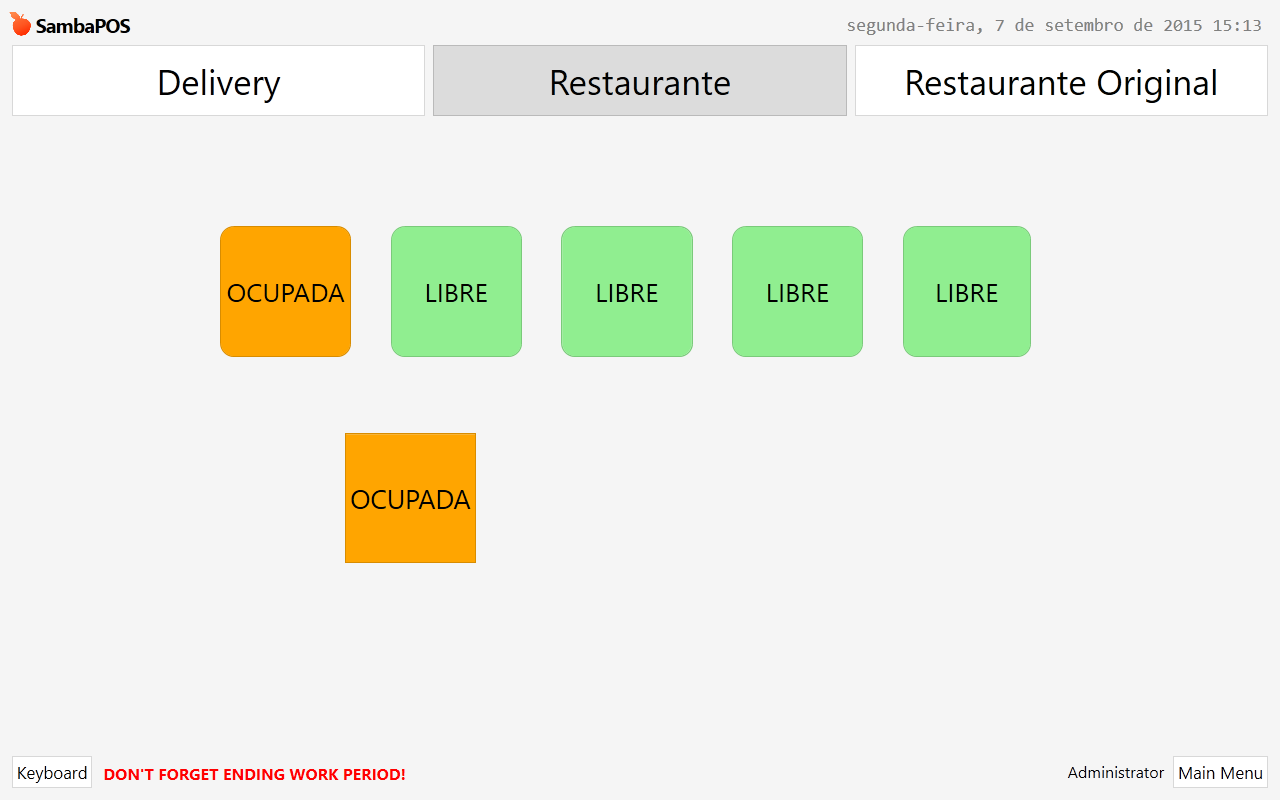
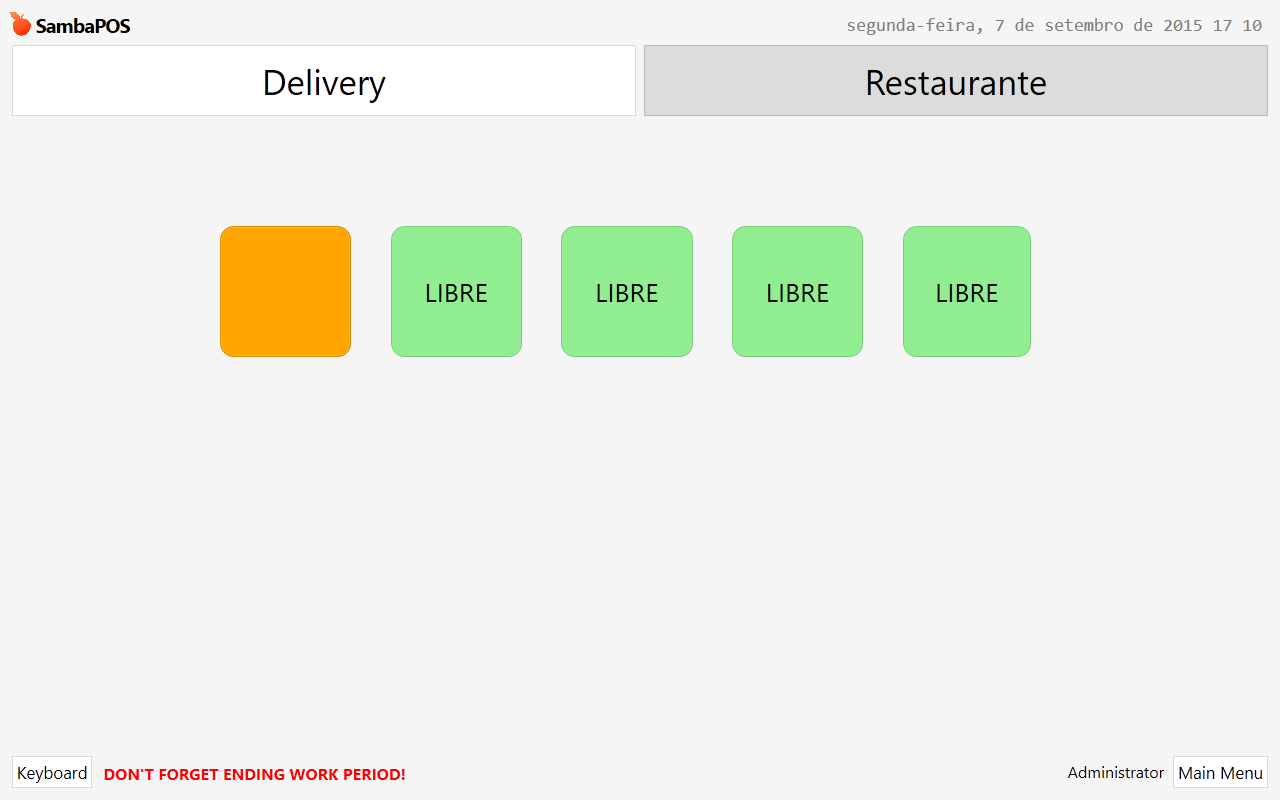
As we changed New Orders state’s display format white buttons still remains unchanged. As you’ve guessed we can change Available state to change how unoccupied buttons appears.
###Using tags to display dynamic data.
Displaying Occupied label is not too exciting. By using printing tags you can display dynamic data. For example we can try using {DATE} tag to display date on button.
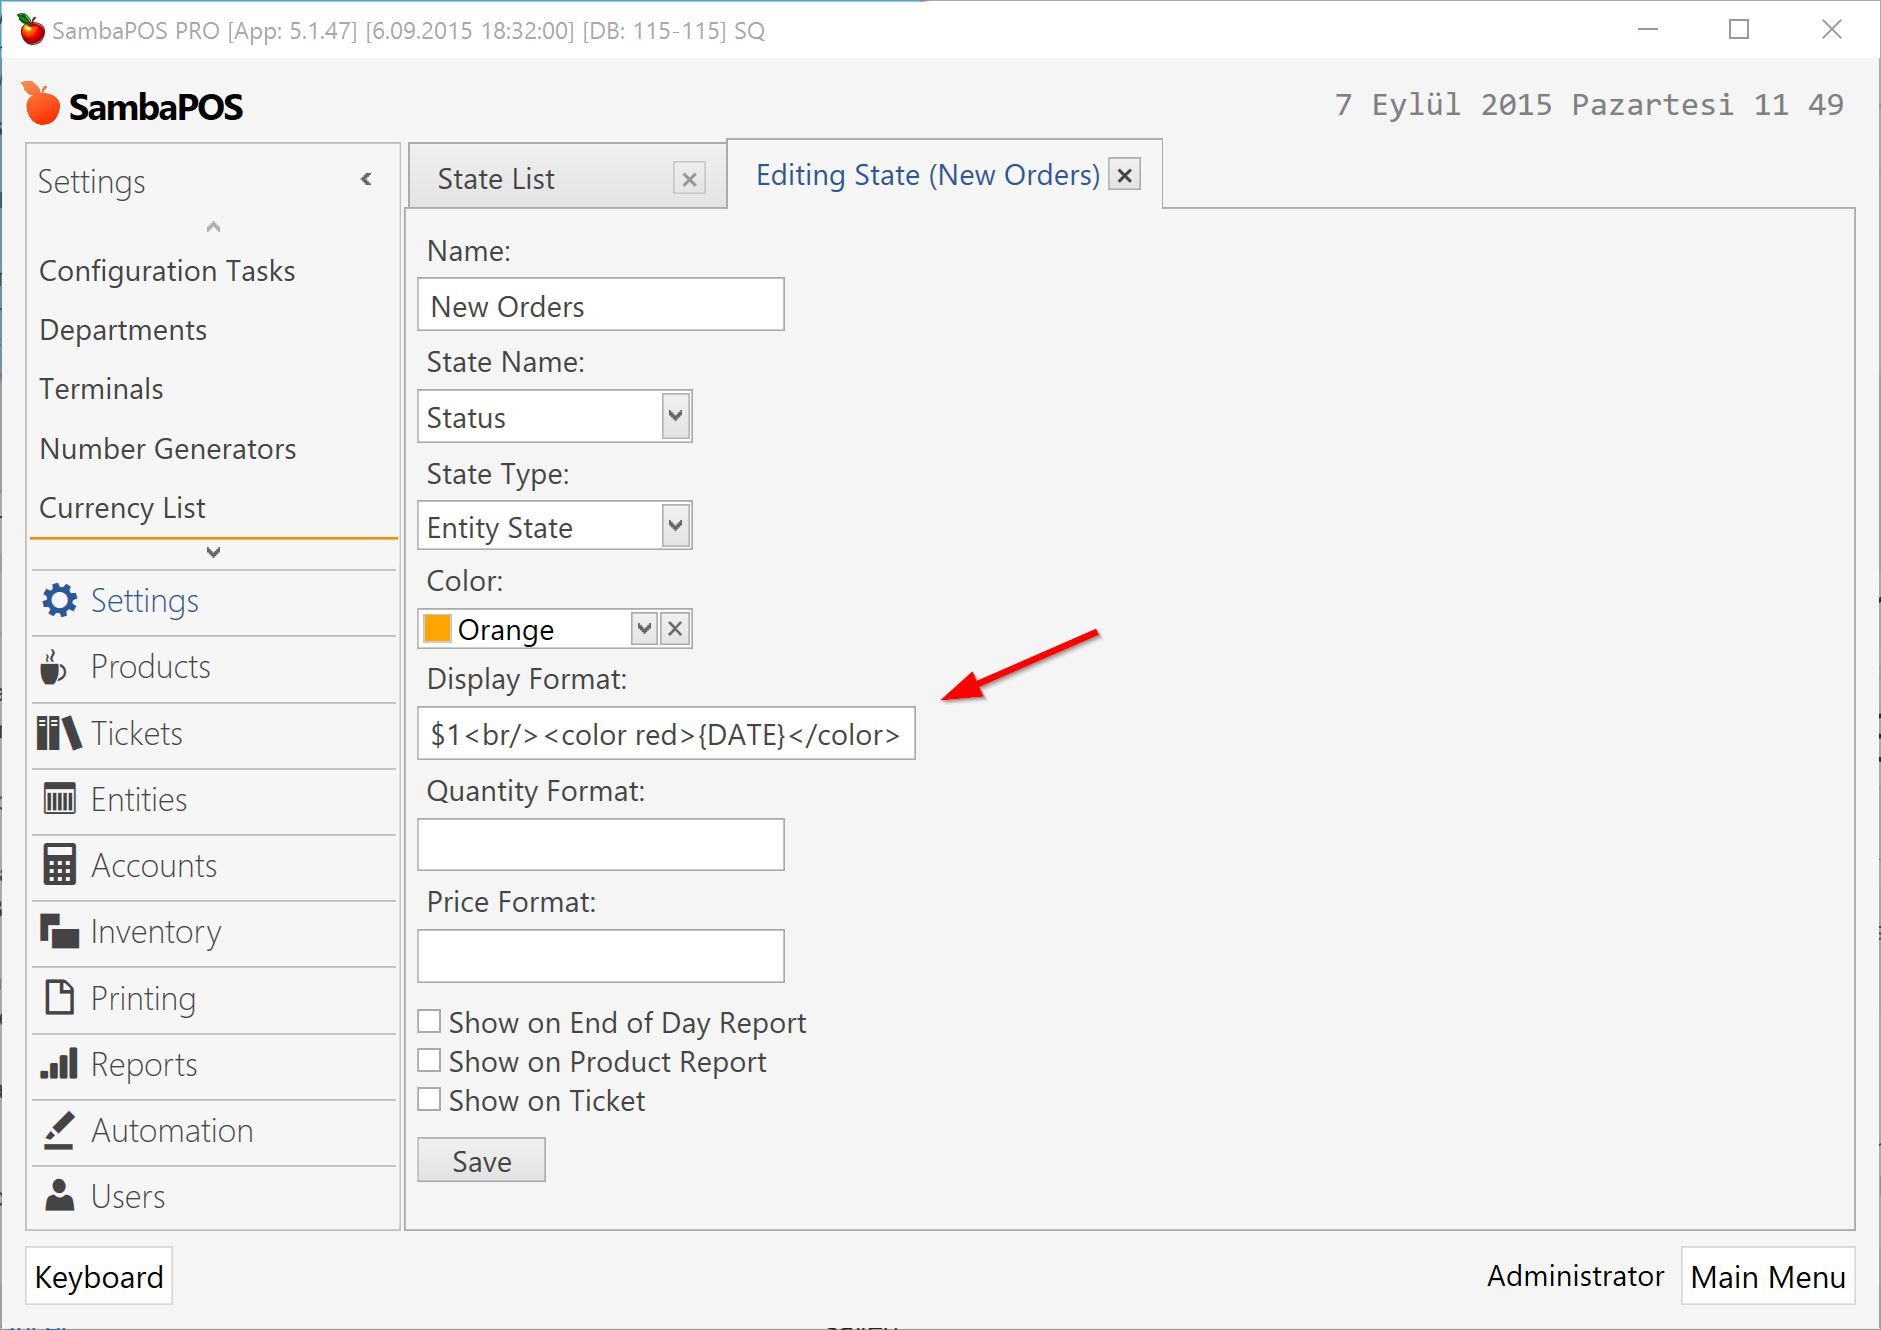
This time I’ve also used <color> tag to display date in red color. That formatting support is a new V5 feature and I’ll create tutorials to show you all supported tags. For now think it like HTML or XML like markup syntax.

V5 supports
{CALL:X}tag to execute JScript. You can write scripts to access external data from web services or to execute SQL to read data from databases. As requested we’ll have detailed info about such uses.
###Using Report Tags to Display Ticket Data
Displaying date still not so exciting. You’ll propably want to display some ticket info on buttons like ticket total or Customer Name. We can use reporting tags to fetch needed ticket data.
Custom reports module is a built in module in V5 so we can use reporting tags without installing additional modules.
Before updating states we can use Report Editor screen to test how reporting tags displays data. I’ll create few more tickets for testing.
Create a new report to display report editor. Before editing give a dummy name for report.
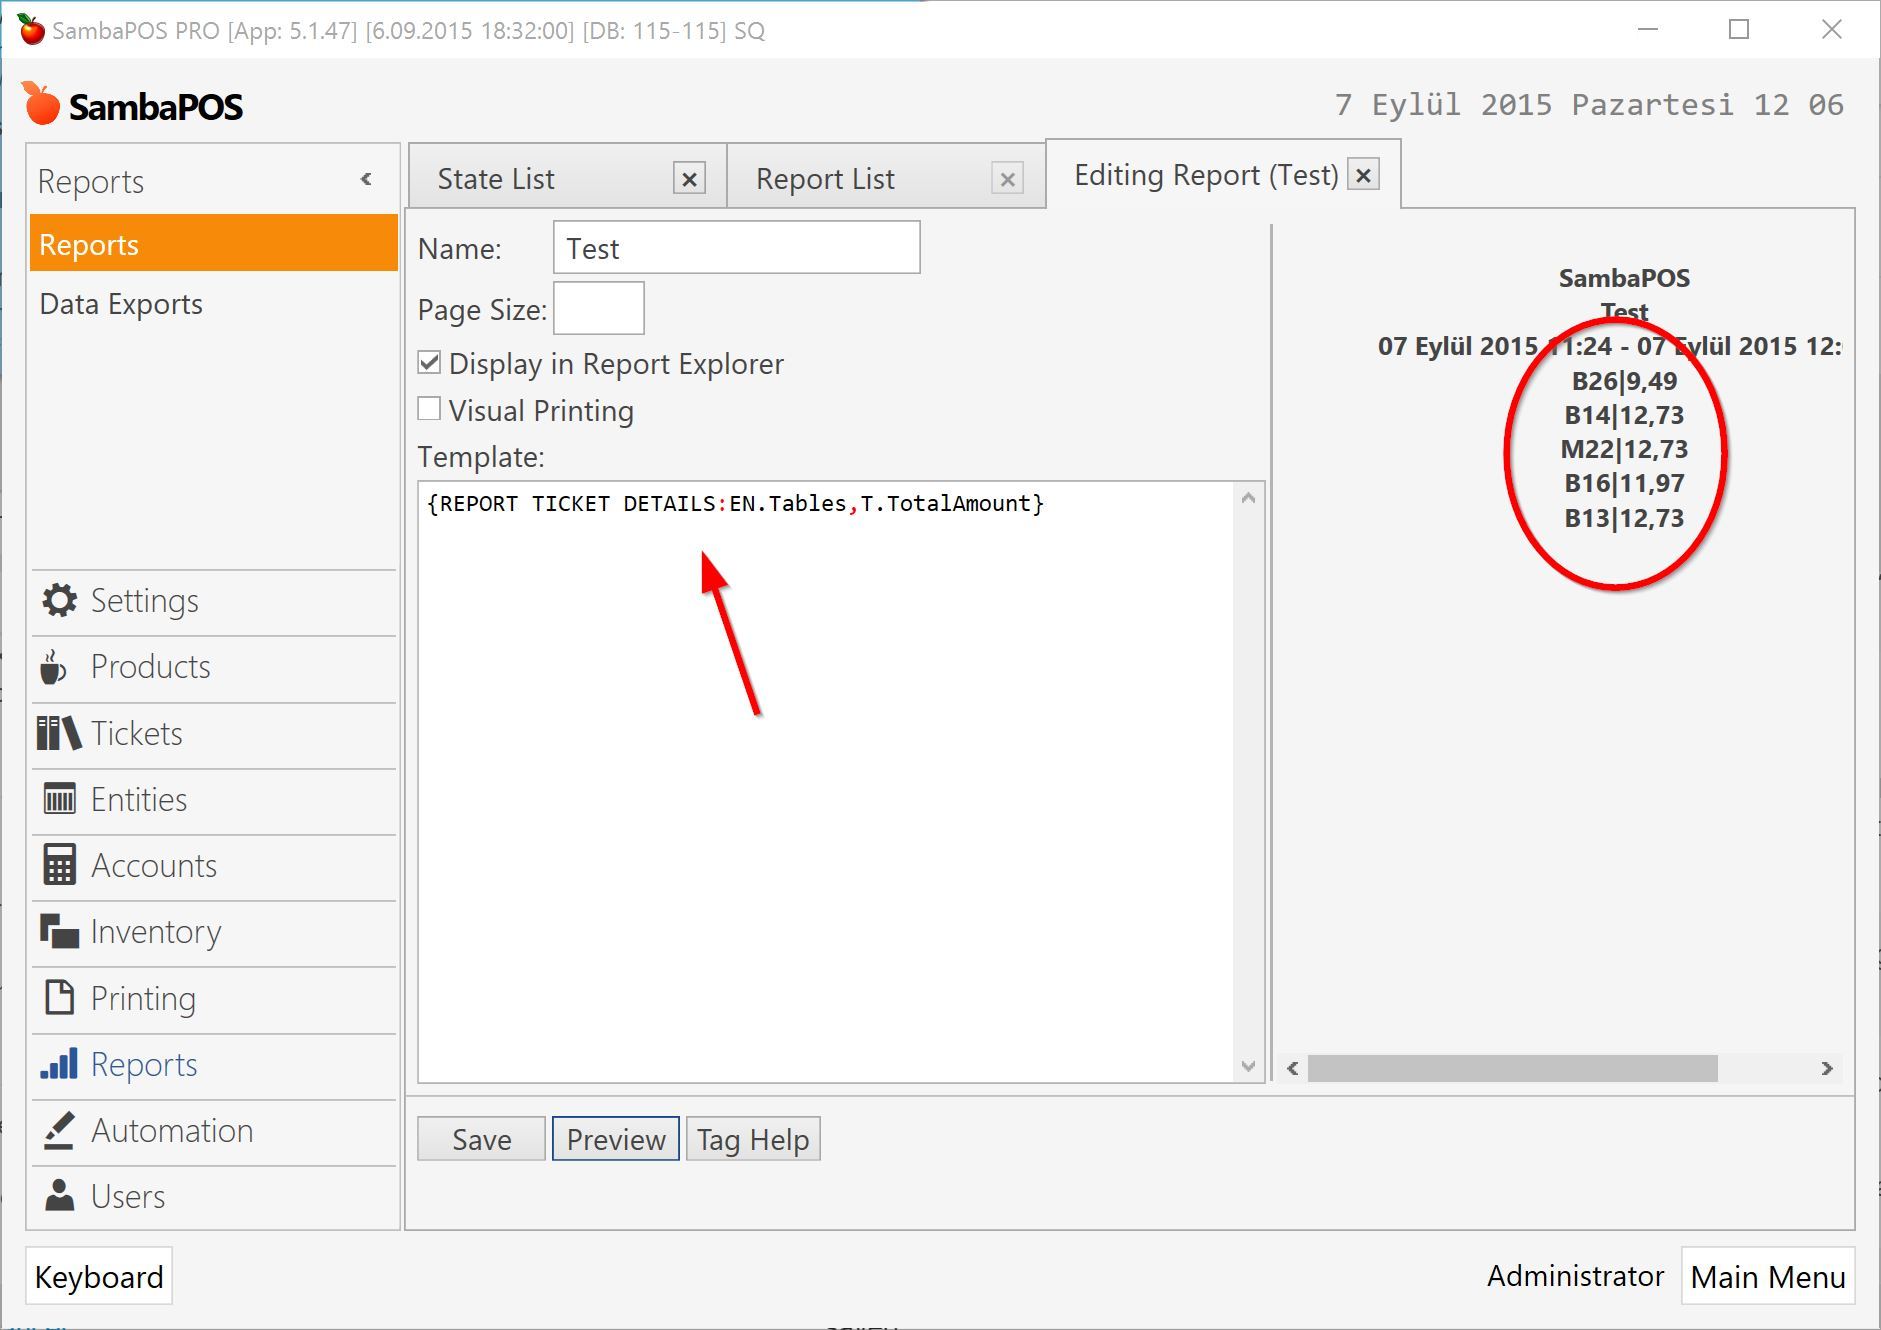
{REPORT TICKET DETAILS:EN.Tables,T.TotalAmount}
This tag lists all tickets and displays table name an total amount. Report Previewing is also a new V5 feature. As we didn’t declared a table our report displays on report header separated with pipes.
Now I’ll add an expression inside tag to list open tickets.
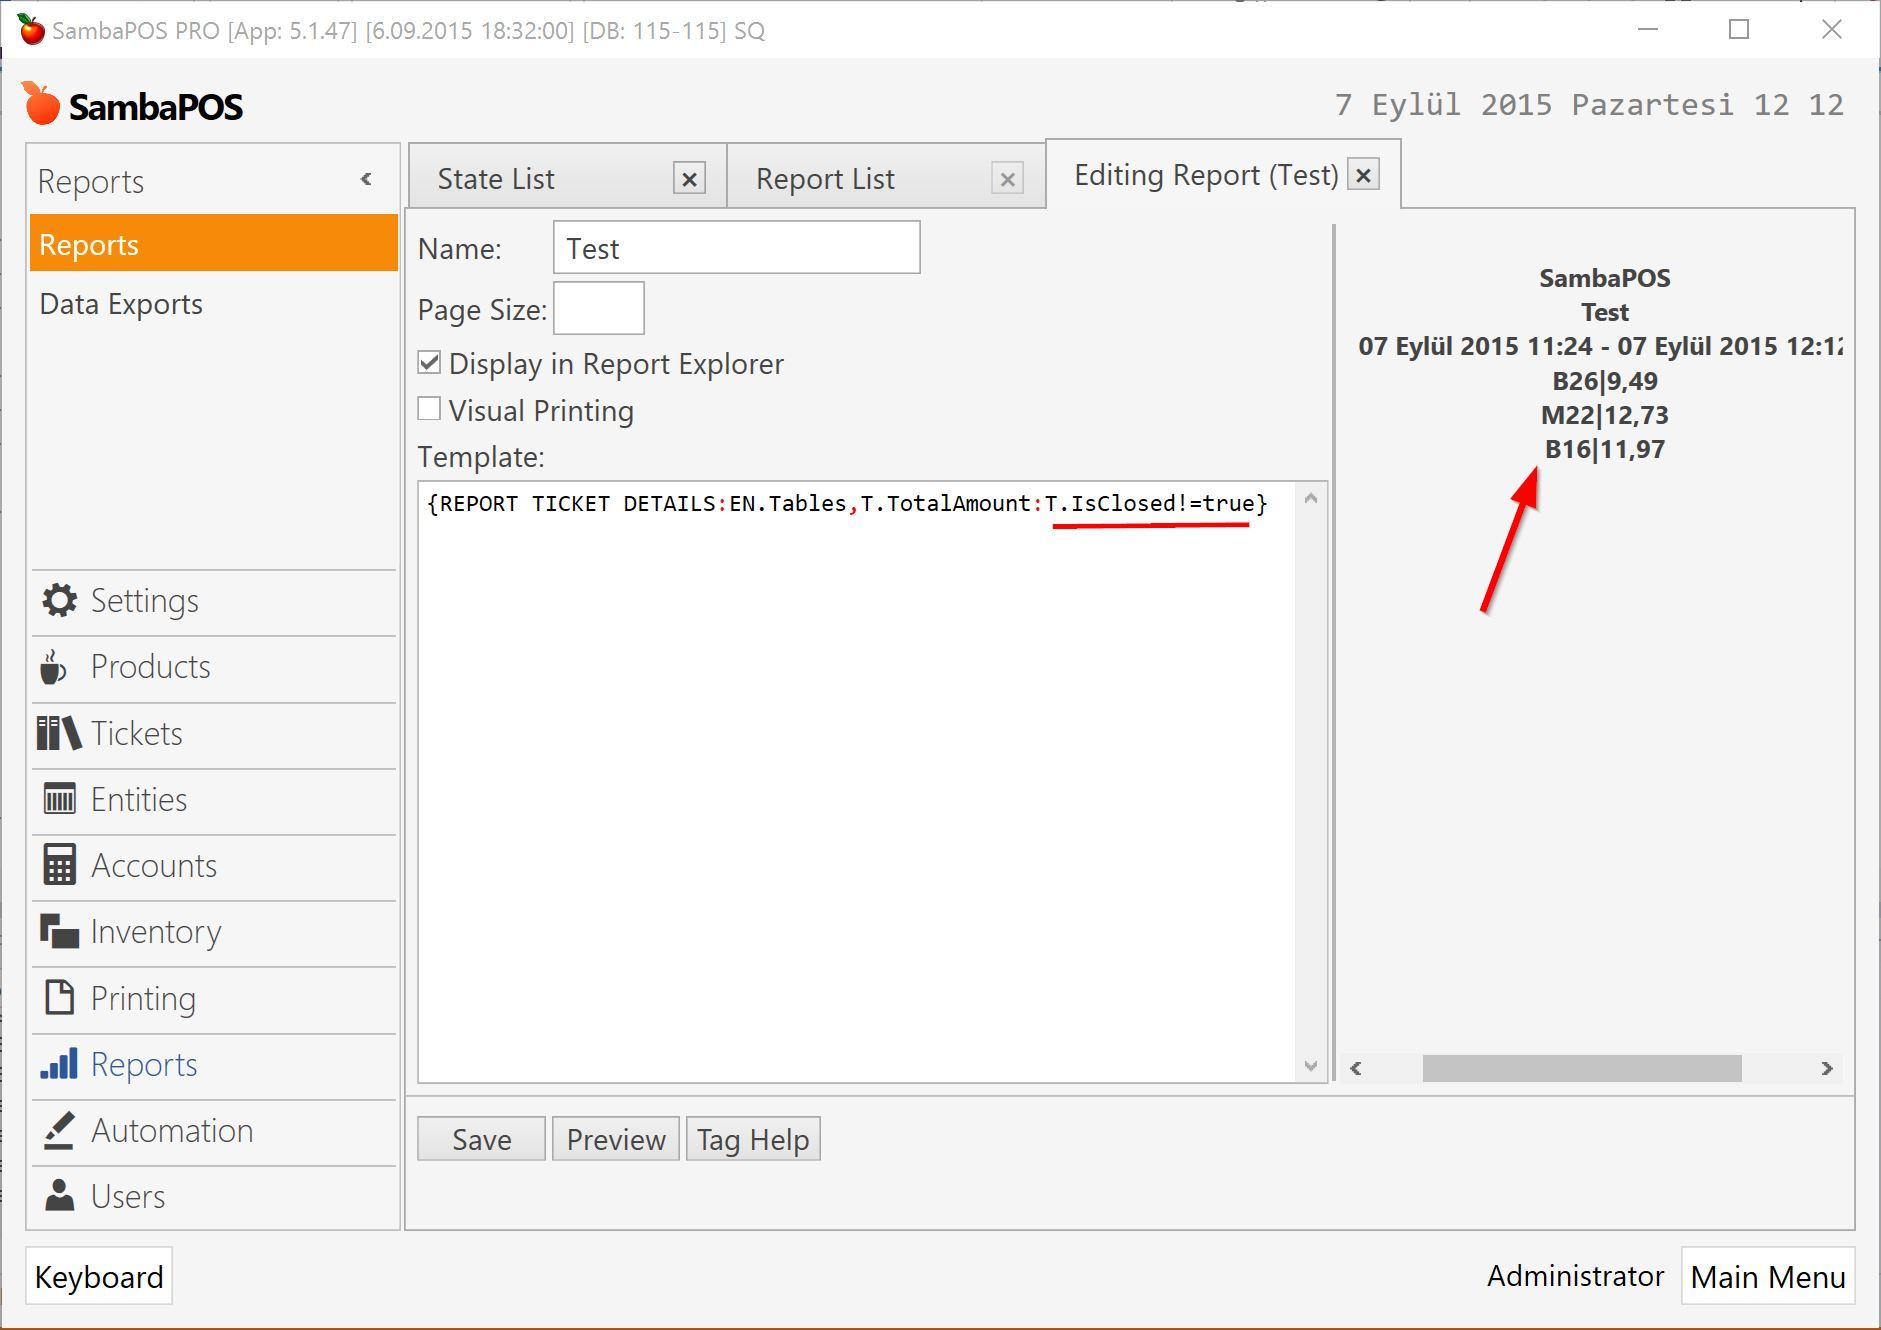
{REPORT TICKET DETAILS:EN.Tables,T.TotalAmount:T.IsClosed!=true}
T.IsClosed value will be True for Closed tickets. As we want to list open tickets we’ll negate equality operator.
We can achieve same thing by using a different expression.
{REPORT TICKET DETAILS:EN.Tables,T.TotalAmount:T.RemainingAmount>0}
As remaining amount will be greater than 0 for open tickets that will also work. It is up to you to determine what you’ll display. When you need assistance feel free to ask questions to learn how to build expressions.
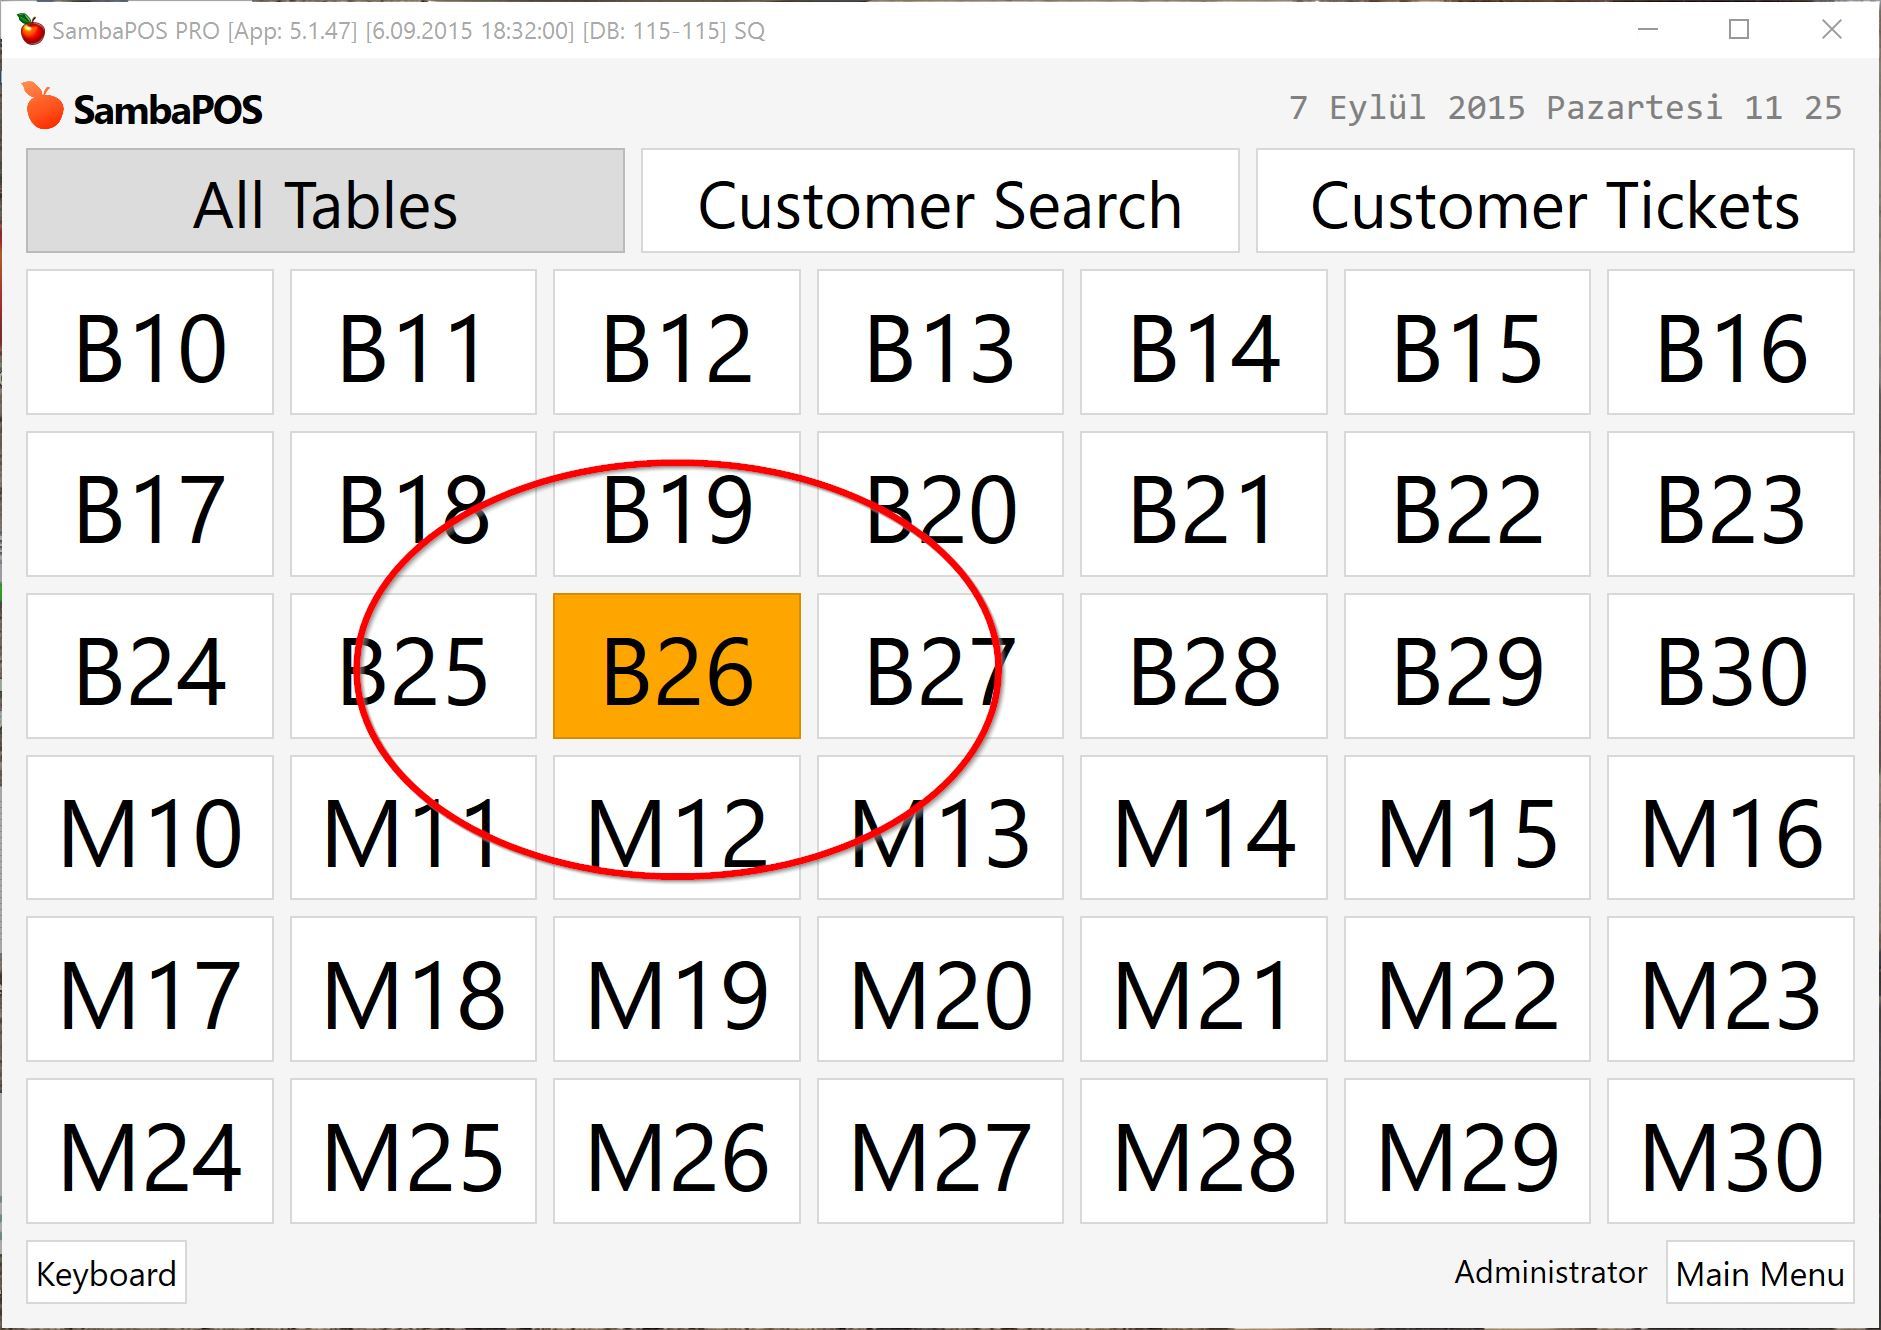
On next step I’ll add another expression to display open tickets for a single table. You’ll remember we’ll use this expression to display on table buttons so we should add table name to expression.
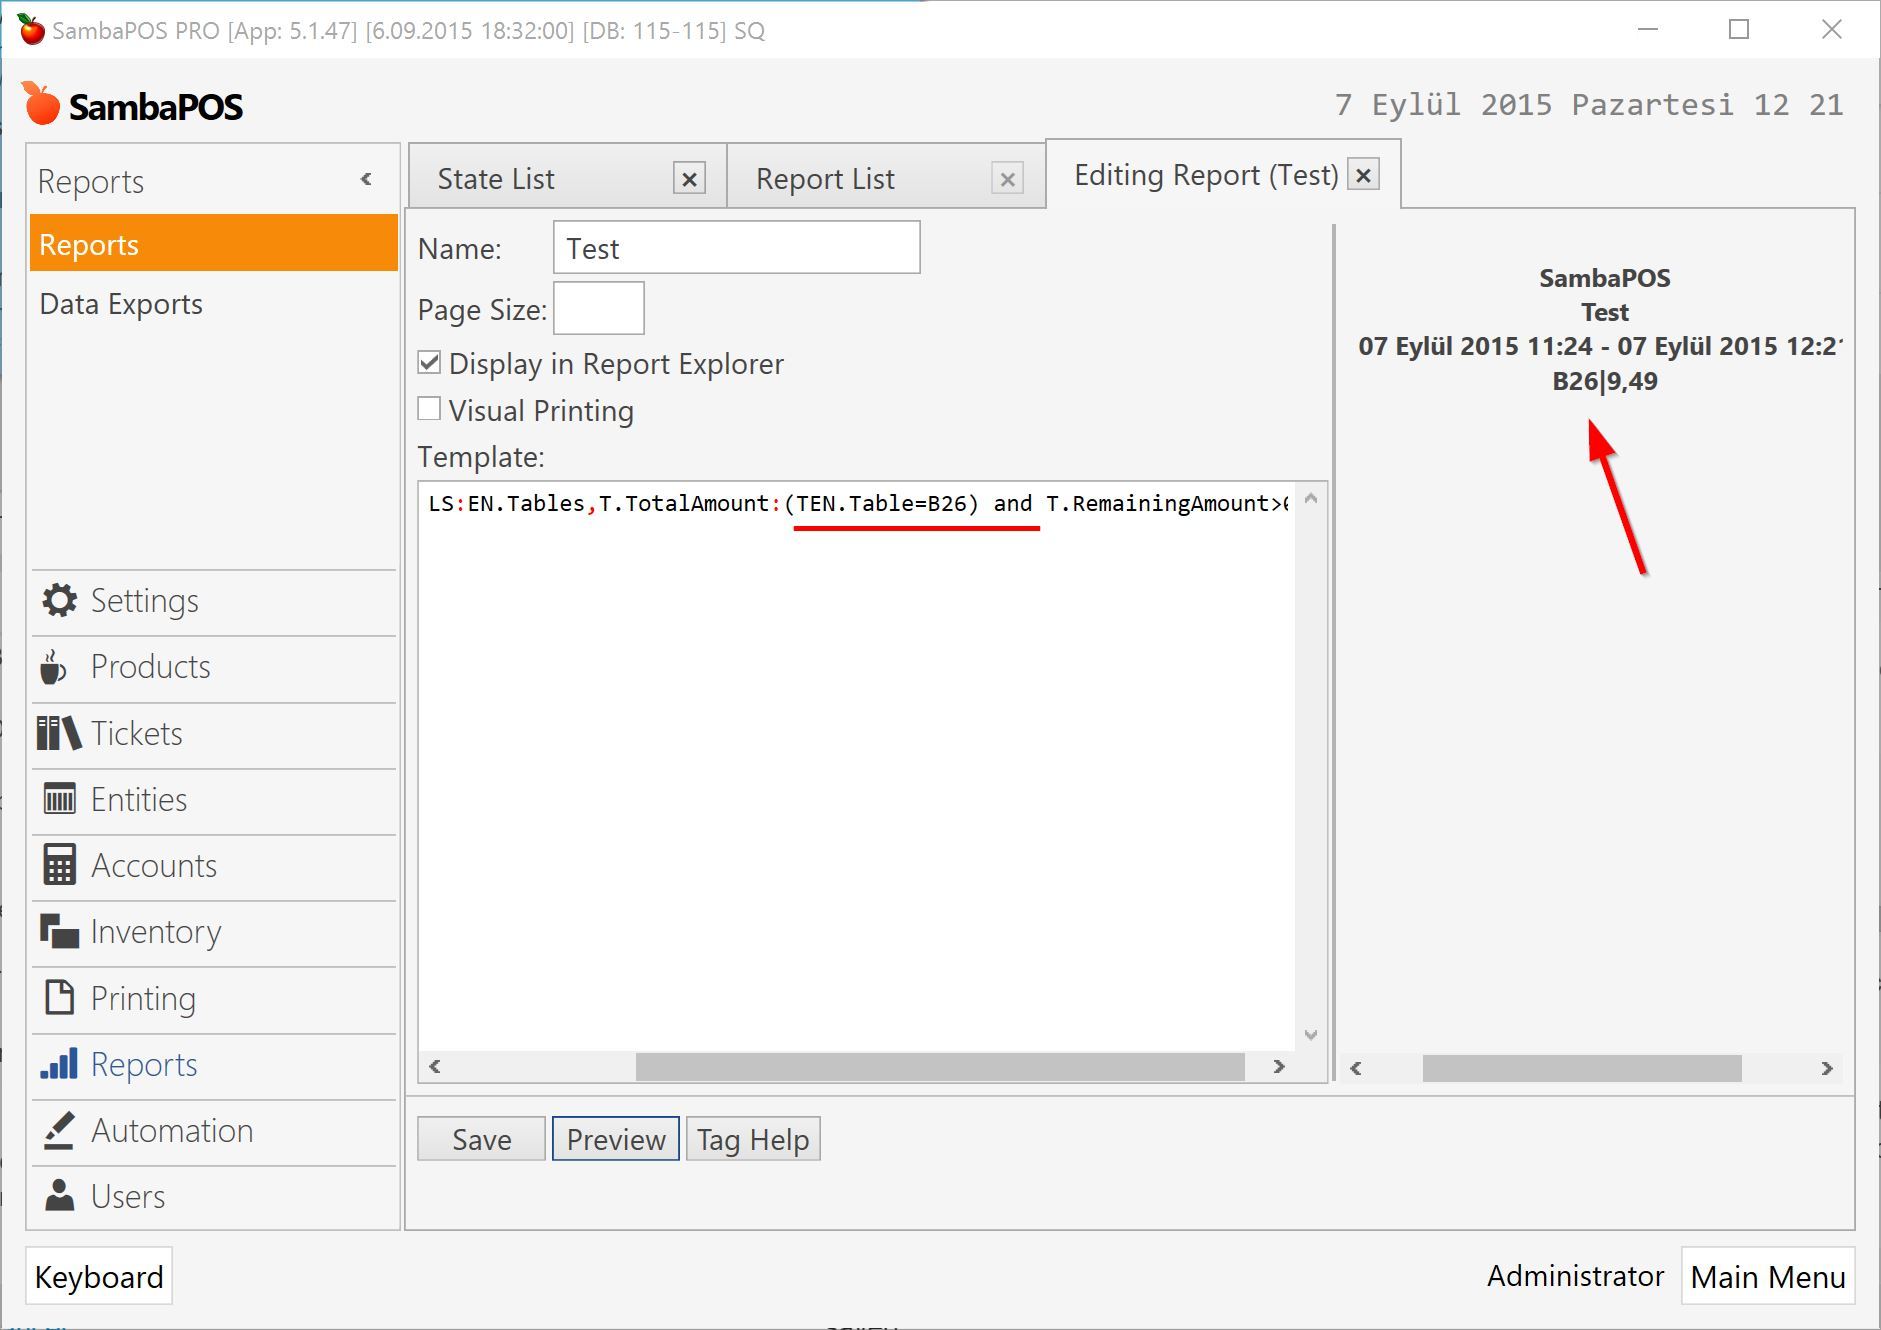
So open tickets for B26 table will appear here. We can use this tag for formatting button headers.
What we’ll display on buttons?
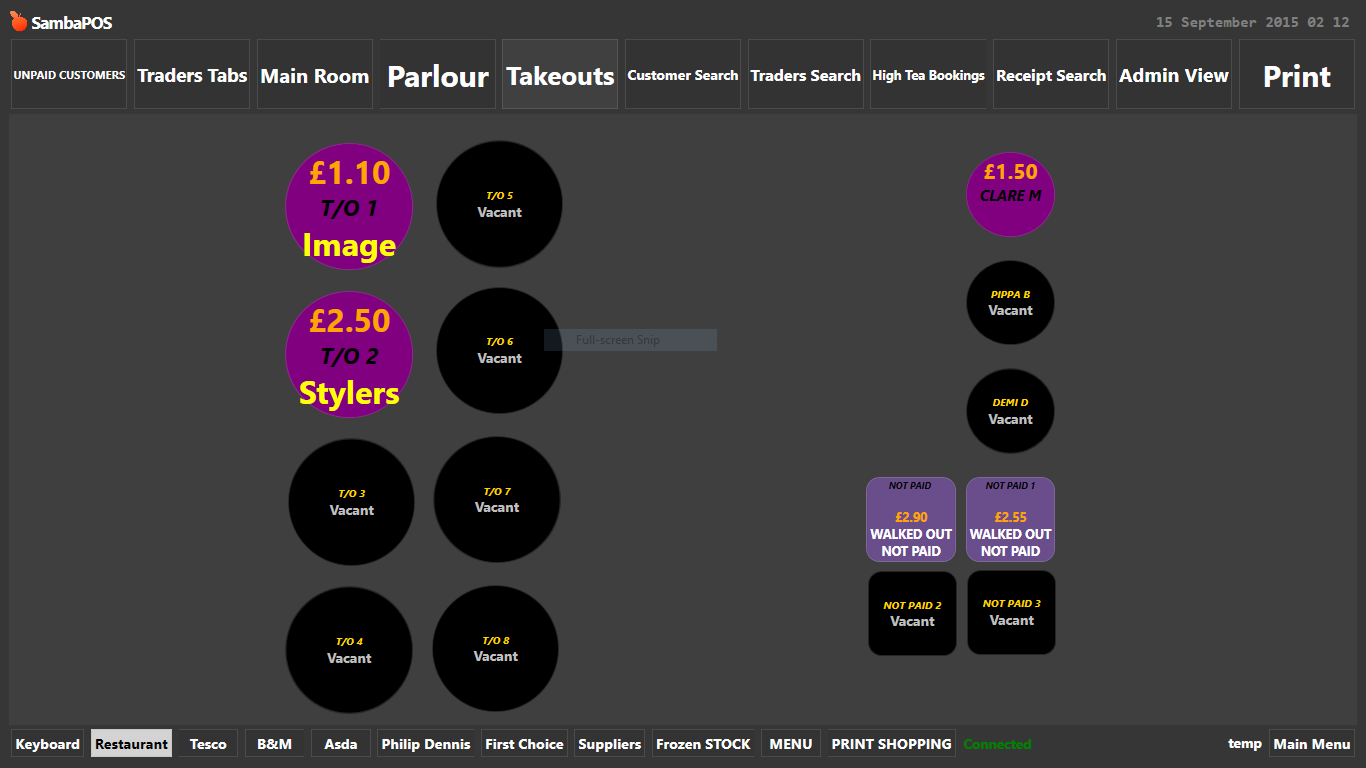
For this sample we can display Remaining Amount of ticket. On final step I’m formatting my tag as follows.
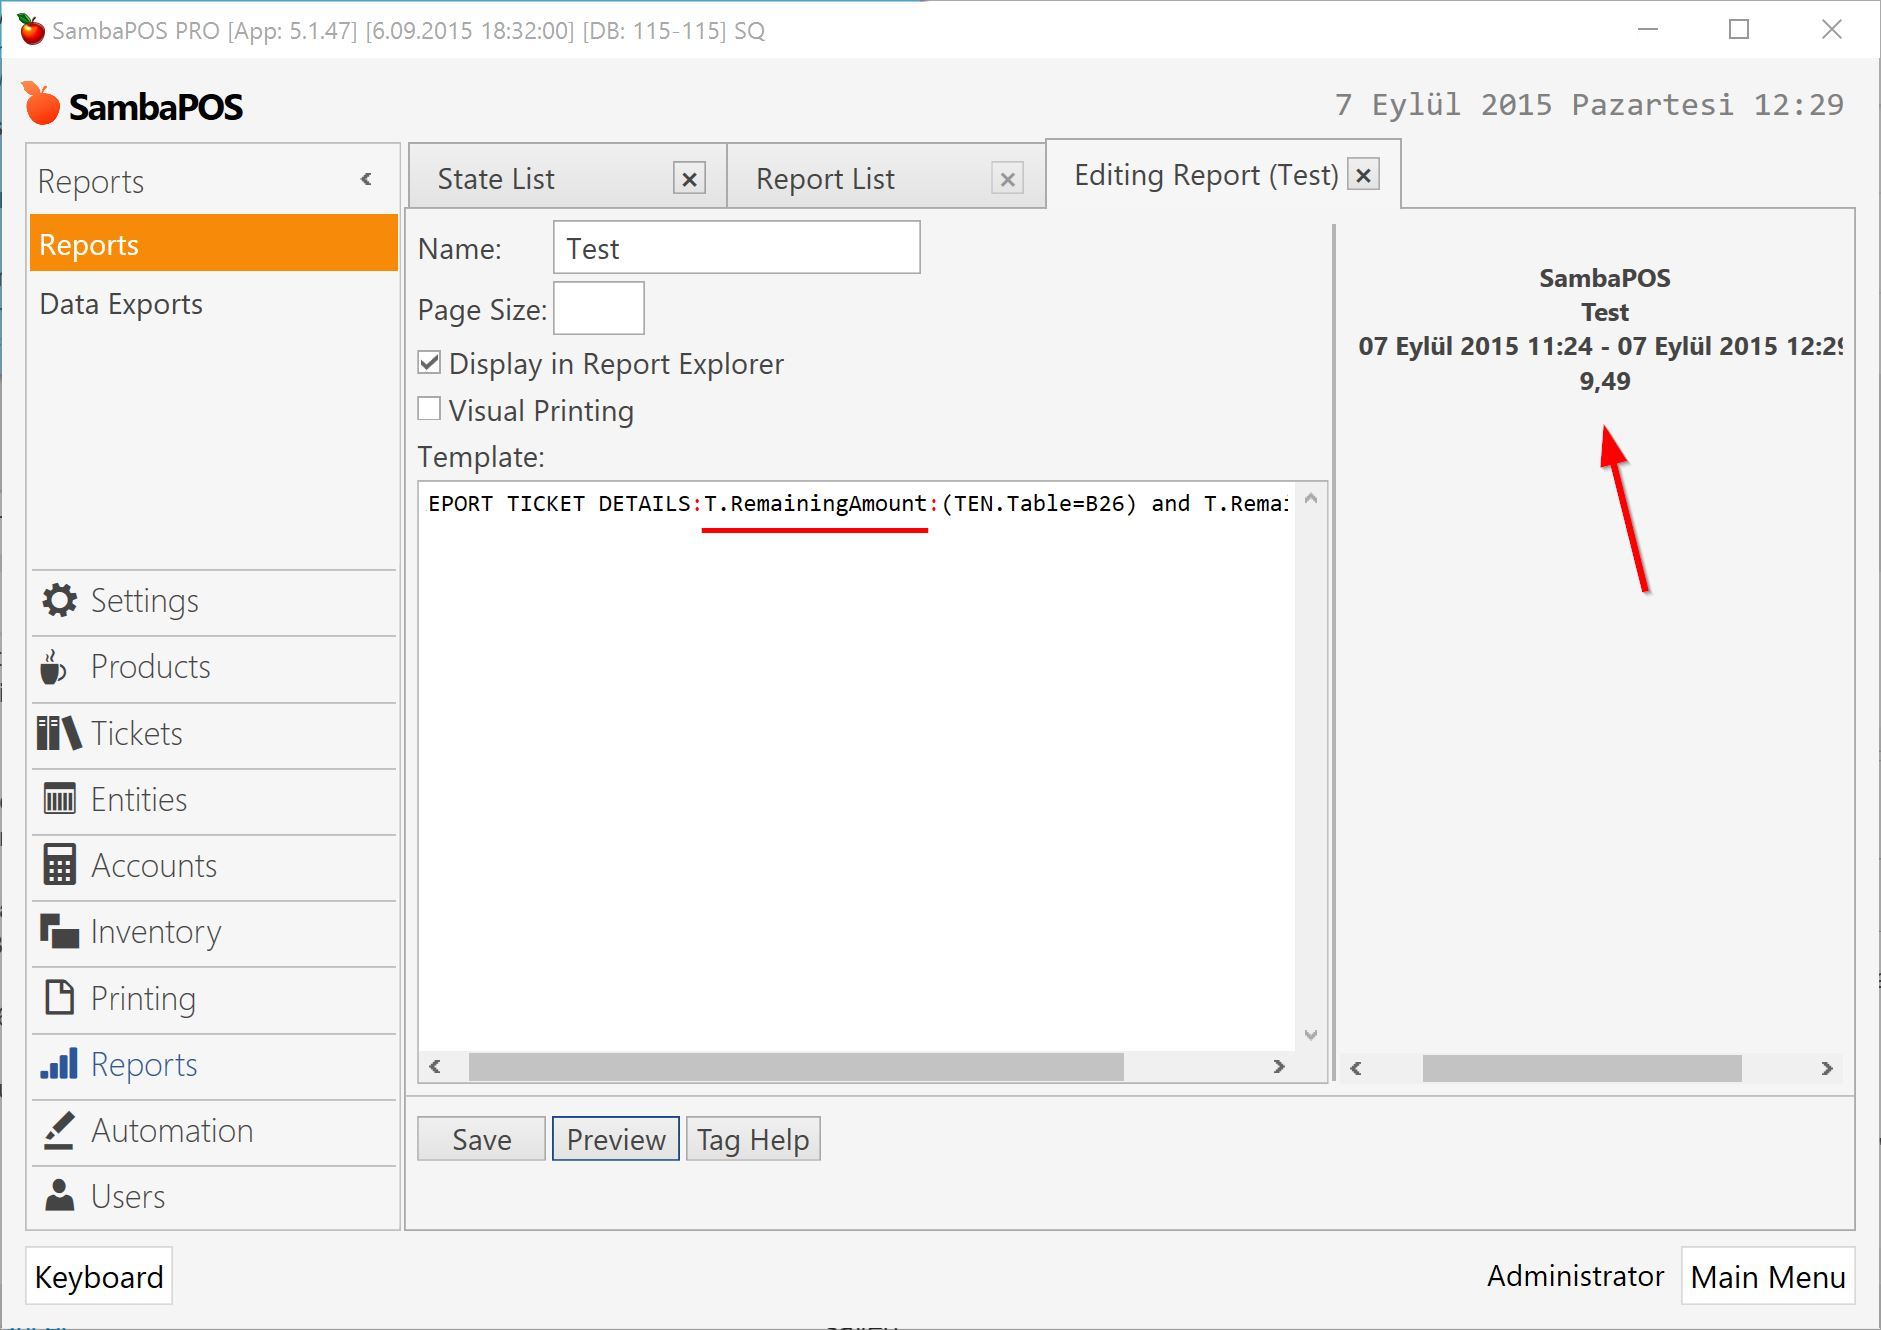
{REPORT TICKET DETAILS:T.RemainingAmount:(TEN.Table=B26) and T.RemainingAmount>0}
If we use reporting tag like that all buttons will display remaining amount for B26 tickets. Do you remember we’re using $1 to replace with table names? So I’m defining state display format as something like that.
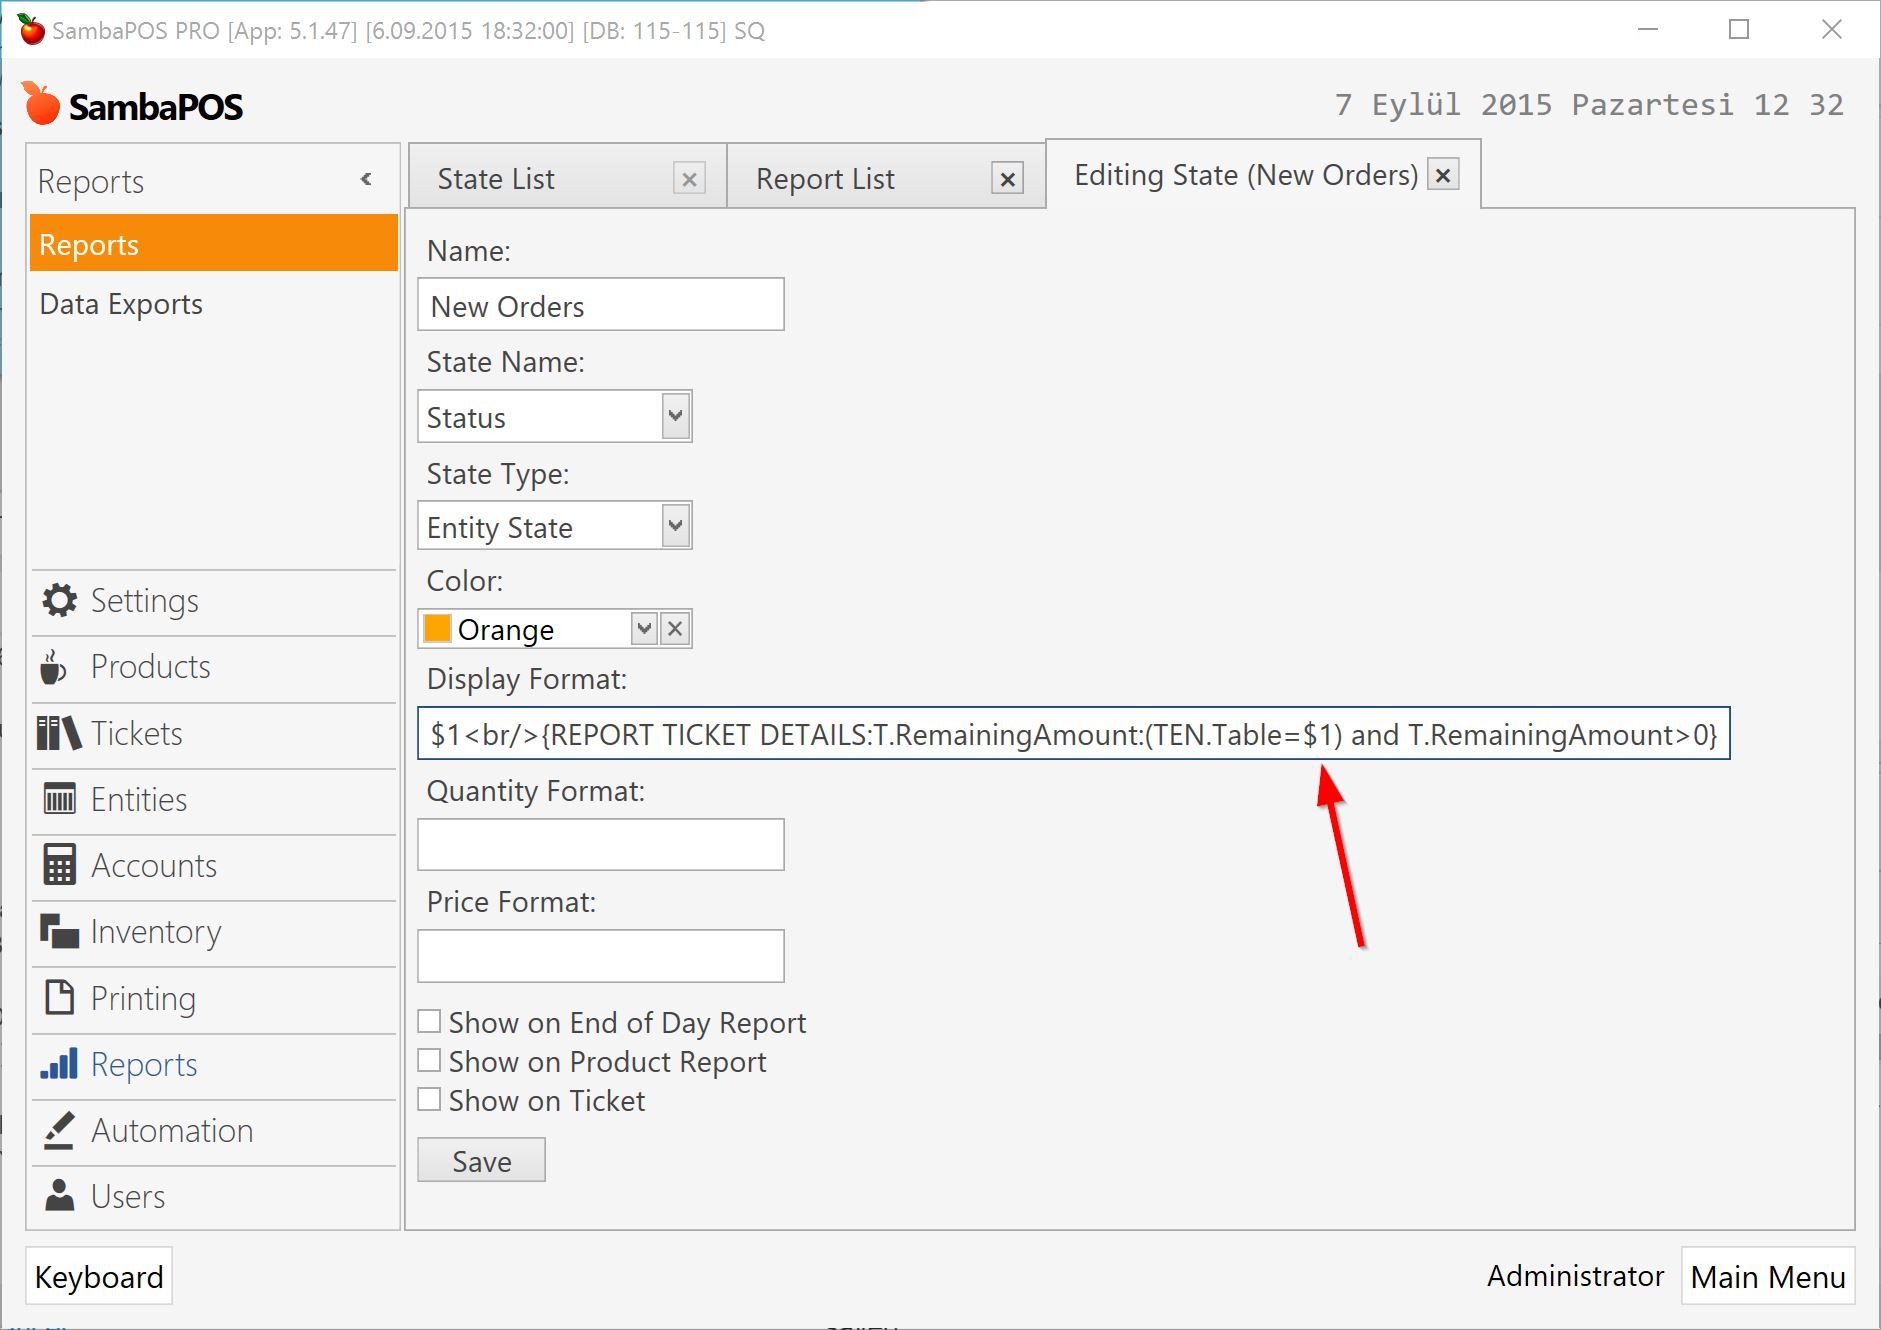
$1<br/>{REPORT TICKET DETAILS:T.RemainingAmount:(TEN.Table=$1) and T.RemainingAmount>0}
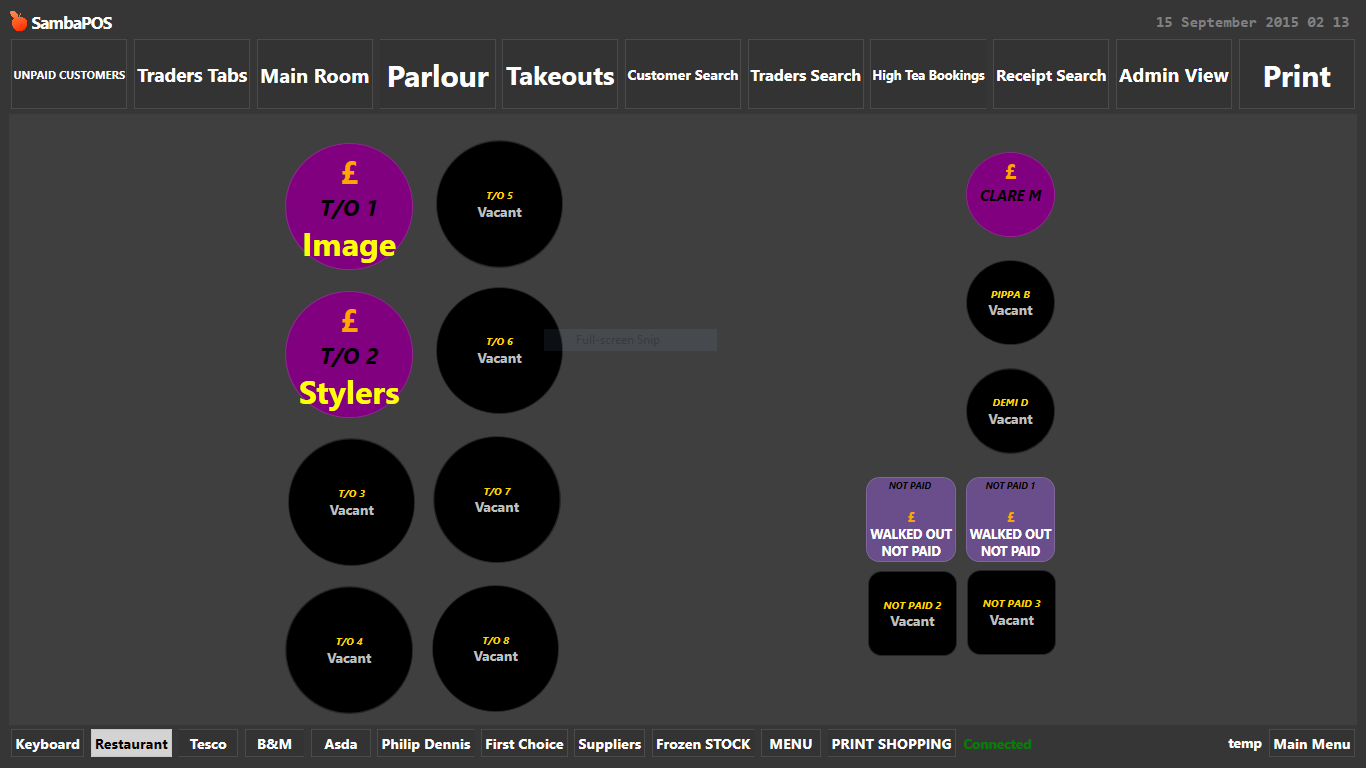
$1’s replace with table names before evaluating display format.
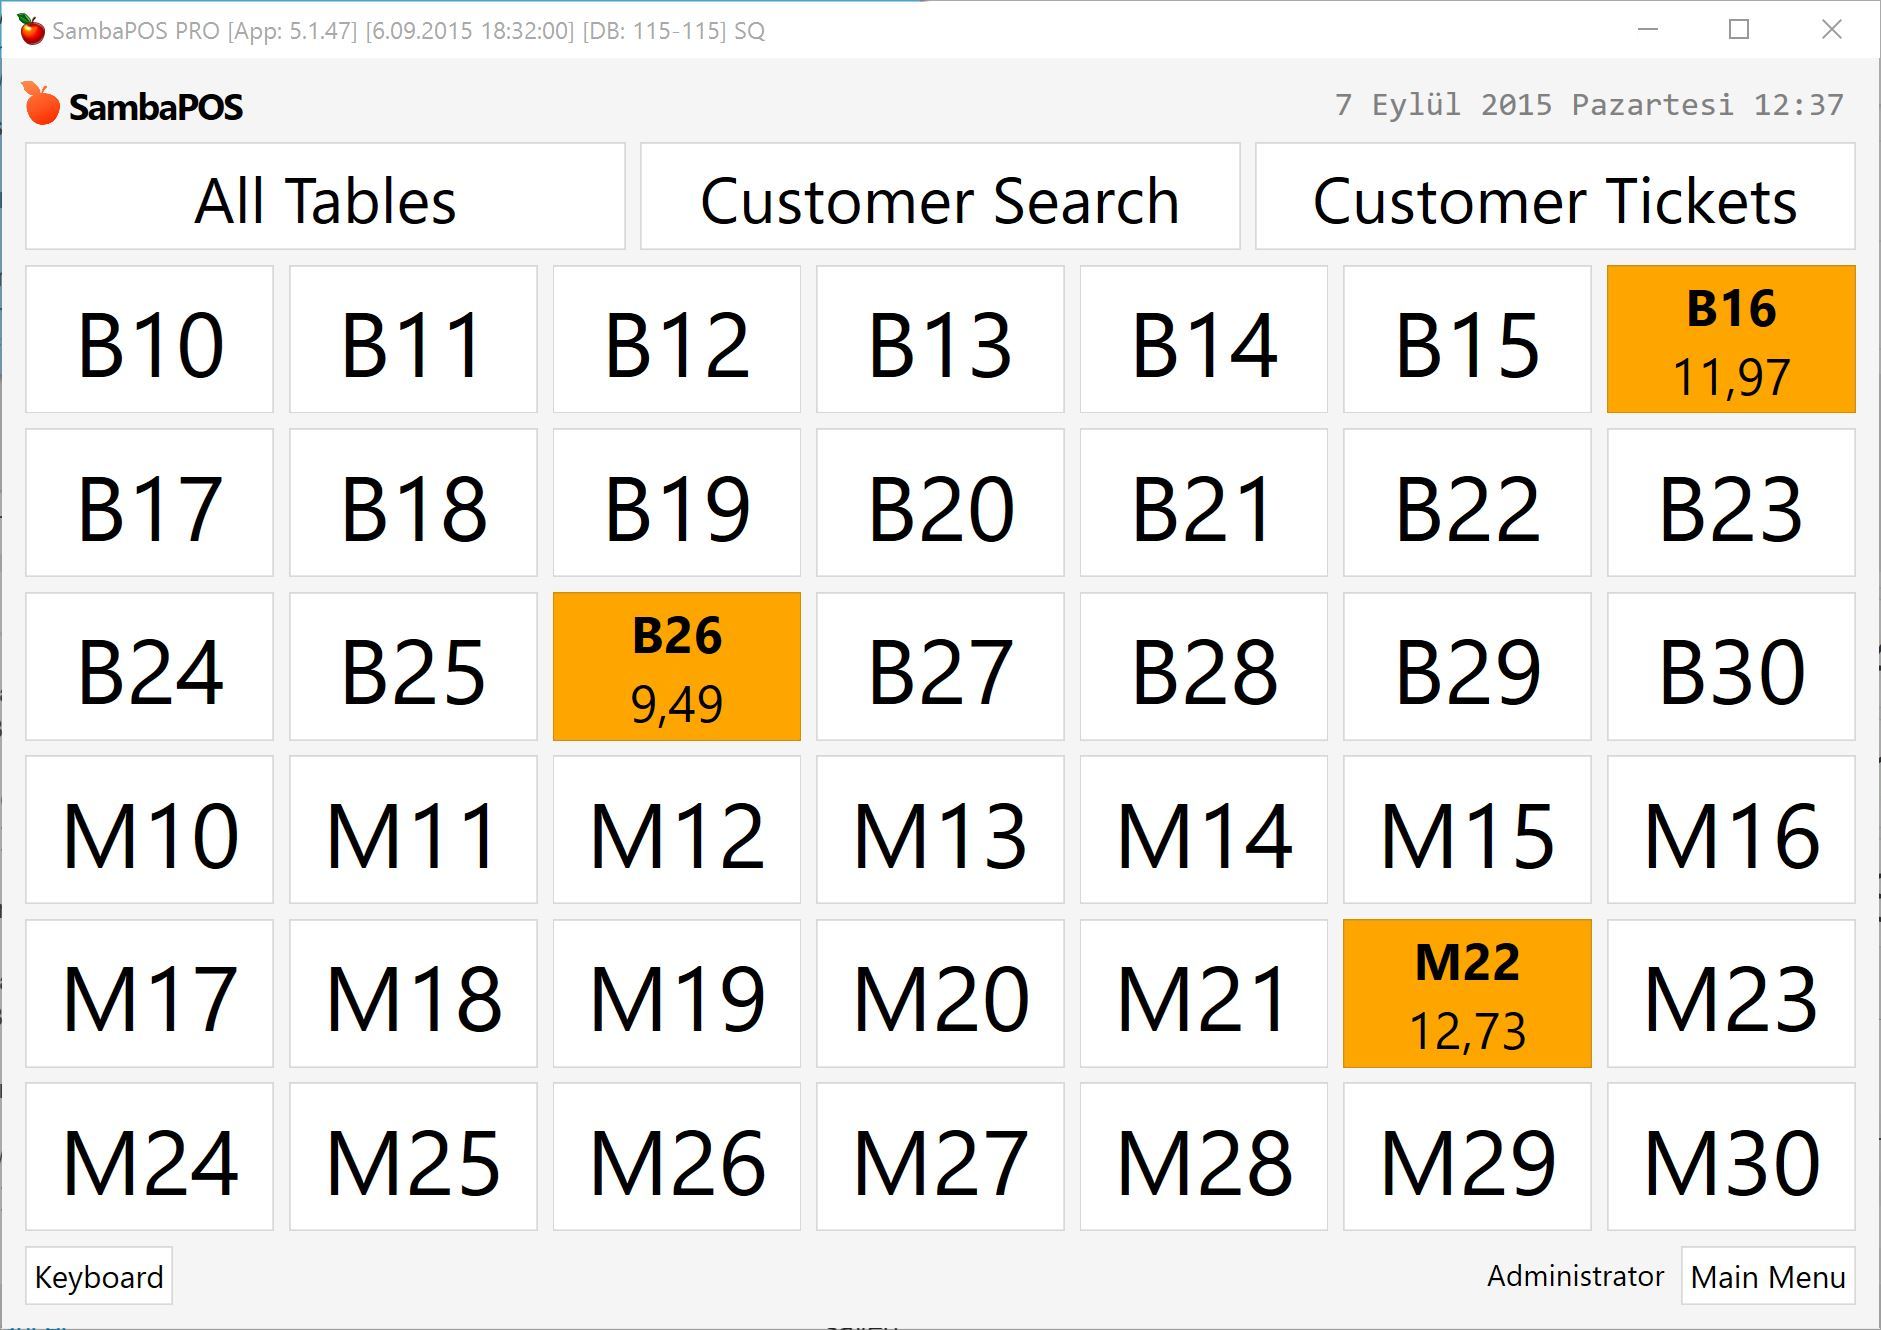
For prettier appearance I can use formatting tags to table names with bold font.
<bold>$1</bold><br/>{REPORT TICKET DETAILS:T.RemainingAmount:(TEN.Table=$1) and T.RemainingAmount>0}
You can try to use these tags together to create even nicer effects. While using multiple tags try to avoid making nesting errors. Tags should open and close properly without intersections like…
 <tag1><tag2>value</tag2></tag1>                works
 <tag1><tag2>value</tag1></tag2>                error !!!!
###Optimizing button display to handle all cases
Now let’s try something else. In SambaPOS you can have multiple tickets for a single table. What will happen when we add one more ticket for B26 table?

It displays two remaining amounts next to each other but that appearance is not so pretty. We have multiple options. For example we can display a summary of them.

Sum keyword is a new V5 feature too. We can use it to display totals instead of listing them one by one.
<bold>$1</bold><br/>{REPORT TICKET DETAILS:T.RemainingAmount.Sum:(TEN.Table=$1) and T.RemainingAmount>0}
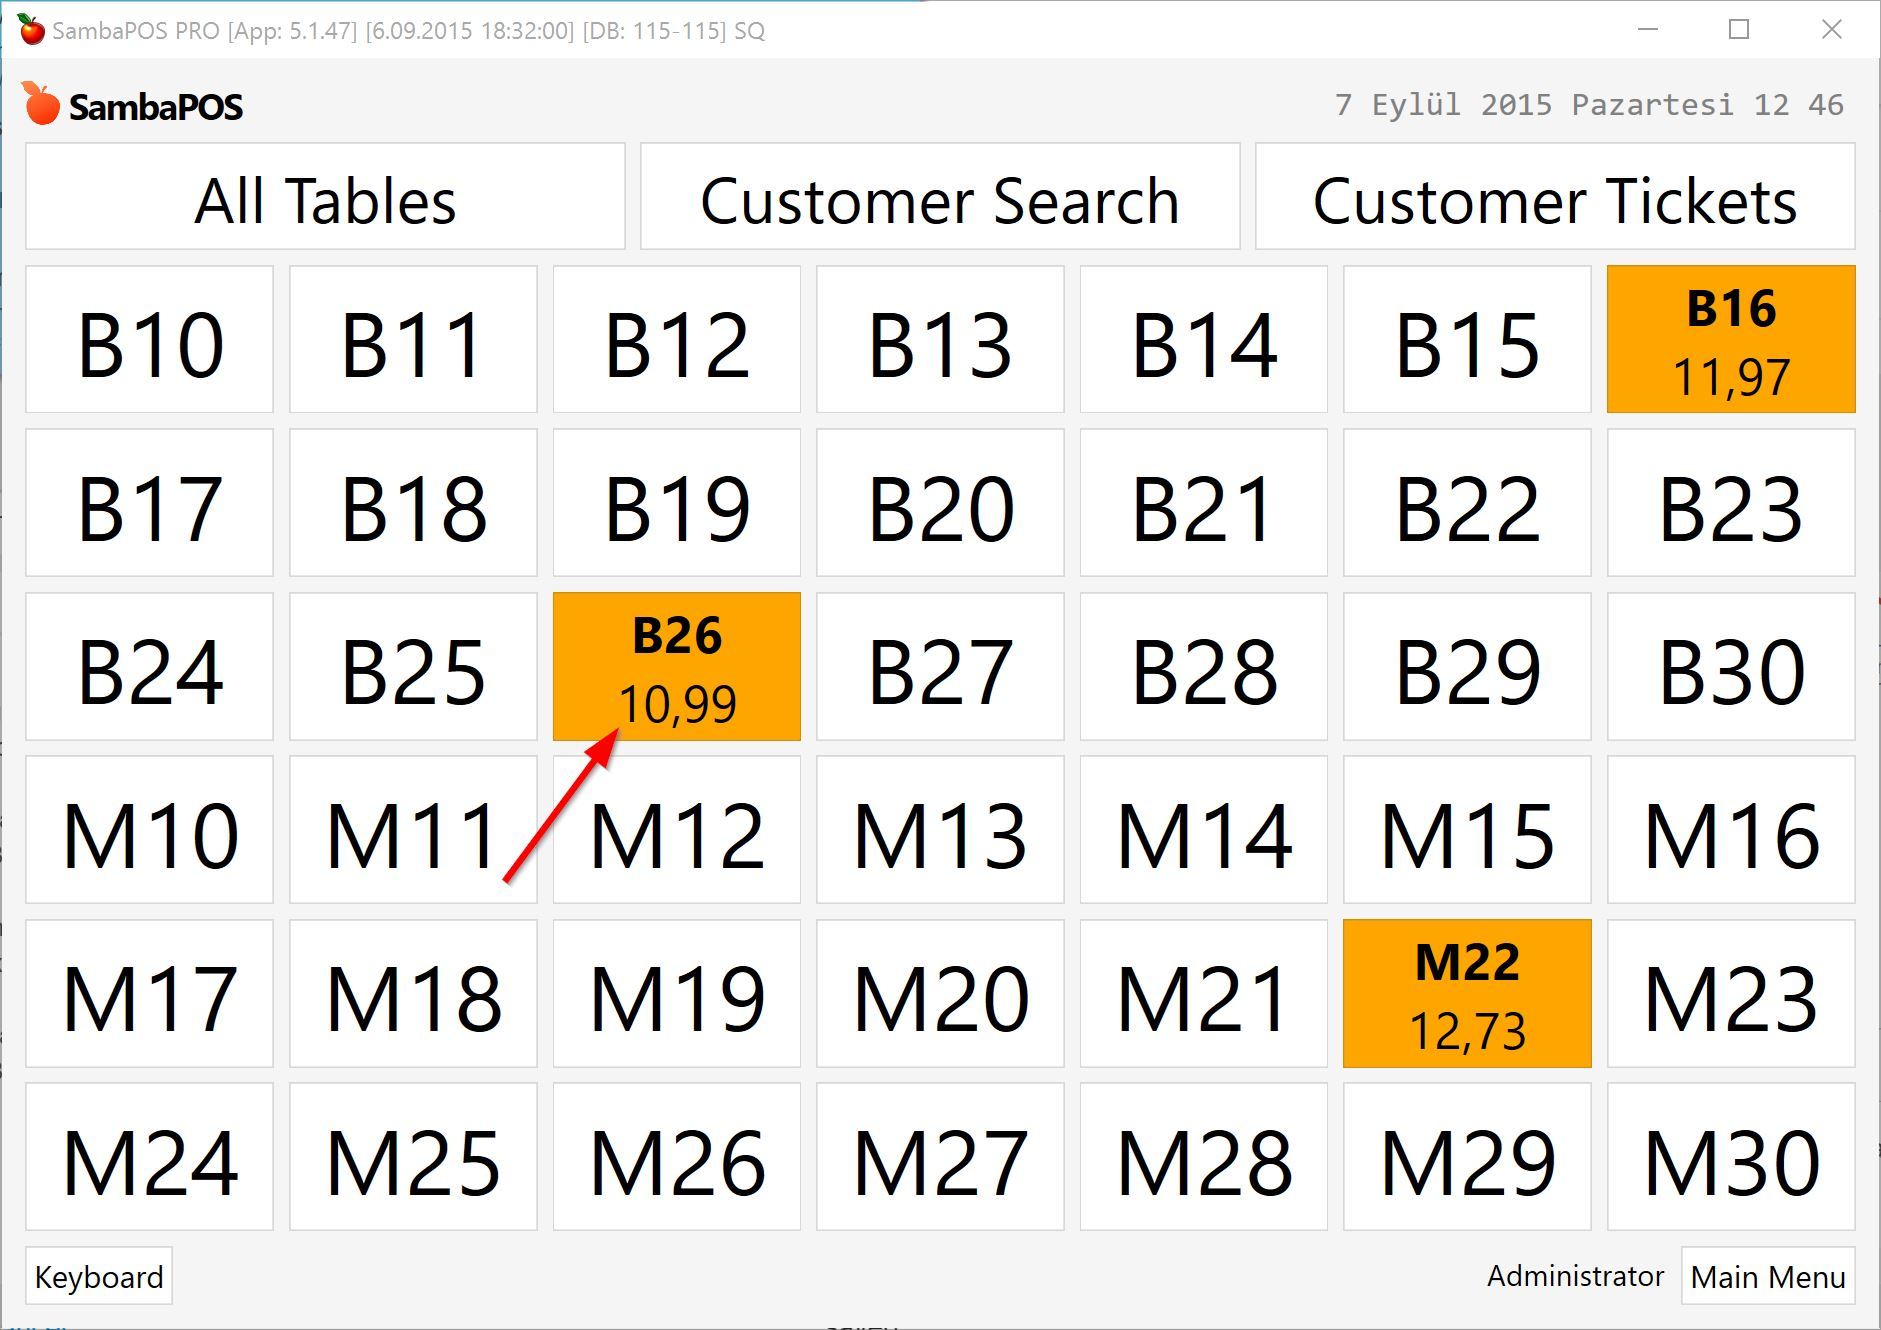
Instead of summing them we can separate them with dashes. I can configure a value delimiter at the end of the tag.
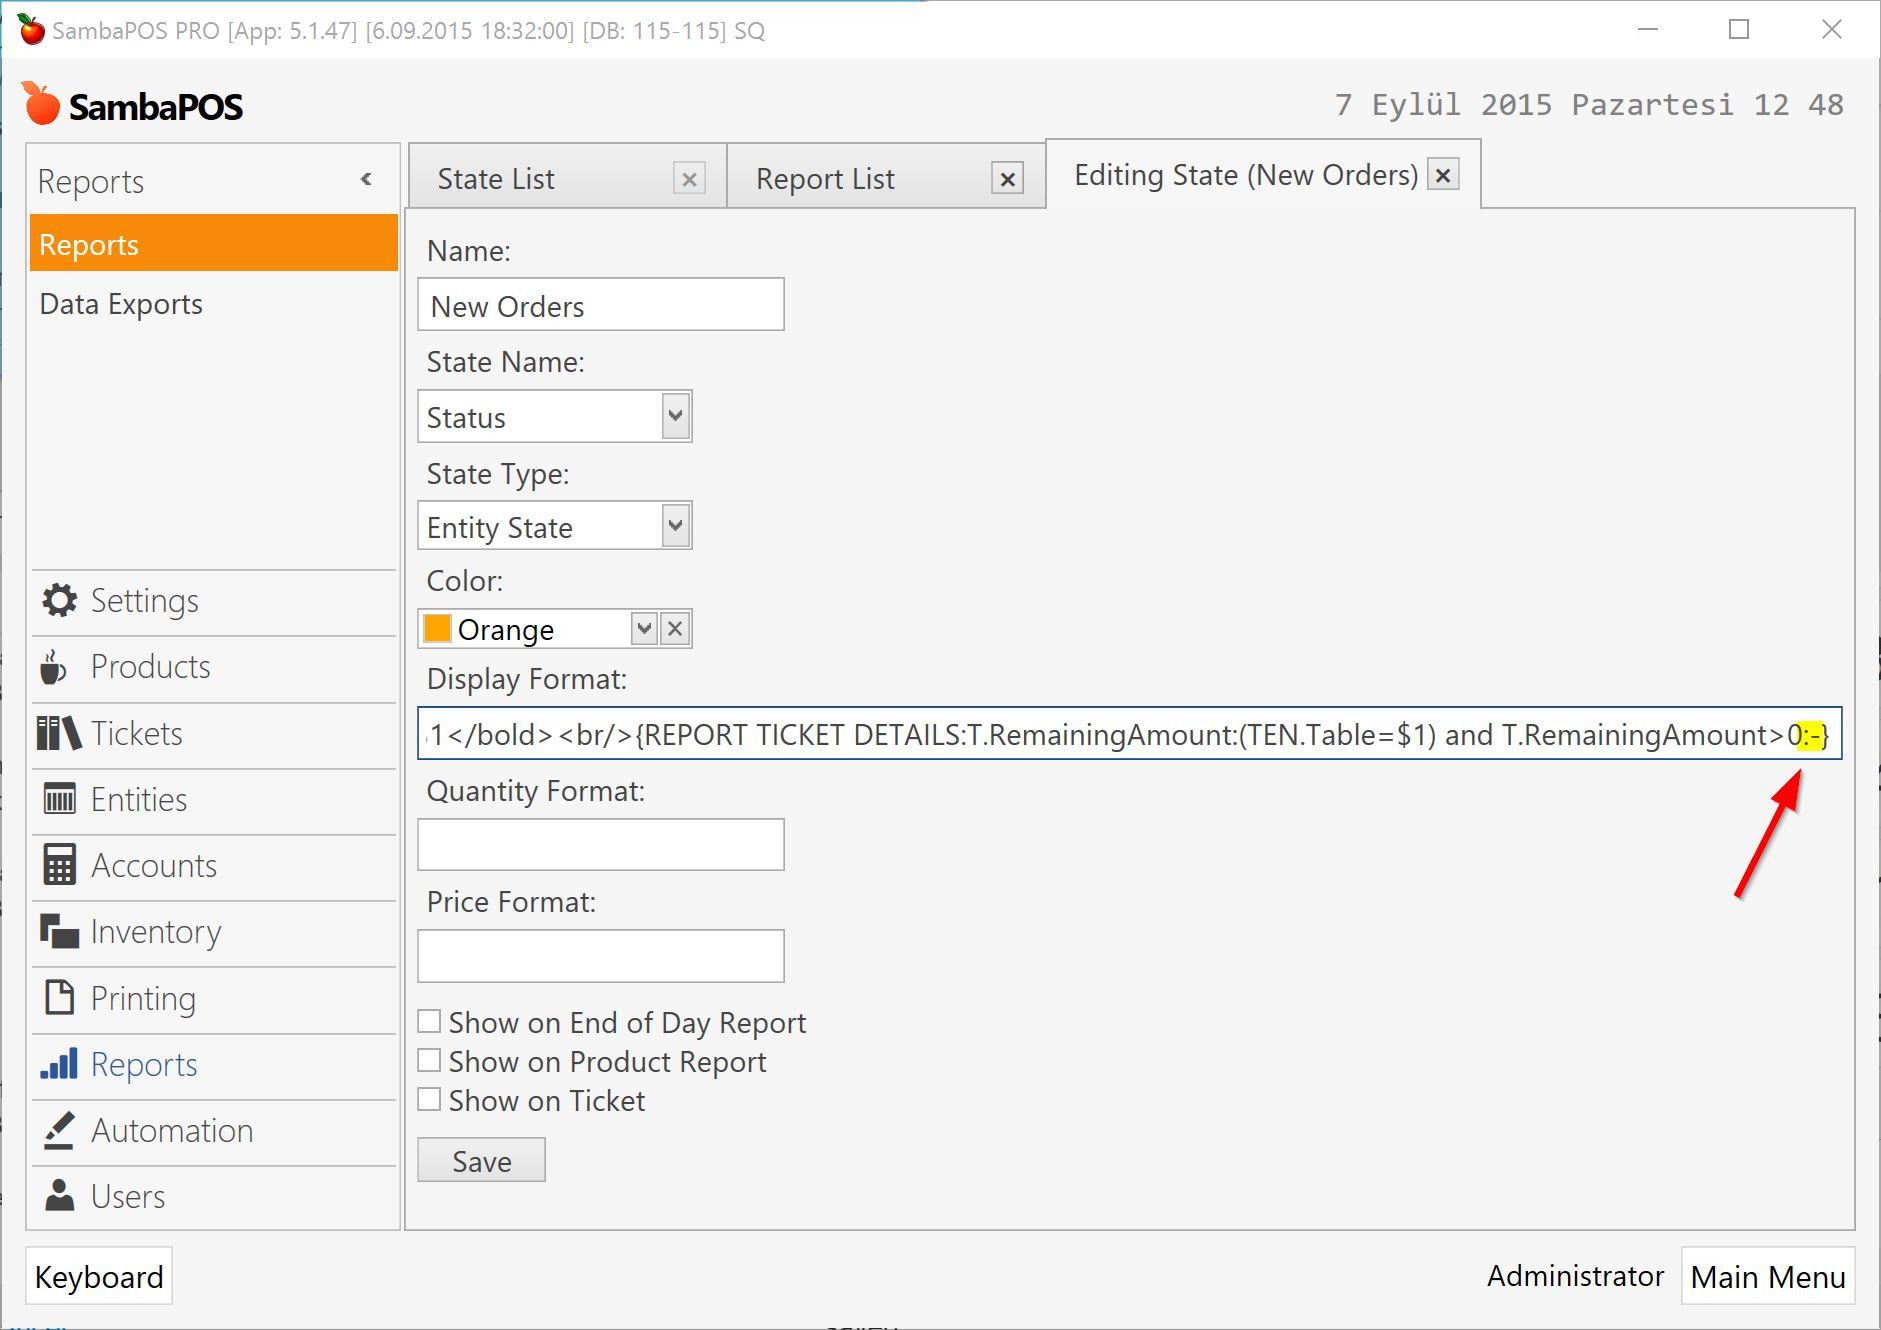
<bold>$1</bold><br/>{REPORT TICKET DETAILS:T.RemainingAmount:(TEN.Table=$1) and T.RemainingAmount>0:-}

###Displaying Customer Names
Instead of displaying ticket totals I can display customer names for tickets. I’ll select a customer for M22 Ticket and change state display format to display customer names instead of remaining amounts.
<bold>$1</bold><br/>C:{REPORT TICKET DETAILS:EN.Customer:(TEN.Table=$1) and T.RemainingAmount>0:-}
I’ve replaced T.RemainingAmount with EN.Customer in report tag so it will display customer names. I’ve also added C: prefix to demonstrate how we can add prefixes.
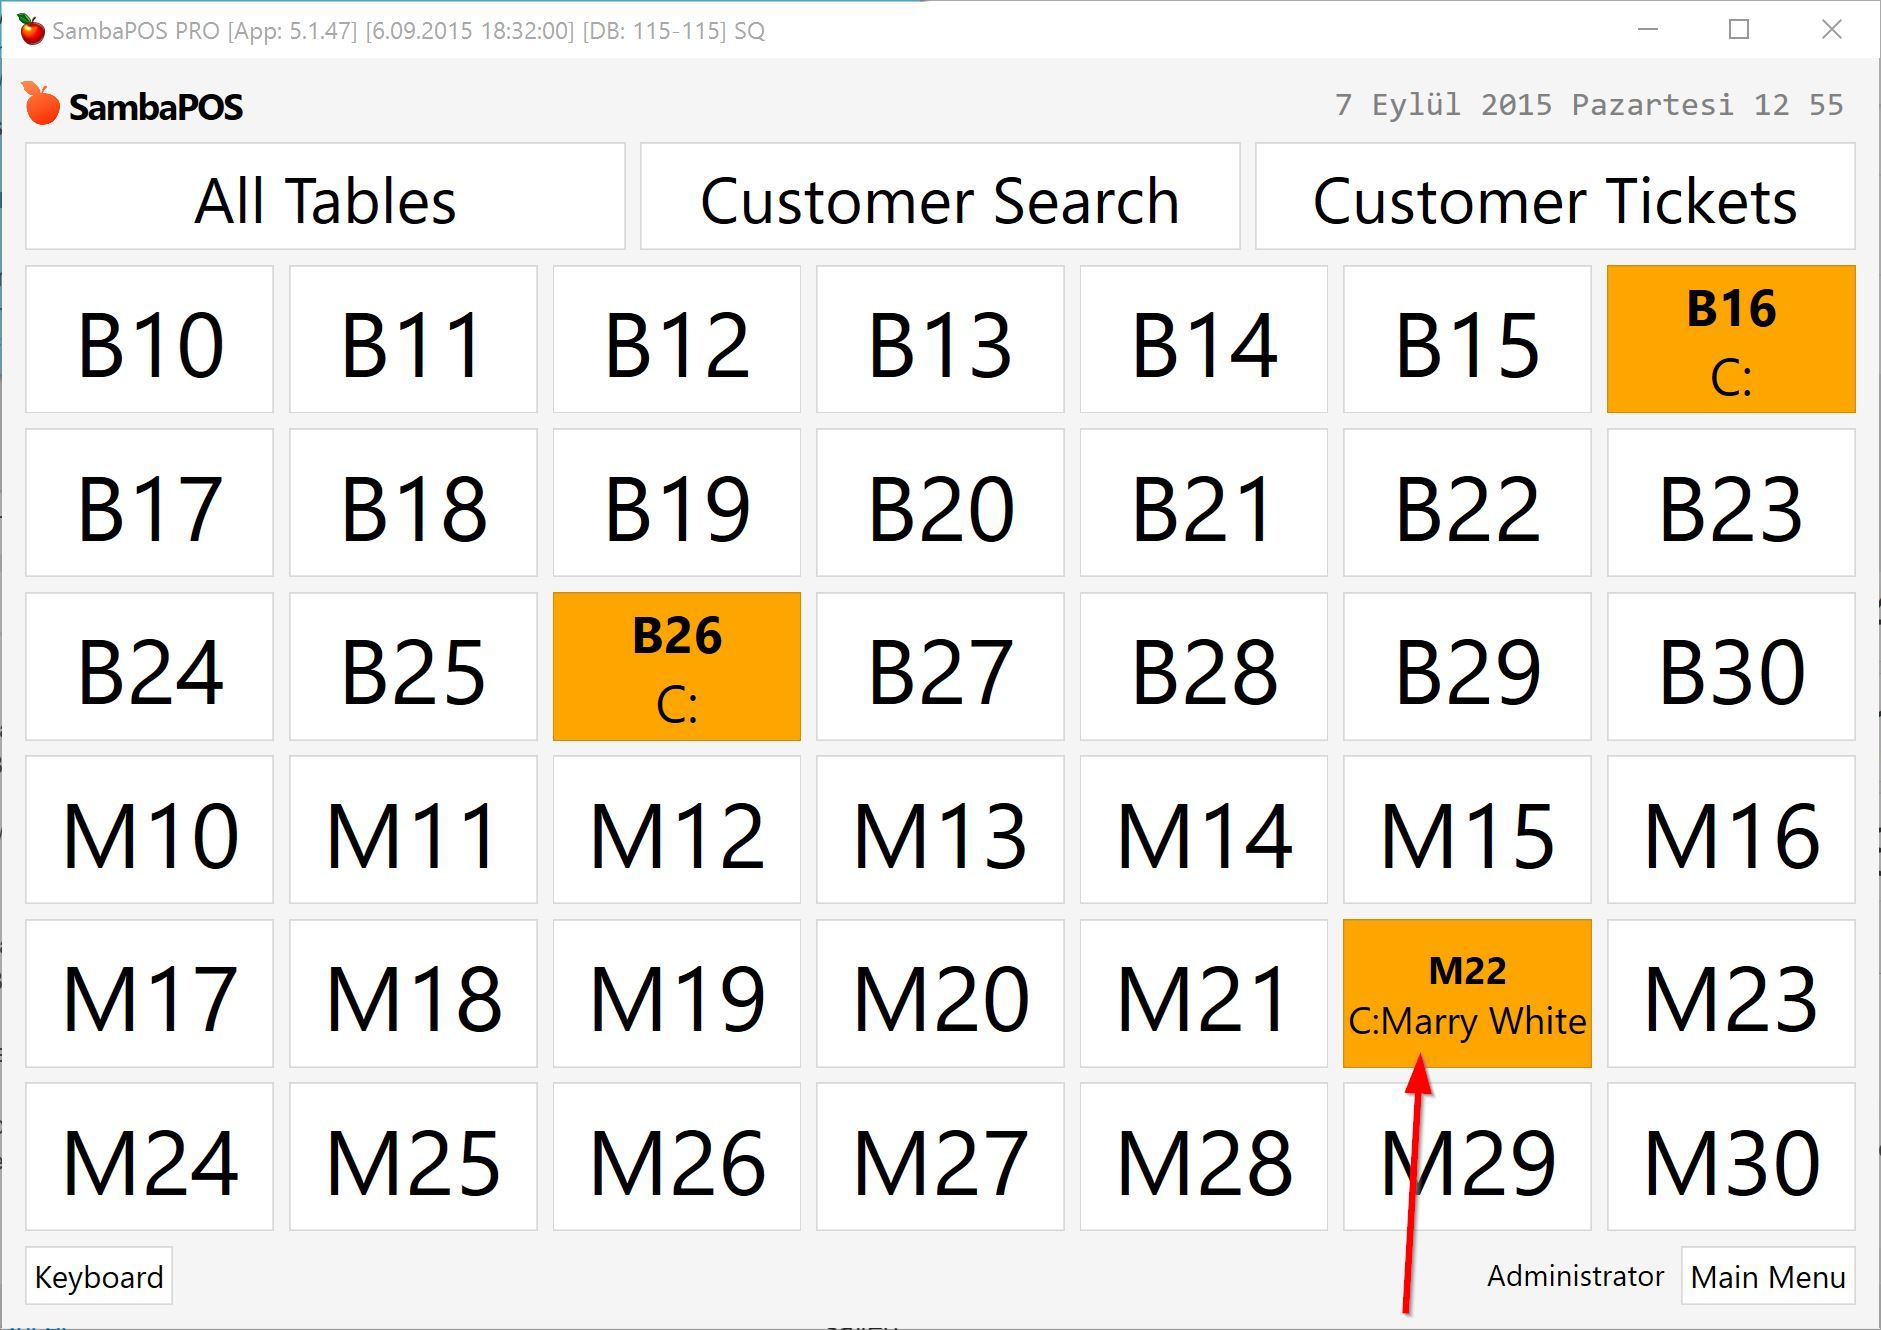
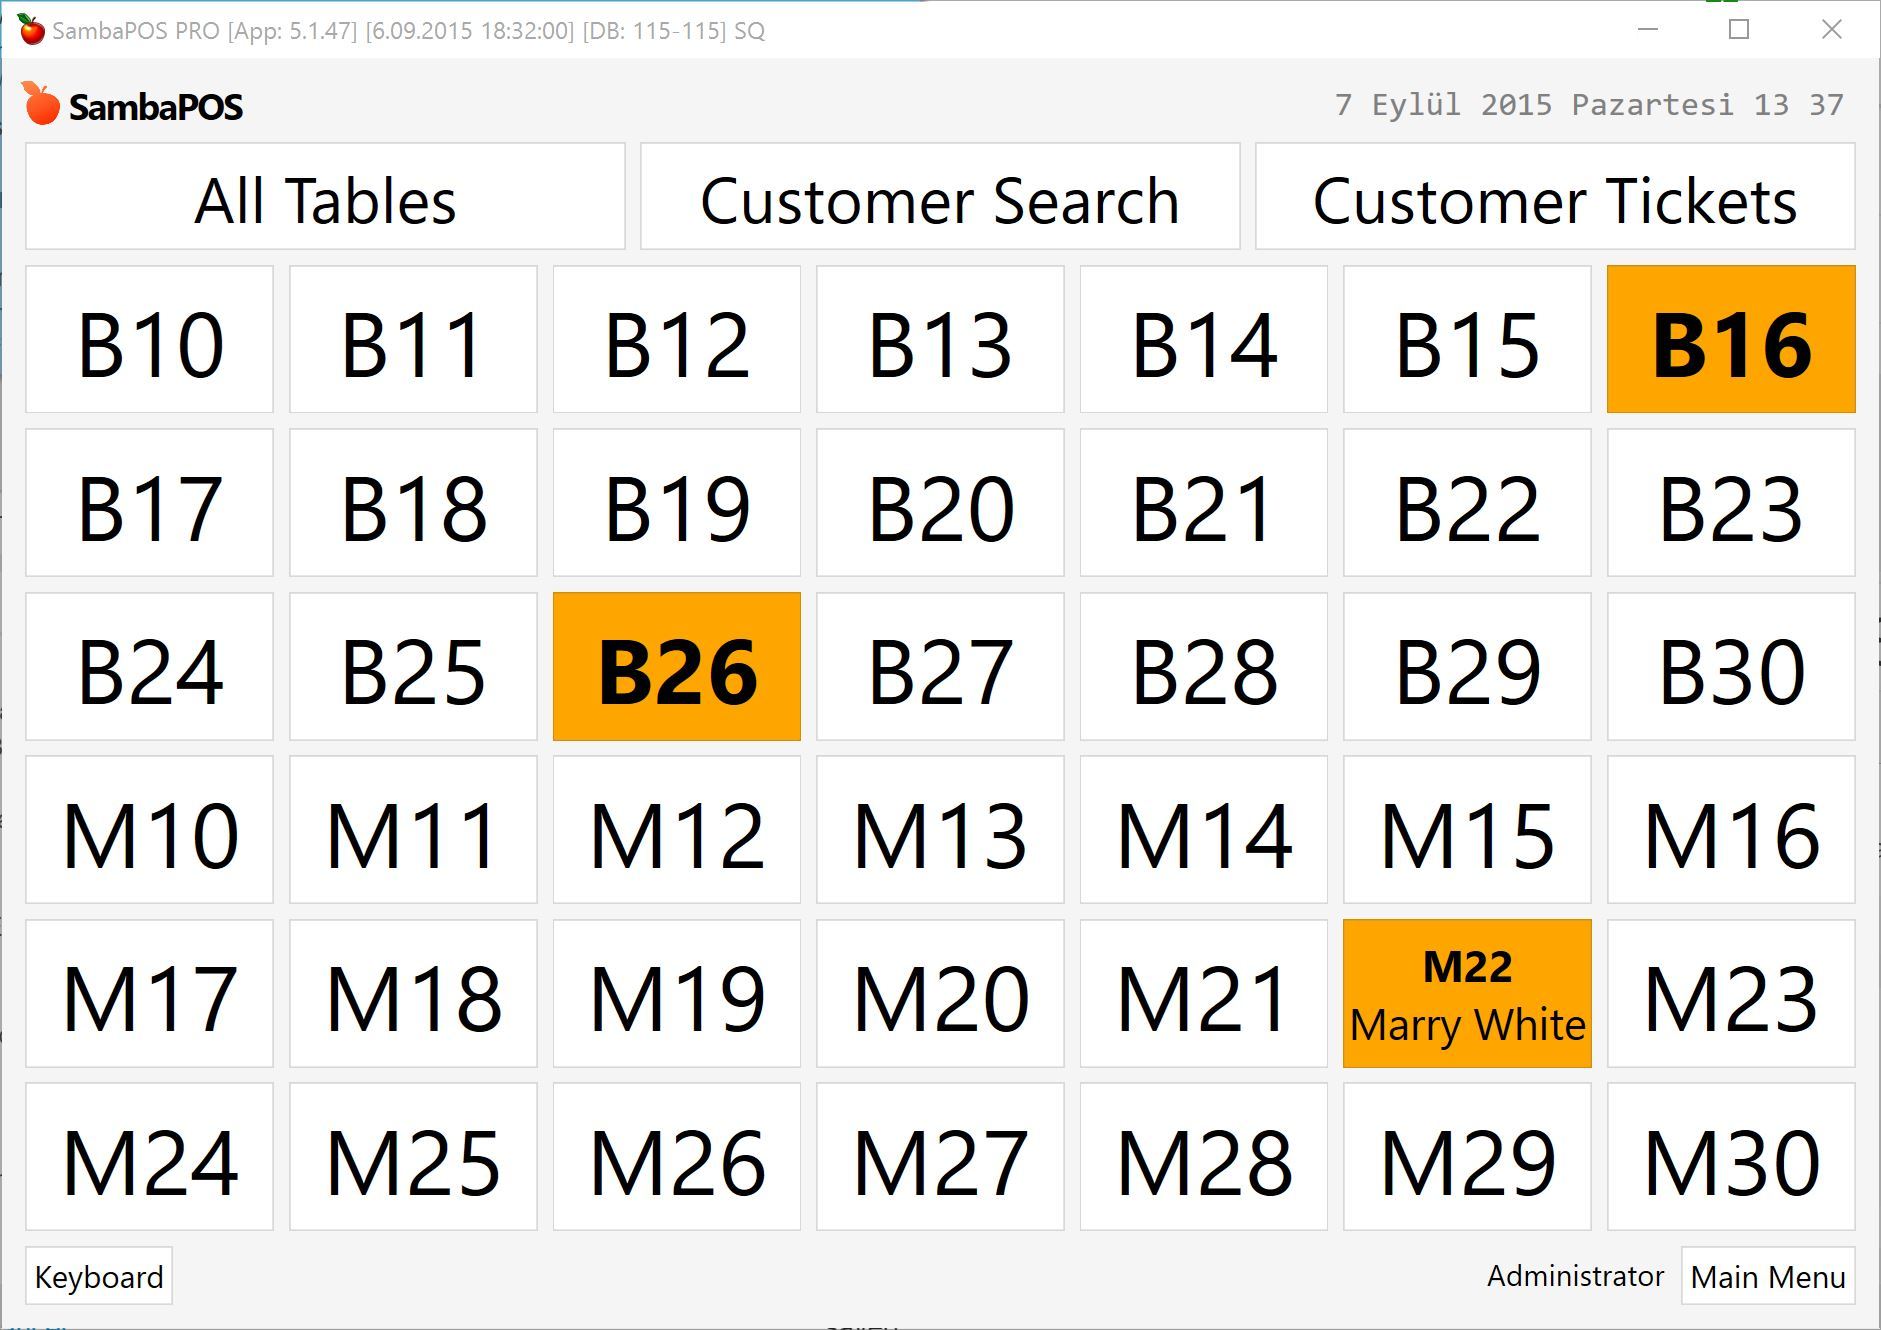
Customer names appears fine but if here is no customer selected for ticket it appears an empty prefix. Instead of using static <br/> and C: prefixes I can configure a field prefix.
<bold>$1</bold>{REPORT TICKET DETAILS:'<br/>'+[EN.Customer]:(TEN.Table=$1) and (TCET=Customer) and T.RemainingAmount>0 }
That expression will add break before customer name and works for tickets that have a customer.
TCET expresion means
Ticket Contains Entity Type
I hope you’ll like these features. Feel free to ask questions.