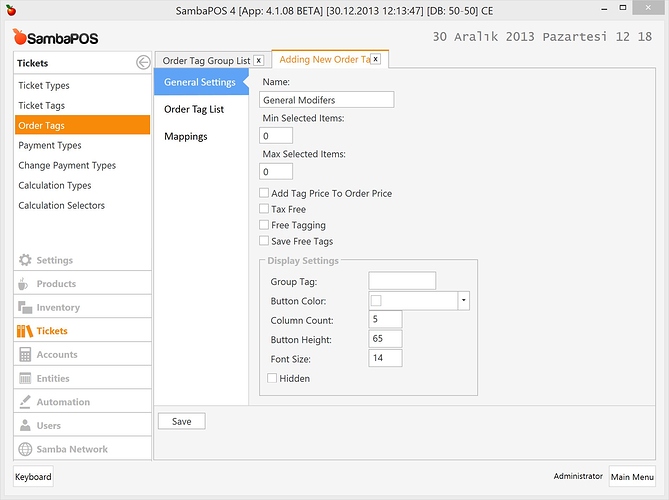
You can use Order Tags to define modifiers for menu items. With SambaPOS V4 you can define global, product group based or product based order tags. Let’s see how it works.
I’ll start by defining Global Modifiers. They will work for all products in my menu. Navigate to Management > Tickets > Order Tags and Add a new order tag group.
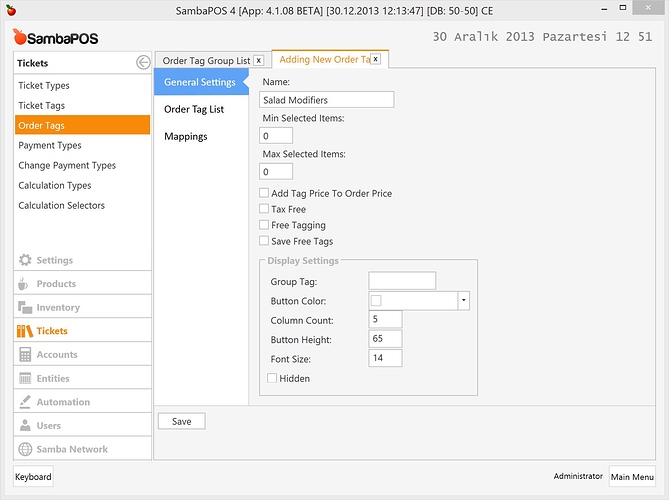
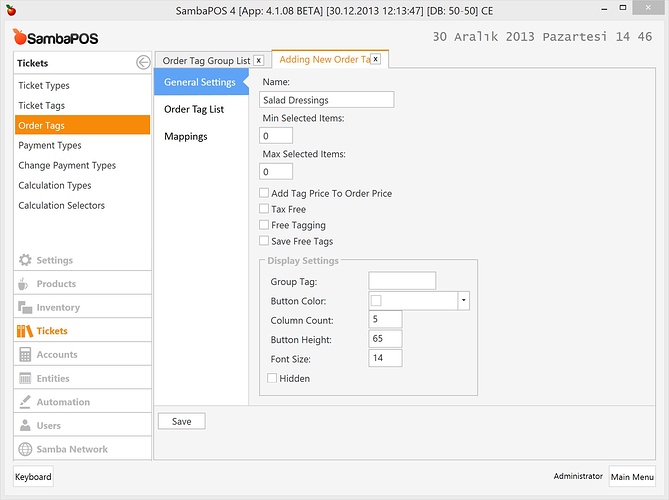
Just give a name to Order Tag Group here. We’ll see other settings on next topic.
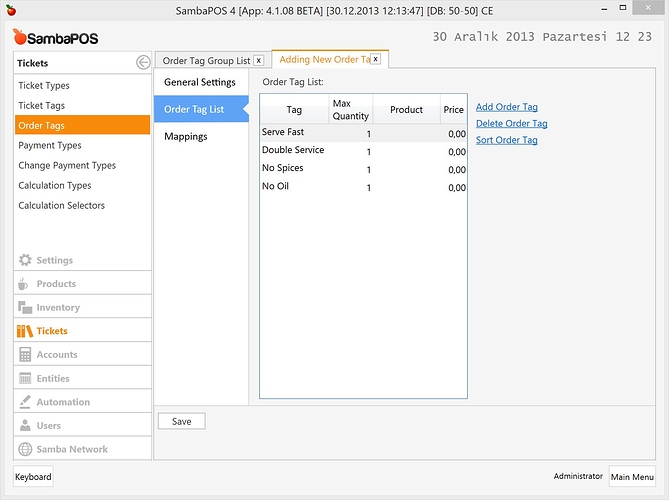
Switch to Order Tags page to add your modifiers.
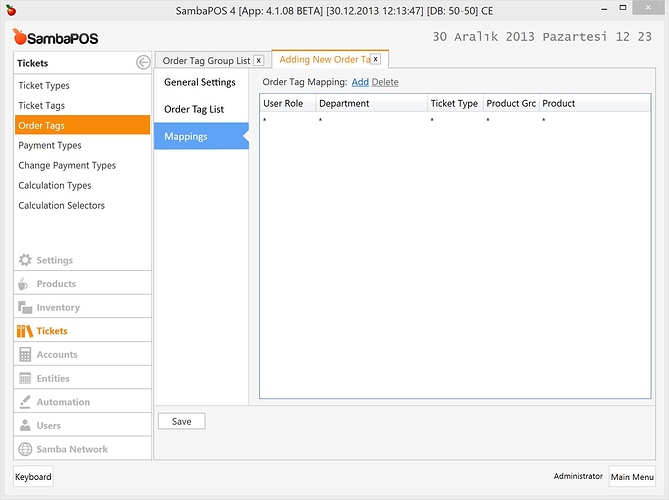
… and add a mapping. I’ll leave everything as * (star) because I want to use them for all products.
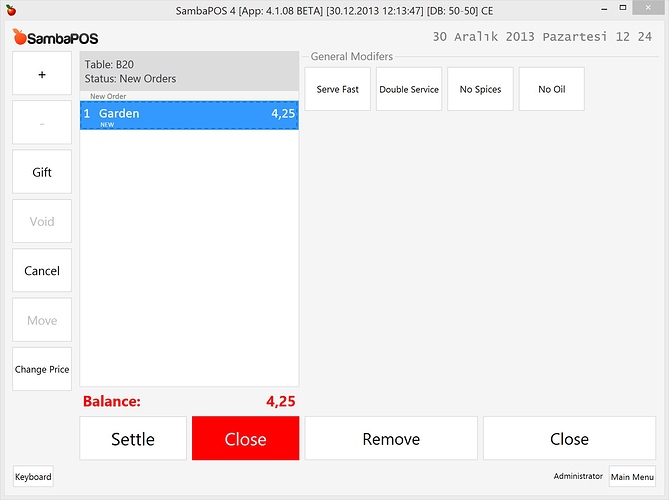
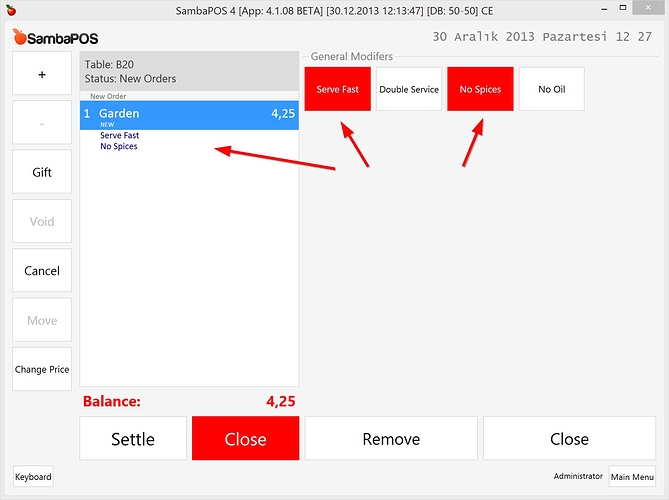
After saving it create a new ticket, add a product and click on order line to display modifiers.
Clicking buttons will toggle (on-off) modifiers.
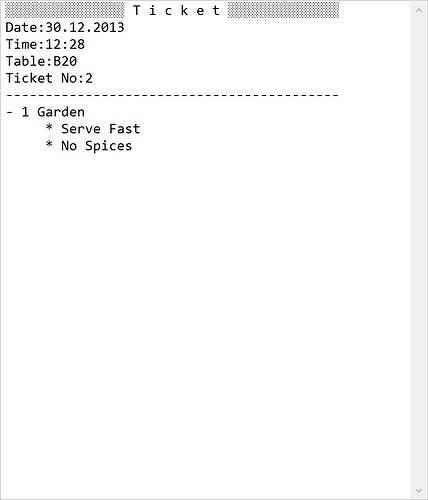
Closing ticket will send this printout to the kitchen.
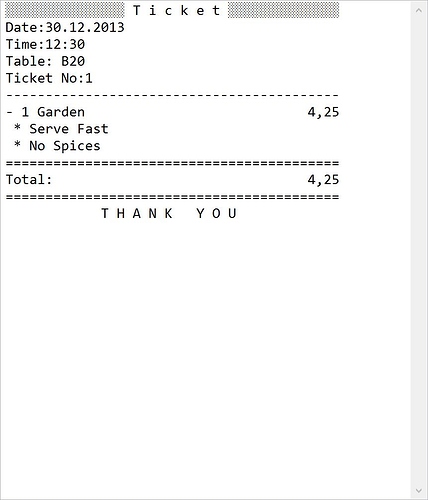
When we print the bill it also displays order tags.
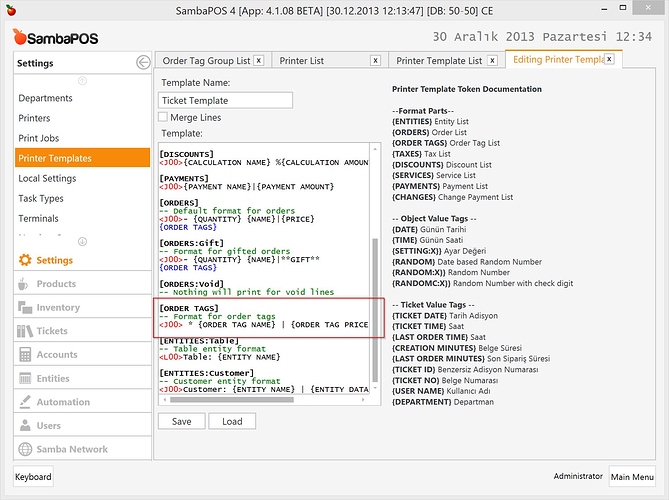
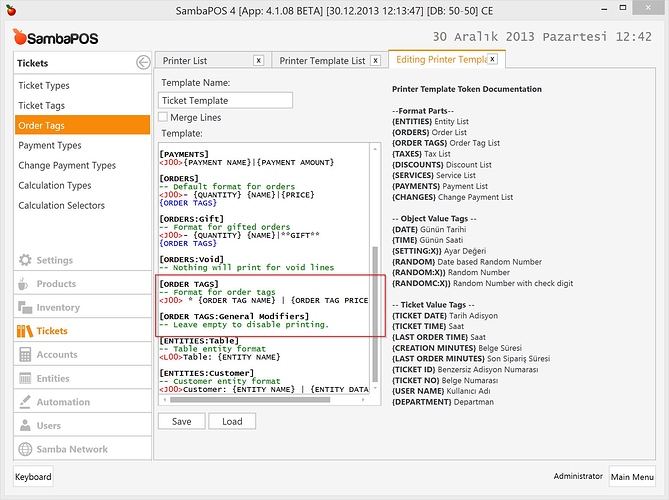
We don’t want to display General Modifiers on bills so we need to hide them on printouts. To be able to do it we need to modify Ticket Template. Navigate to Management > Settings > Printer Templates > Ticket Template.
As you know printer templates divided into sections by [Section Name] labels. [ORDER TAGS] section defines how Order Tags should display on printout. You can remove that section to disable Order Tag printing but for this tutorial I’ll add another section to disable General Modifiers.
I’ve added [ORDER TAGS:General Modifiers] section and left it empty. I’ve just added a comment to remember how I’m using it. That means General Modifiers will use [ORDER TAGS:General Modifiers] section and all other tags will use [ORDER TAGS] section.
Tip: Test this change by creating new tickets.
##Creating Product Group modifiers
We’ll add another order tag group for Salads.
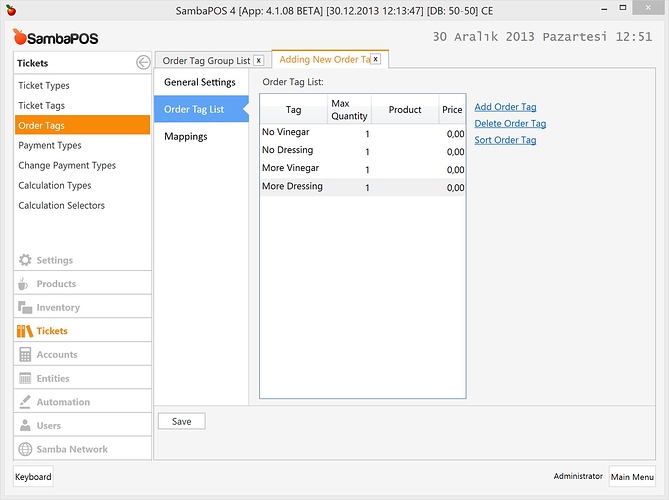
Add some modifiers.
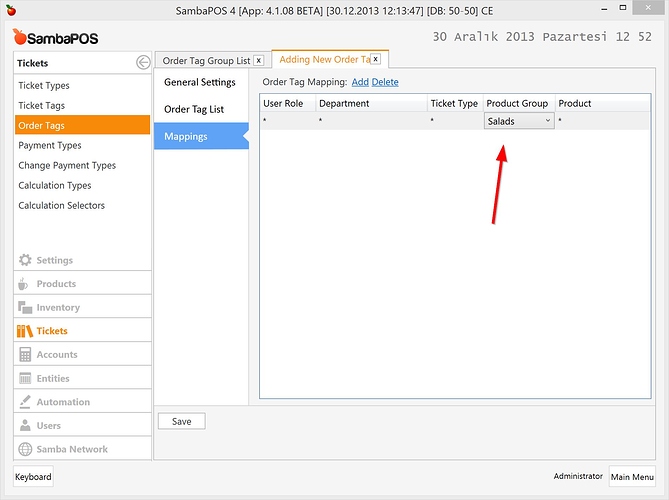
And we’ll map it to Salads product group.
You can also map it to a specific product by choosing a product name.
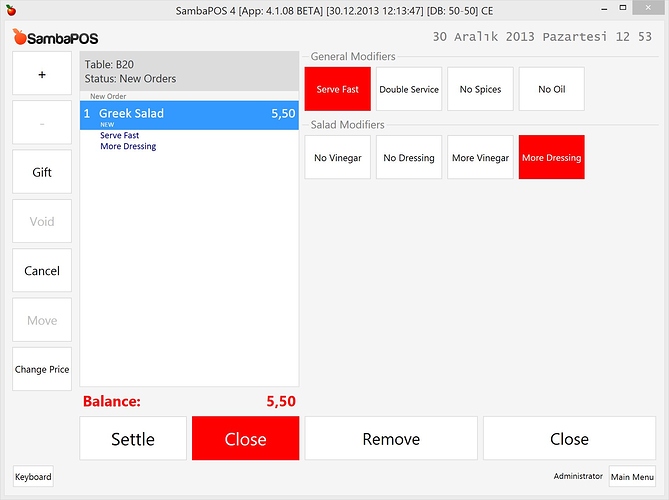
When we add a Salad and click on the order line all modifiers will appear.
##Free tagging
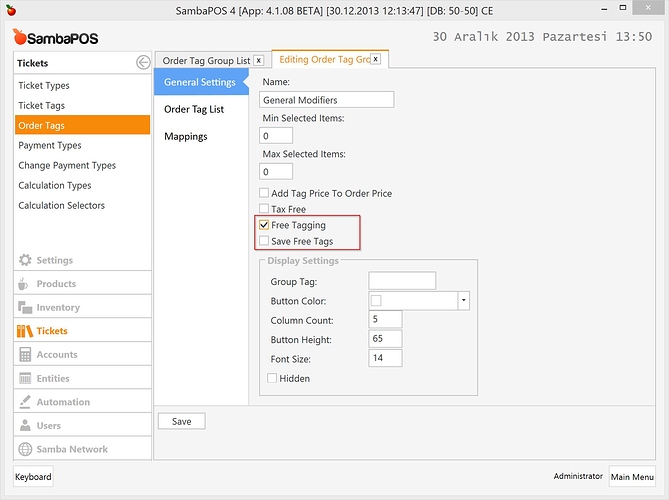
For some cases adding modifiers by typing modifier name would be handy. We’ll change General Modifiers Order Tag Group to support free tagging.
Enabling Free Tagging setting will be enough. If we enable Save Free Tags setting, adding a hand typed modifier will also save it to the static list.
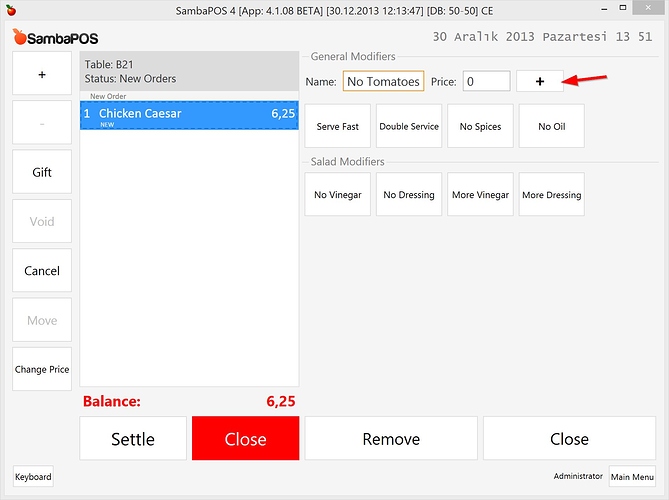
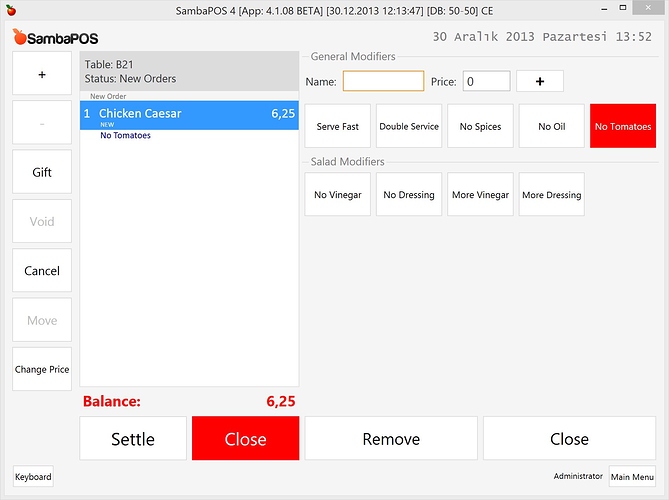
After typing modifier name click + button.
##Modifier prices
Some modifiers can increase or decrease price. We’ll add another order tag group for Salads.
Create new order tag group and switch to Mappings screen to map it to “Salads”
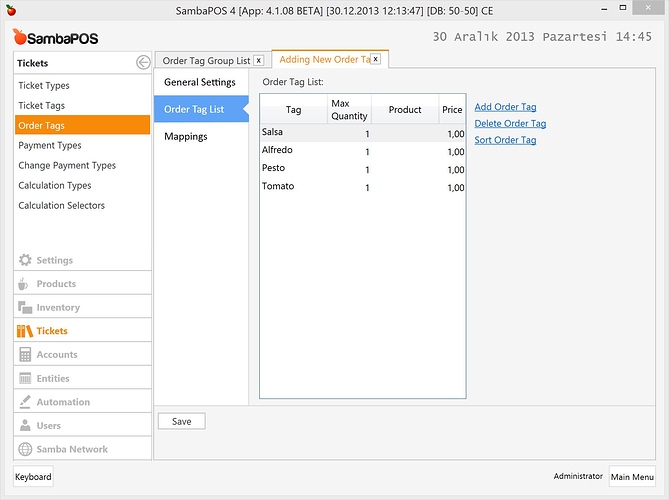
Now we’ll add some modifiers from Order Tags screen
These modifiers have price so they’ll add $1 to product price.
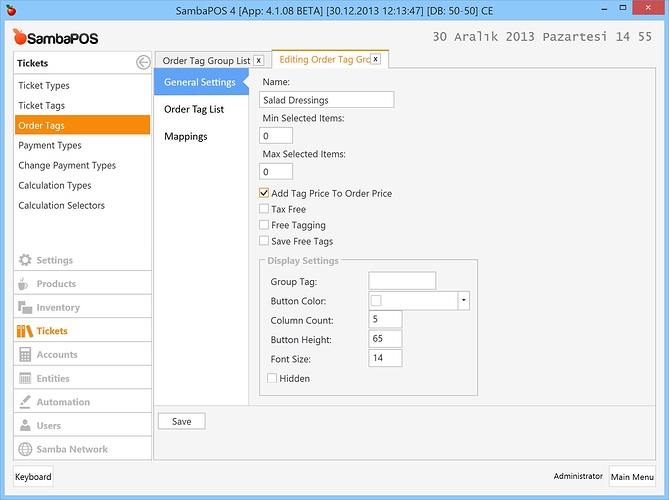
Instead of displaying price separately you may want to add it to product price. To enable this feature go back to Salad Dressings group configuration and enable Add Tag Price to Order Price setting.
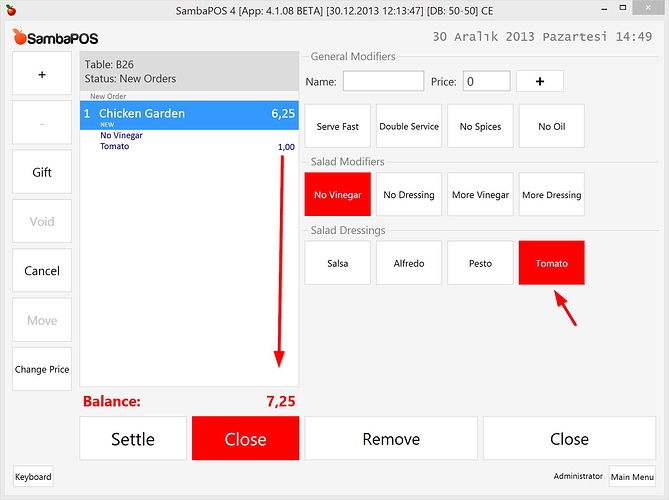
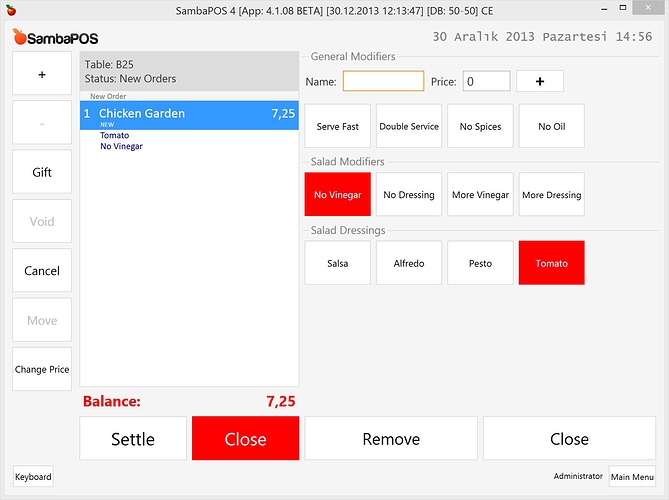
As a result adding modifiers will increase order price.
Instead of displaying 6.25 order price becomes 7.25 and no price displayed next to Tomato modifier. Printouts will also display 7.25.
##Limiting modifiers
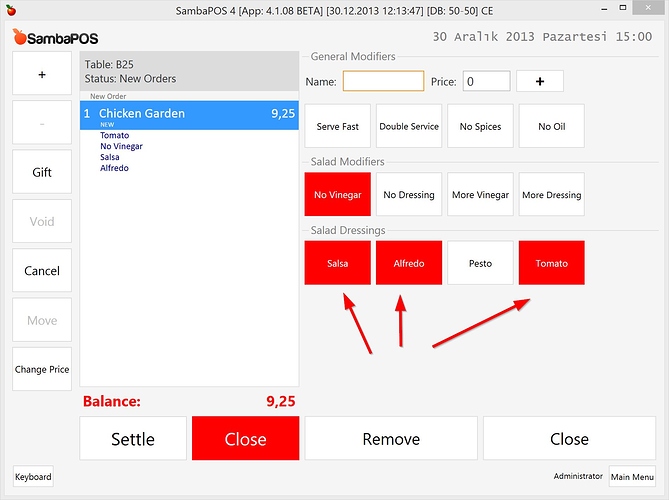
You’ll notice we can select multiple dressings for salads.
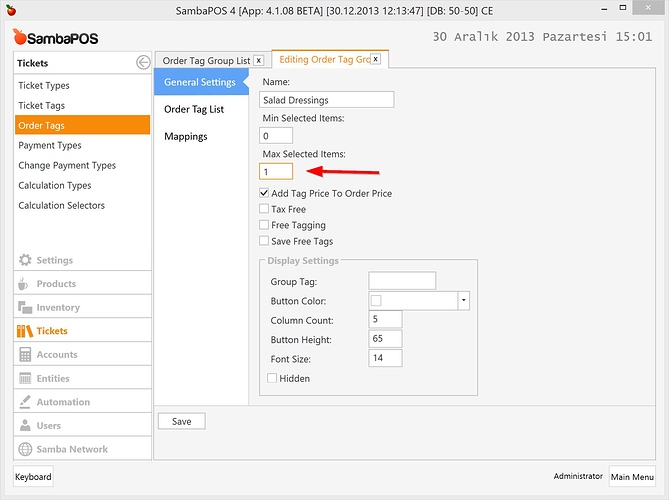
We can limit selection for a single modifier group. Set Max Selected Items value to one.
Now we’ll be able to select just a single dressing for salads.
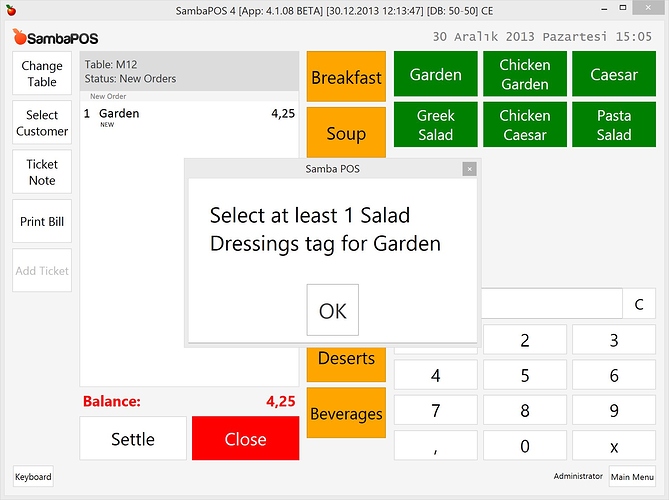
You can also define Min Selected Items value to force user to select modifiers.
In this case choosing no modifiers will display a warning and prevent us to close or print ticket.
Displaying modifier screen automatically
We need to click on order line to display modifiers. We can display modifiers automatically as soon as we add a Salad into ticket.
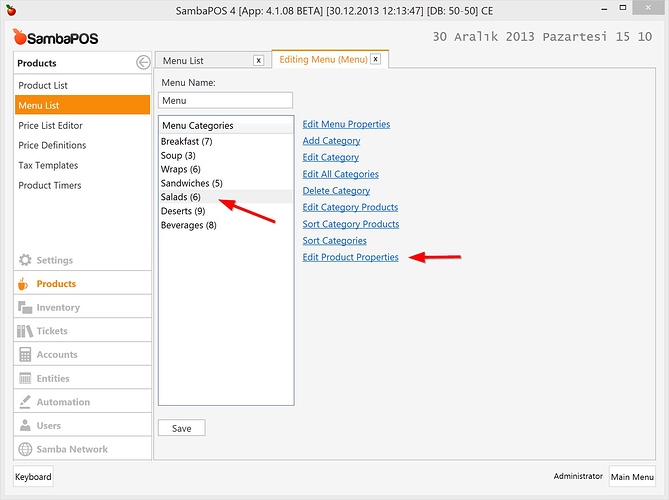
Navigate to Management > Products > Menu List > and double click Menu to edit menu properties.
Click Salads category and click Edit Product Properties.
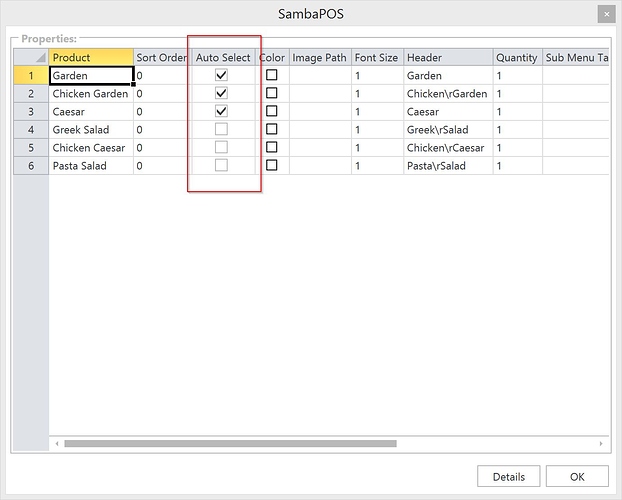
It displays a popup for displaying menu item properties.
Enable Auto Select setting for the products you need to display modifiers automatically. With my configuration Modifier screen will automatically display when I sell Garden, Chicken Garden or Caesar.
Hint: Don’t enable Auto Select setting for all products. Enable it for products that have required modifiers. Enabling it for all products will decrease usability.
Default Modifiers
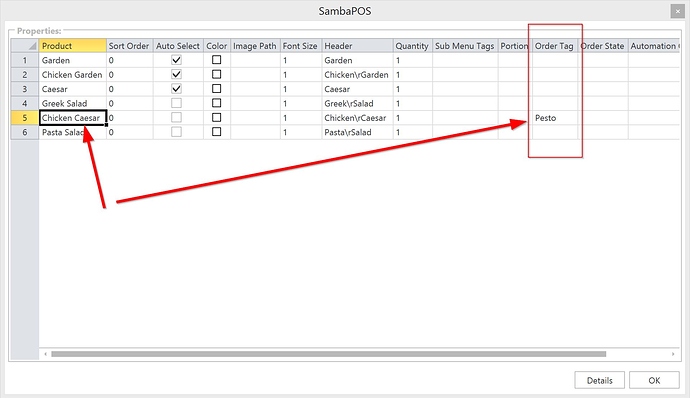
Default modifiers are useful if you want to add modifiers as soon as you choose the products. For example we want to configure Pesto as a default modifier for Chicken Caesar.
We’ll also change this setting on Menu Item Properties popup we saw on previous topic.
I wrote Pesto modifier name here. If you need to use multiple modifiers you can type their names separated with commas.
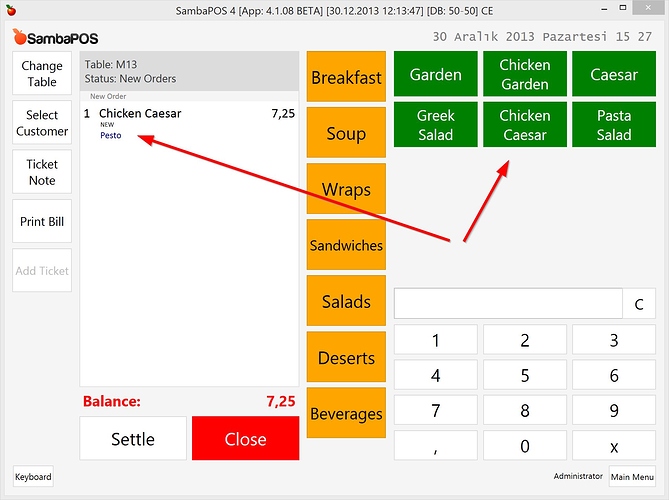
When we sell Chicken Caesar, Pesto modifier will be automatically selected and since we did not enabled Auto Select setting for this item it won’t display modifiers screen automatically.
We can click on order line to display modifiers screen and change Pesto.
##Quantity Modifiers
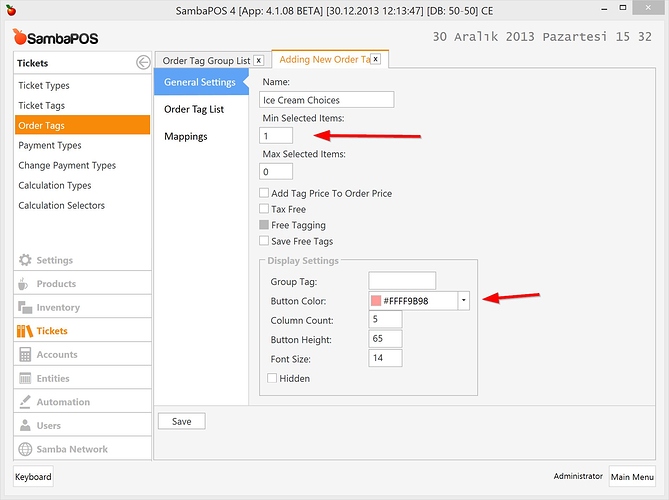
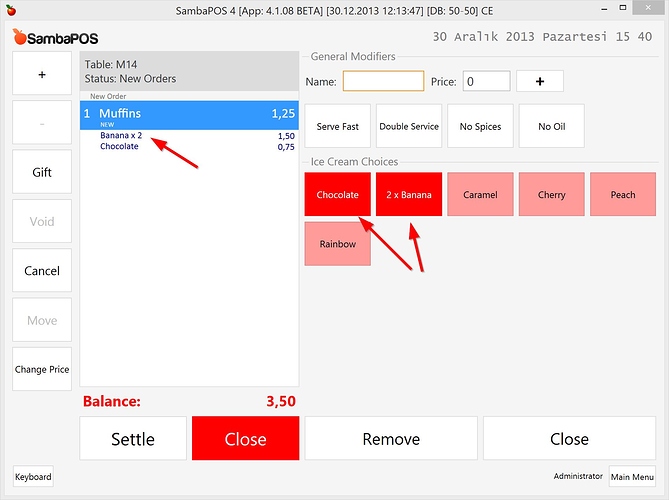
On this sample we’ll create modifiers for Muffin product for ice cream choices.
Min Selected Items will be 1 since we want to force user to select at least one ice cream. Also I’ve changed button color. You can change other display properties to change how buttons looks.
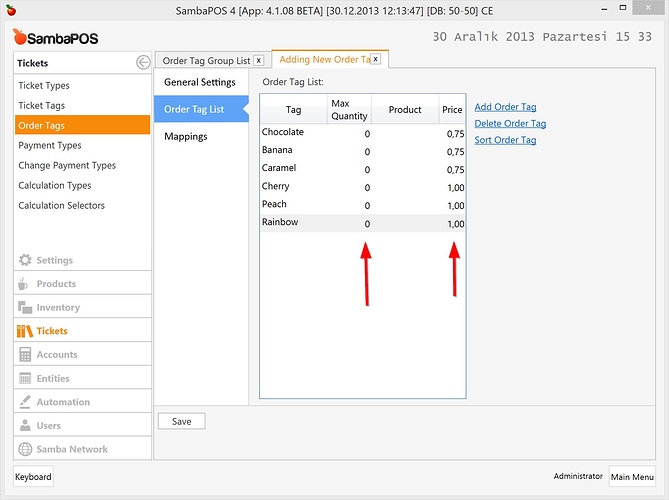
On order tag list screen I’ve added few modifiers. I’ve changed Max quantity values 0 so we can add multiple ice creams. I’ve also changed prices.
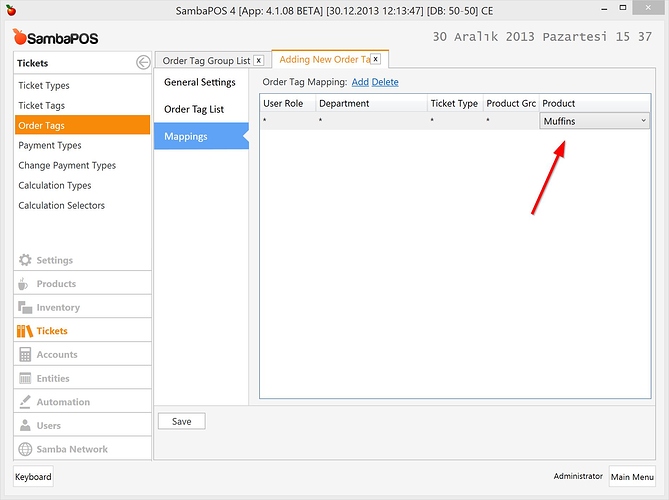
Now we’ll map it to Muffins.
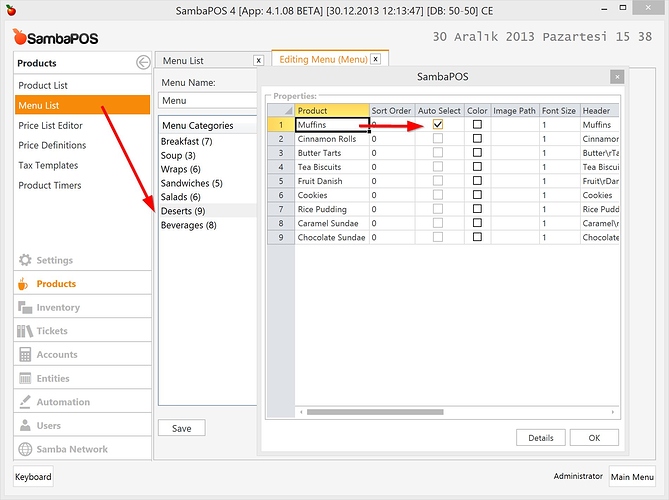
I’ll also Enable Auto Select for Muffins.
I’ll create a new ticket and sell muffin.
Clicking Banana button twice will increase modifier quantity. Price changes as we add more. You’ll notice clicking modifier buttons won’t toggle modifiers. If you want to remove a modifier click Remove button and click the modifier button.
##Grouping modifiers
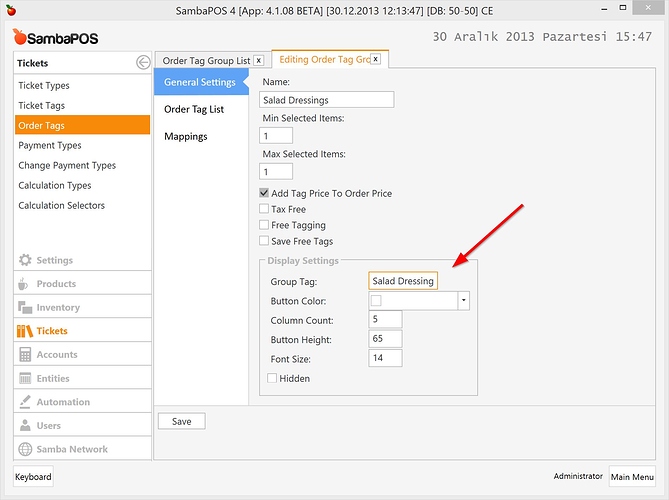
Imagine you are a pizza restaurants. You have a lot of modifiers and all modifiers have No, Less More, Double prefixes. If you have 10 choices that makes 40 buttons. You can group modifiers by typing a group name on group.
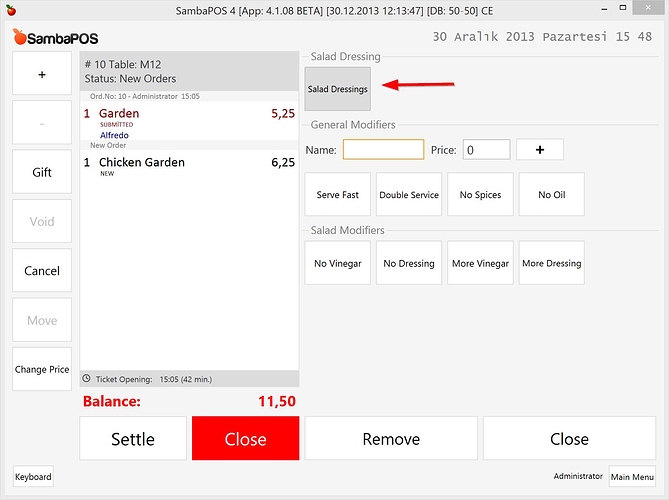
Entering a group name for Salad Dressing will display this group as a single button.
Clicking on this button multiple times will toggle dressings.
